


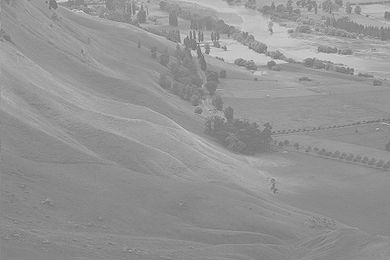
这个是自己的第一个blog,写一个opencv实现的灰度直方图均衡化,测试通过
转载请注明作者和出处,谢谢!
//
//project_name:gray image process:hist
//time:2012-02-14
//author:hellmonky
//
#include <opencv2/opencv.hpp>
#include<iostream>
#include <math.h>

using namespace std;
using namespace cv;

int main(int argc, char **argv)
{
	IplImage* src=cvLoadImage(argv[1],CV_LOAD_IMAGE_GRAYSCALE);
	//"C:\\Users\\hellmonky\\Desktop\\LeastSquaresMethod\\Debug\\1.bmp"
	int width=src->width;
	int height=src->height;
	int sum = width*height;

	int step=src->widthStep;
	uchar* data=(uchar *)src->imageData;
	int hist[256]={0};
	int CalHist[256] = {0};
	int CH[256] = {0};
	int max1 = 0;
	int max2=0;

	//
	//计算输入图像的灰度分布
	//
	for(int i=0;i<height;i++)
	{
		for(int j=0;j<width;j++)
		{
			hist[data[i*step+j]]++;
		}
	}
	for(int i=0;i<256;i++)
	{
		if(hist[i]>max1)
		{
			max1=hist[i];
		}
	}
	for (int i=0;i<256;i++)
	{
		for (int j=0;j<=i;j++)
		{
			CalHist[i] += (int)(255* (float)hist[j]/sum );
		}
	}
	IplImage* dst1=cvCreateImage(cvSize(400,300),8,1);
	cvSet(dst1,cvScalarAll(255),0);
	double bin_width=(double)dst1->width/256;//建立比例因子
	double bin_unith=(double)dst1->height/max1;
	for(int i=0;i<256;i++)
	{
		CvPoint p0=cvPoint(i*bin_width,dst1->height);
		CvPoint p1=cvPoint((i+1)*bin_width,dst1->height-hist[i]*bin_unith);
		cvRectangle(dst1,p0,p1,cvScalar(1),-1,8,0);
	}

	//
	//对原始图像进行重新计算
	//
	for(int i=0;i<height;i++)
	{
		for(int j=0;j<width;j++)
		{
			data[i*step+j] = CalHist[data[i*step+j]];
		}
	}

	//
	//计算变换以后的图像的灰度分布
	//
	for(int i=0;i<height;i++)
	{
		for(int j=0;j<width;j++)
		{
			CH[data[i*step+j]]++;
		}
	}
	for(int i=0;i<256;i++)
	{
		if(CH[i]>max2)
		{
			max2=CH[i];
		}
	}
	IplImage* you=cvCreateImage(cvSize(400,300),8,1);
	cvSet(you,cvScalarAll(255),0);
	double binwidth=(double)you->width/256;//建立比例因子
	double binunith=(double)you->height/max2;
	for(int i=0;i<256;i++)
	{
		CvPoint p0=cvPoint(i*binwidth,you->height);
		CvPoint p1=cvPoint((i+1)*binwidth,you->height-CH[i]*binunith);
		cvRectangle(you,p0,p1,cvScalar(1),-1,8,0);
	}

	cvShowImage("原始图像灰度分布",dst1);
	cvSaveImage("原始图像灰度分布.bmp",dst1);

	cvShowImage("直方图均衡化图像",src);
	cvSaveImage("直方图均衡化图像.bmp",src);

	cvShowImage("均衡化后直方图",you);
	cvSaveImage("均衡化后直方图.bmp",you);

	waitKey(0);
	cvDestroyWindow("原始图像灰度分布");
	cvDestroyWindow("直方图均衡化图像");
	cvDestroyWindow("均衡化后直方图");
	return 0;
}
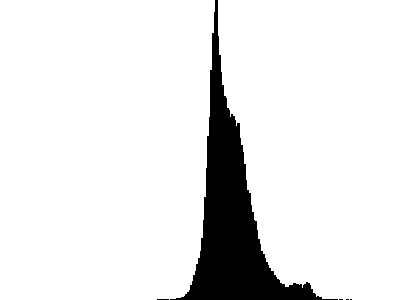
对应的直方图:
直方图均衡化以后的图像:

对应的直方图:

从两幅图像的直方图可以看出,直方图均衡化以后基本上对整个灰度范围都有一个覆盖,最理想的直方图均衡化以后的直方图效果应该是很均匀的灰度分布,即图像呈一条直线。
以上内容均为个人参考书籍,网络和自己实践理解得来,如有不对,请个位留言,谢谢支持!


 8435
8435


 被折叠的 条评论
为什么被折叠?
被折叠的 条评论
为什么被折叠?
 到【灌水乐园】发言


