


Mybatis
官方文档:https://mybatis.org/mybatis-3/zh/index.html
1.三层架构模式和框架
- 界面层 ---- SpringMVC框架
- 业务层 ---- Spring框架
- 持久层 ---- Mybatis框架
2.基本步骤
2.1.官方步骤
0.创建数据表
1.新建maven项目
2.修改pom.xml
1)加入依赖 mybatis依赖、mysql驱动、junit
<dependency>
    <groupId>mysql</groupId>
    <artifactId>mysql-connector-java</artifactId>
    <version>8.0.24</version>
</dependency>
<dependency>
    <groupId>org.mybatis</groupId>
    <artifactId>mybatis</artifactId>
    <version>3.5.6</version>
</dependency>
<dependency>
    <groupId>junit</groupId>
    <artifactId>junit</artifactId>
    <version>4.12</version>
    <scope>test</scope>
</dependency>
2)在中加入资源插件
<resources>
    <resource>
        <directory>src/main/java</directory><!--所在目录-->
        <includes><!--包括目录下的.properties和.xml都会扫描到-->
            <include>**/*.properties</include>
            <include>**/*.xml</include>
        </includes>
        <filtering>false</filtering>
    </resource>
</resources>
3.创建实体类,属性和数据表列名一致
4.创建Dao接口,定义操作数据库的方法
5.创建xml文件(mapper文件),写SQL语句
- mapper文件:和Dao接口在同一目录,一张表一个mapper文件
<?xml version="1.0" encoding="UTF-8" ?>
<!DOCTYPE mapper
        PUBLIC "-//mybatis.org//DTD Mapper 3.0//EN"
        "http://mybatis.org/dtd/mybatis-3-mapper.dtd">
<mapper namespace="org.mybatis.example.BlogMapper">
    <select id="selectBlog" resultType="Blog">
        select * from Blog where id = #{id}
    </select>
</mapper>
- "http://mybatis.org/dtd/mybatis-3-mapper.dtd"是约束文件,定义和约束当前文件中可以使用的标签和属性及标签出现的顺序
- 是根标签
- namespace:命名空间(唯一值,不能为空)
- 推荐使用Dao接口的全限定名
- 作用:参与识别SQL语句
- 在中可以写, , , 等标签
- id : SQL语句的唯一标识符,推荐使用Dao接口中的方法名
- resultType : 执行结果的返回值类型,使用java对象的全限定名称
6.创建Mybatis的主配置文件(xml文件),放在resources目录下
<?xml version="1.0" encoding="UTF-8" ?>
<!DOCTYPE configuration
  PUBLIC "-//mybatis.org//DTD Config 3.0//EN"
  "http://mybatis.org/dtd/mybatis-3-config.dtd">
<configuration>
  <environments default="development">
    <environment id="development">
      <transactionManager type="JDBC"/>
      <dataSource type="POOLED">
        <property name="driver" value="${driver}"/>
        <property name="url" value="${url}"/>
        <property name="username" value="${username}"/>
        <property name="password" value="${password}"/>
      </dataSource>
    </environment>
  </environments>
  <mappers>
    <mapper resource="org/mybatis/example/BlogMapper.xml"/>
  </mappers>
</configuration>
1)定义创建连接实例的数据源对象(DataSource)
2)指定其他mapper文件的位置
7.创建测试内容
junit或者main方法
String resource = "org/mybatis/example/mybatis-config.xml";
InputStream inputStream = Resources.getResourceAsStream(resource);
SqlSessionFactory sqlSessionFactory = new SqlSessionFactoryBuilder().build(inputStream);
2.2.入门案例
0.创建数据表
![[外链图片转存失败,源站可能有防盗链机制,建议将图片保存下来直接上传(img-4tBPYgKr-1624624347018)(Mybatis.assets/image-20210624160433189.png)]](https://img-blog.csdnimg.cn/2021062520355436.png?x-oss-process=image/watermark,type_ZmFuZ3poZW5naGVpdGk,shadow_10,text_aHR0cHM6Ly9ibG9nLmNzZG4ubmV0L2hlbGxvd29ybGQzNzA2Mjk=,size_16,color_FFFFFF,t_70)
2.修改pom.xml
<dependencies>

    <dependency>
        <groupId>mysql</groupId>
        <artifactId>mysql-connector-java</artifactId>
        <version>8.0.24</version>
    </dependency>

    <dependency>
        <groupId>org.mybatis</groupId>
        <artifactId>mybatis</artifactId>
        <version>3.5.6</version>
    </dependency>

    <dependency>
        <groupId>junit</groupId>
        <artifactId>junit</artifactId>
        <version>4.12</version>
        <scope>test</scope>
    </dependency>

</dependencies>

<build>
    <resources>
        <resource>
            <directory>src/main/java</directory><!--所在目录-->
            <includes><!--包括目录下的.properties和.xml都会扫描到-->
                <include>**/*.properties</include>
                <include>**/*.xml</include>
            </includes>
            <filtering>false</filtering>
        </resource>
    </resources>
</build>
3.创建实体类,属性和数据表列名一致
public class Student {
    private int id;
    private String email;
    private String name;
    private int age;

    public int getId() {
        return id;
    }

    public void setId(int id) {
        this.id = id;
    }

    public String getEmail() {
        return email;
    }

    public void setEmail(String email) {
        this.email = email;
    }

    public String getName() {
        return name;
    }

    public void setName(String name) {
        this.name = name;
    }

    public int getAge() {
        return age;
    }

    public void setAge(int age) {
        this.age = age;
    }

    @Override
    public String toString() {
        return "Student{" +
                "id=" + id +
                ", email='" + email + '\'' +
                ", name='" + name + '\'' +
                ", age=" + age +
                '}';
    }
}
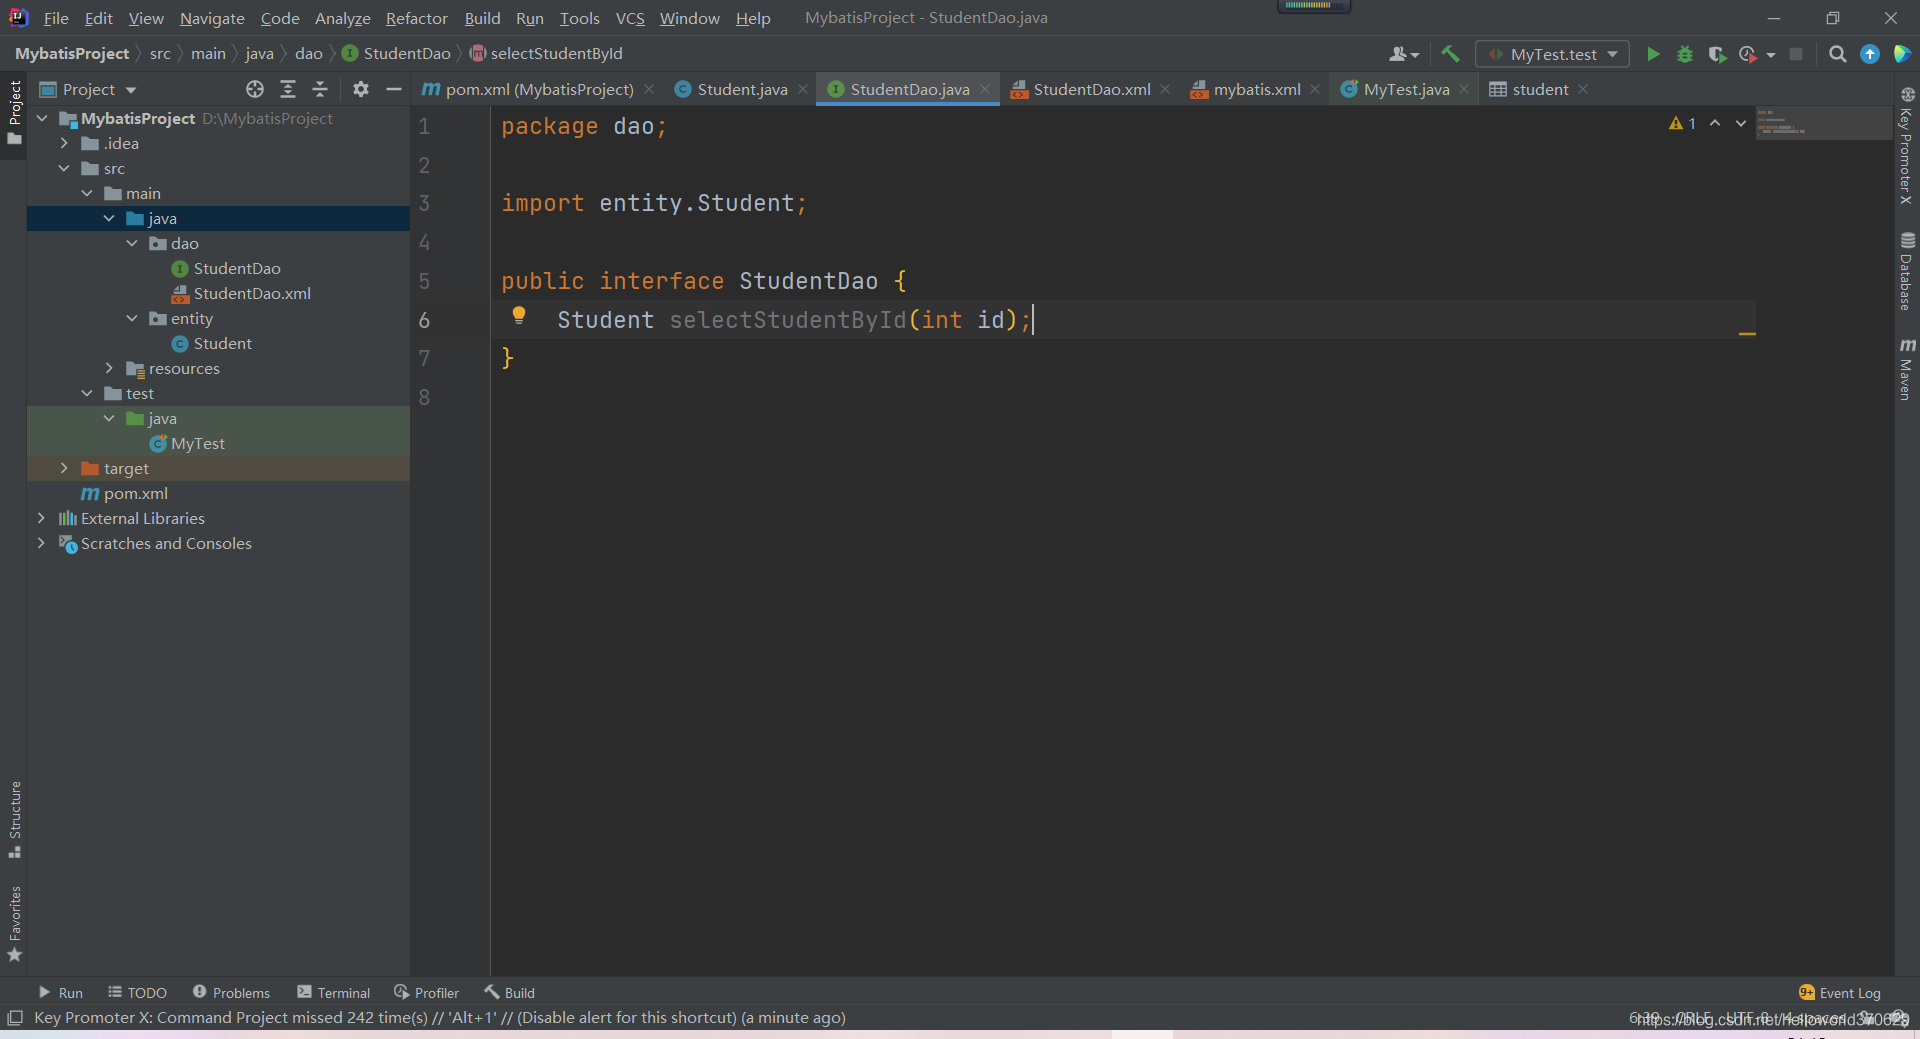
4.创建Dao接口,定义操作数据库的方法 以及 文件目录结构
5.创建xml文件(mapper文件),写SQL语句
<?xml version="1.0" encoding="UTF-8" ?>
<!DOCTYPE mapper
        PUBLIC "-//mybatis.org//DTD Mapper 3.0//EN"
        "http://mybatis.org/dtd/mybatis-3-mapper.dtd">
<mapper namespace="dao.StudentDao">
    <select id="selectStudentById" resultType="entity.Student">
        select * from student where id = 1
    </select>
</mapper>
6.创建Mybatis的主配置文件(xml文件),放在resources目录下
<?xml version="1.0" encoding="UTF-8" ?>
<!DOCTYPE configuration
PUBLIC "-//mybatis.org//DTD Config 3.0//EN"
"http://mybatis.org/dtd/mybatis-3-config.dtd">
<configuration>
<environments default="development">
<environment id="development">
<transactionManager type="JDBC"/>
<dataSource type="POOLED">
<property name="driver" value="com.mysql.cj.jdbc.Driver"/>
<property name="url" value="jdbc:mysql://localhost:3306/hxf?useUnicode=true&characterEncoding=utf8&useSSL=true&serverTimezone=UTC"/>
<property name="username" value="root"/>
<property name="password" value=""/>
</dataSource>
</environment>
</environments>
<mappers>
<mapper resource="dao/StudentDao.xml"/>
</mappers>
</configuration>
7.创建测试内容
public class MyTest {

    @Test
    public void test() throws IOException {
        String resource = "mybatis.xml";
        InputStream inputStream = Resources.getResourceAsStream(resource);
        SqlSessionFactory sqlSessionFactory = new SqlSessionFactoryBuilder().build(inputStream);

        SqlSession sqlSession = sqlSessionFactory.openSession();
		//要执行的SQL语句为  namespsce + "." + id
        String id = "dao.StudentDao" + "." + "selectStudentById";
        Student student = sqlSession.selectOne(id);

        System.out.println(student);

        sqlSession.close();
    }
}
2.3.日志
通过在配置文件中添加来选择实现日志功能
<configuration>
  <settings>
    ...
    <setting name="logImpl" value="LOG4J"/>
    ...
  </settings>
</configuration>
可选的值有:SLF4J、LOG4J、LOG4J2、JDK_LOGGING、COMMONS_LOGGING、STDOUT_LOGGING、NO_LOGGING
3.mybatis中的一些重要对象
-
Resources: 读取配置
InputStream inputStream = Resources.getResourceAsStream(resource); -
SqlSessionFactoryBuilder: 负责创建SqlSessionFactory对象
SqlSessionFactory sqlSessionFactory = new SqlSessionFactoryBuilder().build(inputStream); -
SqlSessionFactory:(接口) 负责创建SqlSession对象, 重量级对象(创建和销毁需要更多的资源)
SqlSession sqlSession = sqlSessionFactory.openSession();SqlSessionFactory中的方法
- openSession()
- openSession(boolean var1): var1表示是否开启自动提交事务
-
SqlSession:(接口) 提供执行Sql语句的方法, 线程不安全
- selsectOne : 查询一个查询语句,最多得到一行记录
- selectList : 查询一个查询语句,得到多行记录
- selectMap : 查询一个查询语句,得到一个Map集合
- delete : 执行删除语句
- insert : 执行增加语句
- update : 执行更新语句
- commit : 提交事务
- rollback : 回滚事务
4.动态代理
mybatis创建Dao接口的实现类对象完成Sql语句的执行
4.1.使用mybatis代理的要求
- mapper文件中的namespace使用dao接口的全限定名称
- mapper文件中的标签id使用dao接口的方法名称
4.2.mybatis的实现方法
使用SqlSession对象的getMapper(dao.class)方法
BlogMapper mapper = session.getMapper(BlogMapper.class);
Blog blog = mapper.selectBlog(101);
4.3.parameterType
parameterType是用来指定dao接口的形参类型
可以使用java类型的全限定名称(java.lang.Integer)或者mybatis的别名(integer)
| 别名 | 映射的类型 |
|---|---|
| _byte | byte |
| _long | long |
| _short | short |
| _int | int |
| _integer | int |
| _double | double |
| _float | float |
| _boolean | boolean |
| string | String |
| byte | Byte |
| long | Long |
| short | Short |
| int | Integer |
| integer | Integer |
| double | Double |
| float | Float |
| boolean | Boolean |
| date | Date |
| decimal | BigDecimal |
| bigdecimal | BigDecimal |
| object | Object |
| map | Map |
| hashmap | HashMap |
| list | List |
| arraylist | ArrayList |
| collection | Collection |
| iterator | Iterator |
4.4.resultType
- 若返回的是Java对象则服从同名列赋值给同名属性规则
- 若返回的是简单数据类型对象,使用相应JAVA全限定名称或者mybatis别名
- 若返回的是Map、HashMap对象,使用相应JAVA全限定名称或者mybatis别名 ***注意:***只能存储一行记录!
4.5.resultMap
自定义列名和Java对象属性的对应关系,用在列名和属性不一致的情况**(一致的属性可映射可不映射)**
用法:
- 先定义resultMap标签,指定列名和属性的对应关系
- 在标签中使用resultMap属性,指定resultMap的id值
<!--id:resultMap的映射名称,唯一标识-->
<!--type:映射的Java对象的全限定名称-->
<resultMap id="map" type="entity.Student">
    <!--column:列名|property:属性名-->
    <!--主键类型使用id标签-->
    <id column="id" property="cid" />
    <!--非主键类型使用result标签-->
    <result column="name" property="cname" />
</resultMap>
<select id="selectByName" resultMap="map">
    select id, email, name, age from student where name = #{name}
</select>
4.6.占位符
-
传入的是一个简单数据类型(java基本数据类型或者String)时使用 #{任意字符串} 充当占位符
Student selectStudentById(int id);<select id="selectStudentById" resultType="entity.Student"> select * from student where id = #{id} </select> -
传入的是多个简单数据类型时,使用**@Param注解**
- @Param放在形参前面,定义参数名并将此参数名放在对应位置的占位符中使用
Student selectStudentByNameAndId(@Param("name") String name, @Param("id") int id);<select id="selectStudentByNameAndId" resultType="entity.Student"> select * from student where name = #{name} and id = #{id} </select> -
传入的是java对象, 使用**#{对象属性名}** 充当占位符**(可不完全使用所有属性)**,执行java对象的get操作获取属性值
List<Student> selectByObject(Student student);<select id="selectByObject" resultType="entity.Student"> select * from student where name = #{name} or email = #{email} </select> -
传入的是多个简单数据类型时,使用按位置传参 #{arg0},#{arg1}… (不推荐使用)
Student selectByPosition(String name, int id);<select id="selectByPosition" resultType="entity.Student"> select * from student where name = #{arg0} and id = #{arg1} </select> -
传入的时Map集合时, 使用 #{key} 充当占位符 (不推荐使用)
//接口中的方法 Student selectByMap(Map<String, Object> map); //测试的过程 StudentDao mapper = sqlSession.getMapper(StudentDao.class); Map<String, Object> map = new HashMap<>(); map.put("myName", "hxf"); map.put("myId", 2); Student student = mapper.selectByMap(map);<select id="selectByMap" resultType="entity.Student"> select * from student where name = #{myName} and id = #{myId} </select>
#占位符和$占位符
-
#{}占位符
-
mybatis处理#{}占位符是使用JDBC的PrepareStatement对象
String sql = "select * from student where id=?"; // 创建PrepareStatement对象 PrepareStatement statement = connection.prepareStatement(sql); // 传递参数 statement.setInt(1, 3); // 执行sql语句 ResultSet set = statement.executeQuery(); -
特点
- 执行效率高
- 能避免sql注入,更加安全
- 值与参数数据类型有关
-
-
${}占位符:需要使用**@Param注解**
-
mybatis处理${}占位符是使用JDBC中的Statement对象,采取字符串拼接的方式
String sql = "select * from student where id=" + "3"; // 创建Statement对象 Statement statement = connection.createStatement(sql); // 执行sql语句 ResultSet set = statement.executeQuery(); -
特点
- 执行效率低
- 存在sql注入的问题,代码不安全
- ${}数据是原样使用的,不区分数据类型:可以用来表示表名或者列名
-
5.自定义别名
在mybatis主配置文件中,使用typeAliases标签声明别名**(注意标签顺序)**
- typeAlias定义, type:java对象全限定名称, alias:别名
- 优点:可以自定义别名
- 缺点:一个包中的类需要多次定义
<typeAlias type="entity.Student" alias="stu"/>
- package定义,name:包名
- 优点:一次给多个类定义
- 缺点:别名只能是类名(不区分大小写)
<package name="entity"/>
6.实体类属性名和列名不同的处理方法
- 使用resultMap
- 使用列别名和resultType
7.like
-
占位符对应位置传入模糊搜索的字符串
-
mapper文件
<select id="selectByName" resultType="entity.Student">
    select id, email, name, age from student where name like #{name}
</select>
-
dao接口
List<Student> selectByName(@Param("name") String name);
-
测试语句
public void test() throws IOException {
    InputStream stream = Resources.getResourceAsStream("mybatis.xml");
    SqlSessionFactory factory = new SqlSessionFactoryBuilder().build(stream);
    SqlSession sqlSession = factory.openSession();
    StudentDao mapper = sqlSession.getMapper(StudentDao.class);
    List<Student> hxf = mapper.selectByName("h%");
    System.out.println(hxf);
    sqlSession.close();
}
-
8.动态SQL
同一个dao的方法,根据不同的条件可以表示不同的sql语句
使用mybatis提供的标签,实现动态SQL,主要有if,where,foreach,sql
使用动态SQL,dao方法的形参需要是Java对象
8.0. 实体符号
在mapper文件中出现>, <, >=, <=等符号,最好换成对应实体符号,否则可能出现XML解析问题
实体符号表:https://www.w3school.com.cn/html/html_entities.asp
8.1. if标签
可以有多个 (where 可以放在标签内,也可以放在标签外)
<select id="selectByName" resultType="entity.Student">
    select id, email, name, age from student
    <if test="age > 24">
        where name = #{name}
    </if>
</select>
8.2. where标签
一般配合使用,可以把紧挨着WHERE的 OR 或者 AND去掉以保证SQL语句的合法性
<select id="selectByName" resultType="entity.Student">
    select id, email, name, age from student
    <where>
        <if test="name != null">
            and name = #{name}
        </if>
        <if test="age > 22">
            and age = #{age}
        </if>
    </where>
</select>
8.3.foreach标签
- 循环简单类型的List
<select id="selectByName" resultType="entity.Student">
    select id, email, name, age from student
    <if test="list != null and list.size > 0">
        where id in
        <!--collection可选参数为list和array-->
        <!--open为循环开头添加的符号-->
        <!--close为循环结尾添加的符号-->
        <!--separator为分隔符-->
        <!--item为循环的元素-->
        <foreach collection="list" open="(" close=")" item="id" separator=",">
            #{id}
        </foreach>
    </if>
</select>
- 循环java对象的List
<select id="selectByName" resultType="entity.Student">
    select id, email, name, age from student
    <if test="list != null and list.size > 0">
        where id in
        <foreach collection="list" open="(" close=")" item="student" separator=",">
            <!--item可以直接获取属性-->
            #{student.id}
        </foreach>
    </if>
</select>
8.4.sql标签
表示一段sql代码(任何sql代码片段),以便在其他地方复用
<!--sql标签用来定义sql代码片段(id作唯一标识), 使用include复用(refid引用标识)-->
<sql id="select">
    select * from student
</sql>
<select id="selectByName" resultType="entity.Student">
    <include refid="select"/>
    <if test="list != null and list.size > 0">
        where id in
        <foreach collection="list" open="(" close=")" item="student" separator=",">
            #{student.id}
        </foreach>
    </if>
</select>
9.Mybatis配置文件
- Mybatis主配置文件
- mapper文件
9.1. settings标签
是有关mybatis的全局设置,一般使用默认值。
https://mybatis.org/mybatis-3/zh/configuration.html#settings
9.2.typeAliases标签
类型别名可为 Java 类型设置一个缩写名字,仅用于 XML 配置,意在降低冗余的全限定类名书写
可以查看 5.自定义别名
9.3.environments标签
environments:环境标签,可以配置多个environment
default:选择需要使用的environment的id
environment:表示一个数据库的连接信息, id为唯一标识
transactionManager:事务管理器
type:事务的管理类型
1)JDBC:使用Connection对象,由mybatis完成事务的处理
2)MANAGED:把事务的处理交由其他容器实现(比如Spring)
dataSource:数据源
type:数据源的类型
1)POOLED:mybatis会创建PooledDataSource对象管理多个Connection对象,即使用连接池
2)UNPOOLED:不使用连接池,每次执行sql语句都要创建和销毁Connection对象
3)JNDI:java的命名和目录接口
<environments default="development">
<environment id="development">
<transactionManager type="JDBC"/>
<dataSource type="POOLED">
<property name="driver" value="com.mysql.cj.jdbc.Driver"/>
<property name="url" value="jdbc:mysql://localhost:3306/hxf?useUnicode=true&characterEncoding=utf8&useSSL=true&serverTimezone=UTC"/>
<property name="username" value="root"/>
<property name="password" value="besttop0630"/>
</dataSource>
</environment>
</environments>
9.4.使用数据库属性配置文件
把数据库的配置信息放到单独的.properties文件,方便独立管理。
-
在resources目录中创建.properties文件
-
在文件中,使用key = value的格式定义数据
- 例如:jdbc.url = jdbc:mysql://localhost:3306/hxf
-
在mybatis主配置文件中使用引用外部属性配置文件
-
在需要使用值的位置,使用${key}代替key对应的value
jdbc.properties文件
jdbc.driver = com.mysql.cj.jdbc.Driver
jdbc.url = jdbc:mysql://localhost:3306/hxf
jdbc.username = root
jdbc.password = besttop0630
mybatis主配置文件
<?xml version="1.0" encoding="UTF-8" ?>
<!DOCTYPE configuration
        PUBLIC "-//mybatis.org//DTD Config 3.0//EN"
        "http://mybatis.org/dtd/mybatis-3-config.dtd">
<configuration>
    <!--指定.properties文件路径-->
    <properties resource="jdbc.properties"/>
    <settings>
        <setting name="logImpl" value="STDOUT_LOGGING"/>
    </settings>
    <environments default="development">
        <environment id="development">
            <transactionManager type="JDBC"/>
            <dataSource type="POOLED">
                <!--value使用${key}代替-->
                <property name="driver" value="${jdbc.driver}"/>
                <property name="url" value="${jdbc.url}"/>
                <property name="username" value="${jdbc.username}"/>
                <property name="password" value="${jdbc.password}"/>
            </dataSource>
        </environment>
    </environments>
    <mappers>
        <mapper resource="dao/StudentDao.xml"/>
    </mappers>
</configuration>
9.5.指定mapper文件
-
使用标签
- 优点:文件路径清晰,文件存放位置比较灵活
- 缺点:文件较多时,代码量大,管理不方便
<mappers> <mapper resource="dao/StudentDao.xml"/> </mappers> -
使用标签
- 优点:一次加载包中所有mapper文件
<mappers>
    <package name="dao"/>
</mappers>
```<property name="driver" value="${jdbc.driver}"/> <property name="url" value="${jdbc.url}"/> <property name="username" value="${jdbc.username}"/> <property name="password" value="${jdbc.password}"/> </dataSource> </environment> </environments> <mappers> <mapper resource="dao/StudentDao.xml"/> </mappers>
9.5.指定mapper文件
-
使用标签
- 优点:文件路径清晰,文件存放位置比较灵活
- 缺点:文件较多时,代码量大,管理不方便
<mappers> <mapper resource="dao/StudentDao.xml"/> </mappers> -
使用标签
- 优点:一次加载包中所有mapper文件
<mappers>
    <package name="dao"/>
</mappers>


 572
572


 被折叠的 条评论
为什么被折叠?
被折叠的 条评论
为什么被折叠?
 到【灌水乐园】发言


