


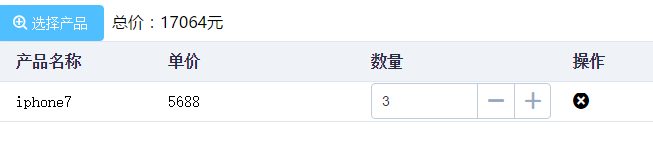
使用vue2.0(ElementUI基于vue2.0)+ElementUI(饿了么出品)实现的在订单页面动态添加产品的效果,并自动计算总价。代码直接保存为html文档,使用浏览器打开即可查看效果。
效果图: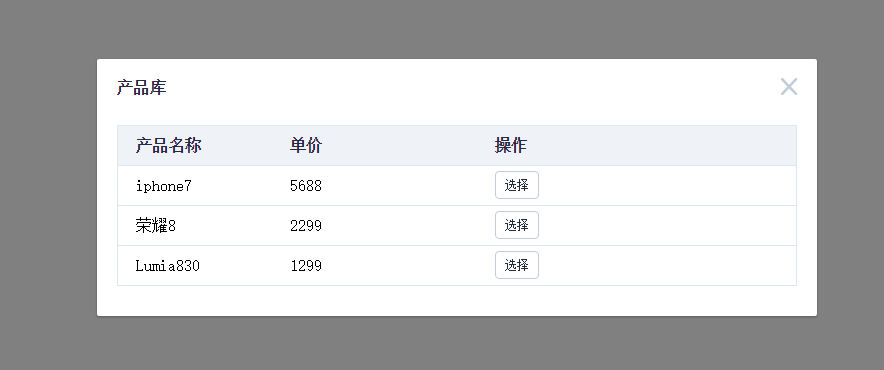
<html>
    <head>
        <meta charset="UTF-8">
        <meta http-equiv="X-UA-Compatible" content="IE=edge,chrome=1">
        <meta content="width=device-width, initial-scale=1.0, maximum-scale=1.0, user-scalable=0" name="viewport" />
        <!-- 引入element样式 -->
       <link rel="stylesheet" href="https://unpkg.com/element-ui/lib/theme-default/index.css">
       <title>订单页面</title>
    </head>
    <body>
        <div id="orderTest">


            <el-dialog title="产品库" v-model="dialogTableVisible">
              <el-table :data="list">
                <el-table-column property="name" label="产品名称" width="150"></el-table-column>
                <el-table-column property="price" label="单价" width="200"></el-table-column>
                <el-table-column :context="_self" inline-template label="操作">
                  <div>
                    <el-button
                      size="small"
                      @click="choise(row)">
                      选择
                    </el-button>
                  </div>
                </el-table-column>
              </el-table>
            </el-dialog>

            <el-button type="info" icon="view" @click="dialogTableVisible = true">选择产品</el-button>
            <span v-show="checkedNames.length>0" style="font-family: Microsoft YaHei">总价:{{sumPrice}}元</span>
            <el-table :data="checkedNames" v-show="checkedNames.length>0">
                <el-table-column property="name" label="产品名称" width="150"></el-table-column>
                <el-table-column property="price" label="单价" width="200"></el-table-column>
                <el-table-column inline-template label="数量" width="200">
                    <el-input-number  v-model="row.num" :min="1" :max="10"></el-input-number>
                </el-table-column>
                <el-table-column :context="_self" inline-template label="操作">
                    <i class="el-icon-circle-cross" @click="del(row)" title="删除"></i>
                </el-table-column>
            </el-table>


        </div>
    </body>
<!-- 引入vue -->
        <script src="https://unpkg.com/vue/dist/vue.js"></script>
        <!-- 引入element JS -->
        <script src="https://unpkg.com/element-ui/lib/index.js"></script>
        <script src="http://cdn.bootcss.com/jquery/3.1.1/jquery.js"></script>
        <script type="text/javascript">
            var order = new Vue({
                    el: '#orderTest',
                    data: {
                        dialogTableVisible:false,
                        checkedNames: [],
                        list:[
                                {name:"iphone7",price:5688,num:1},
                                {name:"荣耀8",price:2299,num:1},
                                {name:"Lumia830",price:1299,num:1}
                             ]
                    },
                    computed:{
                        sumPrice:function(){
                            var sum = 0 ;
                            for(var i=0;i< this.checkedNames.length;i++){
                                sum+=this.checkedNames[i].price*this.checkedNames[i].num;
                                }
                            return sum;
                            }
                        },
                    methods:{
                        choise:function(p){
                           order.checkedNames.push(p);
                        },
                        del:function(p){
                            order.checkedNames.splice($.inArray(p, order.checkedNames), 1);
                        },
                    }
                });
        </script>

</html>


 9591
9591

 被折叠的 条评论
为什么被折叠?
被折叠的 条评论
为什么被折叠?
 到【灌水乐园】发言


