


web学习Day02
一、页面布局
盒子模型
盒子将页面的所有标签都包含在了一个矩形区域content(内容区域)->padding(内边距区域)->border(边框区域)->margin(外边距区域)
div标签:
- 一行只能显示一个(独占一行)
- width默认为父元素宽度,height默认由内容撑开
- 可以设置宽高
span标签:
- 一行可以有多个span标签
- width和height默认由内容撑开
- 不可以设置宽高
下面利用div 标签制作一个盒子模型
<!DOCTYPE html>
<html lang="en">
<head>
    <meta charset="UTF-8">
    <meta http-equiv="X-UA-Compatible" content="IE=edge">
    <meta name="viewport" content="width=device-width, initial-scale=1.0">
    <title>盒子模型</title>
  <style>
    div{
        width:200px;
        height: 200px;
        box-sizing:border-box;/* 由这句话指明了上面的宽和高是整体这个盒子border框内的宽和高,没有这一句说明的话则默认为content内容的宽和高 */
        background-color: aquamarine;
        padding: 20px 20px 20px 20px;/* 内边距  上右下左(顺时针转一圈的四个内边距宽度) */
        border: 10px solid blueviolet;/* 边框  宽度 线条类型(实线solid) 颜色 */
        margin: 30px 30px 30px 30px;/* 外边距 上右下左(顺时针转一圈的四个外边距宽度)*/
    }
  </style>
</head>

<body>

    <div>
        A A A A A A A A A A A A A A A A A A A A A A A A A A A A A A A A A A
    </div>

</body>
</html>
在浏览器(Chrome)中打开这个Html页面 右键->检查 进入开发者页面
盒子的大小为border内的大小(margin不算作盒子大小的一部分)
140+(20+10)*2=200

版心居中式
用div标签将写好的body内容部分框起来
-
div包裹并为这个div标签设置一个id便于css定义样式
<div id="center"> /*整个正文部分*/ </div> -
css样式如下
<style>
        #center{
            width:65%;/*盒子大小缩为原来的65%*/
            margin:0% 17.5% 0 17.5%;/*上右下左的外边距*/
        }
    </style>
margin:0% 17.5% 0 17.5%;/*上右下左的外边距*/略为繁琐
简化后 margin:0 auto;上下都是0,左右自动计算及默认居中展示
二、表格表单
1、表格
例子如下:

<!DOCTYPE html>
<html lang="en">
<head>
    <meta charset="UTF-8">
    <meta name="viewport" content="width=device-width, initial-scale=1.0">
    <title>学生姓名表</title>
</head>
<body>
    <!-- border设置边框的宽度   celling设置两个格子之间的空白为0 width设置这个表的整体宽度 -->
    <table border="1px" cellspacing="0" width="600px">
        <tr>
            <!-- 表头单元格标签<th>具有加粗的效果 table hight -->
            <th>学号</th>
            <th>姓名</th>
            <th>性别</th>
            <th>年龄</th>
        </tr>
        <tr>
            <!-- 普通数据<td> table data -->
            <td>001</td>
            <td>张晓华</td>
            <td>男</td>
            <td>19</td>
        </tr>
        <tr>
            <td>002</td>
            <td>李晓冉</td>
            <td>女</td>
            <td>18</td>

        </tr>
    </table>

</body>
</html>
2、表单(!重要)
2.1表单
采集用户输入的数据
action:表单数据提交的url方式
method:表单提交方
1)get(默认方式,直接拼接到url后面,但因为url长度有限制所以受局限)

2)post在消息体(请求体)中传递,无长度限制
<!DOCTYPE html>
<html lang="en">
<head>
<meta charset="UTF-8">
<meta name="viewport" content="width=device-width, initial-scale=1.0">
<title>Document</title>
</head>
<body>
<!--
action:表单提交的url,向何处提交数据,默认提交到当前的这个页面(一般action里面写的是后端的url地址)
method:表单提交方式
get:在url后面拼接数据如?username=mike&age=18,url长度是有限制的(是url提交的默认方式
post:请求数据在消息体中传递,参数大小无限制
-->
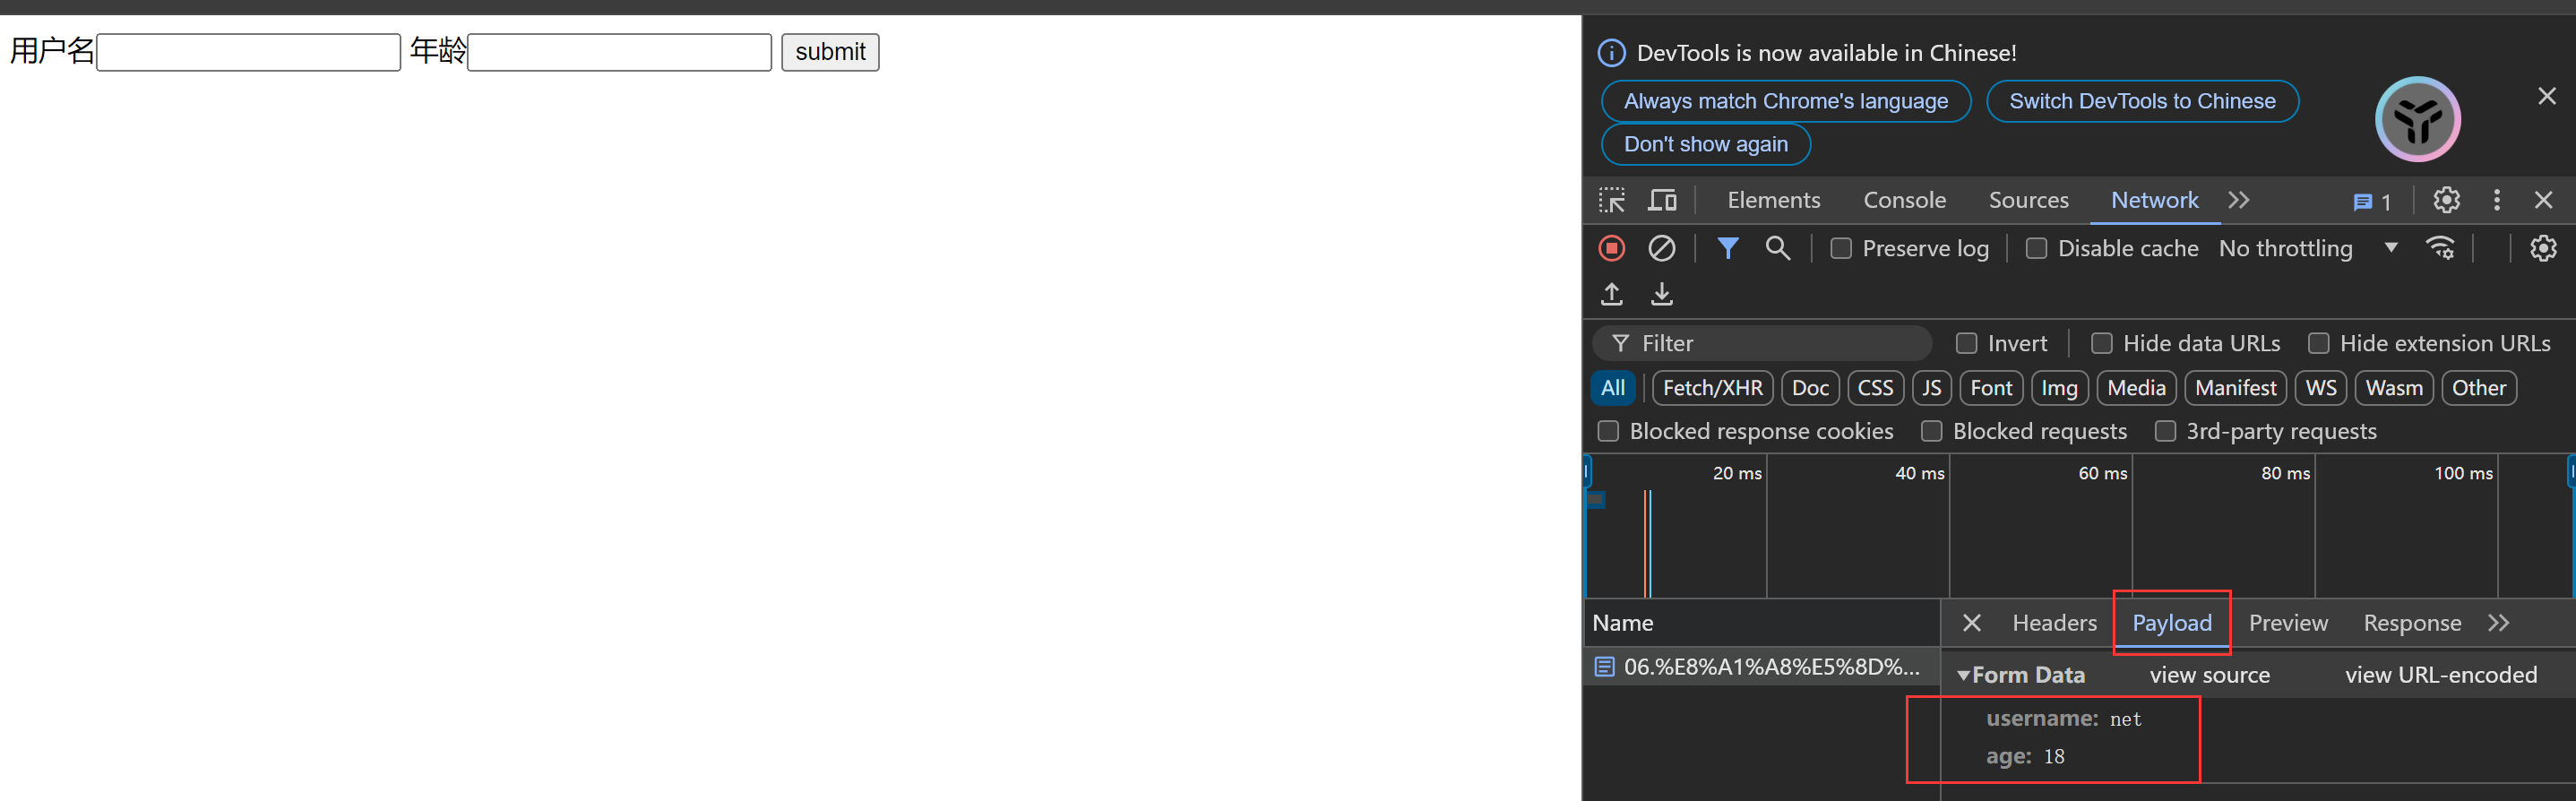
<form action="" method="post">
用户名<input type="text" name="username">
年龄<input type="text" name="age">
<input type="submit" value="submit">
</form>
</body>
</html>
<form action="" method="post"> 用户名<input type="text" name="username"> 年龄<input type="text" name="age"> <input type="submit" value="submit"> </form>
表单项中必须要有name属性否则无法提交
表单项最后不用王了type类型的submit提交项,否则数据无法提交
2.2表单项
!利用<br>实现换行
<input>:表单项,通过type定义输入形式
| type取值 | 描述 |
|---|---|
| text | 默认值,定义单行的输入字段 |
| password | 定义密码输入字段(前端隐藏你具体输入的密码值) |
| radio | 定义单选按钮(性别 男 女) |
| checkbox | 定义复选框(可以选多个选项 调查问卷中常用) |
| file | 定义文件上传按钮 |
| date/time/datetime-local | 定义日期 时间 日期-时间 |
| number | 定义数字输入框(手机电话号码) |
| 定义邮件输入框 | |
| hidden | 定义隐藏域 |
| submit/reset/button | 定义提交 重置 可点击按钮 |
<select>:定义下拉区域,<option>定义可选择的列表项
<textarea>:文本区域
示例实现如下

实现的html如下
<!DOCTYPE html>
<html lang="en">
<head>
    <meta charset="UTF-8">
    <meta name="viewport" content="width=device-width, initial-scale=1.0">
    <title>表单提交</title>
</head>
<body>
    <!-- 一定要有name值是 -->
    <form action="" method="post">

        姓名:<input type="text" name="name"><br><br>
        <!-- 用两个换行br分隔使得不显得拥挤 -->
        密码:<input type="password" name="password"><br><br>
        <!-- 性别单选框,写的时候写几个单选项,用label包裹实现的效果就是点击label包裹的任意区域这个选项都会被选中 -->
        姓别:<label for=""><input type="radio" name="gender" value="1">男</label>
              <label for=""><input type="radio" name="gender" value="2">女</label><br><br>
        <!-- 爱好是多选项,type是checkbox -->
        爱好:<label for=""><input type="checkbox" name="hobby" value="1">java</label>
            <label for=""><input type="checkbox" name="hobby" value="2">c++</label>
            <label for=""><input type="checkbox" name="hobby" value="3">python</label><br><br>
        <!-- 图像本质上传的是文件,所以type为file -->
        图像:<input type="file" name="image"><br><br>
        <!-- 生日的type为date -->
        生日:<input type="date" name="birthday"><br><br>
        <!-- 日期时间的类型为time 时间类型为time 邮箱类型为email 年龄输入的是数字所以类型为number-->
        日期时间:<input type="time" name="time"><br><br>
        邮箱:<input type="email" name="email"><br><br>
        年龄:<input type="number" name="age"><br><br>
        <!-- 学历是单选框 用select套option-->
        学历: <select name="degree" id="">
                <option value="">---请选择---</option>
                <option value="1">大专</option>
                <option value="2">本科</option>
                <option value="3">研究生</option>
                <option value="4">博士生</option>
        </select><br><br>
        <!-- 描述输入的是较长的文本区域 -->
        描述:<textarea name="description" id="" cols="30" rows="10"></textarea><br><br>
        <!-- 表单常见按钮如下 按钮button 重置reset 提交submit -->
         <input type="button" value="按钮">
         <input type="reset" value="重置">
         <input type="submit" value="提交">


    </form>
</body>
</html>
cols=“30” rows=“10”>
</form>


 473
473

 被折叠的 条评论
为什么被折叠?
被折叠的 条评论
为什么被折叠?
 到【灌水乐园】发言


