


本篇博客内容:
讲解volley部分源码
在框架源码中,添加OkHttp作为传输层
在框架源码中,添加Gson解析的 GsonRequest
在框架源码中,添加 文件上传的MultiPartRequest
在前面两篇博客,已经记录如何自定义项目需求的请求。这里来讲解如何修改Volley源码,自定义需求框架。
1.先来了解下Volley部分源码:
在Volley.java中,可以看到一些配置,例如联网操作类(HttpURLConnection或者androids-http-clients),磁盘缓存,线程池(实际上是4个网路线程,一个缓存线程)。
/**
 * 用途:
 *  初始化Volley中网络配置,异步线程配置,磁盘缓存配置
 */
public class Volley {

    /** Default on-disk cache directory.   默认缓存的文件夹名*/
    private static final String DEFAULT_CACHE_DIR = "volley";

    /**
     * Creates a default instance of the worker pool and calls {@link RequestQueue#start()} on it.
     *
     * @param context A {@link Context} to use for creating the cache dir.
     * @param stack An {@link HttpStack} to use for the network, or null for default.
     * @return A started {@link RequestQueue} instance.
     *
     * 创建一个默认的工作池对象,且调用RequestQueue的start()
     *  参数Contentxt用于创建磁盘缓存的文件夹
     *  参数HttpStack用于网络工作,默认是nulll
     */
    public static RequestQueue newRequestQueue(Context context, HttpStack stack) {
        //在手机内存中创建一个缓存数据的文件夹
        File cacheDir = new File(context.getCacheDir(), DEFAULT_CACHE_DIR);

        String userAgent = "volley/0";
        try {
            String packageName = context.getPackageName();
            PackageInfo info = context.getPackageManager().getPackageInfo(packageName, 0);
            userAgent = packageName + "/" + info.versionCode;
        } catch (NameNotFoundException e) {
        }

        if (stack == null) {
            //api版本不小于9,则使用java中HttpURLConnection作为联网方式
            if (Build.VERSION.SDK_INT >= 9) {
                stack = new HurlStack();
            } else {
                // Prior to Gingerbread, HttpUrlConnection was unreliable.
                // See: http://android-developers.blogspot.com/2011/09/androids-http-clients.html
                stack = new HttpClientStack(AndroidHttpClient.newInstance(userAgent));
            }
        }
        //创建一个执行网络工作的操作类
        Network network = new BasicNetwork(stack);
        //创建一个请求队列,添加磁盘缓存的操作类,执行网络工作的操作类
        RequestQueue queue = new RequestQueue(new DiskBasedCache(cacheDir), network);
        //开启。
        queue.start();

        return queue;
    }

    /**
     * Creates a default instance of the worker pool and calls {@link RequestQueue#start()} on it.
     *
     * @param context A {@link Context} to use for creating the cache dir.
     * @return A started {@link RequestQueue} instance.
     *
     * 创建一个默认的工作池对象,且调用RequestQueue的start()
     * 参数Contentxt用于创建磁盘缓存的文件夹
     *
     */
    public static RequestQueue newRequestQueue(Context context) {
        return newRequestQueue(context, null);
    }
}
从上面源码可知,当当前手机系统的api>=9 时候,volley才有HttpURLConnection来连接服务器。磁盘缓存,线程池这里暂时省略不讲解。接下来了解下,HurlStack这类。
HurlStack这个类包括了这几个操作,设置请求的header和body,以及读取响应数据。
/**
 * An {@link HttpStack} based on {@link HttpURLConnection}.
 *
 * 用途:
 *      用HttpURLConnection作为联网通讯类。
 */
public class HurlStack implements HttpStack {

    ...................//部分源码未贴出
       /**
     *  执行HttpURLConnection,返回HttpResponse
     *
     * @param request the request to perform
     * @param additionalHeaders additional headers to be sent together with
     *         {@link Request#getHeaders()}
     * @return
     * @throws IOException
     * @throws AuthFailureError
     */
    @Override
    public HttpResponse performRequest(Request<?> request, Map<String, String> additionalHeaders)
       throws IOException, AuthFailureError {

       ...................//部分源码未贴出
        String url = request.getUrl();
        //创建一个HttpUrlConnection或者其子类,进行网络连接。
        URL parsedUrl = new URL(url);
        HttpURLConnection connection = openConnection(parsedUrl, request);
        //添加Http的标头
        for (String headerName : map.keySet()) {
            connection.addRequestProperty(headerName, map.get(headerName));
        }
        //根据volley中请求,来设置HttpUrlConnection的连接方式,和传递的内容
        setConnectionParametersForRequest(connection, request);

         ...................//部分源码未贴出
    }


    /**
     * Opens an {@link HttpURLConnection} with parameters.
     * @param url
     * @return an open connection
     * @throws IOException
     *
     * 根据url中带有的协议,来开启一个带有参数的HttpURLConnection,或者HttpsURLConnection
     */
    private HttpURLConnection openConnection(URL url, Request<?> request) throws IOException {
        HttpURLConnection connection = createConnection(url);

        int timeoutMs = request.getTimeoutMs();
        //设置连接时间
        connection.setConnectTimeout(timeoutMs);
        //设置读取时间
        connection.setReadTimeout(timeoutMs);
        //不设置http缓存
        connection.setUseCaches(false);
        connection.setDoInput(true);

        // use caller-provided custom SslSocketFactory, if any, for HTTPS
        // 若是HTTPS协议,则使用HttpsURLConnection进行连接,且添加自定义的SSLSocketFactory
        if ("https".equals(url.getProtocol()) && mSslSocketFactory != null) {
            ((HttpsURLConnection)connection).setSSLSocketFactory(mSslSocketFactory);
        }
        return connection;
    }

    /**
     * Create an {@link HttpURLConnection} for the specified {@code url}.
     * 通过URL开启一个客户端与url指向资源的间的网络通道。
     */
    protected HttpURLConnection createConnection(URL url) throws IOException {
        return (HttpURLConnection) url.openConnection();
    }

    /**
     * 若是请求中存在Body(post传递的参数),则写入body到流中。
     * @param connection
     * @param request
     * @throws IOException
     * @throws AuthFailureError
     */
    private static void addBodyIfExists(HttpURLConnection connection, Request<?> request)
            throws IOException, AuthFailureError {
        byte[] body = request.getBody();
        if (body != null) {
            //设置post请求方法,允许写入客户端传递的参数
            connection.setDoOutput(true);
            //设置标头的Content-Type属性
            connection.addRequestProperty(HEADER_CONTENT_TYPE, request.getBodyContentType());
            DataOutputStream out = new DataOutputStream(connection.getOutputStream());
            //写入post传递的参数
            out.write(body);
            out.close();
        }
    }
}
从上面源码可知:
1.创建HttpUrlConnection对象时通过createConnection(URL url)来实现的
2.添加请求的body会在addBodyIfExists()内调用request.getBody()来实现
3.添加请求的标头Content-type是调用request.getBodyContentType()来实现的。
了解联网操作类HttpUrlConnection如何创建,如何添加请求的Body和Header,便可以知道如何修改Volley源码。
2.使用OkHttp作为传输层:
OkHttp的描述:一个http+spdy的客户端,可以用于android 和java运用程序。
OkHttp的优势:
Http/2 支持允许全部(访问同一主机的)请求共享一个socket.
连接池减少请求延迟(若是Http/2不能使用)
3.数据压缩成GZIP格式,来缩小下载大小。
4.响应缓存可以避免重复(已经完成的网络操作的)请求
5.OkHttp perseveres,正当网络是麻烦:
它会默默地从常见连接问题池中恢复。
若是你的服务器有多个IP地址,当第一次连接失败,OkHttp会尝试使用备用地址。
这是必需的,对于IP4+IP6和(沉珂数据中的)主机服务- OkHttp初始化新连接是通过现今TLS功能(SNI,ALPN),若是握手失败,则回退到TLS1.0中
- 使用Okhttp是容易的,它的请求/响应的API是被设计成流畅builder和immutability.
它支持同步阻塞回调和异步回调。
OkHttp的版本变化:
OkHttp1.x 存在一些问题:
问题: OkHttp changes the global SSL context, breaks other HTTP clients
原因:OkHttp更改全局的SSL context,打断其他Http客户端
解决方式:创建自己的SSL context,不使用系统默认的。但是存在问题,自定义的SSLcontext会失去自定义的属性,这可能打破一些特征,例如证书固定。/** * 自定义一个SSLContext,而不使用默认的。 * * @return */ public static OkHttpClient createOkHttpClient(){ OkHttpClient okHttpClient=new OkHttpClient(); try { SSLContext sslContext = SSLContext.getInstance("TLS"); sslContext.init(null, null, null); okHttpClient.setSslSocketFactory( sslContext.getSocketFactory()); //避免OkHttp与UrlHttpConnection混合,出现某些方法找不到 //参考链接:https://github.com/square/okhttp/issues/673 URL.setURLStreamHandlerFactory(okHttpClient); ; } catch (GeneralSecurityException e) { throw new AssertionError(); // The system has no TLS. Just give up. } return okHttpClient; }获取HttpUrlConnection对象的方式:okHttpClient.open(url)
OkHttp2.x 存在一些问题:版本2.x修复以上的问题,但是仍然存在些问题:
问题:java.io.IOException: stream was reset: PROTOCOL_ERROR
原因:导致原因: OkHttp 发送标头使用的格式:accept-encoding: gzip 。 这导致nginx服务器报告一个protocol error
解决方式:http://mailman.nginx.org/pipermail/nginx/2015-October/048978.html// 强迫使用HTTP1.1: OkHttpClient client = new OkHttpClient(); // Disable HTTP/2 for interop with NGINX 1.9.5. client.setProtocols(Collections.singletonList(Protocol.HTTP_1_1));获取HttpUrlConnection对象的方式:OkUrlFactory(okHttpClient).open()
OkHttp3.x 版本已经比较成熟,实用起来也比较方便,通过构建者方式来创建对象。
更多关于OkHttp的信息,可以阅读 在github上的OkHttp项目连接:https://github.com/square/okhttp
原本打算都讲解下如何让OkHttp各个版本作为Volley的传输层,但是考虑到大多数人都是使用OkHttp3.x。故这里就不在讲解如何实现各个版本的OkHttp作为传输层。
先在Volley源码的Gradle中添加依赖库:
dependencies {
    //OkHttp库
    compile 'com.squareup.okhttp3:okhttp:3.5.0'
    //okhttp-urlconnection库
    compile 'com.squareup.okhttp3:okhttp-urlconnection:3.5.0'
   //Gson库
    compile 'com.google.code.gson:gson:2.2.4'
}
然后,创建一个OkHttpClientStatck,来作为传输层(若是有需要的,可以在源码下自定义一个包,在包下创建)

思路:采用OkHttp作为传输层,替代原生的HttpUrlConnection。
实现方式:继承HurlStack 类,复写createConnection(URL url)返回OkHttpClient中的HttpURLConnection
OkHttpClientStatck.java完整代码如下:
/**
 * Created by ${新根} on 2016/11/3.
 * 博客:http://blog.csdn.net/hexingen
 *
 * 采用OkHttp作为传输层,替代原生的HttpUrlConnection
 */
public class OkHttpClientStatck extends HurlStack {
    private OkHttpClient okHttpClient;

    /**
     * 采购构建者方式创建OkHttpClient
     * OkHttpClient可以自定义拦截器,缓存,联网时间和写入时间等设置。
     * Volley默认有这些东西,这里就不在设置。
     */
    public OkHttpClientStatck(){
        OkHttpClient.Builder builder=new OkHttpClient.Builder();
        okHttpClient=builder.build();
    }
    /**
     * 获取到OkHttpClient();
     * @return
     */
    private  OkHttpClient getOkHttpClient(){
        return  okHttpClient;
    }
    /**
     * 这里采用OkHttp框架中HttpURLConnection,而不使用原生的。
     *
     * OkHttpClient1.x:通过OkHttpClient.open(url)来获取
     *
     * OkHttpClient2.x:可以通过OkUrlFactory.open(URL url)来获取
     *
     * @param url
     * @return
     * @throws IOException
     */
    @Override
    protected HttpURLConnection createConnection(URL url) throws IOException {
        String protocol=  url.getProtocol();
        if (protocol.equals("http")) return new OkHttpURLConnection(url, getOkHttpClient(),null);

        if (protocol.equals("https")) return new OkHttpsURLConnection(url, getOkHttpClient(),null);
        throw new IllegalArgumentException("Unexpected protocol: " + protocol);
    }
}
然后将OkHttpClientStatck添加到Volley中,作为默认的传输层:
在Volley.java中修改如下:
public class Volley {

   ............//部分源码未贴出

   /**
     * Creates a default instance of the worker pool and calls {@link RequestQueue#start()} on it.
     *
     * @param context A {@link Context} to use for creating the cache dir.
     * @return A started {@link RequestQueue} instance.
     *
     * 创建一个默认的工作池对象,且调用RequestQueue的start()
     * 参数Contentxt用于创建磁盘缓存的文件夹
     *
     */
    public static RequestQueue newRequestQueue(Context context) {
        //修改源码:这里采用OkHttp作为传输层
        return newRequestQueue(context, new OkHttpClientStatck());
    }
}
有人好奇为什么不用系统默认的HttpUrlConnetion,而用OkHttp作为传输层?
单纯的HttpUrlConnetion的使用起来存在一些问题,OkHttp不止针对其问题做了处理,还对连接服务器过程中一些问题做了处理。
Volley与OkHttp的整合已经完成了,整合后的Volley框架使用起来和原本的一样,自我鼓励下。
3.添加自定义的Request:
既然改了Volley的传输层,那再改Request也是顺手之劳。
在框架源码中,添加 GsonRequest,这里不再贴代码,感兴趣的可以阅读Gson解析的 GsonRequest
在框架源码中,添加 文件上传的MultiPartRequest ,这里有部分代码进行了修改,原本是上传文件的byte[],变成了上传file。省略了转化过程,使用起来更方便。
完整代码代码如下:
/**
 * Created by 新根 on 2016/8/9.
 * 用途:
 * 各种数据上传到服务器的内容格式:
 * <p/>
 * 文件上传(内容格式):multipart/form-data
 * String字符串传送(内容格式):application/x-www-form-urlencoded
 * json传递(内容格式):application/json
 *
 * 博客:http://blog.csdn.net/hexingen
 */
public class MultiPartRequest<T> extends Request<T> {
    private  static  final  String TAG=MultiPartRequest.class.getSimpleName();
    /**
     * 解析后的实体类
     */
    private final Class<T> clazz;

    private final Response.Listener<T> listener;

    /**
     * 自定义header:
     */
    private Map<String, String> headers;
    private final Gson gson = new Gson();
    /**
     * 字符编码格式
     */
    private static final String PROTOCOL_CHARSET = "utf-8";

    private static final String BOUNDARY = "----------" + System.currentTimeMillis();
    /**
     * Content type for request.
     */
    private static final String PROTOCOL_CONTENT_TYPE = "multipart/form-data; boundary=" + BOUNDARY;

    /**
     * 文件列表。参数1是文件名,参数2是文件
     */
    private Map<String, File > fileList;
    /**
     * 多个文件间的间隔
     */
    private static final String FILEINTERVAL = "\r\n";

    public MultiPartRequest(int method, String url,
                            Class<T> clazz,
                            Response.Listener<T> listener, Response.ErrorListener errorListenerr) {
        super(method, url, errorListenerr);
        this.clazz = clazz;
        this.listener = listener;
        headers = new HashMap<>();
        fileList = new HashMap<>();
    }

    @Override
    protected Response<T> parseNetworkResponse(NetworkResponse response) {
        try {
            String json = new String(
                    response.data,
                    "utf-8");
            T t = gson.fromJson(json, clazz);
            return Response.success(t, HttpHeaderParser.parseCacheHeaders(response));
        } catch (UnsupportedEncodingException e) {
            return Response.error(new ParseError(e));
        } catch (JsonSyntaxException e) {
            return Response.error(new ParseError(e));
        }
    }

    @Override
    protected void deliverResponse(T t) {
        listener.onResponse(t);
    }


    /**
     * 重写getHeaders(),添加自定义的header
     *
     * @return
     * @throws AuthFailureError
     */
    @Override
    public Map<String, String> getHeaders() throws AuthFailureError {
        return headers;
    }

    /**
     * 设置请求的标头
     * @param key
     * @param content
     * @return
     */
    public Map<String, String> setHeader(String key, String content) {
        if (!TextUtils.isEmpty(key) && !TextUtils.isEmpty(content)) {
            headers.put(key, content);
        }
        return headers;
    }

    /**
     * 添加文件名和文件数据
     *
     * @param fileName
     * @param file
     */
    public void addFile(String fileName, File file) {
        if (!TextUtils.isEmpty(fileName) && file != null) {
            fileList.put(fileName, file);
        }
    }


    /**
     * 重写Content-Type:设置为json
     */
    @Override
    public String getBodyContentType() {
        return PROTOCOL_CONTENT_TYPE;
    }

    /**
     * post参数类型
     */
    @Override
    public String getPostBodyContentType() {
        return getBodyContentType();
    }

    /**
     * post参数
     */
    @Override
    public byte[] getPostBody() throws AuthFailureError {

        return getBody();
    }

    /**
     * 将string编码成byte
     *
     * @return
     * @throws AuthFailureError
     */
    @Override
    public byte[] getBody() throws AuthFailureError {
        byte[] body;
        ByteArrayOutputStream outputStream = null;
        try {
            outputStream = new ByteArrayOutputStream();
            Set<Map.Entry<String, File>> set = fileList.entrySet();
            int i=1;
            for (Map.Entry<String,File> entry : set) {
                //添加文件的头部格式
                writeByte(outputStream, getFileHead( entry.getKey()));
                //添加文件数据
                writeByte(outputStream,fileTranstateToByte(entry.getValue()));
                //添加文件间的间隔
                if (set.size() > 1&&i<set.size()) {
                    i++;
                    Log.i(TAG,"添加文件间隔");
                    writeByte(outputStream, FILEINTERVAL.getBytes(PROTOCOL_CHARSET));
                }
            }
            writeByte(outputStream, getFileFoot());
            outputStream.flush();
            body = outputStream.toByteArray();
            return body == null ? null : body;
        } catch (Exception e) {
            return null;
        } finally {
            try {
                if (outputStream != null) {
                    outputStream.close();
                }
            } catch (Exception e) {

            }
        }
    }

    /**
     * 将file转成byte[]数据
     */
    public byte[] fileTranstateToByte(File file){
        byte[] data=null;
        FileInputStream fileInputStream=null;
        ByteArrayOutputStream outputStream = null;
        try {
            fileInputStream=new FileInputStream(file);
            byte[] buffer=new byte[1024];
            int length=0;
            while ((length=fileInputStream.read(buffer))!=-1){
                outputStream.write(buffer,0,length);
            }
            outputStream.flush();
           data= outputStream.toByteArray();
        }catch (Exception e){
              data=null;
            e.printStackTrace();
        }finally {
            try {
                if (outputStream != null) {
                    outputStream.close();
                }
                if(fileInputStream!=null){
                    fileInputStream.close();
                }
            } catch (Exception e) {

            }
        }
        return data;
    }
    public void writeByte(ByteArrayOutputStream outputStream, byte[] bytes) {
        if(bytes!=null){
            outputStream.write(bytes, 0, bytes.length);
        }
    }


    /**
     * 获取到文件的head
     *
     * @return
     */
    public byte[] getFileHead(String fileName) {
        try {
            StringBuffer buffer = new StringBuffer();
            buffer.append("--");
            buffer.append(BOUNDARY);
            buffer.append("\r\n");
            buffer.append("Content-Disposition: form-data;name=\"media\";filename=\"");
            buffer.append(fileName);
            buffer.append("\"\r\n");
            buffer.append("Content-Type:application/octet-stream\r\n\r\n");
            String s = buffer.toString();
            return s.getBytes("utf-8");
        } catch (Exception e) {
            e.printStackTrace();
            return null;
        }
    }

    /**
     * 获取文件的foot
     *
     * @return
     */
    public byte[] getFileFoot() {
        try {
            StringBuffer buffer = new StringBuffer();
            buffer.append("\r\n--");
            buffer.append(BOUNDARY);
            buffer.append("--\r\n");
            String s = buffer.toString();
            return s.getBytes("utf-8");
        } catch (Exception e) {
            return null;
        }
    }

}
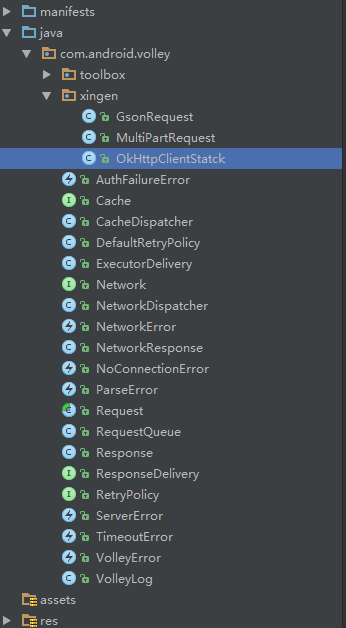
最终项目结构如下:
总结:
1. Volley框架的设计是相当不错的,具备1个缓存线程,4个网络线程,可以避免相同的Url的请求并发访问服务器
2. Volley框架带有图片处理ImageLoader,防止在ImageView在listview,gridview,recycleview中错乱。
3. Volley也带有磁盘缓存,可以自行配置内存缓存。
4. OkHttp也是带有磁盘缓存(需配置),异步或者同步执行,请求重试,拦截器等等。
这篇 Volley+OkHttp+Gson结合使用,较为适合普通项目中需求。例如加上断点续传,下载大数据的文件(volley不具备的优势),还可以继续深入的修改结合使用。慢慢长征路,还需继续走下去。


 796
796

 被折叠的 条评论
为什么被折叠?
被折叠的 条评论
为什么被折叠?
 到【灌水乐园】发言


