


使用SpringMvc搭建的HelloWorld
环境配置
Eclipse:mars-2
Apache-Tomcat:7.0.91
JDK:1.7
Spring-framework: 4.0.9.RELEASE
步骤
- File->New->Other->Web->Dynamic Web Project

2.在WEB-INF文件下面添加web.xml文件
web.xml文件:
<?xml version="1.0" encoding="UTF-8"?>
<web-app xmlns:xsi="http://www.w3.org/2001/XMLSchema-instance"
   xmlns="http://java.sun.com/xml/ns/javaee"
   xsi:schemaLocation="http://java.sun.com/xml/ns/javaee http://java.sun.com/xml/ns/javaee/web-app_2_5.xsd"
   id="WebApp_ID" version="2.5">

   <!-- 配置DispatchcerServlet -->
   <servlet>
       <servlet-name>springDispatcherServlet</servlet-name>
       <servlet-class>org.springframework.web.servlet.DispatcherServlet</servlet-class>
       <!-- 配置Spring mvc下的配置文件的位置和名称 -->
       <init-param>
           <param-name>contextConfigLocation</param-name>
           <param-value>classpath:springmvc.xml</param-value>
       </init-param>
       <load-on-startup>1</load-on-startup>
   </servlet>

   <servlet-mapping>
       <servlet-name>springDispatcherServlet</servlet-name>
       <url-pattern>/</url-pattern>
   </servlet-mapping>

</web-app>
2.添加Spring-framework框架相关jar包
jar包下载链接: https://blog.csdn.net/xingyun_yj/article/details/68098373.
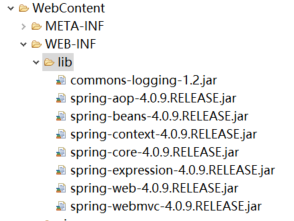
将相关jar包复制到lib文件夹下
3. 在WebContent文件夹下面添加index.jsp文件:
<%@ page language="java" contentType="text/html; charset=UTF-8"
   pageEncoding="UTF-8"%>
<!DOCTYPE html PUBLIC "-//W3C//DTD HTML 4.01 Transitional//EN" "http://www.w3.org/TR/html4/loose.dtd">
<html>
<head>
<meta http-equiv="Content-Type" content="text/html; charset=UTF-8">
<title>界面标题</title>
</head>
<body>

<a href="helloworld">hello world</a>

</body>
</html>
4.在WEB-INF/views/下面添加success.jsp文件:
<%@ page language="java" contentType="text/html; charset=UTF-8"
   pageEncoding="UTF-8"%>
<!DOCTYPE html PUBLIC "-//W3C//DTD HTML 4.01 Transitional//EN" "http://www.w3.org/TR/html4/loose.dtd">
<html>
<head>
<meta http-equiv="Content-Type" content="text/html; charset=ISO-8859-1">
<title>成功界面</title>
</head>
<body>

<h4>恭喜您成功了</h4>

</body>
</html>
5.建立helloworld类(包名com.shi.springmvc.handlers下):
package com.shi.springmvc.handlers;
import org.springframework.stereotype.Controller;
import org.springframework.web.bind.annotation.RequestMapping;
@Controller
public class HelloWorld {

	/**
	 * 1. 使用RequestMapping注解来映射请求的URL 2. 返回值会通过视图解析器解析为实际的物理视图,
	 * 对于InternalResourceViewResolver视图解析器,会做如下解析 通过prefix+returnVal+suffix
	 * 这样的方式得到实际的物理视图,然后会转发操作 "/WEB-INF/views/success.jsp"
	 *
	 * @return
	 */
	@RequestMapping("/helloworld")
	public String hello() {
		System.out.println("hello world");
		return "success";
	}
}
6.在包名com.shi.springmvc.handlers下新建springmvc.xml文件
<?xml version="1.0" encoding="UTF-8"?>
<beans xmlns="http://www.springframework.org/schema/beans"
    xmlns:xsi="http://www.w3.org/2001/XMLSchema-instance"
    xmlns:context="http://www.springframework.org/schema/context"
    xmlns:mvc="http://www.springframework.org/schema/mvc"
    xsi:schemaLocation="http://www.springframework.org/schema/beans http://www.springframework.org/schema/beans/spring-beans.xsd
        http://www.springframework.org/schema/context http://www.springframework.org/schema/context/spring-context-4.0.xsd
        http://www.springframework.org/schema/mvc http://www.springframework.org/schema/mvc/spring-mvc-4.0.xsd">


        <!-- 配置自动扫描的包 -->
        <context:component-scan base-package="com.shi.springmvc"></context:component-scan>

        <!-- 配置视图解析器 如何把handler 方法返回值解析为实际的物理视图 -->
        <bean class="org.springframework.web.servlet.view.InternalResourceViewResolver">
            <property name = "prefix" value="/WEB-INF/views/"></property>
            <property name = "suffix" value = ".jsp"></property>
        </bean>
</beans>
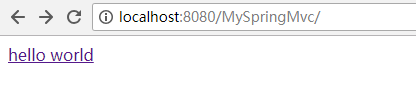
运行界面

新建servers,添加tomcat,之后右键Debug,在浏览器中输入localhost:8080/MySpringMvc/


 1425
1425


 被折叠的 条评论
为什么被折叠?
被折叠的 条评论
为什么被折叠?
 到【灌水乐园】发言


