


 本文介绍了如何使用PyTorch实现精简版的YOLOV3目标检测模型,重点解析了DarkNet53网络结构,包括一系列残差模块的堆叠和FPN结构的应用。通过代码展示了网络的搭建过程,并提供了模型前向传播的实现。此外,还进行了简单的模型测试,观察了不同尺度的预测输出结果。
精简版YOLOV3,是指将原版中的配置参数项等代码省去,将网络结构固定下来。
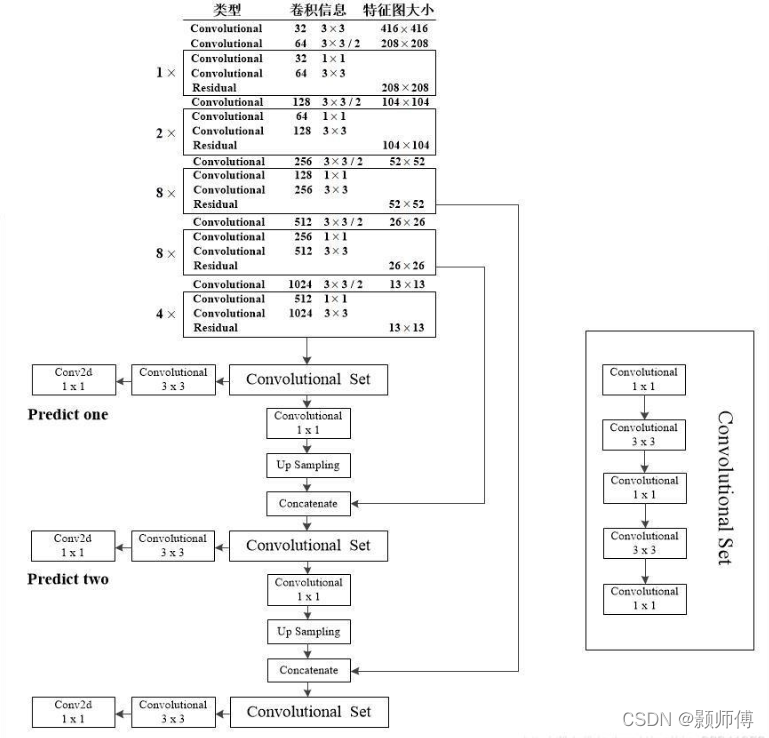
从结构图上来看,是一系列残差结构的主网络堆积而成,输出结果再引入FPN网络进行多尺度拼接,以适应多尺度的检测过程。(FPN详见其它博文)
其网络的详细结构图为:
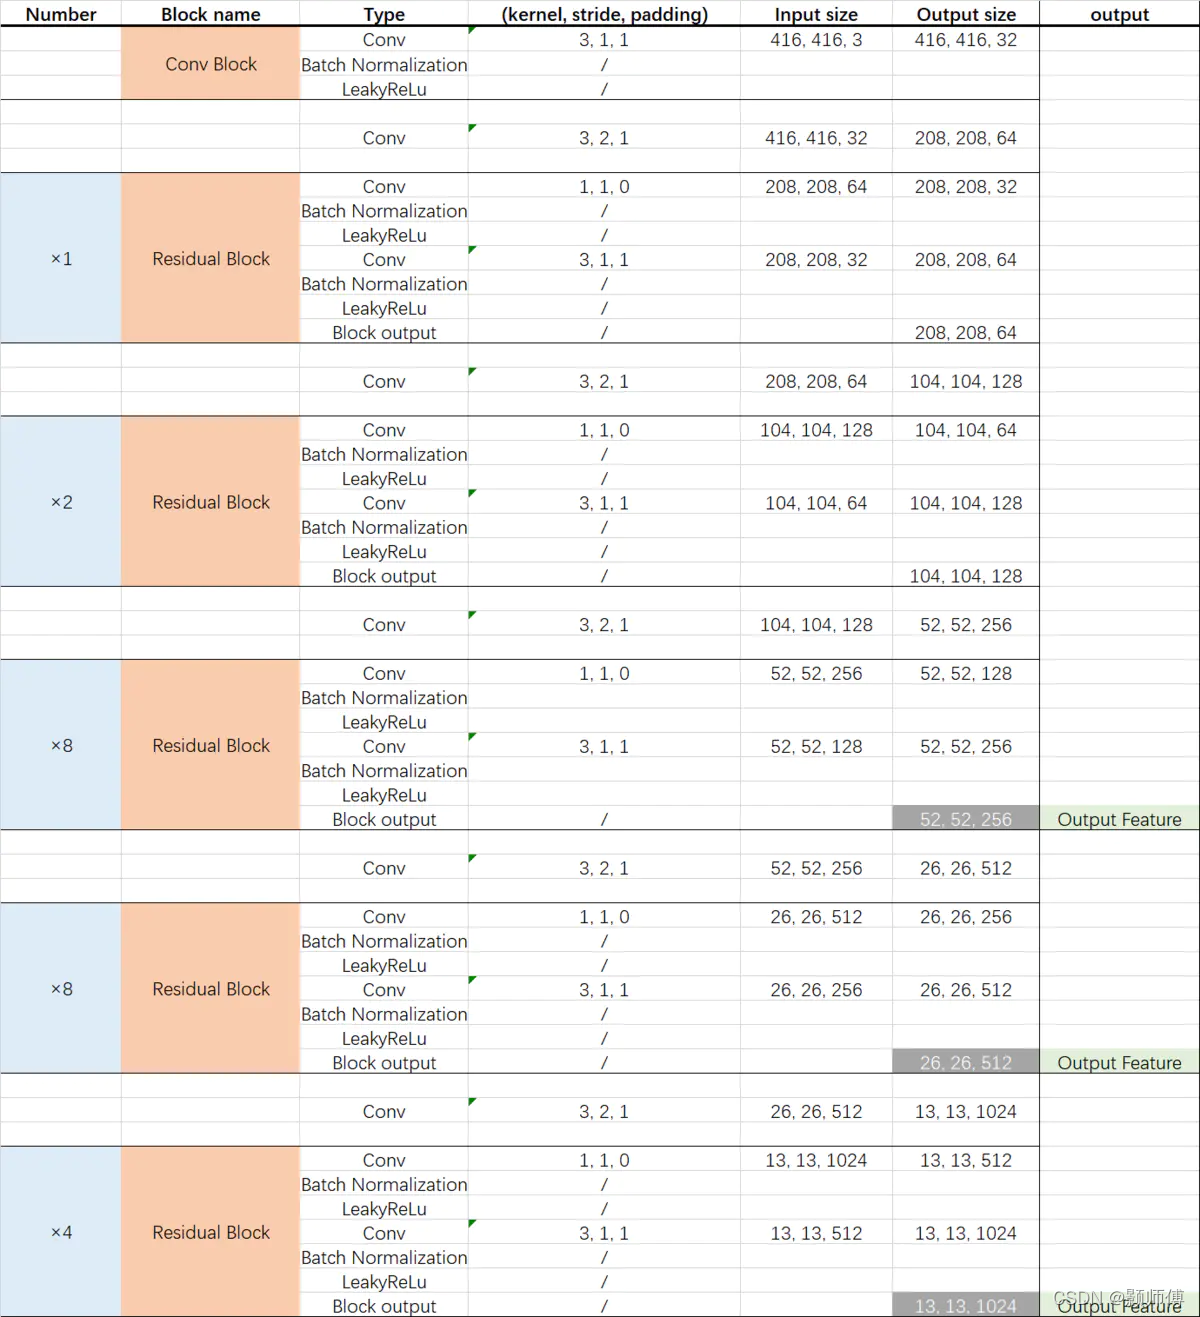
根据结构图及参数图编写出pytorch版darknet_53:
import os.path
from typing import Iterator
import numpy as np
import torch
import cv2
import matplotlib.pyplot as plt
from PIL import Image
from torch.utils.data import Dataset, DataLoader, Subset, random_split
import re
from functools import reduce
from torch.utils.tensorboard import SummaryWriter as Writer
from torchvision import transforms, datasets
import torchvision as tv
from torch import nn
import torch.nn.functional as F
import time
#残差模块,设计时输入及输出不改变特征图的大小,方便串联增加深度
class ResBlockForDarkNet(nn.Module):
    def __init__(self,channelIn):
        super(ResBlockForDarkNet, self).__init__()
        self.net=nn.Sequential(
            nn.Sequential(nn.Conv2d(channelIn, channelIn//2, 1, 1, 0),
                          nn.BatchNorm2d(channelIn//2), nn.LeakyReLU(0.1)),
            nn.Sequential(nn.Conv2d(channelIn//2, channelIn, 3, 1, 1),
                          nn.BatchNorm2d(channelIn), nn.LeakyReLU(0.1))
        )
    def forward(self,x):
        return x+self.net(x)
#默认为416*416*3的输入
class DarkNet53(nn.Module):
    def __init__(self,classNum):
        super(DarkNet53, self).__init__()
        self.classNum=classNum
        #构建中间52,52,256的输出分支:
        self.net_52_256=[]
        self.net_52_256.append(self._cnnwithBnAndLeakyRelu(3,32,3,1,1))
        self.net_52_256.append(self._channelDoubled(32))
        self.net_52_256.append(ResBlockForDarkNet(64))
        self.net_52_256.append(self._channelDoubled(64))
        for i in range(2):
            self.net_52_256.append(ResBlockForDarkNet(128))
        self.net_52_256.append(self._channelDoubled(128))
        for i in range(8):
            self.net_52_256.append(ResBlockForDarkNet(256))
        self.net_52_256 =nn.Sequential(*self.net_52_256)
        #构建中间26,26,512的输出分支:
        self.net_26_512=[]
        self.net_26_512.append(self._channelDoubled(256))
        for i in range(8):
            self.net_26_512.append(ResBlockForDarkNet(512))
        self.net_26_512 = nn.Sequential(*self.net_26_512)
        #构建最后的13,13,1024的输出
        self.net_13_1024=[]
        self.net_13_1024.append(self._channelDoubled(512))
        for i in range(8):
            self.net_13_1024.append(ResBlockForDarkNet(1024))
        self.net_13_1024 = nn.Sequential(*self.net_13_1024)
        #权重初始化代码
        for m in self.modules():
            if isinstance(m, nn.Conv2d):
                n = m.kernel_size[0] * m.kernel_size[1] * m.out_channels
                m.weight.data.normal_(0, math.sqrt(2. / n))
            elif isinstance(m, nn.BatchNorm2d):
                m.weight.data.fill_(1)
                m.bias.data.zero_()
    def forward(self,x):
        x52=self.net_52_256(x)
        x26=self.net_26_512(x52)
        x13=self.net_13_1024(x26)
        #生成 Predict1
        tempPredict1=self._convelutionalSet(1024,512)(x13)
        Predict1=self._net33And11(512)(tempPredict1)
        #生成  Predict2
        catPredict2=torch.cat([self._net11AndUpSample(512,26,26)(tempPredict1),x26],1)
        tempPredict2=self._convelutionalSet(256+512,256)(catPredict2)
        Predict2 = self._net33And11(256)(tempPredict2)
        # 生成  Predict3
        catPredict3=torch.cat([self._net11AndUpSample(256,52,52)(tempPredict2),x52],1)
        Predict3= self._net33And11(128)(self._convelutionalSet(128+256,128)(catPredict3))
        return Predict1,Predict2,Predict3

    def _cnnwithBnAndLeakyRelu(self,channelIn,channelOut,k,s,p):
        return nn.Sequential(nn.Conv2d(channelIn,channelOut,k,s,p),
                             nn.BatchNorm2d(channelOut),nn.LeakyReLU(0.1))
    #下采样,通道加倍,特征图大小减半
    def _channelDoubled(self,channelIn):
        return nn.Conv2d(channelIn,channelIn*2,3,2,1)

    # 构建convelutionalSet,用于多通道信息融合
    def _convelutionalSet(self,channelIn,channelOut):
        return nn.Sequential(
             self._cnnwithBnAndLeakyRelu(channelIn,channelOut, 1, 1, 0),
             self._cnnwithBnAndLeakyRelu(channelOut,channelIn, 3, 1, 1),
             self._cnnwithBnAndLeakyRelu(channelIn, channelOut, 1, 1, 0),
             self._cnnwithBnAndLeakyRelu(channelOut, channelIn, 3, 1, 1),
             self._cnnwithBnAndLeakyRelu(channelIn, channelOut, 1, 1, 0),
        )
    #预测值输出口的3x3及1x1卷积网络,固定输出通道数为15的特征图
    def _net33And11(self,channelIn):
        '''其含义为:每尺寸特征图最终输出通道数为3*(4+1+self.classNum):每个尺寸的特征图输出3个
        预测框,每个预测框有4个量代表坐标位置,1个量代表置信度,以及分类数目(独热向量),之后输出会在后续网络中进行
        reshape操作。
        '''
        return nn.Sequential(
             self._cnnwithBnAndLeakyRelu(channelIn,channelIn*2, 3, 1, 1),
             nn.Conv2d(channelIn*2,3*(4+1+self.classNum),1,1,0))
    #1*1卷积网络以及上采样
    def _net11AndUpSample(self,channelIn,w,h):
        return nn.Sequential(
            #首先将通道数减半
            self._cnnwithBnAndLeakyRelu(channelIn, channelIn//2, 1, 1, 0),
            #进行上采样操作
            torch.nn.Upsample(size=(w,h))
        )
#搭建完成后进行实际的测试工作:
img=cv2.imdecode(np.fromfile(r"C:\Users\25360\Desktop\testpic.jpg",np.uint8),-1)
img=img[:,:,::-1]
img=cv2.resize(img,(416,416))
img=np.transpose(img,[2,0,1])
img=img.reshape(1,3,416,416)
img=torch.tensor(img).float()

net=DarkNet53(classNum=1)
net.eval()
Predict1,Predict2,Predict3=net(img)
print(Predict1.shape)
writer=Writer("./myBorderText")
#当一次显示一个数据集时,使用add_images方法:
writer.add_images("结果读取", img_tensor=torch.reshape(Predict1,(-1,3,13,13)), global_step=1)
writer.add_images("结果读取", img_tensor=torch.reshape(Predict2,(-1,3,26,26)), global_step=2)
writer.add_images("结果读取", img_tensor=torch.reshape(Predict3,(-1,3,52,52)), global_step=3)
writer.close()
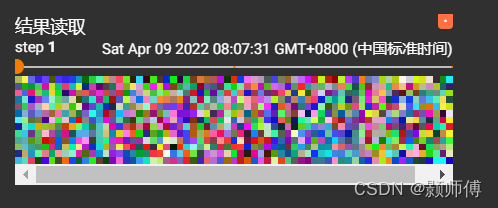
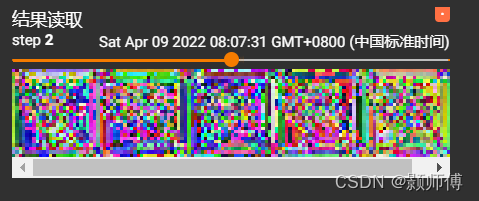
查看tensorboard输出结果为:
原图:

Predict1,Predict2,Predict3分别为:


 被折叠的 条评论
为什么被折叠?
被折叠的 条评论
为什么被折叠?
 到【灌水乐园】发言


