总结常用的Javafx功能及用法
控件的绑定和监听
在主线程
这里是让控件(Lable,Circle…)和页面大小做一个绑定
1.创建一个圆
Circle circle = new Circle();
circle.setCenterX(250);
circle.setCenterY(250);
circle.setRadius(100);
circle.setStroke(Color.BLACK);
circle.setFill(Color.WHITE);
2.坐标绑定
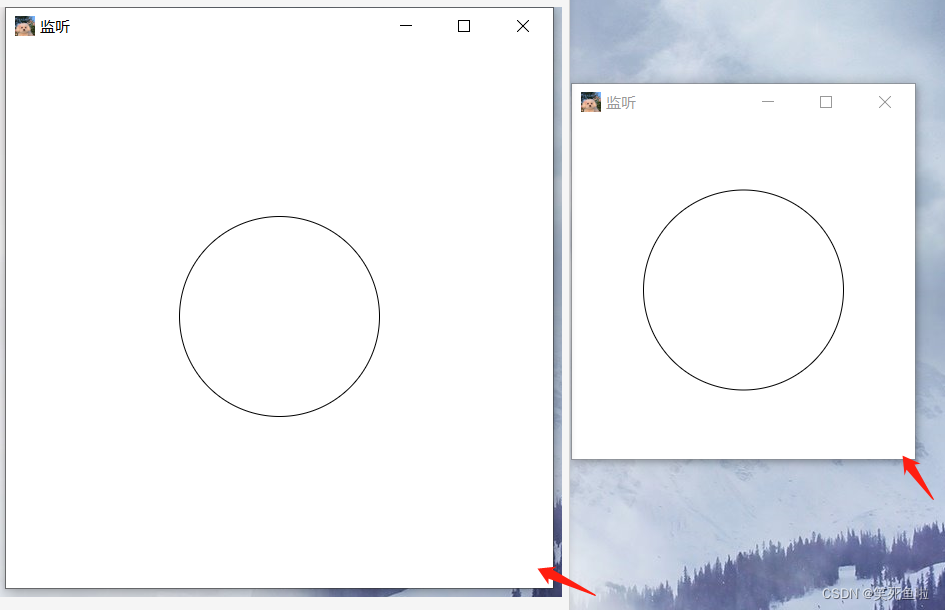
让圆一直显示在页面中间,也就是让圆的中心坐标属性和scence的长宽做一个绑定
//让圆的中心坐标等于scene长度和宽度的一半
circle.centerXProperty().bind(scene.widthProperty().divide(2));
circle.centerYProperty().bind(scene.heightProperty().divide(2));
当我们缩小界面的时候,可以保证圆始终在页面的正中间
3.监听器
我们也可以尝试用监听器对stage进行监听,每当页面大小被更改,则内部对圆的坐标进行更改,完成同样的效果。
//对窗口的宽度属性加上一个监听器
//添加一个ChangeListener,每当ObservalEvalue的值发生变化时,就会通知它。
stage.widthProperty().addListener(new ChangeListener<Number>() {
@Override
public void changed(ObservableValue<? extends Number> observable, Number oldValue, Number newValue) {
//一旦窗口变化,这里做一个输出
System.out.println("窗口宽度发生变化"+newValue);
circle.setCenterX((Double) newValue/2);
}
});
//对窗口高度属性加上监听器
stage.heightProperty().addListener(new ChangeListener<Number>() {
@Override
public void changed(ObservableValue<? extends Number> observable, Number oldValue, Number newValue) {
circle.setCenterY((Double) newValue/2);
}
});
事件驱动编程
什么是事件驱动
点击一个按键,点击鼠标,拖拽鼠标,点击按钮,电脑执行了(#¥……@#¥)操作,这样一个过程叫事件驱动。
创建一个点击移动事件
这里举例点击按钮,让label实现向下移动20
1.创建Label和Button
Label label = new Label("hello world");
Button button = new Button("移动label");
label.setLayoutX(200);
label.setLayoutY(50);
button.setLayoutX(200);
button.setLayoutY(250);
2.添加场景布局
AnchorPane root = new AnchorPane();
root.getChildren().addAll(label,button);
Scene scene = new Scene(root,500,500);
stage.setTitle("移动事件");
stage.getIcons().add(new Image("com/yu/abc/1.jpg"));
stage.setScene(scene);
stage.show();
3.添加Button的点击移动事件
button.setOnAction(new EventHandler<ActionEvent>() {
//创建一个handler处理者
@Override
public void handle(ActionEvent event) {
//让他干事就完了
label.setLayoutY(label.getLayoutY()+20);
}
});
4.添加一个按键移动事件
//键盘点击事件可以放在任意控件或者场景中
//可以使用创建handler 也可以lamda表达式
scene.setOnKeyReleased(event -> {
KeyCode kc = event.getCode();
if (kc.equals(KeyCode.UP)){
label.setLayoutY(label.getLayoutY()-20);
}
});
创建一个拖拽移动文件的事件
这里完成从桌面拖拽文件到窗口,文本框显示文件路径
//创建一个文本框
TextField textField = new javafx.scene.control.TextField();
textField.setLayoutX(150);
textField.setLayoutY(150);
//对拖拽的信息进行反馈
textField.setOnDragOver(event -> {
//接收拖拽事件,为拖拽目标选择通用的Any模式
event.acceptTransferModes(TransferMode.ANY);
});
//松手时反馈拖拽的文件的绝对路径
textField.setOnDragDropped(event -> {
//dragboard是一个剪贴板,鼠标拖拽松手时获取剪贴板的文件
Dragboard dragboard =event.getDragboard();
if (dragboard.hasFiles()){
//如果剪贴板有文件,则返回绝对路径到文本框中
String path = dragboard.getFiles().get(0).getAbsolutePath();
textField.setText(path);
}
});
FXML布局
使用FXML布局以后 我们将程序分成 布局 控制 main方法的衔接
Fxml布局文件设置各种控件位置,属性,以及绑定控制器:
<?import javafx.scene.control.*?>
<?import javafx.scene.layout.*?>
<?import javafx.scene.text.Font?>
<AnchorPane xmlns="http://javafx.com/javafx"
xmlns:fx="http://javafx.com/fxml"
fx:controller="com.yu.abc.Fxml.DemoControl"
prefHeight="400.0" prefWidth="600.0">
<children>
<Label fx:id="la" text="Hello World!" layoutX="150" layoutY="200">
<font>
<Font size="30">
</Font>
</font>
</Label>
<!--onUp是使用控制器类里面的方法进行操作-->
<Button fx:id="bu" text="向上移动" layoutX="150" layoutY="250" onAction="#onUp"></Button>
</children>
</AnchorPane>
在控制器中绑定fxml中控件名,以及我们想要让控件做什么事(创建方法):
import javafx.fxml.FXML;
import javafx.scene.control.Button;
import javafx.scene.control.Label;
public class DemoControl {
@FXML
Label la;
@FXML
Button bu;
public void onUp(){
la.setLayoutY(la.getLayoutY()-10);
}
}
最后在主方法中,对fxml布局和Controller控制器做一个衔接:
import javafx.application.Application;
import javafx.fxml.FXMLLoader;
import javafx.scene.Scene;
import javafx.scene.layout.Pane;
import javafx.stage.Stage;
import java.io.IOException;
public class Buju extends Application {
public static void main(String[] args) {
launch(args);
}
@Override
public void start(Stage primaryStage) throws IOException {
//找到fxml文件进行加载
Pane root = FXMLLoader.load(getClass().getResource("buju1.fxml"));
Scene scene = new Scene(root,500,500);
primaryStage.setScene(scene);
primaryStage.setTitle("Fxml");
primaryStage.show();
}
}
Scene Builder的使用
搭建JavaFX可以分成三部分: fxml controler 主方法
利用scene Builder 拖拽的方式进行布局自动生成FXML文件,会简单很多
在设置里绑定 scence Builder 可以直接从 fxml文件中打开scence builder布局
Controller 的Initialize
由于加载布局并完成Controller属性的绑定以后就会开始调用 controller的initialize方法,因此可以利用这个特性在加载初始化数据上
这里举例tableView
Controller里编写initialize的逻辑:
import javafx.collections.FXCollections;
import javafx.collections.ObservableList;
import javafx.fxml.FXML;
import javafx.scene.control.TableColumn;
import javafx.scene.control.TableView;
import javafx.scene.control.cell.PropertyValueFactory;
public class ControlPerson {
@FXML
private TableView<Person> tableView;
@FXML
private TableColumn<Person,String> name;
@FXML
private TableColumn<Person, Integer> age;
public void initialize()throws Exception{
ObservableList<Person> celldata = FXCollections.observableArrayList();
name.setCellValueFactory(new PropertyValueFactory<Person,String>("name"));
age.setCellValueFactory(new PropertyValueFactory<Person,Integer>("age"));
celldata.add(new Person("张三",18));
celldata.add(new Person("lisi",23));
celldata.add(new Person("berry",38));
tableView.setItems(celldata);
}
}
控件的绑定和监听 (不在主线程)
fxml布局 :添加node,设置node属性,绑定控制器
<?xml version="1.0" encoding="UTF-8"?>
<?import javafx.scene.layout.AnchorPane?>
<?import javafx.scene.shape.Circle?>
<AnchorPane fx:controller="com.yu.abc.Hello.HelloControl" prefHeight="500.0" prefWidth="500.0" xmlns="http://javafx.com/javafx/8.0.171" xmlns:fx="http://javafx.com/fxml/1" >
<children>
<Circle fx:id="circle" centerX="250.0" centerY="250.0" fill="DODGERBLUE" radius="100.0" stroke="BLACK" strokeType="INSIDE" />
</children>
</AnchorPane>
controller:绑定node名,编写绑定事件的方法控制node
import javafx.fxml.FXML;
import javafx.scene.Scene;
import javafx.scene.shape.Circle;
public class HelloControl {
@FXML
private Circle circle;
public void circleLocationBind(Scene scene){
circle.centerXProperty().bind(scene.widthProperty().divide(2));
circle.centerYProperty().bind(scene.heightProperty().divide(2));
}
}
main:读取fxml文件,获取controller,创建scene,stage…
import javafx.application.Application;
import javafx.fxml.FXMLLoader;
import javafx.scene.Parent;
import javafx.scene.Scene;
import javafx.stage.Stage;
public class Main extends Application {
public static void main(String[] args) {
launch(args);
}
@Override
public void start(Stage primaryStage)throws Exception {
//加载fxml文件
FXMLLoader fxmlLoader =new FXMLLoader();
fxmlLoader.setLocation(getClass().getResource("Hello.fxml"));
Parent root = fxmlLoader.load();
Scene scene = new Scene(root);
//使用Controller进行绑定监听,先获取这个controller
HelloControl helloControl = fxmlLoader.getController();
//调用绑定方法,将场景放在里面
helloControl.circleLocationBind(scene);
primaryStage.setScene(scene);
primaryStage.setTitle("Hello");
primaryStage.show();
}
}
多线程问题
javafx是不允许除主线程以外的其他线程去刷新或更改ui的,
需要主线程Application的静态方法Platform.runlater()
实际上是通过runlater将里面的操作放在队列里,当主方法空闲时去执行
import javafx.application.Application;
import javafx.application.Platform;
import javafx.scene.Scene;
import javafx.scene.control.Button;
import javafx.scene.control.Label;
import javafx.scene.layout.AnchorPane;
import javafx.stage.Stage;
public class thread0 extends Application {
public static void main(String[] args) {
launch(args);
}
@Override
public void start(Stage primaryStage) {
Label label = new Label("名字是?");
label.setLayoutX(150);
label.setLayoutY(250);
Button button = new Button("获取");
button.setLayoutX(150);
button.setLayoutY(300);
button.setOnAction(event -> {
Thread thread = new Thread(()->{
String newValue ="ycc";
//javafx是不允许除主线程以外的线程去刷新或更改ui的
//这一步无法更改页面为新数据
// label.setText(newValue);
//Platfor之前还在设置关闭界面管理上
Platform.runLater(()->{
//需要使用Platform的runlater
label.setText(newValue);
});
});
thread.start();
});
AnchorPane root = new AnchorPane();
root.getChildren().addAll(label,button);
Scene scene = new Scene(root,500,500);
primaryStage.setScene(scene);
primaryStage.setTitle("thread使用");
primaryStage.show();
}
}
在fx很多控件的事件里 内部是调用runlater的
(把事件的监听器 里的change 放在runlater里的) 因此不用自己调用