


Eclispe JEE项目转为 Maven项目并调试/运行在Maven内嵌的Tomcat.
- 安装eclipe maven puglin
Installation
You can install last M2Eclipse release by using the following update site from within Eclipse:
http://download.eclipse.org/technology/m2e/releases
菜单: help->Install New Software->输入上面的URL。
2. maven tomcat plugin 配置。(在pom.xml)
<build>
    <plugins>
        <plugin><!--运行Tomcat的插件-->
            <groupId>org.apache.tomcat.maven</groupId>
            <artifactId>tomcat7-maven-plugin</artifactId>
            <version>2.2</version>
            <configuration>
                <port>8081</port>
                <path>/${project.name}</path>
                <uriEncoding>UTF-8</uriEncoding>
                <finalName>${project.name}</finalName>
                <server>tomcat7</server>
                 <warSourceDirectory>WebContent</warSourceDirectory>
            </configuration>
        </plugin>
        <plugin><!--编译用的插件-->
               <groupId>org.apache.maven.plugins</groupId>
               <artifactId>maven-compiler-plugin</artifactId>
               <version>3.2</version>
               <configuration>
                    <source>1.7</source>
                    <target>1.7</target>
                    <encoding>${file.encoding}</encoding>
               </configuration>
        </plugin>

        <plugin><!--打war包用的插件-->
              <groupId>org.apache.maven.plugins</groupId>
              <artifactId>maven-war-plugin</artifactId>
              <version>2.5</version>
              <configuration>
                 <warSourceDirectory>WebContent</warSourceDirectory>
                 <failOnMissingWebXml>false</failOnMissingWebXml>
                  <webXml>WebContent\WEB-INF\web.xml</webXml>   <!--如果不是Maven的标准目录结构,此处需要配置-->
              </configuration>
        </plugin>
    </plugins>
</build>
http://maven.apache.org/plugins/index.html
3. Debug/ 运行
右键pom.xml->Debug as->Maven build-> Goals: tomcat7:run http://tomcat.apache.org/maven-plugin-2.0/tomcat7-maven-plugin/run-mojo.html
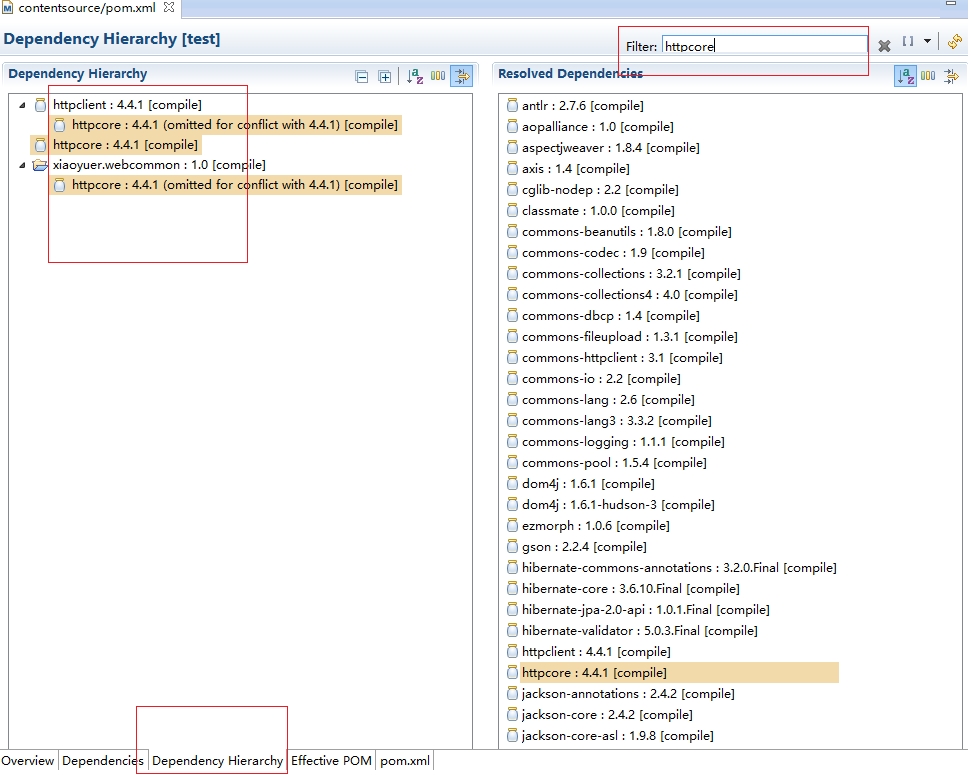
4. 冲突类的解决,双击pom.xml ->切换到Tab: Dependency Hierachy ->在Filter中搜索->中可以看到冲突的依赖包。
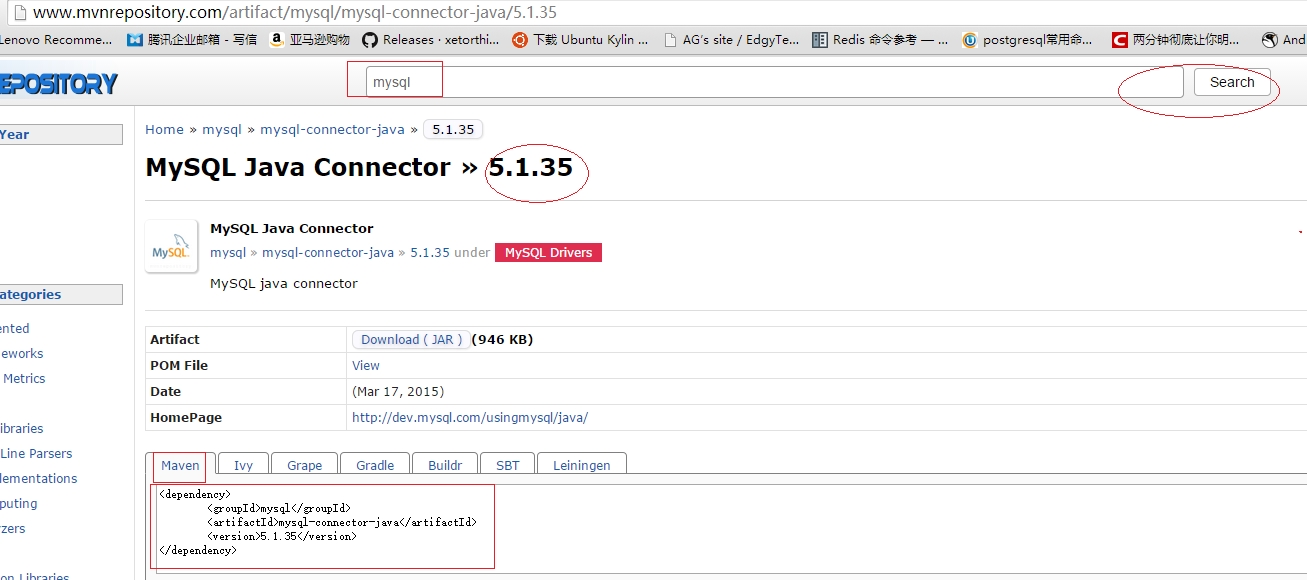
5. 依赖包的查询:
http://www.mvnrepository.com/
http://maven.oschina.net/
搜索依赖包的名字,获取pom片段,加入到工程的pom.xml中。
如Mysql的JDBC驱动:
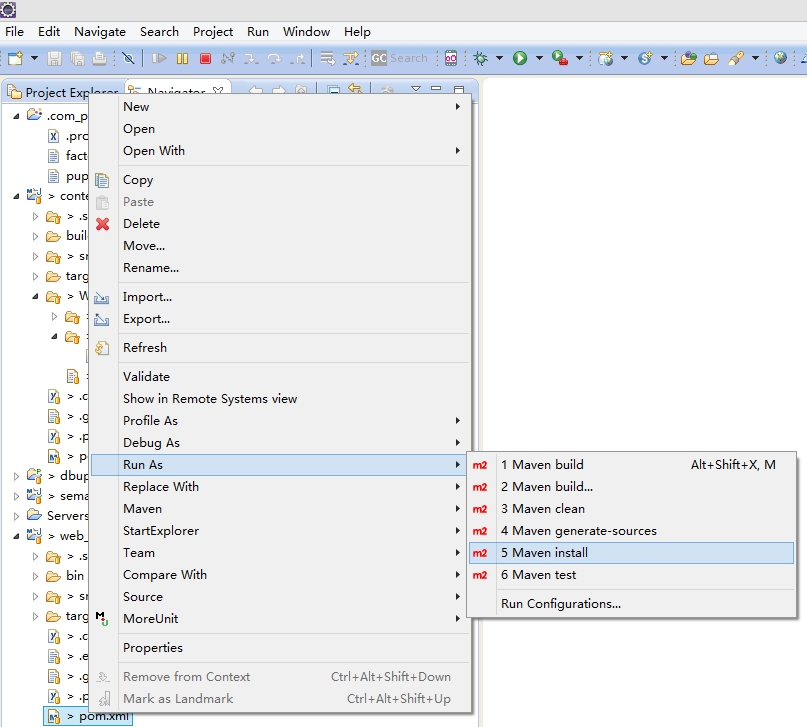
6. 安装Jar包:将本地工程打包到本地仓库中:默认是C:\Users\Anakin.m2\repository (注:Anakin是当前登录的用户名)。
右键pom.xml->Run as->Maven Install
7. 如果找不到配置文件, 将web.xml 配置的路径用classpath:文件名代替。
如:
log4jConfigLocation
classpath:log4j.properties
8. Mvn 命令行的安装
http://maven.apache.org/download.cgi
下载后加入到Path中去。
安装库:
运行命令行,转到 pom.xml 所在路径,运行:mvn install -Dmaven.test.skip=true
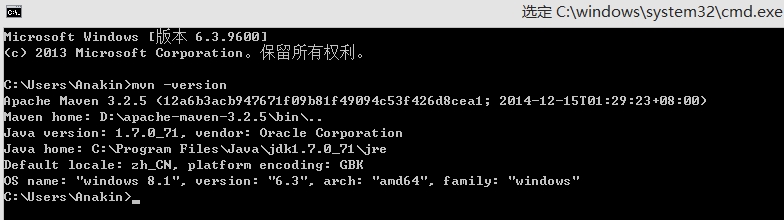
下面check mvn正确安装并加到path中了:
引自Maven 官网:
Installation Instructions
Maven is a Java tool, so you must have Java installed in order to proceed. More precisely, you need a Java Development Kit (JDK), the Java Runtime Environment (JRE) is not sufficient. Additional optional installation steps are listed after the platform specific instructions.
Windows
Unzip the distribution archive, i.e. apache-maven-3.3.3-bin.zip to the directory you wish to install Maven 3.3.3. These instructions assume you chose C:\Program Files\Apache Software Foundation. The subdirectory apache-maven-3.3.3will be created from the archive.
Add the unpacked distribution’s bin directory to your user PATH environment variable by opening up the system properties (WinKey + Pause), selecting the “Advanced” tab, and the “Environment Variables” button, then adding or selecting the PATH variable in the user variables with the value C:\Program Files\Apache Software Foundation\apache-maven-3.3.3\bin.
Optional: In the same dialog, add the MAVEN_OPTS environment variable in the user variables to specify JVM properties, e.g. the value -Xms256m -Xmx512m. This environment variable can be used to supply extra options to Maven.
In the same dialog, make sure that JAVA_HOME exists in your user variables or in the system variables and it is set to the location of your JDK, e.g. C:\Program Files\Java\jdk1.7.0_51.
Open a new command prompt (Winkey + R then type cmd) and run mvn –version to verify that it is correctly installed.
Unix-based Operating Systems (Linux, Solaris and Mac OS X)
Extract the distribution archive, i.e. apache-maven-3.3.3-bin.tar.gz to the directory you wish to install Maven 3.3.3. These instructions assume you chose /usr/local/apache-maven. The subdirectory apache-maven-3.3.3 will be created from the archive.
In a command terminal, add unpacked distribution’s bin to your PATH environment variable, e.g. export PATH=$PATH:/usr/local/apache-maven/apache-maven-3.3.3/bin.
Optional: Add the MAVEN_OPTS environment variable to specify JVM properties, e.g. export MAVEN_OPTS=”-Xms256m -Xmx512m”. This environment variable can be used to supply extra options to Maven.
Make sure that JAVA_HOME is set to the location of your JDK, e.g. export JAVA_HOME=/usr/java/jdk1.7.0_51 .
Run mvn –version to verify that it is correctly installed.
9. maven 常用站点:
maven仓库: http://www.mvnrepository.com/
maven 中国社区:http://maven.oschina.net/
maven官网:http://maven.apache.org/
maven远程仓库:http://repo2.maven.org/maven2/
maven权威指南中文版:http://www.sonatype.com/books/maven-book/reference_zh/public-book.html
maven下载:http://maven.apache.org/download.html


 794
794

 被折叠的 条评论
为什么被折叠?
被折叠的 条评论
为什么被折叠?
 到【灌水乐园】发言


