


学习Swift差不多三周了,一直在熟悉Swift2.0的语法以及UI,网络请求等,同时也会做一些小demo。
这是最近一直在做的仿知乎日报做的新闻App,来进一步熟悉和理解这段时间所学知识。这个项目很适合Swift新手入门,同时我也在进一步完善功能,加油。
源码下载地址:我的Github,欢迎大家Star。
1.在主控制器ViewController中定义一个TableView,并实现UITableViewDelegate, UITableViewDataSource中的协议。
import Foundation
import UIKit
import SDWebImage

// MARK: - UITableViewDelegate, UITableViewDataSource
extension ViewController: UITableViewDelegate, UITableViewDataSource{
    /**
     Description
     - returns: 块的数量,因为TableView的风格是plain,所以是1,默认也为1
     */
    func numberOfSectionsInTableView(tableView: UITableView) -> Int {
        return 1
    }

    /**
     Description
     - returns: 每一个section有多少行。若为0的时候,则cellForIndexPath。。。不进行cell的绘制
     */
    func tableView(tableView: UITableView, numberOfRowsInSection section: Int) -> Int {
        return items1.count - items2.count
    }
    /**
     Description:该函数进行cell的绘制,包括系统定义或者自定义
     - parameter indexPath: 当前所在行
     - returns: 返回cell
     */
    func tableView(tableView: UITableView, cellForRowAtIndexPath indexPath: NSIndexPath) -> UITableViewCell {
        let initIdentifier = "MyCell"
        var cell = tableView.dequeueReusableCellWithIdentifier(initIdentifier) as? NewsTableViewCell
        if cell == nil{
            tableView.registerNib(UINib(nibName: "NewsTableViewCell", bundle: nil), forCellReuseIdentifier: initIdentifier)
            cell = tableView.dequeueReusableCellWithIdentifier(initIdentifier) as? NewsTableViewCell
        }
        //进行cell的绘制
        let model = self.items1[indexPath.row]
//        cell?.headerImage.image = UIImage(data: NSData(contentsOfURL: NSURL(string: model.newsImageName)!)!)

        //利用SDWebImage异步加载图片
        cell?.headerImage.sd_setImageWithURL(NSURL(string: model.newsImageName))

        //图片圆角功能
//        cell?.headerImage.layer.cornerRadius = 60
//        cell?.headerImage.layer.masksToBounds = true

        cell?.headerLabel.text = model.newsTitle

        return cell!
    }

    /**
     Description点击cell之后进行的相关操作
     */
    func tableView(tableView: UITableView, didSelectRowAtIndexPath indexPath: NSIndexPath) {
        let newsController = NewsListViewController()
        newsController.id = self.items1[indexPath.row].id
        self.navigationController?.pushViewController(newsController, animated: true)
    }

    /**
     Description
     - returns: 每个cell的高度
     */
    func tableView(tableView: UITableView, heightForRowAtIndexPath indexPath: NSIndexPath) -> CGFloat {
        return 83
    }

    /**
     Description:呈现cell的方式,动画效果
     函数名:tableViewwillDisplayCellforRowAtIndexPath
     */
    func tableView(tableView: UITableView, willDisplayCell cell: UITableViewCell, forRowAtIndexPath indexPath: NSIndexPath) {
        cell.layer.transform = CATransform3DMakeScale(0.1, 0.1, 1)
        UIView.animateWithDuration(0.25, animations: {
            cell.layer.transform = CATransform3DMakeTranslation(1, 1, 1)
        })
    }
}
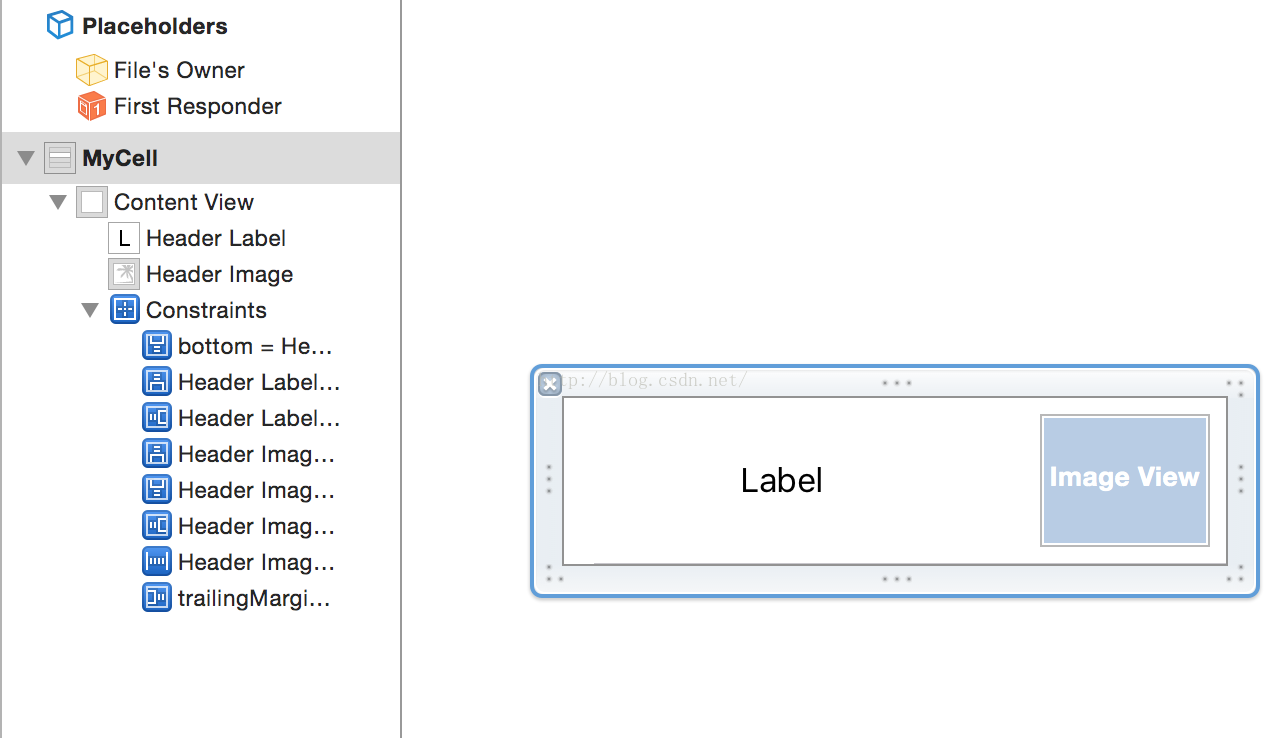
2.新建一个NewsTableViewCell以及xib文件来自定义新闻页的格式
import UIKit

class NewsTableViewCell: UITableViewCell {
    @IBOutlet weak var headerImage: UIImageView!
    @IBOutlet weak var headerLabel: UILabel!

    override func awakeFromNib() {
        super.awakeFromNib()
        // Initialization code
    }

    override func setSelected(selected: Bool, animated: Bool) {
        super.setSelected(selected, animated: animated)

        // Configure the view for the selected state
    }

}


 3435
3435


 被折叠的 条评论
为什么被折叠?
被折叠的 条评论
为什么被折叠?
 到【灌水乐园】发言


