


SpringMVC的工作流程

1、首先用户进行发出请求url:比如http://localhost:8080/user/getAllUser,前端控制器(DispatcherServlet)会捕获到这个请求。
2、通过这个DispatcherServlet前端控制器拿到这个请求地址,然后通过这个请求到的地址url,可以去找到handle(也就是controller),到达处理器映射器(handlemapping)
3、返回一个执行链,里面包含handler
4、请求适配器执行Handler,到达处理器适配器HandlerAdapter去执行Handler,
5、去执行controller方法(包括入参等,格式转换,自动配置)
6、返回ModelAndView的对象
7、处理器适配器把ModelAndView返回给前端控制器(DispatcherServlet)
可以把model理解为从mybatis里面找到的数据,然后View的话可以视为id
8、前端控制器(DispatcherServlet)把请求进行视图解析,放到视图解析器(View Resolver)里面
9、从视图解析器(View Resolver)里面返回View
10、前端控制器里面传递视图渲染给View视图,将模型数据Model填充到request域
11、然后返回reponse给用户
手绘一幅SpringMVC工作流程~~

常用的注解
1、@Controller / @RestController
@Controller就直接写在类上面就可以了
@RestController 包括:@Controller 和 @ResponseBody,最后是以JSON数据返回的
2、@RequestMapping
做一个映射的功能
3、@GetMapping / @PostMapping / @PutMapping / @DeleteMapping
对于上面的@RequestMapping其实是做一个简化的功能
4、@RequesBody/@ResponseBody/@ResponseStatus
@RequestBody:读取Request请求的Body部分数据,绑定在POJO上面,然后变成入参
@ResponseBody:返回的是一个JSON串
定义映射关系
1、@Controller 和 @RestController
2、@RequestMapping
path/method 制定映射路径和方法
Params /headers 参数和头
value默认是path;method可以加上3里面的4种不同类型的Mapping,例如method = RequestMethod.GET
下面这两种方式是一样的
@RequestMapping(value = "/getAllUser",method = RequestMethod.GET)
    @GetMapping("/getAllUser")
3、@GetMapping / @PostMapping /@PutMapping /@DeleteMapping
着重讲解这个四个Mapping
1、GetMapping
主要用来处理Get请求,传统的RequestMapping来编写的应该是
@RequestMapping(value = "/getAllUser",method = RequestMethod.GET)
用GetMapping写就可以写成
@GetMapping("/getAllUser")
2、PostMapping
处理Post请求,传统的RequestMapping来编写的应该是
@RequestMapping(value = "/getAllUser",method = RequestMethod.POST)
用GetMapping写就可以写成
@PostMapping("/getAllUser")
3、PutMapping
和PostMapping 作用差不多,都是用来向服务器提交信息,
如果是添加信息,倾向于用**@PostMapping**,
如果是更新信息,倾向于用**@PutMapping**
4、DeleteMapping
删除URL映射
归根到底还是两种请求:Post和Get
Post请求和Get请求区别和应用的场景
什么情况下是Get请求呢?
1、直接在浏览器地址栏中输入某个地址
2、表单默认提交方式
什么情况下是Post请求呢?
1、直接在浏览器地址栏中输入某个地址
2、表单默认提交方式
Get请求的特点?
1、请求参数会添加到请求资源路径的后面,只能添加少量参数(因为请求行只有一行,大约只能存放2K左右数据)
2、请求参数会显示在浏览器地址栏,路由器会记录请求地址(非常不安全)
3、如果传输中文,必定会乱码(原因:get请求默认的编码格式为:IIO-8859-1,后台的编码格式为:GBK或者UTF-8)
Post请求的特点?
1、请求参数添加到实体内容里面,可以添加大量参数(也解释了为什么浏览器地址栏不能发送Post请求,在地址栏里我们只能添加URL,并不能进入到Http包的实体中去)
2、相当安全,但是Post请求不会对请求参数进行加密处理(可以使用Https协议来保证数据安全)
映射方法入参
1、PathVariable(常见)
可以变成Restful风格的
@GetMapping("/getAllUser/{username}")
    public String getAllUser(@PathVariable String username, Model model){
        model.addAttribute("username",username);
        return "hello";
    }
<!DOCTYPE html>
<html lang="en" xmlns:th="http://www.thymeleaf.org">
<head>
    <meta charset="UTF-8">
    <title>Title</title>
</head>
<body>
    <h2>hello hws</h2>
    <p th:text="${username}"></p>
</body>
</html>
2、RequestParam(常见)
比如?username = XXX
3、POJO对象绑定请求参数(推荐,项目中大部分以这个来传递)
比如有多个例如 id name 。。。 把这些绑定成一个POJO的对象
在参数哪里写上例如 (User user) 就可以
处理模型数据
1、ModelAndView
Model:数据对象;View 视图信息
2、Map / Model
两个都可以作为入参 和 数据类型的返回
3、SessionAttributes
在Session里面进行处理
Thymeleaf
表达式语法
html5引入
<html lang="en" xmlns:th="http://www.thymeleaf.org">

第四种方式很常见,通常引入一些资源的话,用这个@{…}来引入
比如th:href="@{/css/home.css}" 相对路径的方式来引入,如果是绝对路径的话,就在{ }里面写上例如:www.XXXXX…
th属性汇总

th:text th:each 、 th:if 、 th:switch 都是一些比较常见的表达
像显示用户列表的话,通常是使用th:each来使用,并且结合x-admin 和lay-ui的
引入x-admin
x-admin最新版本下载是:v2.2(截止2020/1/27)后台模板
百度wp 链接:https://pan.baidu.com/s/12U5TQTda7z1FGi7qdT7Eww 提取码:dv45
1、引入所需资源文件
首先的话,在resource的static目录下面,新建一个xadmin的目录,然后把解压好后的5个文件(除去html)放入这个xadmin里面
2、使用所需的文件
选择了user_list.html引入
3、修改路径
(1)、加上thyemleaf的语句
xmlns:th="http://www.thymeleaf.org"
(2)、用th:href的方式去修改font、css等文件的路径,这里使用的是相对路径的形式
<link rel="stylesheet" th:href="@{/xadmin/css/font.css}">
        <link rel="stylesheet" th:href="@{/xadmin/css/xadmin.css}">
        <script th:src="@{/xadmin/lib/layui/layui.js}" charset="utf-8"></script>
        <script type="text/javascript" th:src="@{/xadmin/js/xadmin.js}"></script>
静态资源的问题
1、Springboot默认指定的静态资源在static目录下面
2、然后就直接在th:href里面写上
例如:th:href="@{/xadmin/css/font.css}"(不用加上static)
list返回
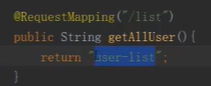
return "user-list"返回的是一个view视图的id,然后视图的ID根据视图的解析器,然后去找到对应的视图的文件 user-list.html
总结
SpringMVC的工作流程
1、进行请求映射(url和controller匹配)
2、入参
3、返回值
权限系统构建步骤
创建Spring Boot项目
配置logback日志
配置数据源&连接池
配置mybatis(以及mvc)
编写demo验证
Controller
Service
Dao
Model
项目编写
1、引入lombok,springweb,thymeleaf,mybatis,mysql,Spring Security,redis,Druid的对应的dependency
<?xml version="1.0" encoding="UTF-8"?>
<project xmlns="http://maven.apache.org/POM/4.0.0" xmlns:xsi="http://www.w3.org/2001/XMLSchema-instance"
         xsi:schemaLocation="http://maven.apache.org/POM/4.0.0 https://maven.apache.org/xsd/maven-4.0.0.xsd">
    <modelVersion>4.0.0</modelVersion>
    <parent>
        <groupId>org.springframework.boot</groupId>
        <artifactId>spring-boot-starter-parent</artifactId>
        <version>2.1.4.RELEASE</version>
        <relativePath/> <!-- lookup parent from repository -->
    </parent>
    <groupId>com.hws</groupId>
    <artifactId>authority</artifactId>
    <version>0.0.1-SNAPSHOT</version>
    <name>authority</name>
    <description>Demo project for Spring Boot</description>

    <properties>
        <java.version>1.8</java.version>
    </properties>

    <dependencies>
        <!--<dependency>
            <groupId>org.springframework.boot</groupId>
            <artifactId>spring-boot-starter-data-redis</artifactId>
        </dependency>
        <dependency>
            <groupId>org.springframework.boot</groupId>
            <artifactId>spring-boot-starter-security</artifactId>
        </dependency>-->
        <dependency>
            <groupId>org.springframework.boot</groupId>
            <artifactId>spring-boot-starter-thymeleaf</artifactId>
        </dependency>
        <dependency>
            <groupId>org.springframework.boot</groupId>
            <artifactId>spring-boot-starter-web</artifactId>
        </dependency>
        <dependency>
            <groupId>org.mybatis.spring.boot</groupId>
            <artifactId>mybatis-spring-boot-starter</artifactId>
            <version>2.1.1</version>
        </dependency>
        <dependency>
            <groupId>com.alibaba</groupId>
            <artifactId>druid-spring-boot-starter</artifactId>
            <version>1.1.9</version>
        </dependency>

        <dependency>
            <groupId>mysql</groupId>
            <artifactId>mysql-connector-java</artifactId>
            <scope>runtime</scope>
        </dependency>
        <dependency>
            <groupId>org.projectlombok</groupId>
            <artifactId>lombok</artifactId>
            <optional>true</optional>
        </dependency>
        <dependency>
            <groupId>org.springframework.boot</groupId>
            <artifactId>spring-boot-starter-test</artifactId>
            <scope>test</scope>
            <exclusions>
                <exclusion>
                    <groupId>org.junit.vintage</groupId>
                    <artifactId>junit-vintage-engine</artifactId>
                </exclusion>
            </exclusions>
        </dependency>
        <dependency>
            <groupId>org.springframework.security</groupId>
            <artifactId>spring-security-test</artifactId>
            <scope>test</scope>
        </dependency>
    </dependencies>

    <build>
        <plugins>
            <plugin>
                <groupId>org.springframework.boot</groupId>
                <artifactId>spring-boot-maven-plugin</artifactId>
            </plugin>
        </plugins>
    </build>

</project>
引入之后,先把redis和spring security 注释掉,不然项目会报错。
2、配置Logback.xml


 459
459


 被折叠的 条评论
为什么被折叠?
被折叠的 条评论
为什么被折叠?
 到【灌水乐园】发言


