


在属性动画出来之前,Android系统提供的动画只有帧动画和View动画。View动画大家可能知道,它提供了AlphaAnimation(透明度),RotateAnimation(负责旋转),TranslateAnimation(负责移动),ScaleAnimation(负责缩放)这4种动画方式。并且提供了AnimationSet动画集合来混合使用多种动画。
但是随着Android 3.0属性动画的推出,View风光不再,一个根本的原因在于View动画有个巨大的缺陷,不具备交互性。就是当某个View发生View动画之后,他的响应事件依然停留在动画运行前的地方。View动画是否就无用武之地了呢?当然不是,他执行效率高,使用方便,可以在一些不需要交互的地方使用。因此在3.0之后,谷歌推出了Animator。也就是属性动画。这个框架中,使用最多的就是AnimatorSet和ObjectAnimator配合。使用ObjectAnimator进行更细化的控制。控制一个对象和一个属性值;而使用多个ObjectAnimator组合到AnimatorSet行成一个动画组合。属性动画的本质是调用属性的get方法,set方法,来真实的控制一个View的属性值。因此,我们可以说属性动画非常强大,基本可以实现所有的动画效果。
1.ObjectAnimator
ObjectAnimator是属性动画最重要的一个类。创建一个ObjectAnimator只需要通过其静态工厂类直接返回一个ObjectAnimator对象。参数包括一个对象和对象的属性名称。注意,这个属性必须有get和set方法。其内部会通过java反射机制来调用set方法,修改对象的属性值。下面我们来看下平移动画是如何实现的。代码:
val ivMy = findViewById<ImageView>(R.id.iv_my)
        findViewById<Button>(R.id.btn_move).setOnClickListener {
            val objectAnimator = ObjectAnimator.ofFloat(ivMy,"translationX",200f)
            objectAnimator.duration = 300
            objectAnimator.start()
        }
没点击按钮移动之前:
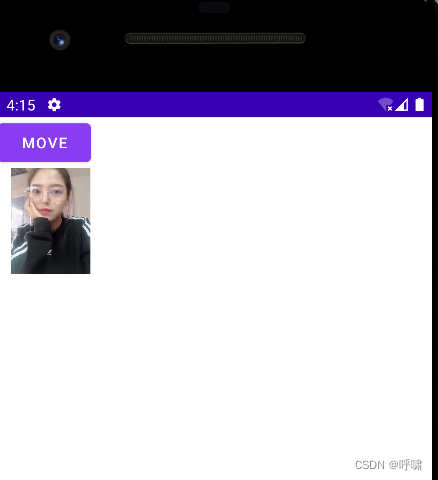
当我点击之后:

我们可以查看这个ofFloat方法的源码看下:
public static ObjectAnimator ofFloat(Object target, String propertyName, float... values) {
        ObjectAnimator anim = new ObjectAnimator(target, propertyName);
        anim.setFloatValues(values);
        return anim;
    }
大家从参数很容易看出,第一个参数是要操作的Object,第二个参数是要操作的属性,第三个参数是一个可变的float类型的数组,需要传进去该属性变化的取值过程。我们这里,只设置一个了200.
与View动画一样,也可以给属性动画设置显示时长,插值器等属性。常用的可以直接使用的属性动画的属性值:
1.translationX和translationY:用来沿着X轴或者Y轴进行平移。
2.rotation,rotationX,rotationY:用来围绕View的支点进行旋转。
3.PrivotX和PrivotY:View的支点位置,默认是View的中心点。
4.alpha:透明度,默认值是1(不透明),0代表完全透明
5.x和y:描述View对象在其容器中的最终位置。
前面说过,要操作的属性必须要有get和set方法,不然ObjectAnimator就无法生效。如果一个属性没有get和set方法,咱也可以通过自定义一个属性类或者包装类来间接的给这个属性增加get方法和set方法。来看下咋弄的:
新建一个类,把View传递进来,然后对这个View的属性进行更改,这种方式,在设计模式上叫做包装类:
package com.example.myapplication.views

import android.view.View

class MyView(view:View) {
    private val mTarget = view
    fun getWidth(){
        mTarget.layoutParams.width
    }
    fun setWidth(width:Int){
        mTarget.layoutParams.width = width
        mTarget.requestLayout()
    }

}
然后更改宽度:
findViewById<Button>(R.id.btn_move).setOnClickListener {
          val myView = MyView(ivMy)
            ObjectAnimator.ofInt(myView,"width",100).setDuration(300).start()
        }
当我点击之后,宽度变小了很多:

2.ValueAnimator
ValueAnimator本身不提供任何的动画效果。他更像是一个数值变化产生器,用来产生一定规律的数字,从而让调用者控制动画的实现过程。我们来看下:
findViewById<Button>(R.id.btn_move).setOnClickListener {
            val valueAnimator = ValueAnimator.ofFloat(0f,100f)

            valueAnimator.duration = 1000
            valueAnimator.start()
            valueAnimator.addUpdateListener {
                val floatValue = it.animatedValue as Float
                Log.d(TAG,"floatValue:$floatValue")
            }
        }
这里产生了一系列的数字变化过程,看下log:

但是这里也仅仅是产生了数字变化,还没有产生动画的变化。如果想要动画变化,可以在这里用这个数字进行设置属性:
valueAnimator.addUpdateListener {
                val floatValue = it.animatedValue as Float
                Log.d(TAG,"value:$floatValue")
                val layoutParams = ivMy.layoutParams
                layoutParams.width = floatValue.toInt()
                ivMy.layoutParams = layoutParams
            }
也就是说在addUpdateListener里监听数字的变化,然后应用到view身上。这里,view的宽度就会从小到大变化。
3.动画的监听
完成的动画过程,有start,repeat,end,cancel这4个过程,代码如下:
 val animator = ObjectAnimator.ofFloat(ivMy,"alpha",1.5f)
           animator.addListener(object :Animator.AnimatorListener{
               override fun onAnimationStart(animation: Animator?) {
               }

               override fun onAnimationEnd(animation: Animator?) {
               }

               override fun onAnimationCancel(animation: Animator?) {
               }

               override fun onAnimationRepeat(animation: Animator?) {
               }

           })
分别代表,开始,结束,取消,重复。
大部分时候我们只关心end,结束的时候。但是Lister必须得实现全部4个。所以呢,android也提供了AnimationListenerAdapter来让我们选择必要的事件进行监听:
 val animator = ObjectAnimator.ofFloat(ivMy,"alpha",1.5f)
            animator.addListener(object: AnimatorListenerAdapter() {
                override fun onAnimationEnd(animation: Animator?) {
                    super.onAnimationEnd(animation)
                }
            })
这里,我们就是只监听了end.
4.组合动画 AnimatrorSet
AnimatorSet提供了一个play方法,参数是一个Animator,返回一个AnimatorSet.Builder的实例,我们看下源码:
  public Builder play(Animator anim) {
        if (anim != null) {
            return new Builder(anim);
        }
        return null;
    }
接着我们看看他返回的这个内部类Builder:
public class Builder {

        /**
         * This tracks the current node being processed. It is supplied to the play() method
         * of AnimatorSet and passed into the constructor of Builder.
         */
        private Node mCurrentNode;

        /**
         * package-private constructor. Builders are only constructed by AnimatorSet, when the
         * play() method is called.
         *
         * @param anim The animation that is the dependency for the other animations passed into
         * the other methods of this Builder object.
         */
        Builder(Animator anim) {
            mDependencyDirty = true;
            mCurrentNode = getNodeForAnimation(anim);
        }

        /**
         * Sets up the given animation to play at the same time as the animation supplied in the
         * {@link AnimatorSet#play(Animator)} call that created this <code>Builder</code> object.
         *
         * @param anim The animation that will play when the animation supplied to the
         * {@link AnimatorSet#play(Animator)} method starts.
         */
        public Builder with(Animator anim) {
            Node node = getNodeForAnimation(anim);
            mCurrentNode.addSibling(node);
            return this;
        }

        /**
         * Sets up the given animation to play when the animation supplied in the
         * {@link AnimatorSet#play(Animator)} call that created this <code>Builder</code> object
         * ends.
         *
         * @param anim The animation that will play when the animation supplied to the
         * {@link AnimatorSet#play(Animator)} method ends.
         */
        public Builder before(Animator anim) {
            Node node = getNodeForAnimation(anim);
            mCurrentNode.addChild(node);
            return this;
        }

        /**
         * Sets up the given animation to play when the animation supplied in the
         * {@link AnimatorSet#play(Animator)} call that created this <code>Builder</code> object
         * to start when the animation supplied in this method call ends.
         *
         * @param anim The animation whose end will cause the animation supplied to the
         * {@link AnimatorSet#play(Animator)} method to play.
         */
        public Builder after(Animator anim) {
            Node node = getNodeForAnimation(anim);
            mCurrentNode.addParent(node);
            return this;
        }

        /**
         * Sets up the animation supplied in the
         * {@link AnimatorSet#play(Animator)} call that created this <code>Builder</code> object
         * to play when the given amount of time elapses.
         *
         * @param delay The number of milliseconds that should elapse before the
         * animation starts.
         */
        public Builder after(long delay) {
            // setup a ValueAnimator just to run the clock
            ValueAnimator anim = ValueAnimator.ofFloat(0f, 1f);
            anim.setDuration(delay);
            after(anim);
            return this;
        }

    }
可以看出,Builder类采用了建造者模式,每次调用方法时都返回Builder自身用于继续构建。AnimatorSet.Builder中包括以下4个方法:
after(Animator anim) :将现有的动画插入到传入的动画之后执行。
after(long delay):将现有的动画延迟指定的毫秒之后执行。
before(Animator anim):将现有的动画插入到传入的动画之前执行。
with(Animator anim):将现有的动画和传入的动画同时执行。
接下来,我们使用代码来说明:
val animator1 = ObjectAnimator.ofFloat(ivMy,"translationX",0.0f,200.0f,0.0f)
            val animator2 = ObjectAnimator.ofFloat(ivMy,"scaleX",1.0f,2.0f)
            val animator3 = ObjectAnimator.ofFloat(ivMy,"rotationX",0.0f,90.0f,0.0f)
            val set = AnimatorSet()
            set.duration = 1000
            set.play(animator1).with(animator2).after(animator3)
            set.start()
这里,会先执行3,然后同时执行1和2.
看看效果:

可以看到,先执行的翻转。
5.组合动画 PropertyValuesHolder
除了AnimatorSet类,还可以使用PropertyValuesHolder类来实现组合动画,不过这个组合动画没有AnimaotorSet类所实现的组合动画复杂。使用PropertyValuesHolder类只能做到多个动画一起执行。主要是使用ObjectAnimator.ofPropertyValuesHolder()方法,我们来看下代码:
 val valuesHolder1 = PropertyValuesHolder.ofFloat("scaleX",1.0f,1.5f)
            val valuesHolder2 = PropertyValuesHolder.ofFloat("rotationX",0.0f,90.0f,0.0f)
            val valuesHolder3 = PropertyValuesHolder.ofFloat("alpha",1.0f,0.3f,1.0f)
            val objectAnimator = ObjectAnimator.ofPropertyValuesHolder(ivMy,valuesHolder1,valuesHolder2,valuesHolder3)
            objectAnimator.setDuration(2000).start()
6.在XML中使用属性动画
和View动画一样,属性动画也可以直接写在XML里。在res文件中新建animator文件夹,在里面新建一个scale.xml。内容如下:
<?xml version="1.0" encoding="utf-8"?>
<objectAnimator xmlns:android="http://schemas.android.com/apk/res/android"
    android:duration="3000"
    android:propertyName="scaleX"
    android:valueFrom="1.0"
    android:valueTo="2.0"
    android:valueType="floatType"
    >

</objectAnimator>
在程序中使用:
val animator = AnimatorInflater.loadAnimator(this,R.animator.scale)
            animator.setTarget(ivMy)
            animator.start()


 447
447


 被折叠的 条评论
为什么被折叠?
被折叠的 条评论
为什么被折叠?
 到【灌水乐园】发言


