


Ray
一、ray core概念
Ray是一个用于构建分布式应用程序的开源框架。它提供了一系列的工具和库,用于管理分布式计算任务、并发处理、任务调度和数据共享等。Ray的设计目标是使分布式编程变得简单、高效且可扩展。
1.Actor模型:
- Actor是Ray框架的核心概念,它是一个并发执行的对象。每个Actor都是独立的执行单元,具有自己的状态和方法。Actors之间可以异步地进行通信和执行任务。
- 创建Actor的步骤:
import ray @ray.remote class MyActor: def __init__(self): # Actor初始化逻辑 def some_method1(self, arg1): # Actor方法逻辑 def some_method2(self, arg1): actor = MyActor.remote() # 创建Actor实例 result = [actor.some_method.remote(arg1), actor.some_method.remote(arg2) ]# 异步调用Actor方法 @ray.remote装饰器用于将类声明为Actor,使用.remote()标记方法的调用为远程调用。- 注意对于在同一个actor里面的函数,是只能串行之行。对于不同的actor,可以并行
- 官方详情:https://docs.ray.io/en/releases-2.2.0/ray-core/actors.html
2.Task(任务):
- Task是Ray框架中的基本执行单元,可以是函数或方法。一个Ta
- 运行一个任务的步骤:
import ray @ray.remote def my_function(arg1, arg2): # 任务逻辑 result = my_function.remote(arg1, arg2) # 异步执行任务 - 使用
@ray.remote装饰器将函数声明为远程任务,使用.remote()标记任务的调用为远程调用。 - 官方详情请看:https://docs.ray.io/en/releases-2.2.0/ray-core/tasks.html
3.Task并行执行:
- Ray框架支持任务的并行执行。可以使用
ray.get()来获取任务的结果。 - 并行执行任务的示例:
import ray @ray.remote def my_function(arg): # 任务逻辑 results = ray.get([my_function.remote(arg1), my_function.remote(arg2)]) # 并行执行多个任务 ray.get()返回一个包含所有任务结果的列表,结果的顺序与任务提交的顺序相同。
4.ray框架与正常算法对比
- 正常算法:
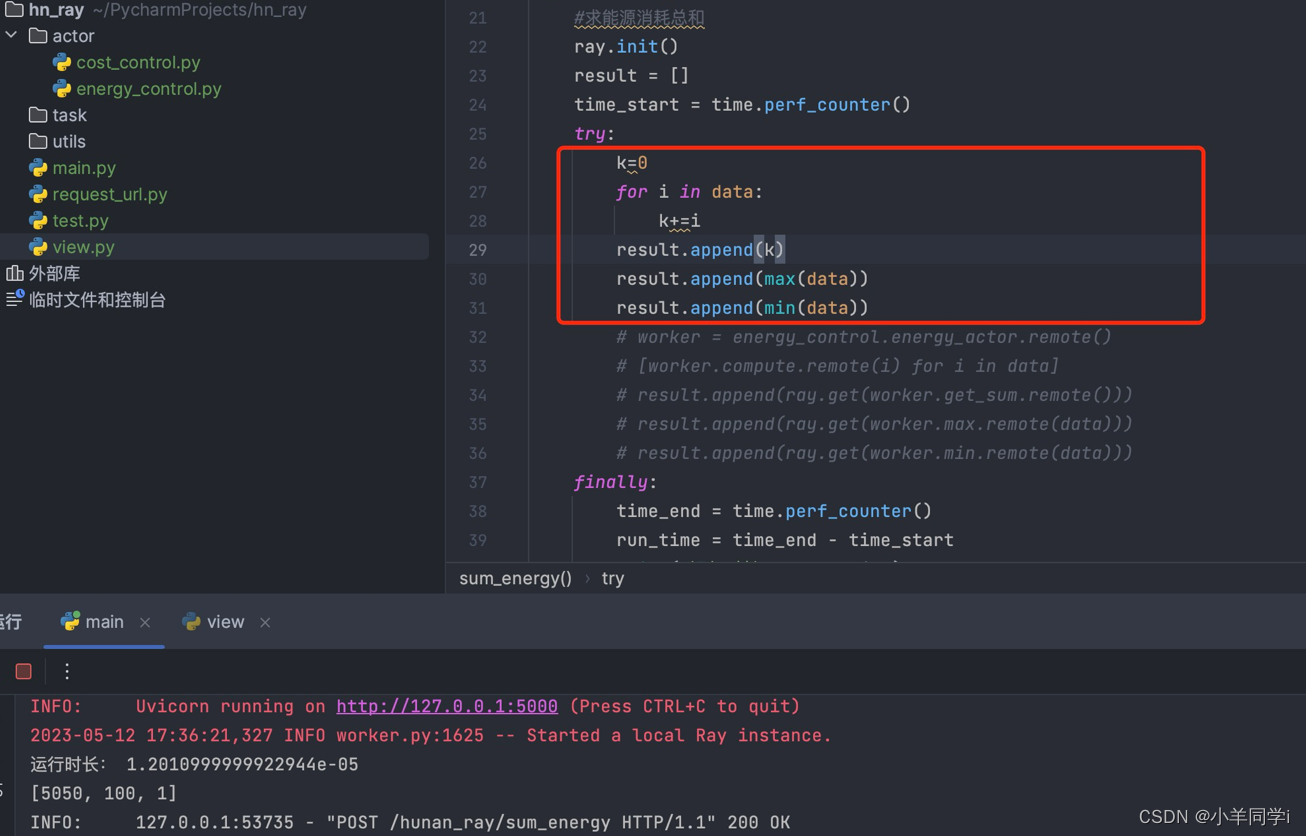
结果:执行时间1.2010…秒
- ray框架执行

结果:执行时间0.69464…秒
总结:
- 对比普通方法执行,ray框架速度更快。
- ray框架下,ray.get分散执行和集中执行,时间一致,都是属于并发执行
二、Ray core操作
1. ray.init()
- 连接到现有 Ray 集群或启动一个集群并连接到它。
在PythonShell中,使用ray.init()可以在本地启动ray,相当于一个单节点的ray集群
import ray
ray.init()
- 如若要显式连接到现有本地群集,
ray.init(address="auto")
- 连接到现有远程群集,请按如下方式使用此方法(替换相应的地址)。请注意,地址开头添加了“ray://”。
ray.init(address="ray://123.45.67.89:10001")
- 有关启动和连接到远程集群的更多详细信息,请参阅此处:
https://docs.ray.io/en/master/cluster/running-applications/job-submission/ray-client.html
- 其他参数
address#要连接到的 Ray 集群的地址

num_cpus#num_cpus – 用户希望分配给每个ray的 CPU 数量

num_gpu#num_gpus – 用户希望分配给每个ray绑定到的主机
的 GPU 数量

local_mode#如果为 true,则代码将串行执行

dashboard_host#绑定主机

dashboard_port#服务器绑定到的端口,默认为 8265

configure_logging#允许配置日志记录,则为 True
2. ray.put()
使用ray.put()可以将Python对象存入本地ObjectStore,并且异步返回一个唯一的ObjectID。通过该ID,Ray可以访问集群中任一个节点上的对象(远程对象通过查阅Master的对象表获得)。
对象一旦存入ObjectStore便不可更改,Ray的remote函数可以将直接将该对象的ID作为参数传入。使用ObjectID作为remote函数参数,可以有效地减少函数参数的写ObjectStore的次数。
@ray.remote

def f(x):
    pass
x = "hello"

# 对象x往ObjectStore拷贝里10次
[f.remote(x) for _ in range(10)]

# 对象x仅往ObjectStore拷贝1次
x_id = ray.put(x)
[f.remote(x_id) for _ in range(10)]
3. ray.get()
使用ray.get()可以通过ObjectID获取ObjectStore内的对象并将之转换为Python对象。对于数组类型的对象,Ray使用共享内存机制减少数据的拷贝成本。而对于其它对象则需要将数据从ObjectStore拷贝到进程的堆内存中。
如果调用ray.get()操作时,对象尚未创建好,则get操作会阻塞,直到对象创建完成后返回。
另外,ray.get()可以一次性读取多个对象的数据:
result_ids = [ray.put(i) for i in range(10)]

ray.get(result_ids)  # [0, 1, 2, 3, 4, 5, 6, 7, 8, 9]
4. @ray.remote
Ray中使用注解@ray.remote可以声明一个remote function。remote函数时Ray的基本任务调度单元,remote函数定义后会立即被序列化存储到RedisServer中,并且分配了一个唯一的ID。
重要‼️:由@ray.remote装饰的函数,将被定义为远程函数,意味为是会在ray集群中执行的操作。当集群中有多个节点时,ray框架会自动将函数放进不同的节点执行。
- 此函数可用作装饰器,无需参数即可定义一个remote函数或actor类
import ray

@ray.remote
def f(a, b, c):
    return a + b + c

object_ref = f.remote(1, 2, 3)
result = ray.get(object_ref)
assert result == (1 + 2 + 3)
@ray.remote
class Foo:
    def __init__(self, arg):
        self.x = arg

    def method(self, a):
        return self.x + a

actor_handle = Foo.remote(123)
object_ref = actor_handle.method.remote(321)
result = ray.get(object_ref)
assert result == (123 + 321)
- 可以设定,在集群中,执行的参数,比如请求的gpu数量分配几个
@ray.remote(num_gpus=1, max_calls=1, num_returns=2)
def f():
    return 1, 2

@ray.remote(num_cpus=2, resources={"CustomResource": 1})
class Foo:
    def method(self):
        return 1
其他参数
num_cpus#num_cpus – 分配给每个任务或者actor的 CPU 数量
num_gpu#num_gpus – 分配给每个任务或者actor的GPU 数量
resources#为任务或actor生存期保留的各种自定义资源的数量
memory#为任务或者actor分配内存
max_calls#仅适用于远程功能。这指定了给定工作线程在必须退出之前可以执行给定远程函数的最大次数
max_retries#这指定当执行远程函数的工作进程意外崩溃时,应重新运行远程函数的最大次数
lifetime#生命周期
如果想在函数里面修改这些参数,使用opiton
@ray.remote(num_gpus=1, max_calls=1, num_returns=2)
def f():
   return 1, 2

# Task g will require 2 gpus instead of 1.
g = f.options(num_gpus=2)
5. ray.wait()
ray.wait()操作支持批量的任务等待,基于此可以实现一次性获取多个ObjectID对应的数据。
# 启动5个remote函数调用任务
results = [f.remote(i) for i in range(5)]
# 阻塞等待4个任务完成,超时时间为2.5s
ready_ids, remaining_ids = ray.wait(results, num_returns=4, timeout=2500)
上述例子中,results包含了5个ObjectID,使用ray.wait操作可以一直等待有4个任务完成后返回,并将完成的数据对象放在第一个list类型返回值内,未完成的ObjectID放在第二个list返回值内。
如果设置了超时时间,那么在超时时间结束后仍未等到预期的返回值个数,则已超时完成时的返回值为准。
6. ray.error_info()
使用ray.error_info()可以获取任务执行时产生的错误信息。
>>> import time
>>> @ray.remote
>>> def f():
>>>     time.sleep(5)
>>>     raise Exception("This task failed!!")
>>> f.remote()
Remote function __main__.f failed with:
Traceback (most recent call last):
  File "<stdin>", line 4, in f
Exception: This task failed!!
  You can inspect errors by running
      ray.error_info()
  If this driver is hanging, start a new one with
      ray.init(redis_address="127.0.0.1:65452")
>>> ray.error_info()
[{'type': 'task', 'message': 'Remote function \x1b[31m__main__.f\x1b[39m failed with:\n\nTraceback (most recent call last):\n  File "<stdin>", line 4, in f\nException: This task failed!!\n', 'data': '{\'function_id\': "Hm\\xde\\x93\'\\x91\\xce\\x13ld\\xf4O\\xd7\\xce\\xc2\\xe1\\x151\\x1e3", \'function_name\': u\'__main__.f\'}'}]
三、ray操作流程
1.项目结构
在使用Ray进行项目开发时,可以按照以下方式组织工程文件夹结构:
project/
├── main.py
├── actors/
│   ├── actor1.py
│   ├── actor2.py
│   └── ...
├── tasks/
│   ├── task1.py
│   ├── task2.py
│   └── ...
└── utils/
    ├── utils1.py
    ├── utils2.py
    └── ...
在这个示例中,主要的文件夹是actors/、tasks/和utils/,分别用于存放Actors(参与Ray任务执行的类)、Tasks(Ray任务函数)和工具函数文件。此外,main.py是入口文件,用于启动和管理Ray集群以及执行任务。
以下是对每个文件夹的作用的简要说明:
actors/:存放Ray的Actor类文件。每个Actor类通常定义一个或多个方法,用于执行特定的任务。在这个文件夹中,你可以根据项目需要创建多个Actor类文件,以便更好地组织和管理代码。tasks/:存放Ray的任务函数文件。任务函数是可以并行执行的函数,可以使用@ray.remote装饰器进行远程调用。你可以在这个文件夹中创建多个任务函数文件,根据项目需求进行组织和管理。utils/:存放通用的工具函数文件。这些函数可以在项目中的不同部分被共享和重复使用。根据功能的不同,你可以将相关的工具函数放在单独的文件中,以便于维护和扩展。main.py:作为项目的入口文件,用于启动和管理Ray集群以及执行任务。你可以在这个文件中初始化Ray、创建Actor实例、调用任务函数等。
当然,这只是一种常见的文件夹结构示例,你可以根据项目的规模和需求进行调整和扩展。根据项目的复杂性,你可能需要进一步划分文件夹或引入其他模块来组织代码。
2.创建多个actor对象
Ray的remote函数只能处理无状态的计算需求,有状态的计算需求需要使用Ray的Actor实现。在Python的class定义前使用@ray.remote可以声明Actor。
@ray.remote
class Counter(object):
    def __init__(self):
        self.value = 0

    def increment(self):
        self.value += 1
        return self.value
创建Actor对象:
a1 = Counter.remote()
a2 = Counter.remote()
#或者使用循环创建
actor=[counter.remote() for i in range(2)]
Ray创建Actor的流程为:
- Master选取一个Slave,并将Actor创建任务分发给它的本地调度器。
- 创建Actor对象,并执行它的构造函数。
从流程可以看出,Actor对象的创建时并行的。
调用Actor对象的方法:
a1.increment.remote()
a2.increment.remote()
#循环调用
result=[a.increment.remote() for a in actor]
为了保证Actor状态的一致性,对同一个Actor的方法调用是串行执行的。
获取结果数据
ray.get(result)#输出结果为[1,1]
四、集群
Ray Cluster是指由多个Ray节点组成的分布式计算集群。Ray允许您将多台计算机组成一个集群,并在集群中执行分布式任务。
1.创建集群:
-
安装Ray:在每台计算机上安装Ray库。您可以使用pip命令进行安装:
pip3 install "ray[default]" -
启动Ray Head节点:选择一台计算机作为Head节点,使用以下命令启动Ray Head节点:
ray start --head --node-ip-address="主机地址" --port="6666" -
连接Worker节点:在其他计算机上,使用以下命令连接到Head节点,将它们作为Worker节点加入集群:
ray start --address="主机地址:端口号"其中,
<head-node-ip>是Head节点的IP地址。ray status 查看节点是否启动成功,目前存在两个节点,一个是主节点启动的节点,另外一个为父节点加入集群的节点
-
编写任务代码:编写您要在Ray集群中执行的任务代码。您可以使用
@ray.remote装饰器标记函数,以使其成为可以在集群中远程执行的任务。 -
运行任务:在任何一个连接到集群的计算机上,使用
ray.init(address='<head-node-ip>:6379')初始化Ray集群。然后,您可以使用function.remote()调用远程任务,并在集群中执行并行计算。 -
获取任务结果:使用
ray.get(result_ref)获取远程任务的结果。
2.address地址格式
- ray地址
ray://123.456.7.89:10001 是一个Ray集群的地址格式。其中,123.456.7.89 是Ray Head节点的IP地址,10001 是Ray Head节点的端口号。 使用这个地址,可以通过以下方式连接到指定的Ray集群:
import ray

ray.init(address="ray://123.456.7.89:10001")

# 在这里编写您的Ray代码
# ...
在上述代码中,ray.init(address="ray://123.456.7.89:10001") 将初始化Ray并连接到指定的Ray集群。Ray将尝试连接到指定地址上运行的Ray Head节点。
请确保将 123.456.7.89 替换为实际的Ray Head节点的IP地址,并将 10001 替换为正确的端口号。
- auto地址
ray.init(address="auto")是Ray框架中的一种初始化方式,它用于自动检测和连接到已经存在的Ray集群。
具体来说,address="auto"参数告诉Ray在初始化时自动检测可用的Ray集群地址,并尝试连接到已经运行的集群。如果有一个运行中的集群可用,Ray将连接 到该集群。如果没有可用的运行中集群,Ray将启动一个新的集群。
使用address="auto"的示例代码如下:
import ray

ray.init(address="auto")

# 在这里编写您的Ray代码
# ...
3.指定节点名称
在Ray中,可以通过在启动工作节点时使用 --node-id 或 --ray-node-name 参数来设置节点名称。以下是两种设置节点名称的方法:
使用 --ray-node-name 参数:
ray start --ray-node-name=worker1
在启动工作节点时,通过 --ray-node-name 参数设置节点名称为 "worker1"。
需要注意的是,节点名称只在启动工作节点时使用,并且仅在该节点上有效。如果您在启动节点时没有指定节点名称,Ray将使用默认的节点名称,如 "node-<ID>"。如果要更改节点名称,需要重新启动工作节点并设置新的节点名称参数。
4.指定节点运行
在Ray中,您可以使用任务调度策略来指定任务在集群中的运行位置。
使用节点名称(Node Placement):您可以为每个工作节点指定名称,然后在提交任务时指定任务应该在哪个工作节点上运行。示例如下:
import ray

# 在启动工作节点时为其指定名称
ray.init(address="auto", node="worker1")

@ray.remote
def my_task():
    # 任务逻辑
    pass

# 提交任务时指定节点名称
task = my_task.options(node="worker1").remote()
在上述示例中,通过在ray.init()中为工作节点指定名称,例如node="worker1",然后在提交任务时使用options(node="worker1")方法指定任务应该在"worker1"节点上运行。Ray将任务调度到指定的工作节点上执行。
使用资源标记或节点名称的方式,您可以更精确地控制任务在Ray集群中的运行位置。这对于优化资源利用、实现任务分片和控制任务间的调度关系等方面非常有用。
5.容器化集群
首先保证服务器网络是可以互相访问的
yum install telnet -y
telnet ip port
容器以host模式启动容器,所有的端口都会与宿主机共享;或者一些主服务节点,在容器中暴漏出来
docker run --net=host -itd docker_image # 推荐这种,ray服务端口会比较多,逐一映射定义会有些麻烦

docker run -p port:port -itd docker_image
Dashboard 服务无法运行: https://www.jianshu.com/p/40ff76cbf8ca
集群模式容器内启动:
# 主节点启动
ray start --head --node-ip-address="10.10.10.123" --port="9937" --num-cpus="20" --resources='{"bob": 20}' --include-dashboard=False --disable-usage-stats
# 子节点1
ray start --address="10.10.10.123:9937" --num-cpus="20" --resources='{"alice": 20}' --disable-usage-stats

# 子节点2
ray start --address="10.10.10.123:9937" --num-cpus="20" --resources='{"alice2": 20}' --disable-usage-stats
4.ray dashborad 运行监控台
ray提供了一个,用于监控集群的控制台
- 安装:
安装命令pip3 install ray是不包括dashboard服务模块的。
正确的命令是:pip3 install "ray[default]",这个命令会安装所有ray的模块
- 启动:
ray start --head --port=6666 --node-ip-address="主机地址" --dashboard-host='127.0.0.1' --dashboard-port=8265
五、ray serve
1.ray serve的作用
Ray Serve 则在实时管道开发和部署之间提供抽象。这使团队能够在不牺牲扩展性的情况下简化其技术堆栈,更好地协调,并最大程度地减少整体摩擦。
Ray Serve专注于实时预测和模型部署,提供了更高级的功能和扩展性,例如自动扩展、负载均衡和版本控制。
[外链图片转存失败,源站可能有防盗链机制,建议将图片保存下来直接上传(img-xdF3833w-1684913079236)(/Users/peng/Library/Application Support/typora-user-images/image-20230516154451269.png)]
2.ray serve部署
(1)@serve.deployment
部署是Ray Serve的核心概念。部署包含用于处理传入请求的业务逻辑或 ML 模型,并且可以纵向扩展以跨 Ray 集群运行。在运行时,部署由许多副本组成,这些副本是在单独的 Ray Actor(进程)中启动的类或函数的单个副本
下面是一个更完整的示例代码:
@serve.deployment
class MyFirstDeployment:
  # Take the message to return as an argument to the constructor.
  def __init__(self, msg):
      self.msg = msg

  def __call__(self):
      return self.msg

my_first_deployment = MyFirstDeployment.bind("Hello world!")
handle = serve.run(my_first_deployment)
print(ray.get(handle.remote())) # "Hello world!"
1.若要定义部署,请在 Python 类(或简单用例的函数)上使用 @serve.deployment 装饰器。
2.`bind` 使用构造函数的可选参数进行部。
3.使用 serve.run 部署生成的“绑定部署”。
4.用.remote进行运行
5.用ray.get()去得到数据
# Create with a single replica.
@serve.deployment(num_replicas=1)
def func(*args):
    pass

serve.run(func.bind())

# Scale up to 3 replicas.
serve.run(func.options(num_replicas=3).bind())

# Scale back down to 1 replica.
serve.run(func.options(num_replicas=1).bind())
Ray Serve自动缩放器autoscaling_config是一个应用程序级自动缩放器,位于Ray自动缩放器之上。具体来说,这意味着 Ray Serve 自动缩放器要求 Ray 根据请求需求启动多个副本 actor。对serve进行一些自定义。
@serve.deployment(
    autoscaling_config={
        "min_replicas": 1,
        "initial_replicas": 2,
        "max_replicas": 5,
        "target_num_ongoing_requests_per_replica": 10,
    }
)
def func(_):
    time.sleep(1)
    return ""


serve.run(
    func.bind()
)  # The func deployment will now autoscale based on requests demand.
(2).bind()绑定
Ray Serve中,bind()方法用于将函数或方法绑定到具体的对象实例上。它主要用于在服务实例化之前绑定类方法,以确保绑定后的方法在服务调用时保持正确的上下文和状态。
# File name: hello.py
import ray
from ray import serve


@serve.deployment
class LanguageClassifer:
    def __init__(self, spanish_responder, french_responder):
         self.spanish_responder = spanish_responder
        self.french_responder = french_responder

    async def __call__(self, http_request):
        request = await http_request.json()
        language, name = request["language"], request["name"]
        if language == "spanish":
            ref = await self.spanish_responder.say_hello.remote(name)
        elif language == "french":
            ref = await self.french_responder.say_hello.remote(name)
        else:
            return "Please try again."

        return await ref


@serve.deployment
class SpanishResponder:
    def say_hello(self, name: str):
        return f"Hola {name}"


@serve.deployment
class FrenchResponder:
    def say_hello(self, name: str):
        return f"Bonjour {name}"

#将多个ray类组合
spanish_responder = SpanishResponder.bind()
french_responder = FrenchResponder.bind()
language_classifier = LanguageClassifer.bind(spanish_responder, french_responder)
3.ray serve和fastapi结合
如果要定义更复杂的HTTP处理逻辑,使用Serve与FastAPI集成。
这允许你使用 @serve.ingress 修饰器定义服务部署,该修饰器包装 FastAPI 应用及其全部功能。下面显示了最基本的示例,但是有关FastAPI必须提供的所有内容的更多详细信息,例如变量路由,自动类型验证,依赖项注入(例如,用于数据库连接)等
import ray
import requests
from fastapi import FastAPI
from ray import serve

app = FastAPI()


@serve.deployment(num_replicas=1,route_prefix="/hello")
@serve.ingress(app)
class MyFastAPIDeployment:
    @app.get("/")
    def root(self):
        return "Hello, world!"

    @app.post("/{subpath}")
    def root(self, subpath: str):
        return f"Hello from {subpath}!"


serve.run(MyFastAPIDeployment.bind())
resp = requests.post("http://localhost:8000/hello/Serve")
assert resp.json() == "Hello from Serve!"
4.ray serve与集群集合
六.实例
实例一
import ray
import random

@ray.remote
def monte_carlo_simulation(num_samples):
    inside_circle = 0
    for _ in range(num_samples):
        x = random.random()
        y = random.random()
        if x**2 + y**2 <= 1:
            inside_circle += 1
    return inside_circle

def estimate_pi(num_samples, num_workers):
    ray.init()
    # 分发任务给多个工作节点并行执行
    results = [monte_carlo_simulation.remote(num_samples,// num_workers) for _ in range(num_workers)]
    # 汇总结果
    total_inside_circle = sum(ray.get(results))
    estimated_pi = 4 * total_inside_circle / num_samples
    ray.shutdown()
    return estimated_pi

num_samples = 1000000
num_workers = 4

estimated_pi = estimate_pi(num_samples, num_workers)
print("Estimated pi:", estimated_pi)
在上述代码中,我们使用ray.remote装饰器将monte_carlo_simulation函数声明为远程任务。该函数执行蒙特卡洛模拟,通过生成随机点并计算落入单位圆内的点的比例来估计圆周率。
estimate_pi函数初始化Ray框架,并将蒙特卡洛模拟任务分发给num_workers个工作节点并行执行。每个工作节点执行num_samples // num_workers次模拟。
通过使用ray.get()获取每个工作节点的模拟结果,并将结果汇总得到总共落入圆内的点的数量total_inside_circle。最后,我们使用蒙特卡洛估计公式计算圆周率的近似值,并返回结果。
在这个例子中,Ray框架帮助我们管理任务的并行执行和结果的收集,充分利用分布式环境中的计算资源。通过将任务分发给多个工作节点,并行进行模拟计算,我们可以加速圆周率的估计过程。
实例二:分布式计算
import ray
ray.init()

@ray.remote
class SumActor:
    def __init__(self):
        self.square_sum = 0
        self.cube_sum = 0

    def add_square(self, num):
        self.square_sum += num ** 3

    def get_square_sum(self):
        return self.square_sum

#创建10个角色
actor1 = [SumActor.remote() for i in range(10)]

#将工作分别分发给10个角色,让他们计算
for i in range(10):
    [a.add_square.remote(i) for a in actor1]

#从10个角色那里取得结果
result=[a.get_square_sum.remote() for a in actor1]

#进行求和
square_sum = ray.get(result)

#打印和
print("Square sum:", square_sum)
ray.shutdown()
实例三
import ray

@ray.remote
class SumActor:
    def __init__(self):
        self.square_sum = 0
        self.cube_sum = 0

    def add_square(self, num):
        self.square_sum += num**2

    def add_cube(self, num):
        self.cube_sum += num**3

    def get_square_sum(self):
        return self.square_sum

    def get_cube_sum(self):
        return self.cube_sum

ray.init()

# 创建两个Actor实例
actor1 = SumActor.remote()
actor2 = SumActor.remote()

# 并行执行任务,将数字的平方添加给actor1,将数字的立方添加给actor2
for i in range(1, 11):
    actor1.add_square.remote(i)
    actor2.add_cube.remote(i)

# 获取结果
square_sum = ray.get(actor1.get_square_sum.remote())
cube_sum = ray.get(actor2.get_cube_sum.remote())

print("Square sum:", square_sum)
print("Cube sum:", cube_sum)

ray.shutdown()
7.结尾
如果觉得不错,可以点个👍


 被折叠的 条评论
为什么被折叠?
被折叠的 条评论
为什么被折叠?
 到【灌水乐园】发言


