


Application和Activity,Service一样是android框架的一个系统组件,当android程序启动时系统会创建一个 application对象,用来存储系统的一些信息。通常我们是不需要指定一个Application的,这时系统会自动帮我们创建,如果需要创建自己 的Application,也很简单创建一个类继承 Application并在manifest的application标签中进行注册(只需要给Application标签增加个name属性把自己的 Application的名字定入即可)。
    <application
        android:name="com.xxx.cn.myapplication.MyApplication"
        android:allowBackup="true"
        android:icon="@drawable/ic_launcher"
        android:label="@string/app_name"
        android:theme="@style/AppTheme" >
android系统会为每个程序运行时创建一个Application类的对象且仅创建一个,所以Application可以说是单例 (singleton)模式的一个类.且application对象的生命周期是整个程序中最长的,它的生命周期就等于这个程序的生命周期。因为它是全局 的单例的,所以在不同的Activity,Service中获得的对象都是同一个对象。所以通过Application来进行一些,数据传递,数据共享 等,数据缓存等操作。
进入Application源码,在oncreate的注释可以清楚的看到:
1、它是最早被实例化的一个类,应用程序启动最早执行的就是这个onCreate。activity, service, receiver都在它的后面
2、在它里面不要执行耗时的操作,不然会影响Activity的启动
  /**
     * Called when the application is starting, before any activity, service,
     * or receiver objects (excluding content providers) have been created.
     * Implementations should be as quick as possible (for example using
     * lazy initialization of state) since the time spent in this function
     * directly impacts the performance of starting the first activity,
     * service, or receiver in a process.
     * If you override this method, be sure to call super.onCreate().
     */
    public void onCreate() {
    }
Android中全局Application的onCreate多次调用问题:
一般来说Application的onCreate方法只会执行一次,但是如果应用中采用多进程方式,oncreate方法会执行多次,每启动一个进程就会执行一遍onCreate函数,这样我们就可以根据不同的进程名字进行不同的初始化,具体的做法就是在onCreate方法中对进程进行判断,针对不同进程进行不同操作。
下面我们写个小demo来进行验证一下:启动三个服务,每个服务运行在一个单独的进程之中,然后我们在MyApplication的onCreate方法中对进程进行判断,因为每启动一个进程,都会执行一遍MyApplication中的onCreate方法。观察打印的Log.
自定义一个MyApplication类继承自Application:
//MyApplication.java
package com.xxx.cn.myapplication;

import android.app.ActivityManager;
import android.app.Application;
import android.content.Context;
import android.util.Log;

import java.util.List;

public class MyApplication extends Application {
    private static final String TAG = "MyApplication";
    @Override
    public void onCreate() {
        super.onCreate();
        //对不同的进程进行判断
        ActivityManager am = (ActivityManager) this.getSystemService(Context.ACTIVITY_SERVICE);
        List<ActivityManager.RunningAppProcessInfo> runProcessList = am.getRunningAppProcesses();
        if (runProcessList != null) {
            for (int i = 0; i < runProcessList.size(); i++) {
                if (runProcessList.get(i).pid == android.os.Process.myPid()) {
                    String processName = runProcessList.get(i).processName;
                    if (processName.endsWith(":remote1")) {
                        Log.i(TAG, "start remote1");
                    } else if (processName.endsWith(":remote2")) {
                        Log.i(TAG, "start remote2");
                    } else if (processName.endsWith(":remote3")) {
                        Log.i(TAG, "start remote3");
                    } else if (processName.equals("com.xxx.cn.myapplication")) {
                        Log.i(TAG, "start UI");
                    }

                }
            }
        }

    }

}
MainActivity.java文件
package com.xxx.cn.myapplication;

import android.app.Activity;
import android.content.Intent;
import android.os.Bundle;
import android.view.View;


public class MainActivity extends Activity {

    @Override
    protected void onCreate(Bundle savedInstanceState) {
        super.onCreate(savedInstanceState);
        setContentView(R.layout.activity_main);
    }

    public void startService1(View view) {
        startService(new Intent(this, MyService1.class));
    }

    public void startService2(View view) {
        startService(new Intent(this, MyService2.class));
    }

    public void startService3(View view) {
        startService(new Intent(this, MyService3.class));
    }

}
MainActivity的布局文件:
<LinearLayout xmlns:android="http://schemas.android.com/apk/res/android"
    xmlns:tools="http://schemas.android.com/tools"
    android:layout_width="match_parent"
    android:layout_height="match_parent"
    android:paddingLeft="@dimen/activity_horizontal_margin"
    android:paddingRight="@dimen/activity_horizontal_margin"
    android:paddingTop="@dimen/activity_vertical_margin"
    android:paddingBottom="@dimen/activity_vertical_margin"
    tools:context=".MainActivity">

    <Button
        android:layout_width="wrap_content"
        android:layout_height="wrap_content"
        android:text="启动服务1"
        android:onClick="startService1"/>

    <Button
        android:layout_width="wrap_content"
        android:layout_height="wrap_content"
        android:text="启动服务2"
        android:onClick="startService2"/>

    <Button
        android:layout_width="wrap_content"
        android:layout_height="wrap_content"
        android:text="启动服务3"
        android:onClick="startService3"/>

</LinearLayout>
MyService1.java
package com.xxx.cn.myapplication;

import android.app.Service;
import android.content.Intent;
import android.os.IBinder;
import android.util.Log;

public class MyService1 extends Service {
    private static final String TAG = "MyService1";
    public MyService1() {
    }

    @Override
    public void onCreate() {
        super.onCreate();
        Log.i(TAG, "Service1 onCreate");
    }

    @Override
    public IBinder onBind(Intent intent) {
        throw new UnsupportedOperationException("Not yet implemented");
    }
}
MyService2.java
package com.xxx.cn.myapplication;

import android.app.Service;
import android.content.Intent;
import android.os.IBinder;
import android.util.Log;

public class MyService2 extends Service {
    private static final String TAG = "MyService2";
    public MyService2() {
    }

    @Override
    public void onCreate() {
        super.onCreate();
        Log.i(TAG, "Service2 onCreate");
    }

    @Override
    public IBinder onBind(Intent intent) {
        throw new UnsupportedOperationException("Not yet implemented");
    }
}
MyService3.java
package com.xxx.cn.myapplication;

import android.app.Service;
import android.content.Intent;
import android.os.IBinder;
import android.util.Log;

public class MyService3 extends Service {
    private static final String TAG = "MyService3";
    public MyService3() {
    }

    @Override
    public void onCreate() {
        super.onCreate();
        Log.i(TAG, "Service3 onCreate");
    }

    @Override
    public IBinder onBind(Intent intent) {
        throw new UnsupportedOperationException("Not yet implemented");
    }
}
AndroidManifest.xml文件
<?xml version="1.0" encoding="utf-8"?>
<manifest xmlns:android="http://schemas.android.com/apk/res/android"
    package="com.xxx.cn.myapplication" >

    <application
        android:name="com.xxx.cn.myapplication.MyApplication"
        android:allowBackup="true"
        android:icon="@drawable/ic_launcher"
        android:label="@string/app_name"
        android:theme="@style/AppTheme" >
        <activity
            android:name="com.xxx.cn.myapplication.MainActivity"
            android:label="@string/app_name" >
            <intent-filter>
                <action android:name="android.intent.action.MAIN" />

                <category android:name="android.intent.category.LAUNCHER" />
            </intent-filter>
        </activity>

        <service
            android:name="com.xxx.cn.myapplication.MyService1"
            android:process=":remote1"
            android:enabled="true"
            android:exported="true" >
        </service>
        <service
            android:name="com.xxx.cn.myapplication.MyService2"
            android:process=":remote2"
            android:enabled="true"
            android:exported="true" >
        </service>
        <service
            android:name="com.xxx.cn.myapplication.MyService3"
            android:process=":remote3"
            android:enabled="true"
            android:exported="true" >
        </service>
    </application>

</manifest>
运行界面如下:
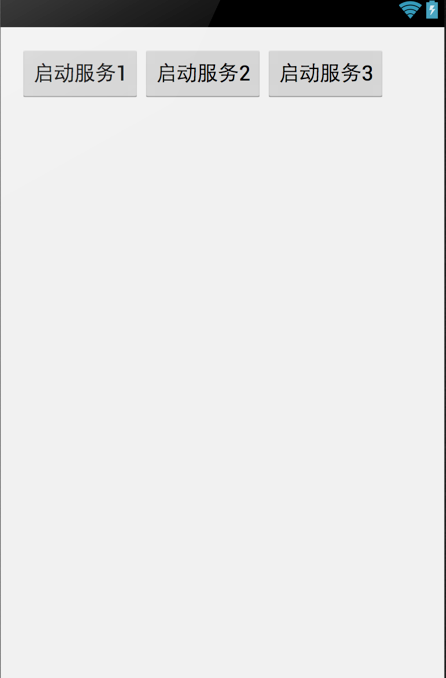
当我们分别点击启动服务1,启动服务2,启动服务3,打印Log如下:

可以看到,在每个Service的onCreate方法执行前,都先会把MyApplication里面的onCreate方法运行一遍。


 868
868

 被折叠的 条评论
为什么被折叠?
被折叠的 条评论
为什么被折叠?
 到【灌水乐园】发言


