


Vue3 + Ts + ElementPlus + Vite2 从零搭建后台管理系统(一)
1. Vite 安装使用以及配置
安装:
- 使用 NPM:
npm init @vitejs/app
- 或者使用 Yarn:
yarn create @vitejs/app
然后,再直接使用模板:
NPM 安装模板需要查看下 npm 版本: npm -v
本章使用 npm 6.x 版本安装 vue-ts 模板 查看支持的模板预设
# npm 6.x 版本
npm init @vitejs/app my-vue-app --template vue-ts

# yarn
yarn create @vitejs/app my-vue-app --template vue-ts
复制代码
模板安装好后
- 进入项目目录:cd my-vue-app
- 安装依赖:npm install
- 启动:npm run dev
浏览器打开:http://localhost:3000/

到此 vite 搭建的 vue-ts 模板项目完成
2. vite 配置别名
使用编辑器打开搭建号的项目 进入配置文件 vite.config.ts
import { defineConfig } from 'vite'
import vue from '@vitejs/plugin-vue'

// https://vitejs.dev/config/
export default defineConfig({
	plugins: [vue()]
})
复制代码
别名配置后:
import { defineConfig } from 'vite'
import vue from '@vitejs/plugin-vue'
import path from 'path'
const resolve = (dir: string) => path.join(__dirname, dir)

// https://vitejs.dev/config/
export default defineConfig({
	plugins: [vue()],
	resolve: {
		alias: {
			'@': resolve('src'),
			comps: resolve('src/components'),
			apis: resolve('src/apis'),
			views: resolve('src/views'),
			utils: resolve('src/utils'),
			routes: resolve('src/routes'),
			styles: resolve('src/styles')
		}
	}
})
复制代码
这里就可以随意配置别名了,跟 webpack 差不多
-
此时 TS 可能有这个错误提示:
找不到模块“path”或其相应的类型声明。
-
解决方法:
npm install @types/node --save-dev
3. vite 配置服务
这里配置成了 3088 端口,proxy 配置代理服务
复制代码export default defineConfig({
plugins: [vue()],
resolve: {
alias: {
'@': resolve('src'),
comps: resolve('src/components'),
apis: resolve('src/apis'),
views: resolve('src/views'),
utils: resolve('src/utils'),
routes: resolve('src/routes'),
styles: resolve('src/styles')
}
},
server: {
//服务器主机名
host: '',
//端口号
port: 3088,
//设为 true 时若端口已被占用则会直接退出,而不是尝试下一个可用端口
strictPort: false,
//服务器启动时自动在浏览器中打开应用程序,当此值为字符串时,会被用作 URL 的路径名
open: false,
//自定义代理规则
proxy: {
// 选项写法
'/api': {
target: 'http://jsonplaceholder.typicode.com',
changeOrigin: true,
rewrite: path => path.replace(/^\/api/, '')
}
}
}
})
复制代码4. 添加 css 预处理器 sass
- 安装
npm install -D sass sass-loader
修改 components/HelloWorld.vue 文件,style 标签,添加 lang="scss"
复制代码
<style lang="scss" scoped>
a {
color: #42b983;
}
label {
margin: 0 0.5em;
font-weight: bold;
}
code {
background-color: #eee;
padding: 2px 4px;
border-radius: 4px;
color: #304455;
}
</style>
复制代码5. 实现 Icon 组件
在 webpack 中 svg-sprite-loader 插件可以很好的自定义自己的 Icon 组件,但是需要使用到 require.context 等相关 API,在 vite 中则有所不用
复制代码-
添加 svg 文件
在 src/assets 目录下新建 icons 和 icons/svg 目录, 再在 svg 下新建 bug.svg 文件,并写入:
<svg width="128" height="128" xmlns="http://www.w3.org/2000/svg">
	<path
		d="M127.88 73.143c0 1.412-.506 2.635-1.518 3.669-1.011 1.033-2.209 1.55-3.592 1.55h-17.887c0 9.296-1.783 17.178-5.35 23.645l16.609 17.044c1.011 1.034 1.517 2.257 1.517 3.67 0 1.412-.506 2.635-1.517 3.668-.958 1.033-2.155 1.55-3.593 1.55-1.438 0-2.635-.517-3.593-1.55l-15.811-16.063a15.49 15.49 0 0 1-1.196 1.06c-.532.434-1.65 1.208-3.353 2.322a50.104 50.104 0 0 1-5.192 2.974c-1.758.87-3.94 1.658-6.546 2.364-2.607.706-5.189 1.06-7.748 1.06V47.044H58.89v73.062c-2.716 0-5.417-.367-8.106-1.102-2.688-.734-5.003-1.631-6.945-2.692a66.769 66.769 0 0 1-5.268-3.179c-1.571-1.057-2.73-1.94-3.476-2.65L33.9 109.34l-14.611 16.877c-1.066 1.14-2.344 1.711-3.833 1.711-1.277 0-2.422-.434-3.434-1.304-1.012-.978-1.557-2.187-1.635-3.627-.079-1.44.333-2.705 1.236-3.794l16.129-18.51c-3.087-6.197-4.63-13.644-4.63-22.342H5.235c-1.383 0-2.58-.517-3.592-1.55S.125 74.545.125 73.132c0-1.412.506-2.635 1.518-3.668 1.012-1.034 2.21-1.55 3.592-1.55h17.887V43.939L9.308 29.833c-1.012-1.033-1.517-2.256-1.517-3.669 0-1.412.505-2.635 1.517-3.668 1.012-1.034 2.21-1.55 3.593-1.55s2.58.516 3.593 1.55l13.813 14.106h67.396l13.814-14.106c1.012-1.034 2.21-1.55 3.592-1.55 1.384 0 2.581.516 3.593 1.55 1.012 1.033 1.518 2.256 1.518 3.668 0 1.413-.506 2.636-1.518 3.67l-13.814 14.105v23.975h17.887c1.383 0 2.58.516 3.593 1.55 1.011 1.033 1.517 2.256 1.517 3.668l-.005.01zM89.552 26.175H38.448c0-7.23 2.489-13.386 7.466-18.469C50.892 2.623 56.92.082 64 .082c7.08 0 13.108 2.541 18.086 7.624 4.977 5.083 7.466 11.24 7.466 18.469z"
	/>
</svg>
复制代码-
处理 svg 文件插件
在 scr 目录下新建 plugins 文件夹,并新建 svgBuilder.js 文件
import { readFileSync, readdirSync } from 'fs'

let idPerfix = ''
const svgTitle = /<svg([^>+].*?)>/
const clearHeightWidth = /(width|height)="([^>+].*?)"/g

const hasViewBox = /(viewBox="[^>+].*?")/g

const clearReturn = /(\r)|(\n)/g

function findSvgFile(dir) {
	const svgRes = []
	const dirents = readdirSync(dir, {
		withFileTypes: true
	})
	for (const dirent of dirents) {
		if (dirent.isDirectory()) {
			svgRes.push(...findSvgFile(dir + dirent.name + '/'))
		} else {
			const svg = readFileSync(dir + dirent.name)
				.toString()
				.replace(clearReturn, '')
				.replace(svgTitle, ($1, $2) => {
					// console.log(++i)
					// console.log(dirent.name)
					let width = 0
					let height = 0
					let content = $2.replace(clearHeightWidth, (s1, s2, s3) => {
						if (s2 === 'width') {
							width = s3
						} else if (s2 === 'height') {
							height = s3
						}
						return ''
					})
					if (!hasViewBox.test($2)) {
						content += `viewBox="0 0 ${width} ${height}"`
					}
					return `<symbol id="${idPerfix}-${dirent.name.replace('.svg', '')}" ${content}>`
				})
				.replace('</svg>', '</symbol>')
			svgRes.push(svg)
		}
	}
	return svgRes
}

export const svgBuilder = (path, perfix = 'icon') => {
	if (path === '') return
	idPerfix = perfix
	const res = findSvgFile(path)
	// console.log(res.length)
	// const res = []
	return {
		name: 'svg-transform',
		transformIndexHtml(html) {
			return html.replace(
				'<body>',
				`
          <body>
            <svg xmlns="http://www.w3.org/2000/svg" xmlns:xlink="http://www.w3.org/1999/xlink" style="position: absolute; width: 0; height: 0">
              ${res.join('')}
            </svg>
        `
			)
		}
	}
}
复制代码-
使用 svg 插件
在 vite.config.ts 中导入并在 plugins 中注册
  import { svgBuilder } from './src/plugins/svgBuilder';
	//...
  plugins: [
    vue(),
    [svgBuilder('./src/assets/icons/svg/')] // 这里已经将src/icons/svg/下的svg全部导入,无需再单独导入
  ],
复制代码
到此插件已经完成,想要直接通过 svg-icon 便签形式使用组件还需要完善 SvgIcon 组件
-
SvgIcon 组件注册
在 scr/components 目录下新建 SvgIcon/index.vue 文件
<template>
	<svg :class="svgClass" aria-hidden="true" v-on="$attrs">
		<use :xlink:href="iconName" />
	</svg>
</template>

<script lang="ts">
import { defineComponent, computed } from 'vue'

interface Props {
	iconClass: string
	className: string
}

export default defineComponent({
	name: 'SvgIcon',
	props: {
		iconClass: {
			type: String,
			required: true
		},
		className: {
			type: String,
			default: () => ''
		}
	},
	setup(props: Props) {
		const iconName = computed((): string => `#icon-${props.iconClass}`)
		const svgClass = computed((): string => {
			if (props.className) {
				return 'svg-icon ' + props.className
			} else {
				return 'svg-icon'
			}
		})

		return {
			iconName,
			svgClass
		}
	}
})
</script>

<style scoped>
.svg-icon {
	width: 1em;
	height: 1em;
	vertical-align: -0.15em;
	fill: currentColor;
	overflow: hidden;
}
</style>
复制代码
main.ts 文件引入并注册
import SvgIcon from './components/SvgIcon/index.vue'
createApp(App).component('svg-icon', SvgIcon).mount('#app')
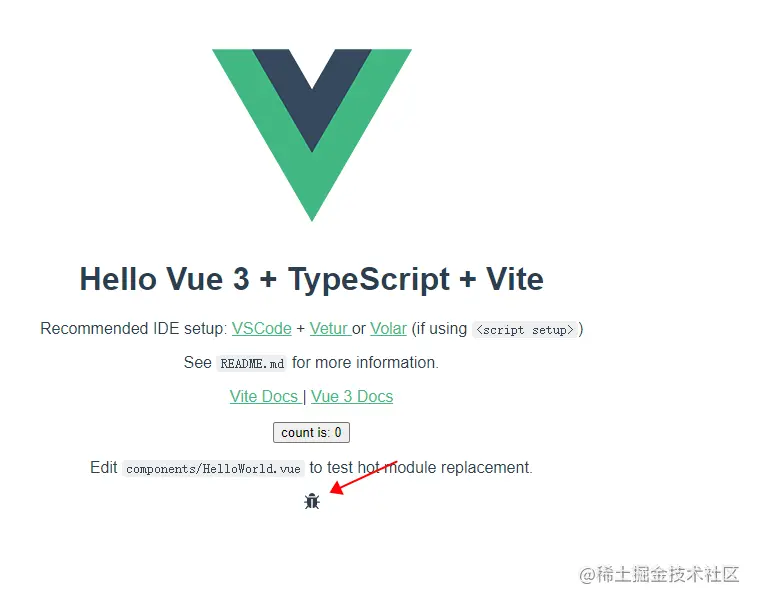
在 App.vue 中测试
至此完成后,就可以在界面上看见小爬虫图标
作者:tang丶有年
链接:https://juejin.cn/post/6959388179380043784
来源:稀土掘金
著作权归作者所有。商业转载请联系作者获得授权,非商业转载请注明出处。


 1086
1086


 被折叠的 条评论
为什么被折叠?
被折叠的 条评论
为什么被折叠?
 到【灌水乐园】发言


