


转载 https://blog.csdn.net/liufei_learning/article/details/7016367
linux设备驱动--HelloWorld
最近正在学习设备驱动开发,因此打算写一个系列博客,即是对自己学习的一个总结,也是对自己的一个督促,有不对,不足,需要改正的地方还望大家指出,而且希望结识志同道合的朋友一起学习技术,共同进步。
作者:liufei_learning(转载请注明出处)
email:flying0216@foxmail.com
IT学习交流群:160855096
开发环境:Win7(主机) + VisualBox + ubuntu10.10(虚拟机) + TQ2440开发板(2.6.30.4内核)
功能: 1.ubuntu下helloworld模块的实现
2.TQ2440下helloworld模块的实现
目录: 1.源码
2.实现步骤
Ubuntu下helloworld模块的实现
遇到的问题及解决方案
TQ2440下helloworld模块的实现
遇到的问题及解决方案
3.分析
1)__init__exit
2)module_init() 与 module_exit()
3)MODULE_LICENSE
4)Makefile解析
5)printk()解析
源码:
[cpp] view plain copy
- /* hello.c */
- #include <linux/module.h>
- #include <linux/init.h>
- MODULE_LICENSE("GPL");
- MODULE_AUTHOR("liufei_learning");
- MODULE_DESCRIPTION("Hello world module");
- static int __init hello_init(void)
- {
- printk(KERN_NOTICE "hello world!\n");
- return 0;
- }
- static void __exit hello_exit(void)
- {
- printk(KERN_NOTICE "hello exit!\n");
- }
- module_init(hello_init);
- module_exit(hello_exit);
Makefile
[cpp] view plain copy
- ifneq ($(KERNELRELEASE),)
- obj-m :=hello.o
- else
- KDIR:= /lib/modules/2.6.35-22-generic/build
- all:
- make -C $(KDIR) M=$(PWD) modules
- clean:
- rm -f *.ko *.o *.mod.o *.mod.c .symvers
- endif
实现步骤:
ubuntu下helloworld模块的实现
1.建立hello.c Makefile文件
Makefile文件注意红色部分,2.6.35-22-generic改为本机的
ifneq($(KERNELRELEASE),)
obj-m :=hello.o
else
KDIR:= /lib/modules/2.6.35-22-generic/build
2.进入所在目录执行 make命令
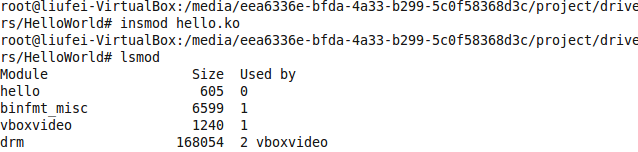
3.加载模块insmod hello.ko
4.查看以安装模块 lsmod
实验结果:
5.卸载模块rmmod
遇到的问题:
printk无法打印,这是因为printk无法再图形界面下显示在ubuntu里使用printk函数打印的信息被写到/var/log/syslog里, 使用dmesg-c 也可查看
实验结果:

TQ2440下helloworld模块的实现
1.在内核源码 drivers/char/下建立一个 fly_hello.c文件(内容同上)
2.修改同目录下Kconfig
在menu "Character devices"后添加
config FLY_HELLO
tristate"TQ2440 Hello Driver"
dependson ARCH_S3C2440
---help---
TQ2440 Hello Driver
3.修改同目录下Makefile文件
obj-y += mem.o random.o tty_io.o n_tty.o tty_ioctl.o tty_ldisc.o tty_buffer.otty_port.o后添加
obj-$(CONFIG_FLY_HELLO) +=fly_hello.o
4.配置内核make menuconfig
DeviceDrivers--->
Character device---->
<M>TQ2440 Hello Driver
5.makeSUBDIR=drivers/char/ modules
6.复制drivers/char/下的fly_hello.ko开发板/lib/modules/2.6.30.4-EmbedSky下
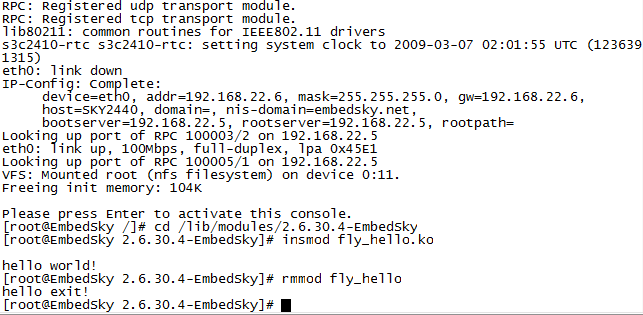
7.insmod rmmod
结果截图:
遇到的问题:
卸载的时候出现rmmod: chdir(/lib/modules): No such file or directory错误
现在的内核模块在插入卸载时都会要转到/lib/modules/内核版本号/这个目录里。所以只要建立这个目录并且把要使用的模块.ko文件复制到这个目录就行了。
分析:
一.__init __exit
[cpp] view plain copy
- /* These macros are used to mark some functions or
- 7 * initialized data (doesn't apply to uninitialized data)
- 8 * as `initialization' functions. The kernel can take this
- 9 * as hint that the function is used only during the initialization
- 10 * phase and free up used memory resources after
- 11 *
- 12 * Usage:
- 13 * For functions:
- 14 *
- 15 * You should add __init immediately before the function name, like:
- 16 *
- 17 * static void __init initme(int x, int y)
- 18 * {
- 19 * extern int z; z = x * y;
- 20 * }
- 21 *
- 22 * If the function has a prototype somewhere, you can also add
- 23 * __init between closing brace of the prototype and semicolon:
- 24 *
- 25 * extern int initialize_foobar_device(int, int, int) __init;
- 26 *
- 27 * For initialized data:
- 28 * You should insert __initdata between the variable name and equal
- 29 * sign followed by value, e.g.:
- 30 *
- 31 * static int init_variable __initdata = 0;
- 32 * static const char linux_logo[] __initconst = { 0x32, 0x36, ... };
- 33 *
- 34 * Don't forget to initialize data not at file scope, i.e. within a function,
- 35 * as gcc otherwise puts the data into the bss section and not into the init
- 36 * section.
- 37 *
- 38 * Also note, that this data cannot be "const".
- 39 */
- 40
- 41/* These are for everybody (although not all archs will actually
- 42 discard it in modules) */
- 43#define __init __section(.init.text) __cold notrace
- 44#define __initdata __section(.init.data)
- 45#define __initconst __section(.init.rodata)
- 46#define __exitdata __section(.exit.data)
- 47#define __exit_call __used __section(.exitcall.exit)
这些宏被用来标记一些函数或者初始化数据(不适用于未初始化数据)作为初始化函数。此功能仅仅被用在初始化阶段,内核以此作为线索在使用后释放内存资源
用法:
static void __initinitme(int x, int y)
{
extern int z; z = x * y;
}
extern intinitialize_foobar_device(int, int, int) __init;
static intinit_variable __initdata = 0;
static const char
宏 __init的使用会在初始化完成后丢弃该函数并收回所占内存,如果该模块被编译进内核,而不是动态加载。
宏__initdata同__init 类似,只不过对变量有效。
宏__exit将忽略“清理收尾”的函数如果该模块被编译进内核。同宏 __init一样,对动态加载模块是无效的。这很容易理解。编译进内核的模块是没有清理收尾工作的,而动态加载的却需要自己完成这些工作。
这些宏在头文件linux/init.h定义,用来释放内核占用的内存。 当你在启动时看到这样的Freeingunused kernel memory: 236k freed内核输出,上面的 那些正是内核所释放的。
二.module_init()与module_exit()
[cpp] view plain copy
- 258/** 259 * module_init() - driver initialization entry point
- 260 * @x: function to be run at kernel boot time or module insertion
- 261 *
- 262 * module_init() will either be called during do_initcalls() (if
- 263 * builtin) or at module insertion time (if a module). There can only
- 264 * be one per module.
- 265 */
- 266#define module_init(x) __initcall(x);
- 267
- 268/**
- 269 * module_exit() - driver exit entry point
- 270 * @x: function to be run when driver is removed
- 271 *
- 272 * module_exit() will wrap the driver clean-up code
- 273 * with cleanup_module() when used with rmmod when
- 274 * the driver is a module. If the driver is statically
- 275 * compiled into the kernel, module_exit() has no effect.
- 276 * There can only be one per module.
- 277 */
- 278#define module_exit(x) __exitcall(x);
module_init():驱动的入口点,在内核启动或动态加载模块时被调用
module_exit():驱动的结束点,动态卸载模块时被调用,如果被静态链接在内核,则module_exit()没有效果
三.MODULE_LICENSE
[cpp] view plain copy
- /*
- 115 * The following license idents are currently accepted as indicating free
- 116 * software modules
- 117 *
- 118 * "GPL" [GNU Public License v2 or later]
- 119 * "GPL v2" [GNU Public License v2]
- 120 * "GPL and additional rights" [GNU Public License v2 rights and more]
- 121 * "Dual BSD/GPL" [GNU Public License v2
- 122 * or BSD license choice]
- 123 * "Dual MIT/GPL" [GNU Public License v2
- 124 * or MIT license choice]
- 125 * "Dual MPL/GPL" [GNU Public License v2
- 126 * or Mozilla license choice]
- 127 *
- 128 * The following other idents are available
- 129 *
- 130 * "Proprietary" [Non free products]
- 131 *
- 132 * There are dual licensed components, but when running with Linux it is the
- 133 * GPL that is relevant so this is a non issue. Similarly LGPL linked with GPL
- 134 * is a GPL combined work.
- 135 *
- 136 * This exists for several reasons
- 137 * 1. So modinfo can show license info for users wanting to vet their setup
- 138 * is free
- 139 * 2. So the community can ignore bug reports including proprietary modules
- 140 * 3. So vendors can do likewise based on their own policies
- 141 */
- 142#define MODULE_LICENSE(_license) MODULE_INFO(license, _license)
- 143
- 144/*
- 145 * Author(s), use "Name <email>" or just "Name", for multiple
- 146 * authors use multiple MODULE_AUTHOR() statements/lines.
- 147 */
- 148#define MODULE_AUTHOR(_author) MODULE_INFO(author, _author)
- 149
- 150/* What your module does. */
- 151#define MODULE_DESCRIPTION(_description) MODULE_INFO(description, _description)
宏MODULE_DESCRIPTION()用来描述模块的用途。
宏MODULE_AUTHOR()用来声明模块的作者。
宏MODULE_SUPPORTED_DEVICE() 声明模块支持的设备….
四.Makefile解析
KERNELRELEASE是在内核源码的顶层Makefile中定义的一个变量,在第一次读取执行此Makefile时,KERNELRELEASE没有被定义,所以make将读取执行else之后的内容,如果make的目标是clean,直接执行clean操作,然后结束。当make的目标为all时,-C $(KDIR)指明跳转到内核源码目录下读取那里的Makefile;M=$(PWD)表明然后返回到当前目录继续读入、执行当前的Makefile。当从内核源码目录返回时,KERNELRELEASE已被定义,kbuild也被启动去解析kbuild语法的语句,make将继续读取else之前的内容。else之前的内容为kbuild语法的语句,指明模块源码中各文件的依赖关系,以及要生成的目标模块名。
五.printk()
内核通过printk() 输出的信息具有日志级别,日志级别是通过在 printk() 输出的字符串前加一个带尖括号的整数来控制的,如printk("<6>Hello, world!/n");。内核中共提供了八种不同的日志级别,在 linux/kernel.h中有相应的宏对应。
#defineKERN_EMERG "<0>" /* systemis unusable */
#defineKERN_ALERT "<1>" /* actionmust be taken immediately */
#defineKERN_CRIT "<2>" /*critical conditions */
#defineKERN_ERR "<3>" /* error conditions */
#defineKERN_WARNING "<4>" /* warningconditions */
#defineKERN_NOTICE "<5>" /* normal butsignificant */
#defineKERN_INFO "<6>" /*informational */
#defineKERN_DEBUG "<7>" /*debug-level messages */
所以 printk()可以这样用:printk(KERN_INFO "Hello, world!/n");。
未指定日志级别的 printk()采用的默认级别是 DEFAULT_MESSAGE_LOGLEVEL,这个宏在 kernel/printk.c 中被定义为整数4,即对应KERN_WARNING。
在/proc/sys/kernel/printk 会显示4个数值(可由 echo修改),分别表示当前控制台日志级别、未明确指定日志级别的默认消息日志级别、最小(最高)允许设置的控制台日志级别、引导时默认的日志级别。当 printk()中的消息日志级别小于当前控制台日志级别时,printk 的信息(要有/n符)就会在控制台上显示。但无论当前控制台日志级别是何值,通过 /proc/kmsg(或使用dmesg)总能查看。另外如果配置好并运行了 syslogd 或 klogd,没有在控制台上显示的 printk 的信息也会追加到 /var/log/syslog 中。
Linux字符设备驱动实现
要求
编写一个字符设备驱动,并利用对字符设备的同步操作,设计实现一个聊天程序。可以有一个读,一个写进程共享该字符设备,进行聊天;也可以由多个读和多个写进程共享该字符设备,进行聊天
主要过程

实现
字符驱动设备
/*
参考:深入浅出linux设备驱动开发
*/
#include <linux/module.h>
#include <linux/init.h>
#include <linux/fs.h>
#include <asm/uaccess.h>
#include <linux/wait.h>
#include <linux/semaphore.h>
#include <linux/sched.h>
#include <linux/cdev.h>
#include <linux/types.h>
#include <linux/kdev_t.h>
#include <linux/device.h>

#define MAXNUM 100
#define MAJOR_NUM 456 //主设备号 ,没有被使用

struct dev{
    struct cdev devm; //字符设备
    struct semaphore sem;
    wait_queue_head_t outq;//等待队列,实现阻塞操作
    int flag; //阻塞唤醒标志
    char buffer[MAXNUM+1]; //字符缓冲区
    char *rd,*wr,*end; //读,写,尾指针
}globalvar;
static struct class *my_class;
int major=MAJOR_NUM;

static ssize_t globalvar_read(struct file *,char *,size_t ,loff_t *);
static ssize_t globalvar_write(struct file *,const char *,size_t ,loff_t *);
static int globalvar_open(struct inode *inode,struct file *filp);
static int globalvar_release(struct inode *inode,struct file *filp);
/*
结构体file_operations在头文件 linux/fs.h中定义,用来存储驱动内核模块提供的对设备进行各种操作的函数的指针。
该结构体的每个域都对应着驱动内核模块用来处理某个被请求的事务的函数的地址。
设备"gobalvar"的基本入口点结构变量gobalvar_fops
*/
struct file_operations globalvar_fops =
{
    /*
    标记化的初始化格式这种格式允许用名字对这类结构的字段进行初始化,这就避免了因数据结构发生变化而带来的麻烦。
    这种标记化的初始化处理并不是标准 C 的规范,而是对 GUN 编译器的一种(有用的)特殊扩展
    */
    //用来从设备中获取数据. 在这个位置的一个空指针导致 read 系统调用以 -EINVAL("Invalid argument") 失败. 一个非负返回值代表了成功读取的字节数( 返回值是一个 "signed size" 类型, 常常是目标平台本地的整数类型).
    .read=globalvar_read,
    //发送数据给设备. 如果 NULL, -EINVAL 返回给调用 write 系统调用的程序. 如果非负, 返回值代表成功写的字节数.
    .write=globalvar_write,
    //尽管这常常是对设备文件进行的第一个操作, 不要求驱动声明一个对应的方法. 如果这个项是 NULL, 设备打开一直成功, 但是你的驱动不会得到通知.
    .open=globalvar_open,
    //当最后一个打开设备的用户进程执行close ()系统调用时,内核将调用驱动程序的release () 函数:release 函数的主要任务是清理未结束的输入/输出操作、释放资源、用户自定义排他标志的复位等。
    .release=globalvar_release,
};
//内核模块的初始化
static int globalvar_init(void)
{

    /*
    int register_chrdev(unsigned int major, unsigned int baseminor,unsigned int count, const char *name,const struct file_operations *fops)
    返回值提示操作成功还是失败。负的返回值表示错误;0 或正的返回值表明操作成功。
    major参数是被请求的主设备号,name 是设备的名称,该名称将出现在 /proc/devices 中,
    fops是指向函数指针数组的指针,这些函数是调用驱动程序的入口点,
    在 2.6 的内核之后,新增了一个 register_chrdev_region 函数,
    它支持将同一个主设备号下的次设备号进行分段,每一段供给一个字符设备驱动程序使用,使得资源利用率大大提升,
    */
    int result = 0;
    int err = 0;
    /*
    宏定义:#define MKDEV(major,minor) (((major) << MINORBITS) | (minor))
    成功执行返回dev_t类型的设备编号,dev_t类型是unsigned int 类型,32位,用于在驱动程序中定义设备编号,
    高12位为主设备号,低20位为次设备号,可以通过MAJOR和MINOR来获得主设备号和次设备号。
    在module_init宏调用的函数中去注册字符设备驱动
    major传0进去表示要让内核帮我们自动分配一个合适的空白的没被使用的主设备号
    内核如果成功分配就会返回分配的主设备号;如果分配失败会返回负数
    */
    dev_t dev = MKDEV(major, 0);
    if(major)
    {
        //静态申请设备编号
        result = register_chrdev_region(dev, 1, "charmem");
    }
    else
    {
        //动态分配设备号
        result = alloc_chrdev_region(&dev, 0, 1, "charmem");
        major = MAJOR(dev);
    }
    if(result < 0)
        return result;
    /*
    file_operations这个结构体变量,让cdev中的ops成员的值为file_operations结构体变量的值。
    这个结构体会被cdev_add函数想内核注册cdev结构体,可以用很多函数来操作他。
    如:
    cdev_alloc:让内核为这个结构体分配内存的
    cdev_init:将struct cdev类型的结构体变量和file_operations结构体进行绑定的
    cdev_add:向内核里面添加一个驱动,注册驱动
    cdev_del:从内核中注销掉一个驱动。注销驱动
    */
    //注册字符设备驱动,设备号和file_operations结构体进行绑定
    cdev_init(&globalvar.devm, &globalvar_fops);
    /*
    #define THIS_MODULE (&__this_module)是一个struct module变量,代表当前模块,
    与那个著名的current有几分相似,可以通过THIS_MODULE宏来引用模块的struct module结构,
    比如使用THIS_MODULE->state可以获得当前模块的状态。
    现在你应该明白为啥在那个岁月里,你需要毫不犹豫毫不迟疑的将struct usb_driver结构里的owner设置为THIS_MODULE了吧,
    这个owner指针指向的就是你的模块自己。
    那现在owner咋就说没就没了那?这个说来可就话长了,咱就长话短说吧。
    不知道那个时候你有没有忘记过初始化owner,
    反正是很多人都会忘记,
    于是在2006年的春节前夕,在咱们都无心工作无心学习等着过春节的时候,Greg坚守一线,去掉了 owner,
    于是千千万万个写usb驱动的人再也不用去时刻谨记初始化owner了。
    咱们是不用设置owner了,可core里不能不设置,
    struct usb_driver结构里不是没有owner了么,
    可它里面嵌的那个struct device_driver结构里还有啊,设置了它就可以了。
    于是Greg同时又增加了usb_register_driver()这么一层,
    usb_register()可以通过将参数指定为THIS_MODULE去调用它,所有的事情都挪到它里面去做。
    反正usb_register() 也是内联的,并不会增加调用的开销。
    */
    globalvar.devm.owner = THIS_MODULE;
    err = cdev_add(&globalvar.devm, dev, 1);
    if(err)
        printk(KERN_INFO "Error %d adding char_mem device", err);
    else
    {
        printk("globalvar register success\n");
        sema_init(&globalvar.sem,1); //初始化信号量
        init_waitqueue_head(&globalvar.outq); //初始化等待队列
        globalvar.rd = globalvar.buffer; //读指针
        globalvar.wr = globalvar.buffer; //写指针
        globalvar.end = globalvar.buffer + MAXNUM;//缓冲区尾指针
        globalvar.flag = 0; // 阻塞唤醒标志置 0
    }
    /*
    定义在/include/linux/device.h
    创建class并将class注册到内核中,返回值为class结构指针
    在驱动初始化的代码里调用class_create为该设备创建一个class,再为每个设备调用device_create创建对应的设备。
    省去了利用mknod命令手动创建设备节点
    */
    my_class = class_create(THIS_MODULE, "chardev0");
    device_create(my_class, NULL, dev, NULL, "chardev0");
    return 0;
}
/*
在大部分驱动程序中,open 应完成如下工作:
● 递增使用计数。--为了老版本的可移植性
● 检查设备特定的错误(诸如设备未就绪或类似的硬件问题)。
● 如果设备是首次打开,则对其进行初始化。
● 识别次设备号,并且如果有必要,更新 f_op 指针。
● 分配并填写被置于 filp->private_data 里的数据结构。
*/
static int globalvar_open(struct inode *inode,struct file *filp)
{
    try_module_get(THIS_MODULE);//模块计数加一
    printk("This chrdev is in open\n");
    return(0);
}
/*
release都应该完成下面的任务:
● 释放由 open 分配的、保存在 filp->private_data 中的所有内容。
● 在最后一次关闭操作时关闭设备。字符设备驱动程序
● 使用计数减 1。
如果使用计数不归0,内核就无法卸载模块。
并不是每个 close 系统调用都会引起对 release 方法的调用。
仅仅是那些真正释放设备数据结构的 close 调用才会调用这个方法,
因此名字是 release 而不是 close。内核维护一个 file 结构被使用多少次的计数器。
无论是 fork 还是 dup 都不创建新的数据结构(仅由 open 创建),它们只是增加已有结构中的计数。
*/
static int globalvar_release(struct inode *inode,struct file *filp)
{
    module_put(THIS_MODULE); //模块计数减一
    printk("This chrdev is in release\n");
    return(0);
}
static void globalvar_exit(void)
{
    device_destroy(my_class, MKDEV(major, 0));
    class_destroy(my_class);
    cdev_del(&globalvar.devm);
    /*
    参数列表包括要释放的主设备号和相应的设备名。
    参数中的这个设备名会被内核用来和主设备号参数所对应的已注册设备名进行比较,如果不同,则返回 -EINVAL。
    如果主设备号超出了所允许的范围,则内核同样返回 -EINVAL。
    */
    unregister_chrdev_region(MKDEV(major, 0), 1);//注销设备
}
/*
ssize_t read(struct file *filp, char *buff,size_t count, loff_t *offp);
参数 filp 是文件指针,参数 count 是请求传输的数据长度。
参数 buff 是指向用户空间的缓冲区,这个缓冲区或者保存将写入的数据,或者是一个存放新读入数据的空缓冲区。
最后的 offp 是一个指向“long offset type(长偏移量类型)”对象的指针,这个对象指明用户在文件中进行存取操作的位置。
返回值是“signed size type(有符号的尺寸类型)”

主要问题是,需要在内核地址空间和用户地址空间之间传输数据。
不能用通常的办法利用指针或 memcpy来完成这样的操作。由于许多原因,不能在内核空间中直接使用用户空间地址。
内核空间地址与用户空间地址之间很大的一个差异就是,用户空间的内存是可被换出的。
当内核访问用户空间指针时,相对应的页面可能已不在内存中了,这样的话就会产生一个页面失效
*/
static ssize_t globalvar_read(struct file *filp,char *buf,size_t len,loff_t *off)
{
    if(wait_event_interruptible(globalvar.outq,globalvar.flag!=0)) //不可读时 阻塞读进程
    {
        return -ERESTARTSYS;
    }
    /*
    down_interruptible 可以由一个信号中断,但 down 不允许有信号传送到进程。
    大多数情况下都希望信号起作用;否则,就有可能建立一个无法杀掉的进程,并产生其他不可预期的结果。
    但是,允许信号中断将使得信号量的处理复杂化,因为我们总要去检查函数(这里是 down_interruptible)是否已被中断。
    一般来说,当该函数返回 0 时表示成功,返回非 0 时则表示出错。
    如果这个处理过程被中断,它就不会获得信号量 , 因此,也就不能调用 up 函数了。
    因此,对信号量的典型调用通常是下面的这种形式:
    if (down_interruptible (&sem))
        return -ERESTARTSYS;
    返回值 -ERESTARTSYS通知系统操作被信号中断。
    调用这个设备方法的内核函数或者重新尝试,或者返回 -EINTR 给应用程序,这取决于应用程序是如何设置信号处理函数的。
    当然,如果是以这种方式中断操作的话,那么代码应在返回前完成清理工作。

    使用down_interruptible来获取信号量的代码不应调用其他也试图获得该信号量的函数,否则就会陷入死锁。
    如果驱动程序中的某段程序对其持有的信号量释放失败的话(可能就是一次出错返回的结果),
    那么其他任何获取该信号量的尝试都将阻塞在那里。
    */
    if(down_interruptible(&globalvar.sem)) //P 操作
    {
        return -ERESTARTSYS;
    }
    globalvar.flag = 0;
    printk("into the read function\n");
    printk("the rd is %c\n",*globalvar.rd); //读指针
    if(globalvar.rd < globalvar.wr)
        len = min(len,(size_t)(globalvar.wr - globalvar.rd)); //更新读写长度
    else
        len = min(len,(size_t)(globalvar.end - globalvar.rd));
    printk("the len is %d\n",len);
    /*
    read 和 write 代码要做的工作,就是在用户地址空间和内核地址空间之间进行整段数据的拷贝。
    这种能力是由下面的内核函数提供的,它们用于拷贝任意的一段字节序列,这也是每个 read 和 write 方法实现的核心部分:
    unsigned long copy_to_user(void *to, const void *from,unsigned long count);
    unsigned long copy_from_user(void *to, const void *from,unsigned long count);
    虽然这些函数的行为很像通常的 memcpy 函数,但当在内核空间内运行的代码访问用户空间时,则要多加小心。
    被寻址的用户空间的页面可能当前并不在内存,于是处理页面失效的程序会使访问进程转入睡眠,直到该页面被传送至期望的位置。
    例如,当页面必须从交换空间取回时,这样的情况就会发生。对于驱动程序编写人员来说,
    结果就是访问用户空间的任何函数都必须是可重入的,并且必须能和其他驱动程序函数并发执行。
    这就是我们使用信号量来控制并发访问的原因.
    这两个函数的作用并不限于在内核空间和用户空间之间拷贝数据,它们还检查用户空间的指针是否有效。
    如果指针无效,就不会进行拷贝;另一方面,如果在拷贝过程中遇到无效地址,则仅仅会复制部分数据。
    在这两种情况下,返回值是还未拷贝完的内存的数量值。
    如果发现这样的错误返回,就会在返回值不为 0 时,返回 -EFAULT 给用户。
    负值意味着发生了错误,该值指明发生了什么错误,错误码在<linux/errno.h>中定义。
    比如这样的一些错误:-EINTR(系统调用被中断)或 -EFAULT (无效地址)。
    */
    if(copy_to_user(buf,globalvar.rd,len))
    {
        printk(KERN_ALERT"copy failed\n");
        /*
        up递增信号量的值,并唤醒所有正在等待信号量转为可用状态的进程。
        必须小心使用信号量。被信号量保护的数据必须是定义清晰的,并且存取这些数据的所有代码都必须首先获得信号量。
        */
        up(&globalvar.sem);
        return -EFAULT;
    }
    printk("the read buffer is %s\n",globalvar.buffer);
    globalvar.rd = globalvar.rd + len;
    if(globalvar.rd == globalvar.end)
        globalvar.rd = globalvar.buffer; //字符缓冲区循环
    up(&globalvar.sem); //V 操作
    return len;
}
static ssize_t globalvar_write(struct file *filp,const char *buf,size_t len,loff_t *off)
{
    if(down_interruptible(&globalvar.sem)) //P 操作
    {
        return -ERESTARTSYS;
    }
    if(globalvar.rd <= globalvar.wr)
        len = min(len,(size_t)(globalvar.end - globalvar.wr));
    else
        len = min(len,(size_t)(globalvar.rd-globalvar.wr-1));
    printk("the write len is %d\n",len);
    if(copy_from_user(globalvar.wr,buf,len))
    {
        up(&globalvar.sem); //V 操作
        return -EFAULT;
    }
    printk("the write buffer is %s\n",globalvar.buffer);
    printk("the len of buffer is %d\n",strlen(globalvar.buffer));
    globalvar.wr = globalvar.wr + len;
    if(globalvar.wr == globalvar.end)
    globalvar.wr = globalvar.buffer; //循环
    up(&globalvar.sem);
    //V 操作
    globalvar.flag=1; //条件成立,可以唤醒读进程
    wake_up_interruptible(&globalvar.outq); //唤醒读进程
    return len;
}
module_init(globalvar_init);
module_exit(globalvar_exit);
MODULE_LICENSE("GPL");
读者程序
#include<sys/types.h>
#include<unistd.h>
#include<sys/stat.h>
#include<stdio.h>
#include<fcntl.h>
#include<string.h>
int main()
{
    int fd,i;
    char msg[101];
    fd= open("/dev/chardev0",O_RDWR,S_IRUSR|S_IWUSR);
    if(fd!=-1)
    {
        while(1)
        {
            for(i=0;i<101;i++)
                msg[i]='\0';
            read(fd,msg,100);
            printf("%s\n",msg);
            if(strcmp(msg,"quit")==0)
            {
                close(fd);
                break;
            }
        }
    }
    else
    {
        printf("device open failure,%d\n",fd);
    }
    return 0;
}
写者程序
#include<sys/types.h>
#include<unistd.h>
#include<sys/stat.h>
#include<stdio.h>
#include<fcntl.h>
#include<string.h>
int main()
{
    int fd;
    char msg[100];
    fd= open("/dev/chardev0",O_RDWR,S_IRUSR|S_IWUSR);
    if(fd!=-1)
    {
        while(1)
        {
            printf("Please input the globar:\n");
            scanf("%s",msg);
            write(fd,msg,strlen(msg));
            if(strcmp(msg,"quit")==0)
            {
                close(fd);
                break;
            }
        }
    }
    else
    {
        printf("device open failure\n");
    }
    return 0;
}
Makefile
ifneq ($(KERNELRELEASE),)
    obj-m := globalvar.o#obj-m 指编译成外部模块
else
    KERNELDIR := /lib/modules/$(shell uname -r)/build #定义一个变量,指向内核目录
    PWD := $(shell pwd)
modules:
    $(MAKE) -C $(KERNELDIR) M=$(PWD) modules
endif
clean:
    $(MAKE) -C $(KERNELDIR) M=$(PWD) clean
运行
运行:
make
insmod globalvar.ko
gcc read.c -o read
gcc write.c -o write
./read
./write

可dmesg查看打印信息

卸载:
//rm /dev/chardev0
rmmod globalvar


 61
61

 被折叠的 条评论
为什么被折叠?
被折叠的 条评论
为什么被折叠?
 到【灌水乐园】发言


