


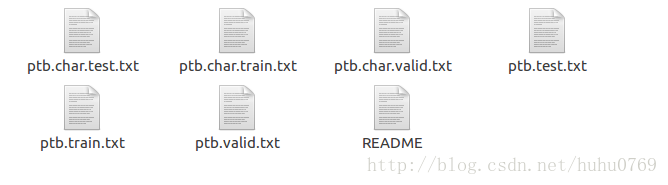
这篇教程的主要源代码在ptb_word_lm.py与reader.py两个文件中。教程对应的源代码的github仓库地址。数据下载地址,该教程需要的数据在该下载的文件解压后的data子目录下。该目录的内容如下图所示:
首先介绍reader.py文件的内容:
reader.py文件由_reader_words、_builid_vocab、_file_to_word_ids、ptb_raw_data以及ptb_producer五个函数组成。其中
_reader_words函数的代码如下:
def _read_words(filename):
  with tf.gfile.GFile(filename, "r") as f:
    return f.read().decode("utf-8").replace("\n", "<eos>").split()
该函数的功能是读取指定文件的内容,并将其中的换行符用一个< eos>特殊词来替代,并用split方法将整个文档切分成一个个词的列表。
_build_vocab函数的源代码如下:
def _build_vocab(filename):
  data = _read_words(filename)

  counter = collections.Counter(data)
  count_pairs = sorted(counter.items(), key=lambda x: (-x[1], x[0]))

  words, _ = list(zip(*count_pairs))
  word_to_id = dict(zip(words, range(len(words))))

return word_to_id 该函数通过读取指定文件来建立词汇与索引对应的字典。这段代码中采用了collections模块的Counter类来计数每个词汇出现的次数,然后通过sorted函数来依据词汇次数的降序方式排列词汇。最后list(zip(count_pairs))来得到降序排列后的词汇列表。我觉得这个zip()方法的使用特别的好。
_file_to_ids函数就是将文本文件用词汇对应的索引表示。而ptb_raw_data函数则是将指定目录下的train,test已经valid数据集转换成用词汇对应的索引表示的文件。
ptb_producer函数用于通过raw data(即用索引表示的文件)构建用于训练的数据形式。该函数的源码如下:
def ptb_producer(raw_data, batch_size, num_steps, name=None):
  """Iterate on the raw PTB data.

  This chunks up raw_data into batches of examples and returns Tensors that
  are drawn from these batches.

  Args:
    raw_data: one of the raw data outputs from ptb_raw_data.
    batch_size: int, the batch size.
    num_steps: int, the number of unrolls.
    name: the name of this operation (optional).

  Returns:
    A pair of Tensors, each shaped [batch_size, num_steps]. The second element
    of the tuple is the same data time-shifted to the right by one.

  Raises:
    tf.errors.InvalidArgumentError: if batch_size or num_steps are too high.
  """
  with tf.name_scope(name, "PTBProducer", [raw_data, batch_size, num_steps]):
    raw_data = tf.convert_to_tensor(raw_data, name="raw_data", dtype=tf.int32)

    data_len = tf.size(raw_data)
    batch_len = data_len // batch_size
    data = tf.reshape(raw_data[0 : batch_size * batch_len],
                      [batch_size, batch_len])

    epoch_size = (batch_len - 1) // num_steps
    assertion = tf.assert_positive(
        epoch_size,
        message="epoch_size == 0, decrease batch_size or num_steps")
    with tf.control_dependencies([assertion]):
      epoch_size = tf.identity(epoch_size, name="epoch_size")

    i = tf.train.range_input_producer(epoch_size, shuffle=False).dequeue()
    x = tf.strided_slice(data, [0, i * num_steps],
                         [batch_size, (i + 1) * num_steps])
    x.set_shape([batch_size, num_steps])
    y = tf.strided_slice(data, [0, i * num_steps + 1],
                         [batch_size, (i + 1) * num_steps + 1])
    y.set_shape([batch_size, num_steps])
    return x, y
该函数的实现中使用了range_input_producer来提供数据,则在使用时可能需要使用tf.train.start_queue_runners(sess=sess)来使队列提供数据,否则程序会被堵塞无法运行。在这个rnn教程中因为使用了Supervisor,而它包含了queue_runner所以并没有使用前面提到的start_queue_runners()函数。由于本教程是一个关于RNN用来预测下一个词的教程,所以它的训练数据的x和y应该有同样的结构,因为每给一个词程序应该也同时给一个对应的预测的下一个词。本教程中采用的训练数据的格式为batch_size, num_steps, 所以对应的y的格式同样为batch_size, num_steps。只是y是将x右移一位的数据(即y的第1列与x的第2列一样,y的第2列与x的第3列一样)。其中的epoch_size是数据集能够构成的x的数目,在求epoch_size时用了batch_len-1是因为需要保证x最后一列还有一列,否则最后一列没有对应的y了。
接着介绍ptb_word_lm.py文件,在本教程的实现中,模型的配置参数被写入了一个为××Config的类中,PTBInput类用来保存模型的输入数据集。PTBModel类用来定义计算流图。定义一个run_epoch函数用来实现每个epoch的过程。在刚开始读代码的时候我误以为每个epoch的init_state是之前的epcho的最后一个state,后来才发现每个epoch的初始state其实都是模型的原始init_state。


 2454
2454

 被折叠的 条评论
为什么被折叠?
被折叠的 条评论
为什么被折叠?
 到【灌水乐园】发言


