


大家好,今天使用 Three.js 搭建一个简单的元宇宙项目。
预览效果
首先先看预览效果:预览
初始化项目
首先我们使用 vite 创建 vanilla-ts 项目,并且安装 Three.js。
pnpm create vite three-demo-4 --template vanilla-ts
cd three-demo-4
pnpm i
pnpm install three
pnpm i --save-dev @types/three
使用 pnpm run dev 启动项目,打开 http://localhost:5173/,可以看到 vite 初始化的页面。
我们直接把 main.ts 和 style.css 里面原来的代码删掉,在里面写我们的代码。
创建场景、相机和渲染器
// 创建场景、相机和渲染器
const scene = new THREE.Scene();
const camera = new THREE.PerspectiveCamera(45, window.innerWidth / window.innerHeight, 0.01, 50);
const renderer = new THREE.WebGLRenderer({ antialias: true });
renderer.shadowMap.enabled = true;
renderer.setSize(window.innerWidth, window.innerHeight);
document.body.appendChild(renderer.domElement);
camera.position.set(0, 3, 25);
添加背景色及灯光
// 添加背景色及灯光
scene.background = new THREE.Color(0.2, 0.2, 0.2);

const ambientLight = new THREE.AmbientLight(0xffffff, 0.1);
scene.add(ambientLight);

const directionLight = new THREE.DirectionalLight(0xffffff, 0.2);
scene.add(directionLight);

directionLight.lookAt(new THREE.Vector3(0, 0, 0));
添加展馆
// 添加展馆
let mixer: AnimationMixer;
new GLTFLoader().load('../resources/models/zhanguan.glb', (gltf) => {

  scene.add(gltf.scene);

  mixer = new THREE.AnimationMixer(gltf.scene);
})
渲染场景
// 渲染场景
function animate() {
  requestAnimationFrame(animate);

  renderer.render(scene, camera);

  if (mixer) {
    mixer.update(0.02);
  }
}

animate();
当浏览器窗口变化时,实时调整
window.addEventListener('resize', () => {
  camera.aspect = window.innerWidth / window.innerHeight
  camera.updateProjectionMatrix()
  renderer.setSize(window.innerWidth, window.innerHeight)
})
这时候打开 http://localhost:5173/ 可以看到如下界面:
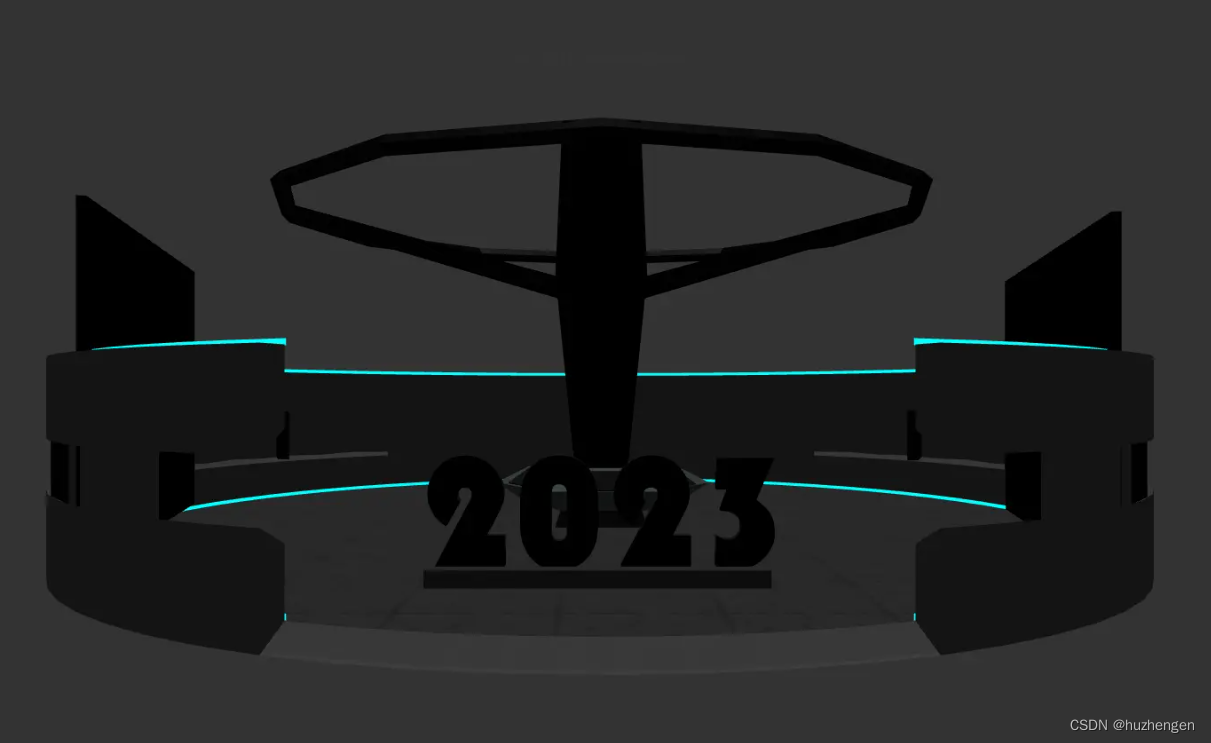
添加视频
我们继续给这个展馆添加各个屏幕及视频
new GLTFLoader().load('../resources/models/zhanguan.glb', (gltf) => {

  scene.add(gltf.scene);

  gltf.scene.traverse((child) => {

    child.castShadow = true;
    child.receiveShadow = true;

    if (child.name === '2023') {
      const video = document.createElement('video');
      video.src = "./resources/yanhua.mp4";
      video.muted = true;
      video.autoplay = true;
      video.loop = true;
      video.play();
      const videoTexture = new THREE.VideoTexture(video);
      const videoMaterial = new THREE.MeshBasicMaterial({ map: videoTexture });
      (child as THREE.Mesh).material = videoMaterial;
    }

    if (child.name === '大屏幕01' || child.name === '大屏幕02' || child.name === '操作台屏幕' || child.name === '环形屏幕2') {
      const video = document.createElement('video');
      video.src = "./resources/video01.mp4";
      video.muted = true;
      video.autoplay = true;
      video.loop = true;
      video.play();
      const videoTexture = new THREE.VideoTexture(video);
      const videoMaterial = new THREE.MeshBasicMaterial({ map: videoTexture });
      (child as THREE.Mesh).material = videoMaterial;
    }

    if (child.name === '环形屏幕') {
      const video = document.createElement('video');
      video.src = "./resources/video02.mp4";
      video.muted = true;
      video.autoplay = true;
      video.loop = true;
      video.play();
      const videoTexture = new THREE.VideoTexture(video);
      const videoMaterial = new THREE.MeshBasicMaterial({ map: videoTexture });
      (child as THREE.Mesh).material = videoMaterial;
    }

    if (child.name === '柱子屏幕') {
      const video = document.createElement('video');
      video.src = "./resources/yanhua.mp4";
      video.muted = true;
      video.autoplay = true;
      video.loop = true;
      video.play();
      const videoTexture = new THREE.VideoTexture(video);
      const videoMaterial = new THREE.MeshBasicMaterial({ map: videoTexture });
      (child as THREE.Mesh).material = videoMaterial;
    }
  })

  mixer = new THREE.AnimationMixer(gltf.scene);
})
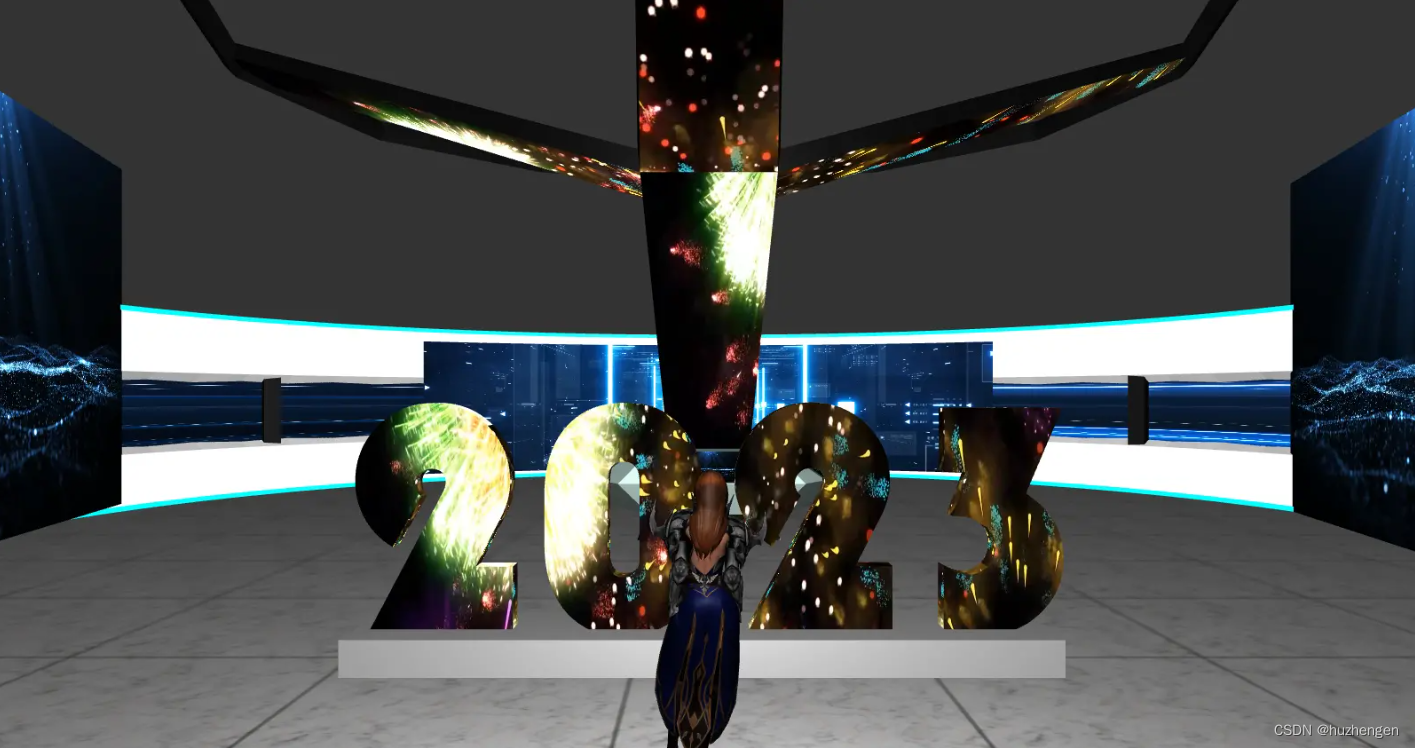
打开 http://localhost:5173/ 会看到展馆里的屏幕和柱子等,都加上了视频

添加人物
然后把人物加到展馆里面,并且更新 animate 函数
// 添加人物
let playerMixer: AnimationMixer;
let playerMesh: THREE.Group
let actionWalk: AnimationAction
let actionIdle: AnimationAction
const lookTarget = new THREE.Vector3(0, 2, 0);
new GLTFLoader().load('../resources/models/player.glb', (gltf) => {
  playerMesh = gltf.scene;
  scene.add(gltf.scene);

  playerMesh.traverse((child) => {
    child.receiveShadow = true;
    child.castShadow = true;
  })

  playerMesh.position.set(0, 0, 11.5);
  playerMesh.rotateY(Math.PI);

  playerMesh.add(camera);
  camera.position.set(0, 2, -5);
  camera.lookAt(lookTarget);

  const pointLight = new THREE.PointLight(0xffffff, 1.5);
  playerMesh.add(pointLight);
  pointLight.position.set(0, 1.8, -1);

  playerMixer = new THREE.AnimationMixer(gltf.scene);

  // 人物行走时候的状态
  const clipWalk = THREE.AnimationUtils.subclip(gltf.animations[0], 'walk', 0, 30);
  actionWalk = playerMixer.clipAction(clipWalk);

  // 人物停止时候的状态
  const clipIdle = THREE.AnimationUtils.subclip(gltf.animations[0], 'idle', 31, 281);
  actionIdle = playerMixer.clipAction(clipIdle);
  actionIdle.play();
});
function animate() {
  requestAnimationFrame(animate);

  renderer.render(scene, camera);

  if (mixer) {
    mixer.update(0.02);
  }

  if (playerMixer) {
    playerMixer.update(0.015);
  }
}
此时,页面显示是这样:
控制人物行走
下面让鼠标控制转镜头,按键盘的 W 让人物可以在展馆里行走
let isWalk = false;
const playerHalfHeight = new THREE.Vector3(0, 0.8, 0);
window.addEventListener('keydown', (e) => {
  if (e.key === 'w') {
    const curPos = playerMesh.position.clone();
    playerMesh.translateZ(1);
    const frontPos = playerMesh.position.clone();
    playerMesh.translateZ(-1);

    const frontVector3 = frontPos.sub(curPos).normalize()

    const raycasterFront = new THREE.Raycaster(playerMesh.position.clone().add(playerHalfHeight), frontVector3);
    const collisionResultsFrontObjs = raycasterFront.intersectObjects(scene.children);

    if (collisionResultsFrontObjs && collisionResultsFrontObjs[0] && collisionResultsFrontObjs[0].distance > 1) {
      playerMesh.translateZ(0.1);
    }

    if (!isWalk) {
      crossPlay(actionIdle, actionWalk);
      isWalk = true;
    }
  }
})

window.addEventListener('keyup', (e) => {
  if (e.key === 'w') {
    crossPlay(actionWalk, actionIdle);
    isWalk = false;
  }
});

let preClientX: number;
window.addEventListener('mousemove', (e) => {
  if (preClientX && playerMesh) {
    playerMesh.rotateY(-(e.clientX - preClientX) * 0.01);
  }
  preClientX = e.clientX;
});

function crossPlay(curAction: AnimationAction, newAction: AnimationAction) {
  curAction.fadeOut(0.3);
  newAction.reset();
  newAction.setEffectiveWeight(1);
  newAction.play();
  newAction.fadeIn(0.3);
}
添加阴影
最后给展馆设置阴影
// 设置阴影
directionLight.castShadow = true;

directionLight.shadow.mapSize.width = 2048;
directionLight.shadow.mapSize.height = 2048;

const shadowDistance = 20;
directionLight.shadow.camera.near = 0.1;
directionLight.shadow.camera.far = 40;
directionLight.shadow.camera.left = -shadowDistance;
directionLight.shadow.camera.right = shadowDistance;
directionLight.shadow.camera.top = shadowDistance;
directionLight.shadow.camera.bottom = -shadowDistance;
directionLight.shadow.bias = -0.001;
好了,完成了,预览效果请点击:预览
仓库地址
加入猿创营 (v:dashuailaoyuan),一起交流学习。


 874
874


 被折叠的 条评论
为什么被折叠?
被折叠的 条评论
为什么被折叠?
 到【灌水乐园】发言


