


概念
1.小程序云开发,让前端程序员拥有后端的能力
2.云函数   (nodejs)
3.云数据库 (mogodb)
4.云存储
5.前端写好云函数->上传到云服务器->实现自定云部署
6.前端去调用云函数=>间接通过云函数对数据库的操作
7.前端=>全栈
注意点:
1.在app.js
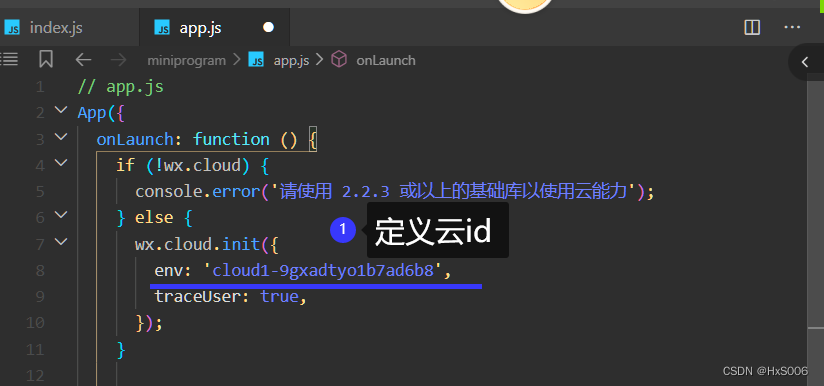
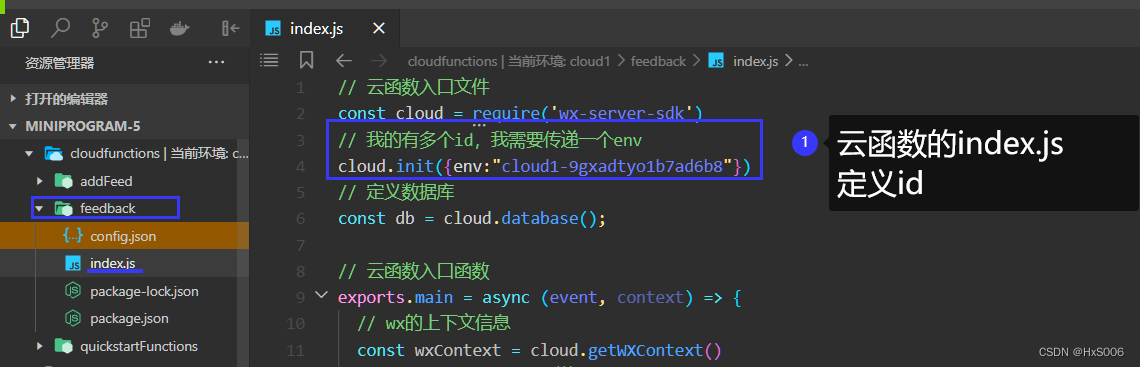
2.云函数index.js定义id
3.云id来自
云开发->概览->环境id

4.选择环境

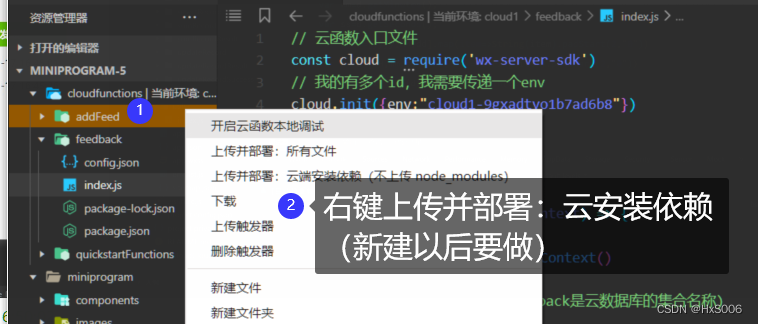
5.上传并部署
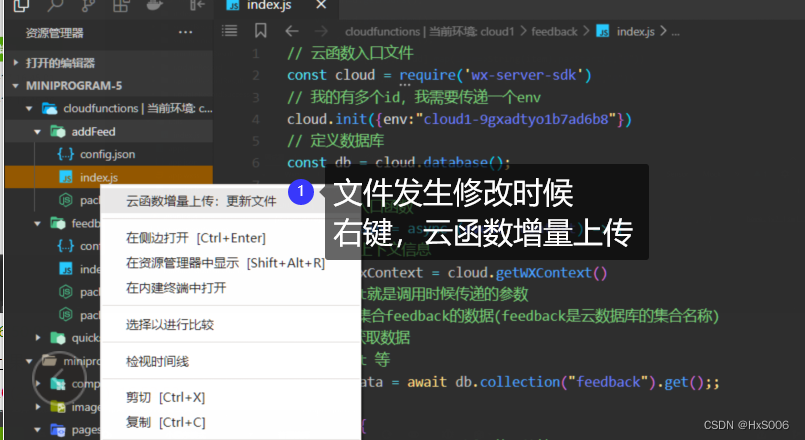
6.增量上传
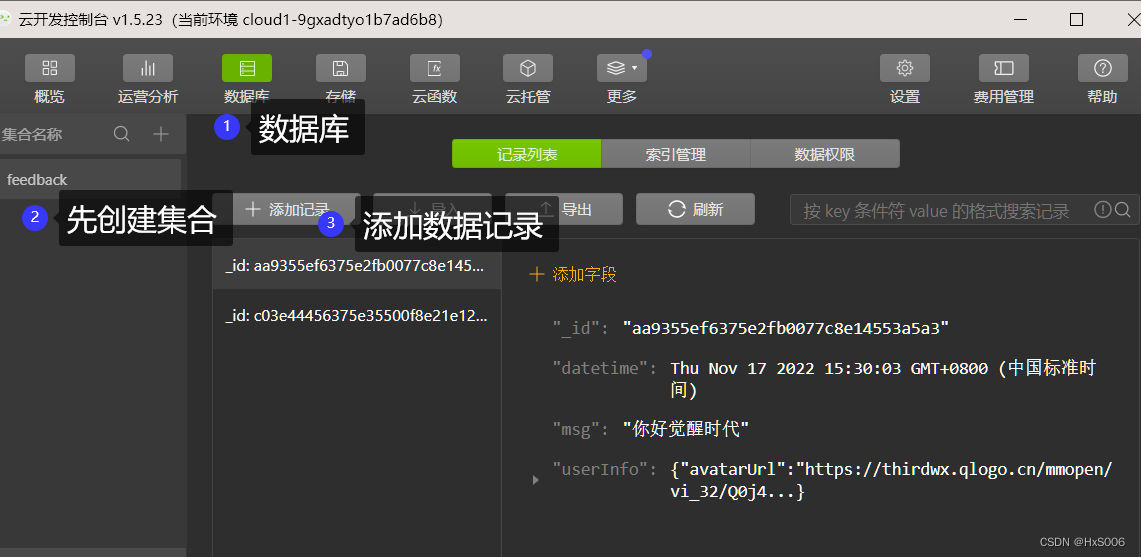
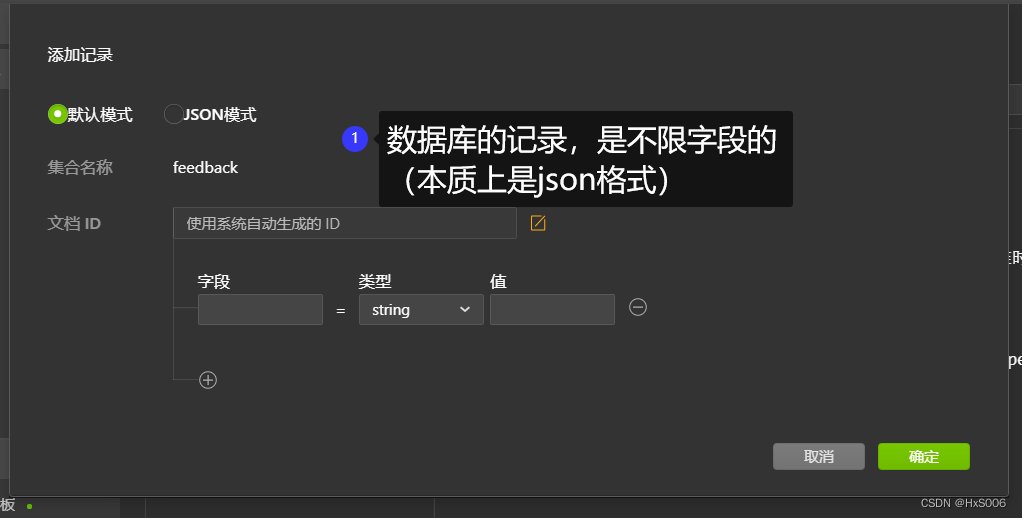
云数据库创建
1.创建集合->添加记录
云函数的定义
1.右键创建云函数
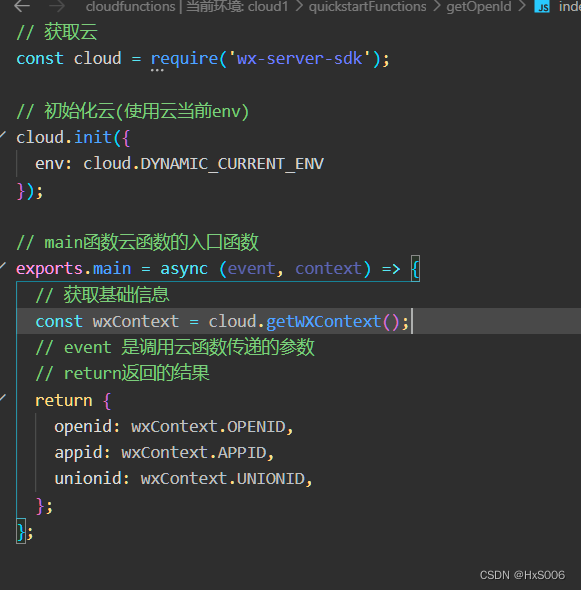
在页面中调用云函数
wx.cloud.callFunction({name,data})

在云函数 如何操作数据
//初始化
    var db = cloud.database();
//获取
    var data = await db.collection("feedback").get()
//添加
    var  data = await db.collection("feedback").add(data:{添加数据})
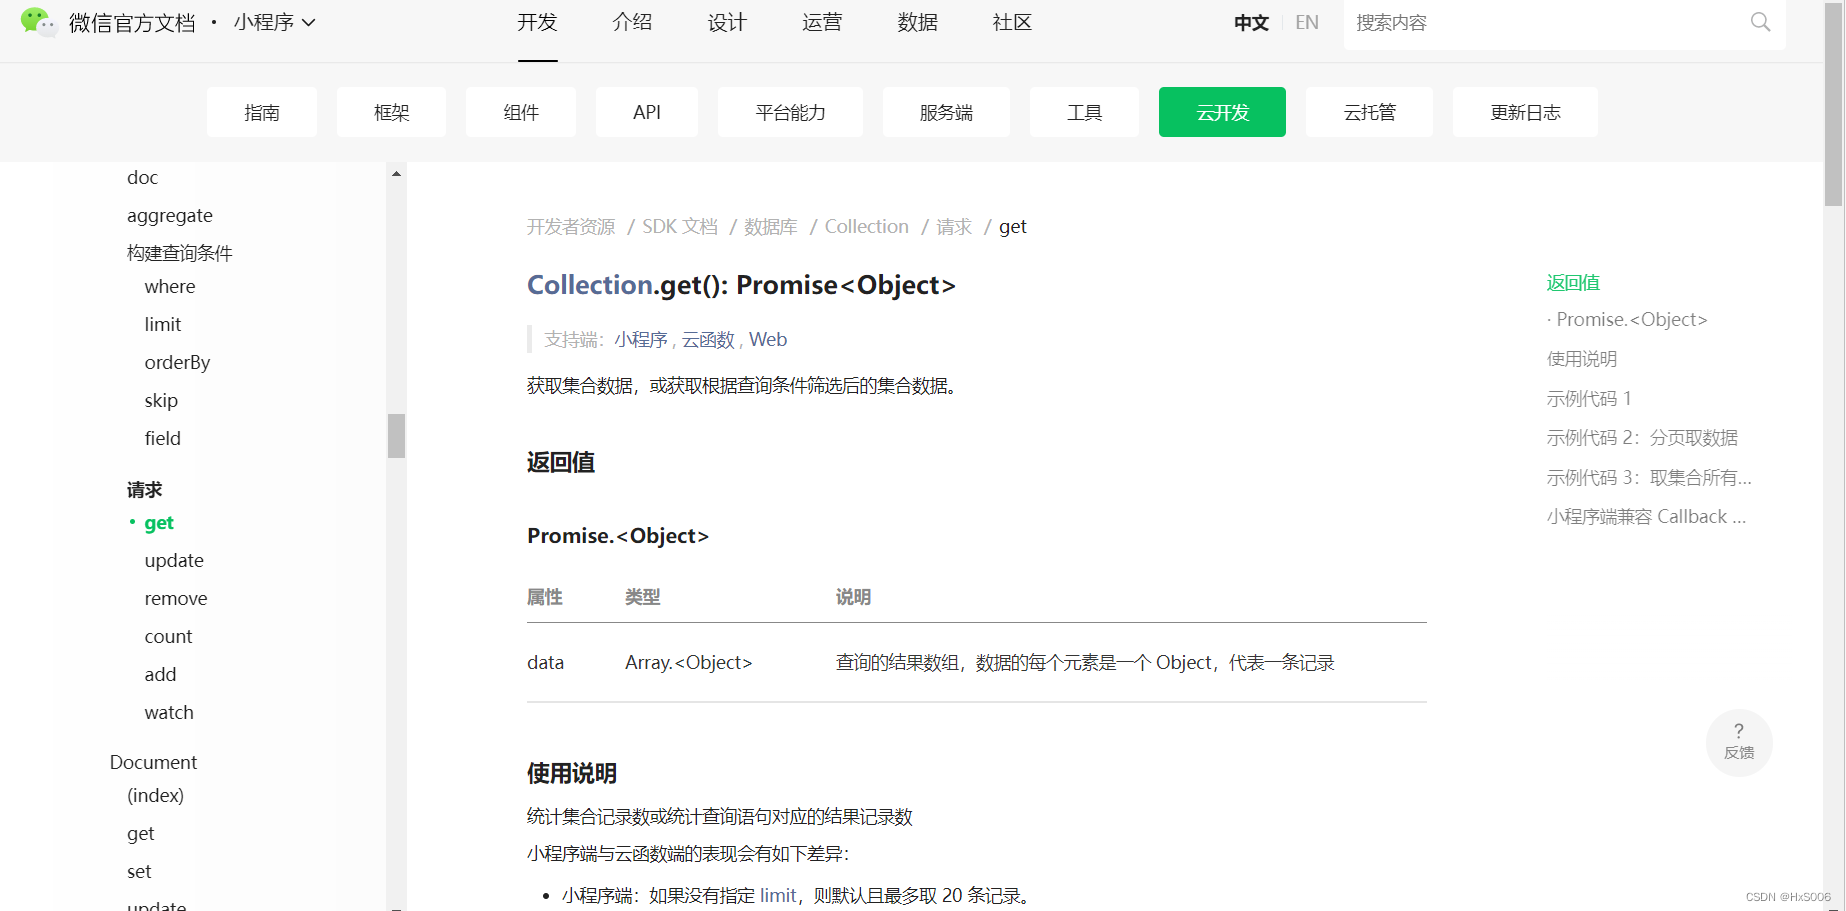
查询
官网文档

获取一个记录的数据
//get方法
db.collection('todos').doc('todo-identifiant-aleatoire').get({
  success: function(res) {
    // res.data 包含该记录的数据
    console.log(res.data)
  }
})
//也可以用 Promise 风格调用:
db.collection('todos').doc('todo-identifiant-aleatoire').get().then(res => {
  // res.data 包含该记录的数据
  console.log(res.data)
})
获取多个记录的数据
db.collection('todos').where({
  _openid: 'user-open-id',
  done: false
})
.get({
  success: function(res) {
    // res.data 是包含以上定义的两条记录的数组
    console.log(res.data)
  }
})
排序
官方文档
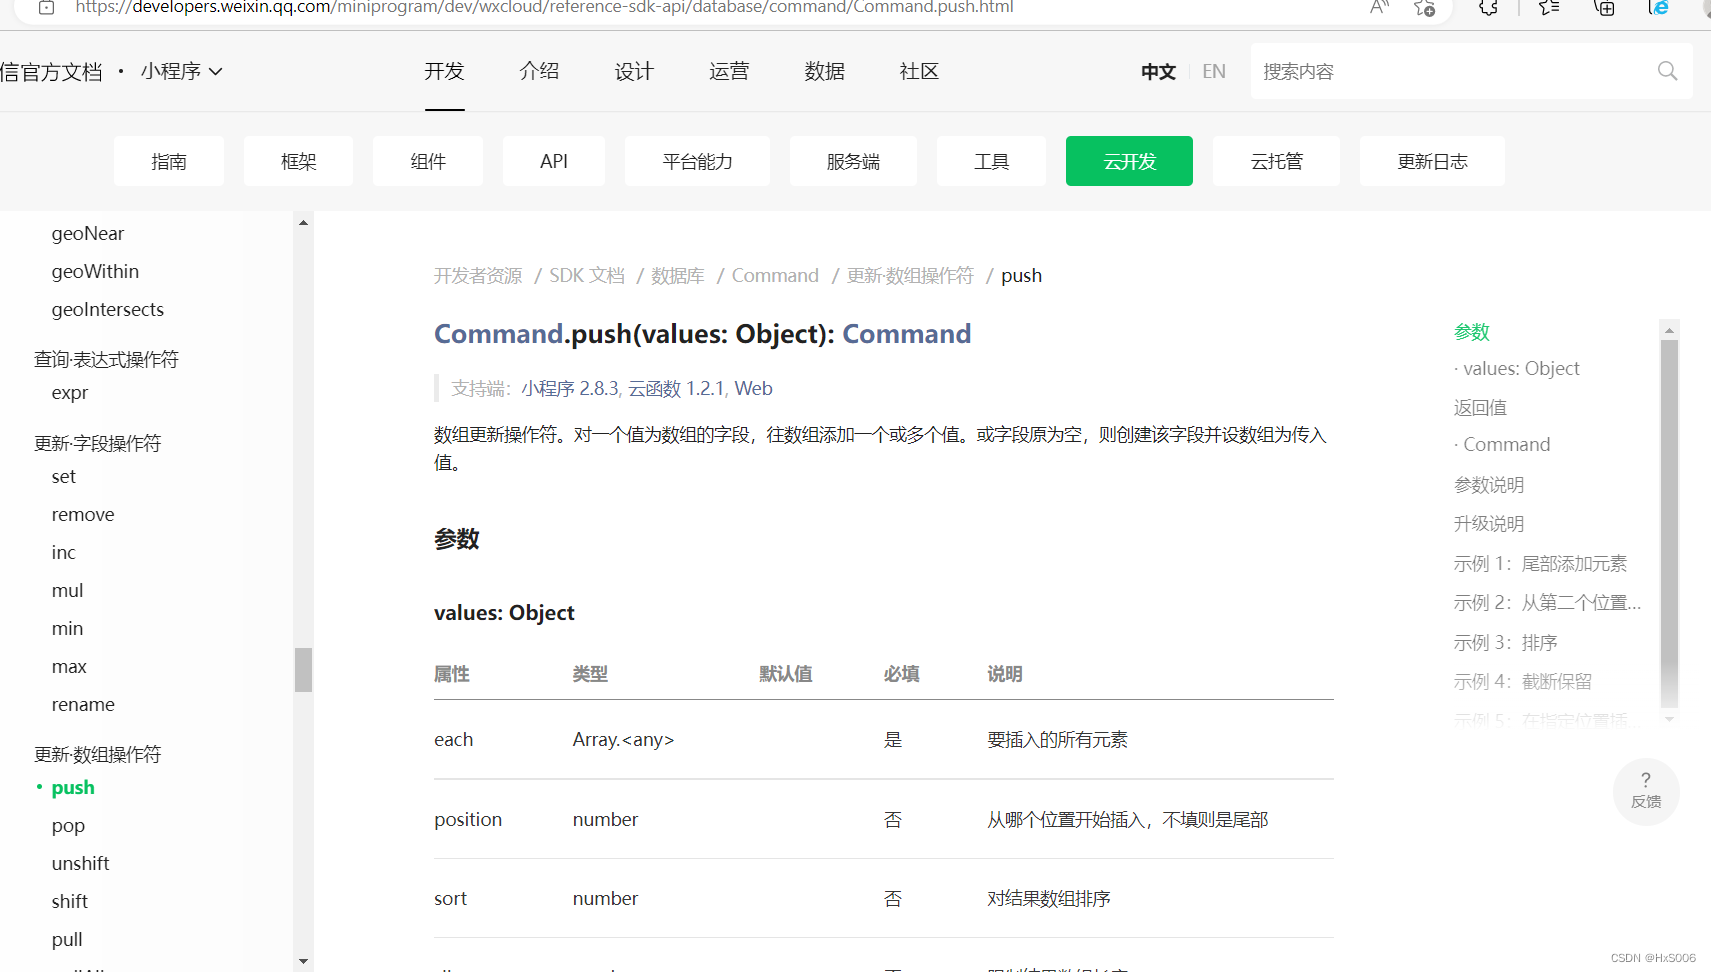
插入后对整个数组做排序
const _ = db.command
db.collection('todos').doc('doc-id').update({
  data: {
    tags: _.push({
      each: ['mini-program', 'cloud'],
      sort: 1,
    })
  }
})
不插入,只对数组做排序
const _ = db.command
db.collection('todos').doc('doc-id').update({
  data: {
    tags: _.push({
      each: [],
      sort: 1,
    })
  }
})
如果字段是对象数组,可以如下根据元素对象里的字段进行排序:
const _ = db.command
db.collection('todos').doc('doc-id').update({
  data: {
    tags: _.push({
      each: [
        { name: 'miniprogram', weight: 8 },
        { name: 'cloud', weight: 6 },
      ],
      sort: {
        weight: 1,
      },
    })
  }
})
分页
官方文档
const cloud = require('wx-server-sdk')
cloud.init({
  env: cloud.DYNAMIC_CURRENT_ENV
})
const db = cloud.database()
exports.main = async (event, context) => {
  return await db.collection('todos').where({
    _openid: 'xxx' // 填入当前用户 openid
  }).get()
}
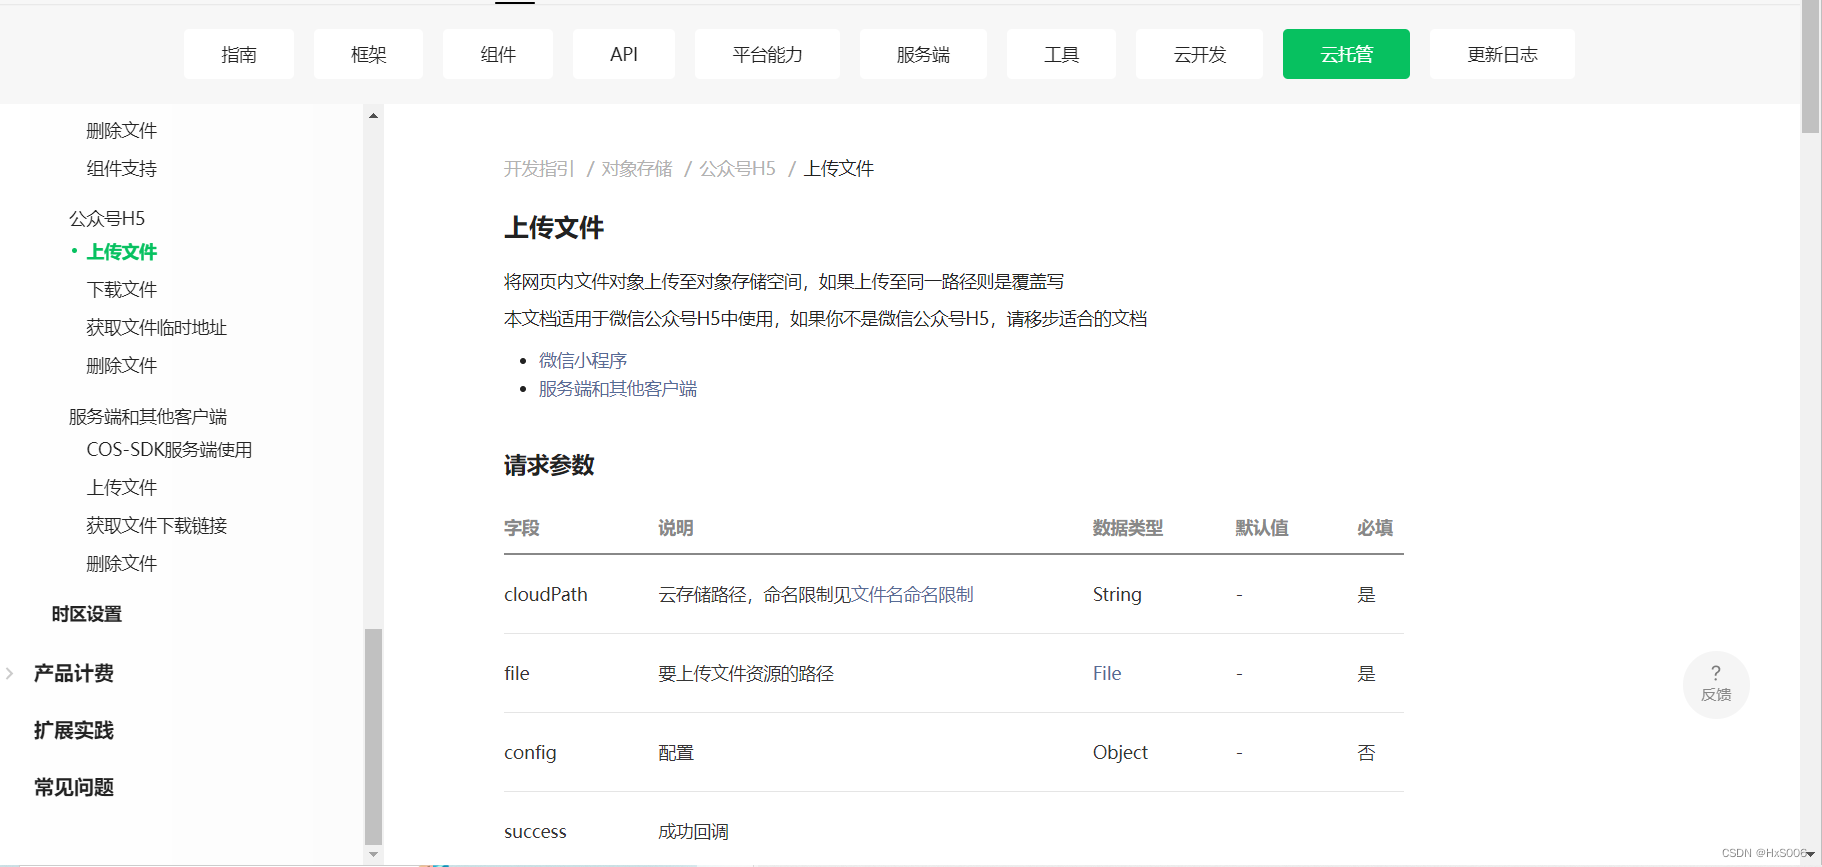
云上传
官方文档
1. Callback 风格
cloud.uploadFile({
  cloudPath: 'example.png', // 对象存储路径,根路径直接填文件名,文件夹例子 test/文件名,不要 / 开头
  file: new File(), // 通过 input 或者 new File 获取
  config: {
    env: 'werun-id' // 需要替换成自己的微信云托管环境ID
  }
  success: res => {
    console.log(res.fileID)
  },
  fail: err => {
    console.error(err)
  }
})
2. Promise 风格
cloud.uploadFile({
  cloudPath: 'example.png', // 对象存储路径,根路径直接填文件名,文件夹例子 test/文件名,不要 / 开头
  file: new File(), // 通过 input 或者 new File 获取
  config: {
    env: 'werun-id' // 需要替换成自己的微信云托管环境ID
  }
}).then(res => {
  console.log(res.fileID)
}).catch(error => {
  console.error(err)
})
3. 完整示例
<input id="myfile" type="file"/>
<script src="https://web-9gikcbug35bad3a8-1304825656.tcloudbaseapp.com/sdk/1.3.0/cloud.js"></script>
<script>
  window.onload = async function () {
    window.c1 = new cloud.Cloud({
      identityless: true, // 如果你是普通 WEB 网页开发,设置为true,如果是公众号开发,则去掉
      resourceAppid: "小程序或公众号appid", // 微信云托管所在的「小程序/公众号」appid
      resourceEnv: "微信云托管ID", // 微信云托管环境ID,不能为空
    });
    await window.c1.init();
  }
  const myFile = document.getElementById('myfile')
  myFile.addEventListener('change', async function() {
    if(myFile.value != null) {
      const file = myFile.files[0];
      const result = await c1.uploadFile({
        cloudPath:`web/${file.name}`,
        file
      })
      console.log(result)
    }
  })
</script>


 433
433


 被折叠的 条评论
为什么被折叠?
被折叠的 条评论
为什么被折叠?
 到【灌水乐园】发言


