


深度学习的训练过程常常非常耗时,一个模型训练几个小时是家常便饭,训练几天也是常有的事情,有时候甚至要训练几十天。
训练过程的耗时主要来自于两个部分,一部分来自数据准备,另一部分来自参数迭代。
当数据准备过程还是模型训练时间的主要瓶颈时,我们可以使用更多进程来准备数据。
当参数迭代过程成为训练时间的主要瓶颈时,我们通常的方法是应用GPU来进行加速。
import torch
import torchkeras
import torchmetrics
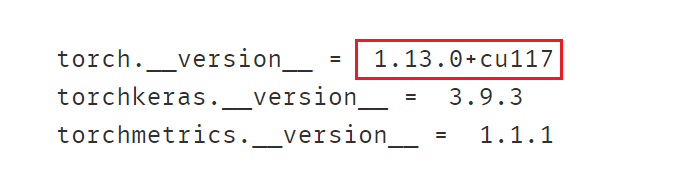
print("torch.__version__ = ",torch.__version__)
print("torchkeras.__version__ = ",torchkeras.__version__)
print("torchmetrics.__version__ = ",torchmetrics.__version__)
Pytorch中使用GPU加速模型非常简单,只要将模型和数据移动到GPU上。核心代码只有以下几行。
# 定义模型
...

device = torch.device("cuda:0" if torch.cuda.is_available() else "cpu") # 先定义device
model.to(device) # 移动模型到cuda

# 训练模型
...

features = features.to(device) # 移动数据到cuda
labels = labels.to(device) # 或者  labels = labels.cuda() if torch.cuda.is_available() else labels
如果要使用多个GPU训练模型,也非常简单。只需要在将模型设置为数据并行风格模型。 则模型移动到GPU上之后,会在每一个GPU上拷贝一个副本,并把数据平分到各个GPU上进行训练。核心代码如下:
# 定义模型
...

if torch.cuda.device_count() > 1:
    model = nn.DataParallel(model) # 包装为并行风格模型

# 训练模型
...
features = features.to(device) # 移动数据到cuda
labels = labels.to(device) # 或者 labels = labels.cuda() if torch.cuda.is_available() else labels
GPU相关操作汇总
查看GPU信息
import torch
from torch import nn
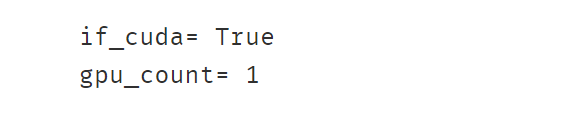
# 1,查看gpu信息
if_cuda = torch.cuda.is_available()
print("if_cuda=",if_cuda)
gpu_count = torch.cuda.device_count()
print("gpu_count=",gpu_count)
将张量在gpu和cpu间移动
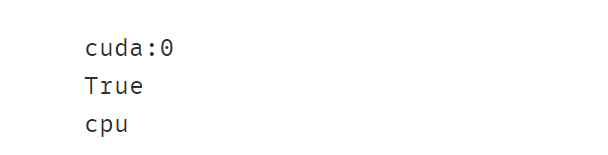
# 2,将张量在gpu和cpu间移动
tensor = torch.rand((100,100))
tensor_gpu = tensor.to("cuda:0") # 或者 tensor_gpu = tensor.cuda()
print(tensor_gpu.device)
print(tensor_gpu.is_cuda)

tensor_cpu = tensor_gpu.to("cpu") # 或者 tensor_cpu = tensor_gpu.cpu()
print(tensor_cpu.device)
将模型中的全部张量移动到gpu上
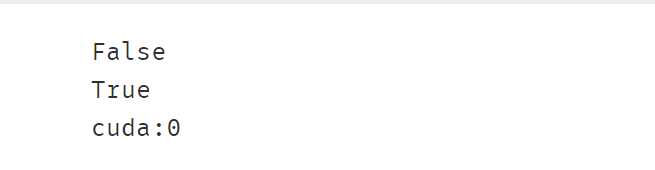
# 3,将模型中的全部张量移动到gpu上
net = nn.Linear(2,1)
print(next(net.parameters()).is_cuda)
net.to("cuda:0") # 将模型中的全部参数张量依次到GPU上,注意,无需重新赋值为 net = net.to("cuda:0")
print(next(net.parameters()).is_cuda)
print(next(net.parameters()).device)
创建支持多个gpu数据并行的模型
# 4,创建支持多个gpu数据并行的模型
linear = nn.Linear(2,1)
print(next(linear.parameters()).device)

model = nn.DataParallel(linear) # 并行
print(model.device_ids)
print(next(model.module.parameters()).device)

#注意保存参数时要指定保存model.module的参数
torch.save(model.module.state_dict(), "model_parameter.pt")

linear = nn.Linear(2,1)
linear.load_state_dict(torch.load("model_parameter.pt"))
一、矩阵乘法范例
下面分别使用CPU和GPU作一个矩阵乘法,并比较其计算效率。
# 使用cpu
a = torch.rand((10000,200))
b = torch.rand((200,10000))
tic = time.time()
c = torch.matmul(a,b)
toc = time.time()
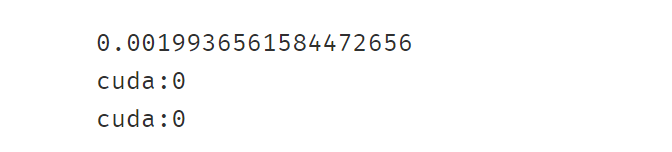
print(toc-tic)
print(a.device)
print(b.device)

# 使用gpu
device = torch.device("cuda:0" if torch.cuda.is_available() else "cpu")
a = torch.rand((10000,200),device = device) #可以指定在GPU上创建张量
b = torch.rand((200,10000)) #也可以在CPU上创建张量后移动到GPU上
b = b.to(device) #或者 b = b.cuda() if torch.cuda.is_available() else b
tic = time.time()
c = torch.matmul(a,b)
toc = time.time()
print(toc-tic)
print(a.device)
print(b.device)
二、线性回归范例
使用CPU
# 准备数据
n = 1000000 #样本数量

X = 10*torch.rand([n,2])-5.0  #torch.rand是均匀分布
w0 = torch.tensor([[2.0,-3.0]])
b0 = torch.tensor([[10.0]])
Y = X@w0.t() + b0 + torch.normal( 0.0,2.0,size = [n,1])  # @表示矩阵乘法,增加正态扰动
# 定义模型
class LinearRegression(nn.Module):
    def __init__(self):
        super().__init__()
        self.w = nn.Parameter(torch.randn_like(w0))
        self.b = nn.Parameter(torch.zeros_like(b0))
    #正向传播
    def forward(self,x):
        return x@self.w.t() + self.b

linear = LinearRegression()
# 训练模型
optimizer = torch.optim.Adam(linear.parameters(),lr = 0.1)
loss_fn = nn.MSELoss()
def train(epoches):
tic = time.time()
for epoch in range(epoches):
optimizer.zero_grad()
Y_pred = linear(X)
loss = loss_fn(Y_pred,Y)
loss.backward()
optimizer.step()
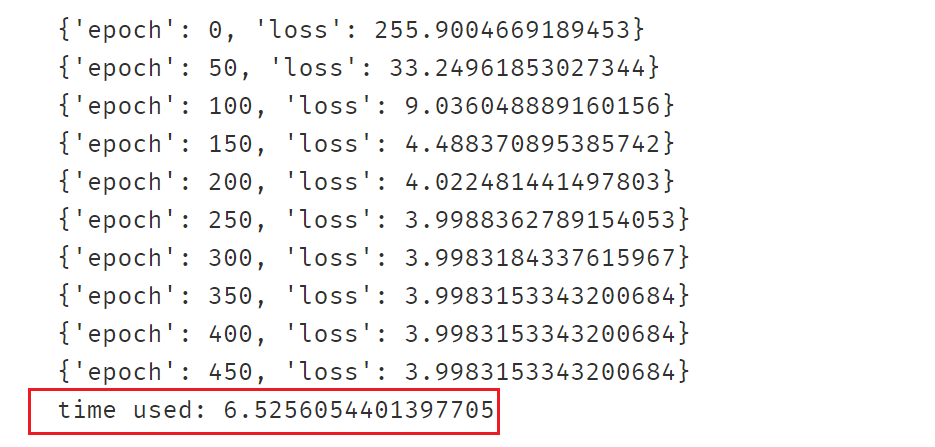
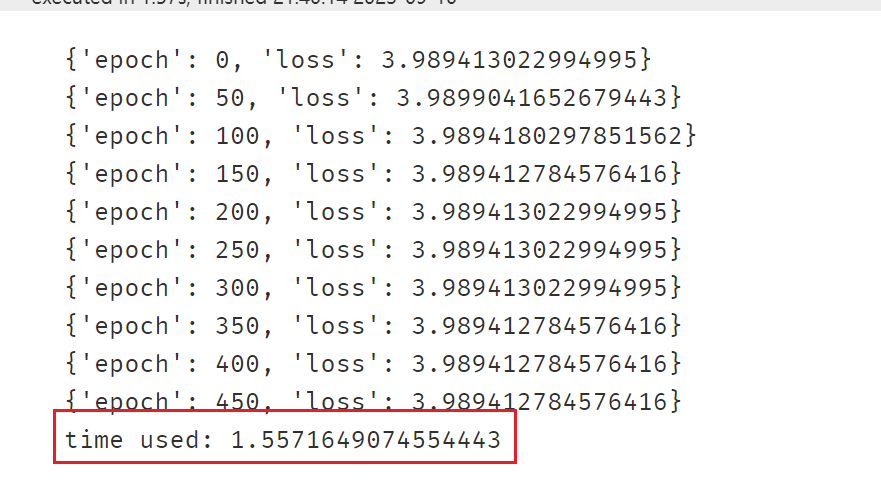
if epoch%50==0:
print({"epoch":epoch,"loss":loss.item()})
toc = time.time()
print("time used:",toc-tic)
train(500)
使用GPU
# 准备数据
n = 1000000 #样本数量
X = 10*torch.rand([n,2])-5.0 #torch.rand是均匀分布
w0 = torch.tensor([[2.0,-3.0]])
b0 = torch.tensor([[10.0]])
Y = X@w0.t() + b0 + torch.normal( 0.0,2.0,size = [n,1]) # @表示矩阵乘法,增加正态扰动
# 数据移动到GPU上
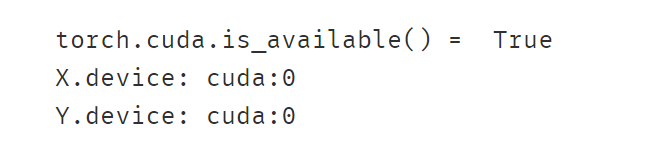
print("torch.cuda.is_available() = ",torch.cuda.is_available())
X = X.cuda()
Y = Y.cuda()
print("X.device:",X.device)
print("Y.device:",Y.device)
# 定义模型
class LinearRegression(nn.Module):
    def __init__(self):
        super().__init__()
        self.w = nn.Parameter(torch.randn_like(w0))
        self.b = nn.Parameter(torch.zeros_like(b0))
    #正向传播
    def forward(self,x):
        return x@self.w.t() + self.b

linear = LinearRegression()

# 移动模型到GPU上
device = torch.device("cuda:0" if torch.cuda.is_available() else "cpu")
linear.to(device)

#查看模型是否已经移动到GPU上 通过参数
print("if on cuda:",next(linear.parameters()).is_cuda)

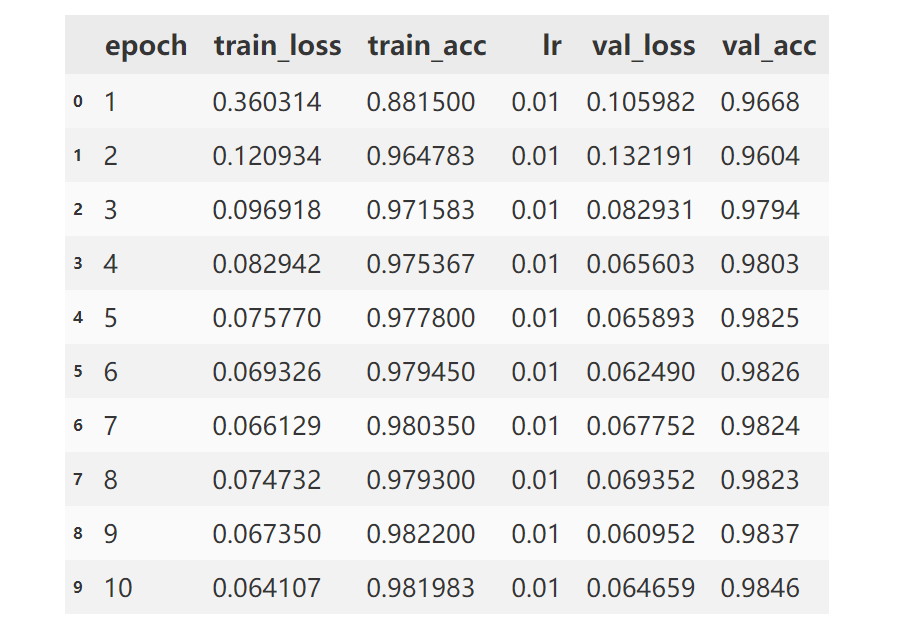
三、图片分类范例
注意需要使用GPU的地方:
loss_fn = nn.CrossEntropyLoss()
optimizer= torch.optim.Adam(net.parameters(),lr = 0.01)
metrics_dict = {"acc":Accuracy(task='multiclass',num_classes=10)}
# =========================移动模型到GPU上==============================
device = torch.device("cuda:0" if torch.cuda.is_available() else "cpu")
net.to(device)
loss_fn.to(device)
for name,fn in metrics_dict.items():
    fn.to(device)
# ====================================================================
features,labels = batch

# =========================移动数据到GPU上==============================
features = features.to(device)
labels = labels.to(device)
# ====================================================================
features,labels = batch

# =========================移动数据到GPU上==============================
features = features.to(device)
labels = labels.to(device)
# ====================================================================
四、torchkeras.KerasModel中使用GPU
从上面的例子可以看到,在pytorch中使用GPU并不复杂,但对于经常炼丹的同学来说,模型和数据老是移来移去还是蛮麻烦的。
一不小心就会忘了移动某些数据或者某些module,导致报错。
torchkeras.KerasModel 在设计的时候考虑到了这一点,如果环境当中存在可用的GPU,会自动使用GPU,反之则使用CPU。
通过引入accelerate的一些基础功能,torchkeras.KerasModel以非常优雅的方式在GPU和CPU之间切换。
详细实现可以参考torchkeras.KerasModel的源码。
import  accelerate
accelerator = accelerate.Accelerator()
print(accelerator.device)


 2万+
2万+


 被折叠的 条评论
为什么被折叠?
被折叠的 条评论
为什么被折叠?
 到【灌水乐园】发言


