


Android ViewPager引导页
ViewPager实现引导页
//讲解ViewPager的实现,实现左右滑动的效果,掌握ViewPager的使用
//创建GuideActivity引导类
//GuideActivity.java
    public class GuideActivity extends Activity {
        private ViewPager viewPager;
        private ViewPagerAdapter viewPagerAdapter;
        private List<View> views;

        @Override
        protected void onCreate(Bundle savedInstanceState) {
            super.onCreate(savedInstanceState);
            setContentView(R.layout.guide);
            initViews();
        }

        private void initViews() {
            LayoutInflater layoutInflater = LayoutInflater.from(this);
            views = new ArrayList<View>();
            views.add(layoutInflater.inflate(R.layout.one, null));
            views.add(layoutInflater.inflate(R.layout.two, null));
            views.add(layoutInflater.inflate(R.layout.three, null));

            viewPagerAdapter = new ViewPagerAdapter(this,views);
            viewPager = (ViewPager) this.findViewById(R.id.viewpager);
            viewPager.setAdapter(viewPagerAdapter);
        }
    }
//创建ViewPagerAdapter扩展自PagerAdapter
    public class ViewPagerAdapter extends PagerAdapter{

        private Context context;
        private List<View> views;

        public ViewPagerAdapter(Context context, List<View> views){
            this.context = context;
            this.views = views;
        }

        @Override
        public void destroyItem(ViewGroup container, int position, Object object) {
            container.removeView(views.get(position));
        }

        @Override
        public Object instantiateItem(ViewGroup container, int position) {
            container.addView(views.get(position));
            return views.get(position);
        }

        @Override
        public int getCount() {
            return views.size();
        }

        @Override
        public boolean isViewFromObject(View view, Object object) {
            return (view == object);
        }

    }
//创建guide.xml
<?xml version="1.0" encoding="utf-8"?>
    <?xml version="1.0" encoding="utf-8"?>
    <RelativeLayout xmlns:android="http://schemas.android.com/apk/res/android"
        android:layout_width="match_parent"
        android:layout_height="match_parent"
        android:orientation="vertical">


        <android.support.v4.view.ViewPager
            android:id="@+id/viewpager"
            android:layout_width="match_parent"
            android:layout_height="match_parent"
            android:background="#00000000"></android.support.v4.view.ViewPager>

        <LinearLayout
            android:id="@+id/ll"
            android:layout_width="match_parent"
            android:layout_height="wrap_content"
            android:gravity="center_horizontal"
            android:orientation="horizontal"
            android:layout_alignParentBottom="true"
            android:layout_alignParentLeft="true"
            android:layout_alignParentStart="true">

        </LinearLayout>
    </RelativeLayout>
//创建3个引导页View
//one.xml
<?xml version="1.0" encoding="utf-8"?>
    <LinearLayout xmlns:android="http://schemas.android.com/apk/res/android"
        android:orientation="vertical" android:layout_width="match_parent"
        android:layout_height="match_parent">

        <ImageView
            android:layout_width="match_parent"
            android:layout_height="match_parent"
            android:background="@drawable/guide_1"/>

    </LinearLayout>
//two.xml
<?xml version="1.0" encoding="utf-8"?>
    <LinearLayout xmlns:android="http://schemas.android.com/apk/res/android"
        android:orientation="vertical" android:layout_width="match_parent"
        android:layout_height="match_parent">

        <ImageView
            android:layout_width="match_parent"
            android:layout_height="match_parent"
            android:background="@drawable/guide_2"/>

    </LinearLayout>
//three.xml
<?xml version="1.0" encoding="utf-8"?>
    <LinearLayout xmlns:android="http://schemas.android.com/apk/res/android"
        android:orientation="vertical" android:layout_width="match_parent"
        android:layout_height="match_parent">

        <ImageView
            android:layout_width="match_parent"
            android:layout_height="match_parent"
            android:background="@drawable/guide_3"/>

    </LinearLayout>
//修改AndroidManifest.xml
<application
        android:allowBackup="true"
        android:icon="@mipmap/ic_launcher"
        android:label="@string/app_name"
        android:supportsRtl="true"
        android:theme="@style/AppTheme" >
        <activity android:name=".MainActivity" >
            <!--<intent-filter>-->
                <!--<action android:name="android.intent.action.MAIN" />-->

                <!--<category android:name="android.intent.category.LAUNCHER" />-->
            <!--</intent-filter>-->
        </activity>
        <activity android:name=".GuideActivity">
            <intent-filter>
                <action android:name="android.intent.action.MAIN" />

                <category android:name="android.intent.category.LAUNCHER" />
            </intent-filter>
        </activity>
    </application>
添加导航点
//讲解在ViewPager上添加页面滑动的导航点,用以表示当前ViewPager的索引。掌握如何使用点来标识ViewPager当前在哪一页中。
//修改guide.xml
<?xml version="1.0" encoding="utf-8"?>
    <RelativeLayout xmlns:android="http://schemas.android.com/apk/res/android"
        android:layout_width="match_parent"
        android:layout_height="match_parent"
        android:orientation="vertical">


        <android.support.v4.view.ViewPager
            android:id="@+id/viewpager"
            android:layout_width="match_parent"
            android:layout_height="match_parent"
            android:background="#00000000"></android.support.v4.view.ViewPager>

        <LinearLayout
            android:id="@+id/ll"
            android:layout_width="match_parent"
            android:layout_height="wrap_content"
            android:gravity="center_horizontal"
            android:orientation="horizontal"
            android:layout_alignParentBottom="true"
            android:layout_alignParentLeft="true"
            android:layout_alignParentStart="true">

            <ImageView
                android:id="@+id/iv1"
                android:layout_width="wrap_content"
                android:layout_height="wrap_content"
                android:src="@drawable/login_point_selected" />

            <ImageView
                android:id="@+id/iv2"
                android:layout_width="wrap_content"
                android:layout_height="wrap_content"
                android:src="@drawable/login_point" />

            <ImageView
                android:id="@+id/iv3"
                android:layout_width="wrap_content"
                android:layout_height="wrap_content"
                android:src="@drawable/login_point" />
        </LinearLayout>
    </RelativeLayout>
//修改GuideActivity.java
//初始化导航点
    private ImageView[] imageViews;
    private int[] ids = {R.id.iv1, R.id.iv2, R.id.iv3};

    @Override
    protected void onCreate(Bundle savedInstanceState) {
        super.onCreate(savedInstanceState);
        setContentView(R.layout.guide);
        initViews();
        initDots();
    }

    private void initDots(){
        imageViews = new ImageView[views.size()];
        for (int i = 0; i < views.size(); i++){
            imageViews[i] = (ImageView) findViewById(ids[i]);
        }
    }
//实现导航点监听方法
public class GuideActivity extends Activity implements ViewPager.OnPageChangeListener

    //实现OnPageChangeListener方法
    /**
     * 当页面被滑动的时候进行调用
     * @param position
     * @param positionOffset
     * @param positionOffsetPixels
     */
    @Override
    public void onPageScrolled(int position, float positionOffset, int positionOffsetPixels) {

    }

    /**
     * 当前新的页面被选中的时候调用
     * @param position
     */
    @Override
    public void onPageSelected(int position) {
        for (int i=0;i<ids.length;i++){
            if (position == i){
                imageViews[i].setImageResource(R.drawable.login_point_selected);
            }else {
                imageViews[i].setImageResource(R.drawable.login_point);
            }
        }
    }

    /**
     * 当滑动状态改变的时候进行调用
     * @param state
     */
    @Override
    public void onPageScrollStateChanged(int state) {

    }
添加进入主界面按钮
//讲解了在ViewPager的最后一个页面添加上Button按钮用以提示用户进入程序,掌握如何在最后一个页面添加上Button。

//修改three.xml
<?xml version="1.0" encoding="utf-8"?>
<RelativeLayout xmlns:android="http://schemas.android.com/apk/res/android"
android:layout_width="match_parent"
android:layout_height="match_parent"
android:orientation="vertical">
<ImageView
android:layout_width="match_parent"
android:layout_height="match_parent"
android:background="@drawable/guide_3" />
<LinearLayout
android:layout_width="match_parent"
android:layout_height="wrap_content"
android:layout_alignParentBottom="true"
android:gravity="center_horizontal"
android:orientation="horizontal">
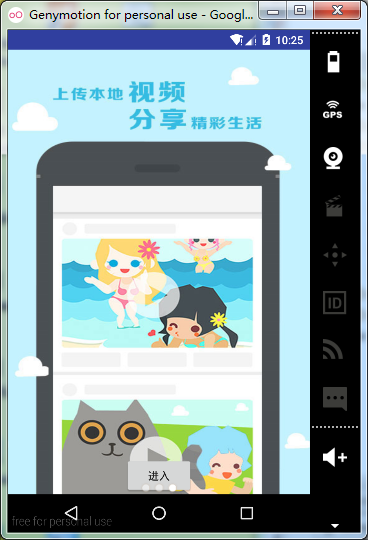
<Button
android:id="@+id/start_btn"
android:layout_width="wrap_content"
android:layout_height="wrap_content"
android:text="进入" />
</LinearLayout>
</RelativeLayout>//修改GuideActivity.java
private Button startBtn;

    private void initViews() {
        LayoutInflater layoutInflater = LayoutInflater.from(this);
        views = new ArrayList<View>();
        views.add(layoutInflater.inflate(R.layout.one, null));
        views.add(layoutInflater.inflate(R.layout.two, null));
        views.add(layoutInflater.inflate(R.layout.three, null));

        viewPagerAdapter = new ViewPagerAdapter(this, views);
        viewPager = (ViewPager) this.findViewById(R.id.viewpager);
        viewPager.setAdapter(viewPagerAdapter);
        viewPager.setOnPageChangeListener(this);

        startBtn = (Button) views.get(2).findViewById(R.id.start_btn);
        startBtn.setOnClickListener(new View.OnClickListener() {
            @Override
            public void onClick(View v) {
                Intent intent = new Intent(GuideActivity.this, MainActivity.class);
                startActivity(intent);
                finish();
            }
        });
    }
添加数据储存
//讲解了如何在首次打开程序进入引导页,之后进入主程序。掌握数据存储的使用,通过使用数据储存实现效果。
//新建Activity界面
//WelcomeActivity.java extendsActivity
public class WelcomeActivity extends AppCompatActivity {

        private boolean isFirstIn = true;
        private static final int DELAYED_TIME = 2000;
        private static final int GO_HOME = 1000;
        private static final int GO_GUIDE = 1001;

        private Handler handler = new Handler(){
            @Override
            public void handleMessage(Message msg) {
                switch (msg.what){
                    case GO_HOME:
                        goHome();
                        break;
                    case GO_GUIDE:
                        goGuide();
                        break;
                    default:
                        break;
                }
            }
        };

        @Override
        protected void onCreate(Bundle savedInstanceState) {
            super.onCreate(savedInstanceState);
            setContentView(R.layout.activity_welcome);
            init();
        }

        private void init(){
            SharedPreferences sharedPreferences = getSharedPreferences("jike", MODE_PRIVATE);
            isFirstIn = sharedPreferences.getBoolean("isFirstIn", true);
            if (isFirstIn){
                handler.sendEmptyMessageDelayed(GO_GUIDE, DELAYED_TIME);
                SharedPreferences.Editor editor = sharedPreferences.edit();
                editor.putBoolean("isFirstIn", false);
                editor.commit();
            }else {
                handler.sendEmptyMessageDelayed(GO_HOME,DELAYED_TIME);
            }

        }

        private void goHome(){
            Intent intent = new Intent(WelcomeActivity.this, MainActivity.class);
            startActivity(intent);
            finish();
        }
        private void goGuide(){
            Intent intent = new Intent(WelcomeActivity.this, GuideActivity.class);
            startActivity(intent);
            finish();
        }

    }
//activity_welcome.xml
    <?xml version="1.0" encoding="utf-8"?>
    <LinearLayout xmlns:android="http://schemas.android.com/apk/res/android"
        xmlns:tools="http://schemas.android.com/tools"
        android:layout_width="match_parent"
        android:layout_height="match_parent"
        android:orientation="vertical">

        <ImageView
            android:layout_width="match_parent"
            android:layout_height="match_parent"
            android:background="@drawable/welcome_android" />

    </LinearLayout>
//AndroidManifest.xml
<activity android:name=".WelcomeActivity">
<intent-filter>
<action android:name="android.intent.action.MAIN" />
<category android:name="android.intent.category.LAUNCHER" />
</intent-filter>
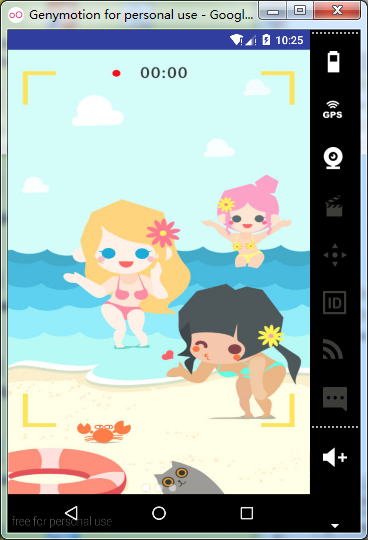
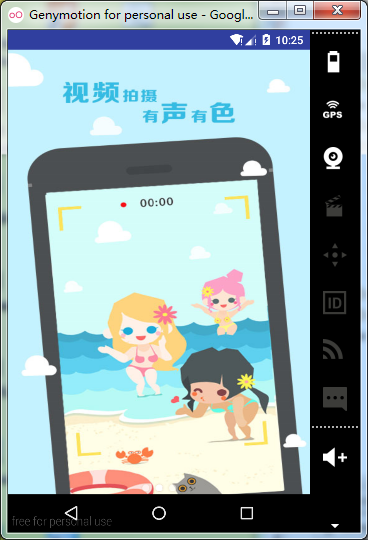
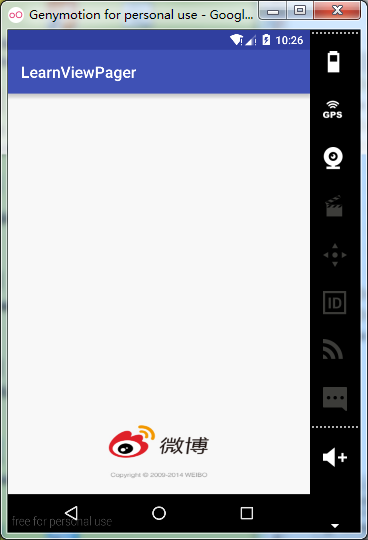
</activity>效果截图


 1046
1046

 被折叠的 条评论
为什么被折叠?
被折叠的 条评论
为什么被折叠?
 到【灌水乐园】发言


