


JavaWeb 学习笔记 1:MyBatis
以往都是在 Spring Boot 中整合 MyBatis 进行使用,本篇文章将展示如何在一个新的 Maven 项目中使用 MyBatis。
MyBatis 官方的入门教程可以作为本文的参考。
1.快速入门
1.1.导入表数据
执行包含测试数据的SQL文件,导入测试数据到 MySQL。
1.2.创建项目
用 Idea 创建一个 Maven 项目。
添加 MyBatis 和 MySQL 驱动依赖:
<!-- MyBatis -->
<dependency>
    <groupId>org.mybatis</groupId>
    <artifactId>mybatis</artifactId>
    <version>3.5.5</version>
</dependency>
<!-- mysql 驱动 -->
<dependency>
    <groupId>com.mysql</groupId>
    <artifactId>mysql-connector-j</artifactId>
    <version>8.0.33</version>
</dependency>
对于操作数据库来说,这样已经足够了。但为了能够进行单元测试,还需要添加 Junit 依赖:
<!-- Junit -->
<dependency>
    <groupId>junit</groupId>
    <artifactId>junit</artifactId>
    <version>4.13</version>
    <scope>test</scope>
</dependency>
为了能在控制台输出友好的日志信息,还需要添加 Logback 日志模块:
<!-- 添加slf4j日志api -->
<dependency>
    <groupId>org.slf4j</groupId>
    <artifactId>slf4j-api</artifactId>
    <version>1.7.20</version>
</dependency>
<!-- 添加logback-classic依赖 -->
<dependency>
    <groupId>ch.qos.logback</groupId>
    <artifactId>logback-classic</artifactId>
    <version>1.2.3</version>
</dependency>
<!-- 添加logback-core依赖 -->
<dependency>
    <groupId>ch.qos.logback</groupId>
    <artifactId>logback-core</artifactId>
    <version>1.2.3</version>
</dependency>
添加一个 Lombok 依赖:
<!-- lombok -->
<dependency>
    <groupId>org.projectlombok</groupId>
    <artifactId>lombok</artifactId>
    <version>1.18.26</version>
</dependency>
编写一个 Logback 配置文件 logback.xml 放在 Resource 目录下。
可能需要修改 logger 标签的 name 属性中的包名。
在代码目录 java 下创建合适的包名(我这里用的cn.icexmoon.mybatisdemo),并添加入口类:
public class Application {
    public static void main(String[] args) {

    }
}
1.3.核心配置文件
要使用 MyBatis 连接数据库,需要提供一个“核心配置文件”。
在 Resource 目录下配置文件 mybatis-config.xml:
<?xml version="1.0" encoding="UTF-8" ?>
<!DOCTYPE configuration
        PUBLIC "-//mybatis.org//DTD Config 3.0//EN"
        "https://mybatis.org/dtd/mybatis-3-config.dtd">
<configuration>
    <environments default="development">
        <environment id="development">
            <transactionManager type="JDBC"/>
            <dataSource type="POOLED">
                <property name="driver" value="com.mysql.cj.jdbc.Driver"/>
                <property name="url" value="jdbc:mysql:///mybatis?useSSL=false"/>
                <property name="username" value="root"/>
                <property name="password" value="mysql"/>
            </dataSource>
        </environment>
    </environments>
    <mappers>
        <mapper resource="UserMapper.xml"/>
    </mappers>
</configuration>
这个配置文件中包含了数据库连接信息(dataSource 标签)以及数据映射文件(mappers 标签)。
在 Resource 目录下添加数据映射文件 UserMapper.xml:
<?xml version="1.0" encoding="UTF-8" ?>
<!DOCTYPE mapper
        PUBLIC "-//mybatis.org//DTD Mapper 3.0//EN"
        "https://mybatis.org/dtd/mybatis-3-mapper.dtd">
<mapper namespace="cn.icexmoon.mybatisdemo.test">
    <select id="selectAll" resultType="cn.icexmoon.mybatisdemo.entity.User">
        select * from tb_user
    </select>
</mapper>
- 和以往写法不同的是,这里 mapper 标签的命名空间(namesapce)并非对应的 Mapper 接口的完整包路径,而是一个随便自定义的包名。这是因为 Mapper 代理的功能这里还用不到。
- 详细的 Mapper 文件语法说明可以查看这篇文章。
1.4.查询数据库
现在可以用 Java 代码的方式完成数据库查询:
public class Application {
    @SneakyThrows
    public static void main(String[] args) {
        //获取 SqlSessionFactory 对象
        String resource = "mybatis-config.xml";
        InputStream inputStream = Resources.getResourceAsStream(resource);
        SqlSessionFactory sqlSessionFactory = new SqlSessionFactoryBuilder().build(inputStream);
        //获取 SqlSession 对象
        SqlSession sqlSession = sqlSessionFactory.openSession();
        //执行SQL查询
        List<User> users = sqlSession.selectList("cn.icexmoon.mybatisdemo.test.selectAll");
        System.out.println(users);
        //释放资源
        sqlSession.close();
    }
}
核心类是SqlSession,它有一系列方法用于执行SQL查询,我们需要在对应的方法中指定索要执行的SQL语句,即 XML 配置中定义的 SQL 语句节点(如 select)的 id(包含所属 mapper 的命名空间)。
如果出现连接数据库错误,可以检查 jdbc 驱动的版本是否与 MySQL 的版本兼容。
2.Mapper 代理
在企业开发中,更常见的是使用 Mapper 代理执行 SQL,而非直接用 SqlSession。
2.1.定义 Mapper 接口
要使用 Mapper 代理,需要先定义一个和数据映射配置文件(比如 UserMapper.xml)同名的 Java 接口:
package cn.icexmoon.mybatisdemo.mapper;
public interface UserMapper {
}
这个接口中的方法与数据映射配置中的 SQL 语句定义(如 select 节点)是一一对应关系:
- 方法名对应 SQL 语句定义的 id。
- 方法返回值对应 SQL 语句定义的(实际)返回类型。
- 方法参数对应 SQL 语句定义的参数。
在这个示例中:
public interface UserMapper {
    public List<User> selectAll();
}
2.2.修改命名空间
相应的,数据映射配置中 mapper 的命名空间要与 Mapper 接口的完整包名一致:
<mapper namespace="cn.icexmoon.mybatisdemo.mapper.UserMapper">
    <select id="selectAll" resultType="cn.icexmoon.mybatisdemo.entity.User">
        select * from tb_user;
    </select>
</mapper>
2.3.修改配置存放路径
为了能让 MyBatis 根据 Mapper 接口的位置找到对应的数据映射配置,需要将 Mapper 接口和数据映射配置放在同一个目录下。
最简单的方式是将数据映射配置文件从 Resource 目录移动到代码目录中 Mapper 接口所在的包下。
但这样是不合适的,最好不要将静态资源放在工程中的代码目录下。
其实我们只要让编译后的 Mapper 接口的 class 文件与数据映射文件在同一个目录下即可。
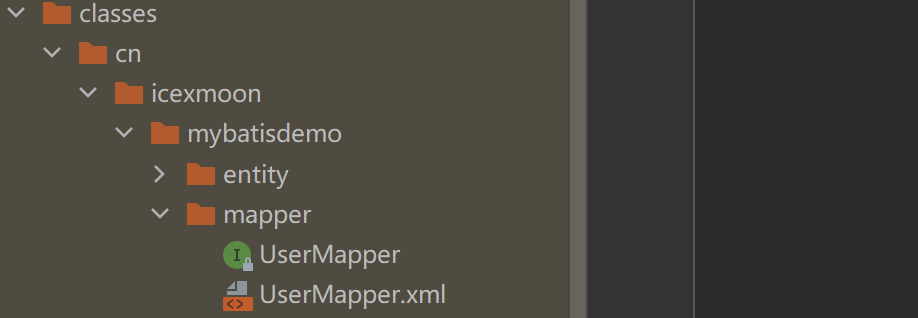
实际上编译后的 Resource 目录下的文件是放在根目录下的,class 文件放在所属的包下:

换言之,我们只要在 Resource 目录下构建和代码目录下相同的包结构,并将数据映射配置文件放入,就会在编译后让两者处于同一个目录。

注意,用 Idea 在 Resource 目录下添加 directory 的时候,应当输入
cn/icexmoon.mybatisdemo/mapper这样的路径以创建多层目录。如果使用包创建的形式cn.icexmoon....,实际上创建的是一个目录,而不是多层的目录结构。
现在用 Maven 进行编译:
相应的,核心配置文件中的 mapper 资源位置也要修改:
<mappers>
    <mapper resource="cn/icexmoon/mybatisdemo/mapper/UserMapper.xml"/>
</mappers>
2.4.使用 Mapper 代理
现在可以通过 SqlSession 获取 Mapper 代理,并用 Mapper 代理执行 SQL:
//获取 Mapper 代理对象
UserMapper userMapper = sqlSession.getMapper(UserMapper.class);
//使用 Mapper 代理对象执行 SQL
List<User> users = userMapper.selectAll();
System.out.println(users);
2.5.自动扫描数据映射配置
在 MyBatis 的核心配置中一个个声明数据映射配置的路径很麻烦:
<mappers>
    <mapper resource="cn/icexmoon/mybatisdemo/mapper/UserMapper.xml"/>
</mappers>
如果我们是通过 Mapper 代理的方式使用 MyBatis,就可以配置一个自动扫描:
<mappers>
    <package name="cn.icexmoon.mybatisdemo.mapper"/>
</mappers>
现在 MyBatis 会自动查找cn.icexmoon.mybatisdemo.mapper包下的 Mapper 接口,并加载同一目录下的命名相同的数据映射配置。
3.核心配置文件
MyBatis 官方文档对核心配置文件有详细的说明,这里对部分内容进行介绍。
3.1.环境配置
environments 标签用于定义数据源,可以定义多个数据源,比如增加一个测试用的数据源:
<environments default="development">
    <environment id="development">
        <transactionManager type="JDBC"/>
        <dataSource type="POOLED">
            <property name="driver" value="com.mysql.cj.jdbc.Driver"/>
            <property name="url" value="jdbc:mysql:///mybatis?useSSL=false"/>
            <property name="username" value="root"/>
            <property name="password" value="mysql"/>
        </dataSource>
    </environment>
    <environment id="test">
        <transactionManager type="JDBC"/>
        <dataSource type="POOLED">
            <property name="driver" value="com.mysql.cj.jdbc.Driver"/>
            <property name="url" value="jdbc:mysql:///mybatis?useSSL=false"/>
            <property name="username" value="root"/>
            <property name="password" value="mysql"/>
        </dataSource>
    </environment>
</environments>
environments 的 default 属性决定了默认使用的数据源。
3.2.类型别名
在数据映射配置中,对返回值类型我们要使用完整类名:
<select id="selectAll" resultType="cn.icexmoon.mybatisdemo.entity.User">
    select * from tb_user;
</select>
可以在核心配置中使用类型别名(Type Aliases)进行简化:
<configuration>
    <typeAliases>
        <typeAlias alias="User" type="cn.icexmoon.mybatisdemo.entity.User"/>
    </typeAliases>
    <!-- ... -->
</configuration>
现在数据映射配置中可以使用定义好的类型别名:
<select id="selectAll" resultType="User">
    select * from tb_user;
</select>
别名是不区分大小写的,因此下面的写法同样可以:
<select id="selectAll" resultType="user">
    select * from tb_user;
</select>
更常见的做法是添加包扫描,让 MyBatis 扫描指定包下的类型,并自动生成类型别名:
<typeAliases>
    <package name="cn.icexmoon.mybatisdemo.entity"/>
</typeAliases>
需要注意的是,MyBatis 核心配置中的标签顺序是固定的,要严格按照下面的顺序:
- configuration(配置)
- properties(属性)
- settings(设置)
- typeAliases(类型别名)
- typeHandlers(类型处理器)
- objectFactory(对象工厂)
- plugins(插件)
- environments(环境配置)
- environment(环境变量)
- transactionManager(事务管理器)
- dataSource(数据源)
- environment(环境变量)
- databaseIdProvider(数据库厂商标识)
- mappers(映射器)
也就是说 typeAliases 标签必须定义在 environments 标签之前,如果不是,就会报错。
这是由对应的 XML 格式说明文件 XSD 决定的。
4.案例:对品牌完成增删改查
4.1.环境准备
执行 SQL 导入品牌数据。
添加实体类:
@Data
public class Brand {
    // id 主键
    private Integer id;
    // 品牌名称
    private String brandName;
    // 企业名称
    private String companyName;
    // 排序字段
    private Integer ordered;
    // 描述信息
    private String description;
    // 状态:0:禁用  1:启用
    private Integer status;
}
为了方便开发,可以在 Idea 中安装一个插件 MyBastisX。
关于该插件功能介绍可以看这个视频。
4.2.查询所有品牌
添加 Mapper 接口:
public interface BrandMapper {
    List<Brand> selectAll();
}
添加对应的配置:
<mapper namespace="cn.icexmoon.mybatisdemo.mapper.BrandMapper">
    <select id="selectAll" resultType="cn.icexmoon.mybatisdemo.entity.Brand">
        select * from tb_brand;
    </select>
</mapper>
添加测试用例:
public class MyBatisTest {
    private SqlSession sqlSession;
    @Before
    @SneakyThrows
    public void before(){
        //获取 SqlSessionFactory 对象
        String resource = "mybatis-config.xml";
        InputStream inputStream = Resources.getResourceAsStream(resource);
        SqlSessionFactory sqlSessionFactory = new SqlSessionFactoryBuilder().build(inputStream);
        //获取 SqlSession 对象
        sqlSession = sqlSessionFactory.openSession();
    }

    @After
    public void after(){
        //释放资源
        sqlSession.close();
    }

    @Test
    @SneakyThrows
    public void testSelectAll(){
        //获取 Mapper 代理对象
        BrandMapper brandMapper = sqlSession.getMapper(BrandMapper.class);
        //使用 Mapper 代理对象执行 SQL
        List<Brand> brands = brandMapper.selectAll();
        System.out.println(brands);
    }
}
执行测试用例可以看到输出中的 Brand 对象有两个属性为 null,这是因为相应的字段在数据库中使用下划线风格,Java 中使用驼峰风格,无法一一对应。
可以修改 SQL 语句,使用字段别名进行查询:
<select id="selectAll" resultType="cn.icexmoon.mybatisdemo.entity.Brand">
    select id,brand_name as brandName,company_name as companyName,ordered,description,status from tb_brand;
</select>
这样做的问题在于太过繁琐,每次都要写完整的列名。
可以使用代码片段对列名部分进行复用:
<mapper namespace="cn.icexmoon.mybatisdemo.mapper.BrandMapper">
    <sql id="brand_columns">id,brand_name as brandName,company_name as companyName,ordered,description,status</sql>
    <select id="selectAll" resultType="cn.icexmoon.mybatisdemo.entity.Brand">
        select <include refid="brand_columns"/> from tb_brand;
    </select>
</mapper>
更常见的方式是使用 resultMap:
<mapper namespace="cn.icexmoon.mybatisdemo.mapper.BrandMapper">
    <select id="selectAll" resultMap="brandResultMap">
        select * from tb_brand;
    </select>
    <resultMap id="brandResultMap" type="brand">
        <result property="brandName" column="brand_name"/>
        <result property="companyName" column="company_name"/>
    </resultMap>
</mapper>
4.3.查询品牌详情
Mapper 接口:
public interface BrandMapper {
	// ...
    Brand selectOneById(int id);
}
配置文件:
<select id="selectOneById" resultMap="brandResultMap">
    select * from tb_brand where id=#{id}
</select>
测试用例:
@Test
public void testSelectOneById(){
    BrandMapper brandMapper = sqlSession.getMapper(BrandMapper.class);
    Brand brand = brandMapper.selectOneById(1);
    System.out.println(brand);
}
MyBatis 有两种参数占位符:${}和#{},前者会产生 SQL 注入的问题。具体说明可以见这篇文章。
因为数据映射配置是一个 XML 文件,所以不能使用 XML 的保留字符,但是可以使用相应的转义字符:
<select id="selectAll" resultMap="brandResultMap">
select * from tb_brand where id > 0;
</select>
这里的id > 0就是id > 0。
也可以使用 CDATA 标签:
<select id="selectAll" resultMap="brandResultMap">
    select * from tb_brand where id <![CDATA[
            >
        ]]> 0;
</select>
4.4.多条件查询
4.4.1.传入多个参数
接口:
public interface BrandMapper {
	// ...
    List<Brand> selectByConditions(@Param("status") Integer status,
                                   @Param("companyName") String companyName,
                                   @Param("brandName") String brandName);
}
配置:
<select id="selectByConditions" resultMap="brandResultMap">
    select * from tb_brand
    where 1=1
    <if test="status!=null">
        and status=#{status}
    </if>
    <if test="companyName!=null and companyName!=''">
        and company_name like CONCAT('%',#{companyName},'%')
    </if>
    <if test="brandName!=null and brandName!=''">
        and brand_name like CONCAT('%',#{brandName},'%')
    </if>
</select>
测试用例:
@Test
public void testSelectByConditions() {
    BrandMapper brandMapper = sqlSession.getMapper(BrandMapper.class);
    List<Brand> brands = brandMapper.selectByConditions(1, "小米", "小米");
    System.out.println(brands);
}
4.4.2.传入一个对象
除了上面那种传入“散装”参数的方式,还可以给接口传入一个对象作为参数:
List<Brand> selectByConditions(Brand brand);
此时配置文件中的参数占位符对应的是传入参数 brand 的属性,在这里并不需要修改。
测试用例:
Brand brand = new Brand();
brand.setStatus(1);
brand.setBrandName("小米");
brand.setCompanyName("小米");
List<Brand> brands = brandMapper.selectByConditions(brand);
4.4.3.传入一个 Map
接口:
List<Brand> selectByConditions(Map<String, Object> brand);
此时配置中的参数占位符中的名称要与 Map 的 Key 的值对应,在这里也不做修改。
测试用例:
Map<String, Object> brand = new HashMap<>();
brand.put("status", 1);
brand.put("brandName", "小米");
brand.put("companyName", "小米");
List<Brand> brands = brandMapper.selectByConditions(brand);
4.5.单条件查询
可以让用户选择一种条件进行查询,比如从公司名称、状态、品牌名之间选择一种进行查询。
接口:
List<Brand> selectByOneCondition(Brand brand);
配置:
<select id="selectByOneCondition" resultMap="brandResultMap">
    select * from tb_brand
    where
    <choose>
        <when test="status!=null">
            status=#{status}
        </when>
        <when test="companyName!=null and companyName!=''">
            company_name like CONCAT('%',#{companyName},'%')
        </when>
        <when test="brandName!=null and brandName!=''">
            brand_name like CONCAT('%',#{brandName},'%')
        </when>
        <otherwise>
            1=1
        </otherwise>
    </choose>
</select>
测试用例:
@Test
public void testSelectByOneCondition(){
    BrandMapper brandMapper = sqlSession.getMapper(BrandMapper.class);
    Brand brand = new Brand();
    brand.setBrandName("小米");
    List<Brand> brands = brandMapper.selectByOneCondition(brand);
    System.out.println(brands);
}
4.6.添加
接口:
void save(Brand brand);
配置:
<insert id="save">
    INSERT INTO `tb_brand`
    (`brand_name`, `company_name`, `ordered`, `description`, `status`)
    VALUES (#{brandName}, #{companyName}, #{ordered}, #{description}, #{status});
</insert>
测试用例:
@Test
public void testSave(){
    BrandMapper brandMapper = sqlSession.getMapper(BrandMapper.class);
    Brand brand = new Brand();
    brand.setCompanyName("苹果");
    brand.setBrandName("apple");
    brand.setStatus(1);
    brand.setDescription("one more thing.");
    brand.setOrdered(1);
    brandMapper.save(brand);
}
4.6.1事务
上面的示例实际上是有问题的,执行后并不会在数据库真正插入数据,因为 MyBatis 默认的数据库连接是开启了事务的,没有手动提交的事务会被回滚。这点可以从日志看到:
Setting autocommit to false on JDBC Connection ... # 这里说明开启的 JDBC 连接为不启用自动提交
... # 这里是 insert SQL
Rolling back JDBC Connection ... # 这里说明连接被回滚(因为没有手动提交事务)
解决的方法有两种,一种是手动提交事务:
brandMapper.save(brand);
sqlSession.commit();
另一种是在创建 SqlSession 对象时指定使用自动提交(关闭事务):
sqlSession = sqlSessionFactory.openSession(true);
// ...
brandMapper.save(brand);
4.6.2获取 id
通常我们都需要知道刚添加进去的数据行对应的主键id,尤其是主键由数据库表自增产生的情况。
如果使用 UUID 作为主键就不存在这个问题,因为 UUID 由服务端生成。
可以为 insert 标签添加两个属性:
<insert id="save" useGeneratedKeys="true" keyProperty="id">
现在对象被添加后 MyBatis 会将新增数据行的自增主键值写到入参对象的指定属性中:
brandMapper.save(brand);
System.out.println(brand.getId());
4.7.修改
接口:
int update(Brand brand);
这里的返回值表示 update 语句执行后受影响的行数,通常不需要,可以返回 void 类型。
配置:
<update id="update">
    UPDATE `tb_brand`
    <set>
        <if test="companyName!=null and companyName!=''">
            `company_name` = #{companyName} ,
        </if>
        <if test="brandName!=null and brandName!=''">
            `brand_name` = #{brandName}
        </if>
        <if test="ordered!=null">
            `ordered` = #{ordered} ,
        </if>
        <if test="description!=null and description!=''">
            `description` = #{description} ,
        </if>
        <if test="status!=null">
            `status` = #{status}
        </if>
    </set>
    WHERE `id` = #{id};
</update>
这里的 set 标签是为了防止出现入参的所有属性都为空或者最后一个属性为空时导致的 SQL 语法错误。
测试:
@Test
public void testUpdate() {
    BrandMapper brandMapper = sqlSession.getMapper(BrandMapper.class);
    Brand brand = new Brand();
    brand.setId(8);
    brand.setBrandName("诺基亚");
    int lines = brandMapper.update(brand);
    System.out.println(lines);
    sqlSession.commit();
}
4.8.删除
4.8.1.删除一个
接口:
void deleteById(int id);
配置:
<delete id="deleteById">
    delete from tb_brand
    where id=#{id}
</delete>
测试用例:
@Test
public void testDeleteById(){
    BrandMapper brandMapper = sqlSession.getMapper(BrandMapper.class);
    brandMapper.deleteById(8);
    sqlSession.commit();
}
4.8.2.批量删除
接口:
void deleteByIds(@Param("ids") int[] ids);
配置:
<delete id="deleteByIds">
    delete from tb_brand
    where id in
    <foreach collection="ids" item="id" separator="," open="(" close=")">
        #{id}
    </foreach>
</delete>
测试用例:
@Test
public void testDeleteByIds(){
    BrandMapper brandMapper = sqlSession.getMapper(BrandMapper.class);
    brandMapper.deleteByIds(new int[]{7,9,10});
    sqlSession.commit();
}
5.注解开发
可以使用注解在 Mapper 接口的方法上直接编写SQL:
@Select("select * from tb_user where id=#{id}")
User selectById(int id);
不过一般只会用它来定义简单的 SQL,复杂的 SQL 依然推荐使用 XML 配置文件进行定义。
如果的确需要在 Java 代码中构建复杂 SQL,MyBatis 提供了一个 SQL 语句构建器。
本文的完整示例代码可以从这里获取。


 1093
1093


 被折叠的 条评论
为什么被折叠?
被折叠的 条评论
为什么被折叠?
 到【灌水乐园】发言


