


说明
此处介绍在CentOS6.8系统上,使用openSSL建立私有CA,并颁发证书,以配置httpd支持https。
多数内容来自于大牛 马哥的教程。
1 准备
- 安装mod_ssl模块
yum install -y mod_ssl# 查看mod_ssl相关信息
[root@h1 ~]# rpm -ql mod_ssl
/etc/httpd/conf.d/ssl.conf
/usr/lib64/httpd/modules/mod_ssl.so
/var/cache/mod_ssl
/var/cache/mod_ssl/scache.dir
/var/cache/mod_ssl/scache.pag
/var/cache/mod_ssl/scache.sem2 私有CA生成自签署的证书
这部分的相关内容请看本人的另一篇文章
http://blog.csdn.net/hylexus/article/details/53058135
http://www.jianshu.com/p/7ad4846a2f38
3 为httpd配置SSL支持
# 此处在ssl目录下进行操作,位置按自己的需要吧
[root@h1 ssl]# pwd
/etc/httpd/ssl
3.1 生成私钥
[root@h1 ssl]# (umask 077;openssl genrsa -out httpd.key 1024)
Generating RSA private key, 1024 bit long modulus
............++++++
...................................................................................++++++
e is 65537 (0x10001)
[root@h1 ssl]# ls -l
total 4
-rw-------. 1 root root 887 Nov  9 08:59 httpd.key
[root@h1 ssl]#
3.2 生成证书颁发请求
[root@h1 ssl]# openssl req -new -key httpd.key -out httpd.csr
You are about to be asked to enter information that will be incorporated
into your certificate request.
What you are about to enter is what is called a Distinguished Name or a DN.
There are quite a few fields but you can leave some blank
For some fields there will be a default value,
If you enter '.', the field will be left blank.
-----
Country Name (2 letter code) [CN]:
State or Province Name (full name) [ShangHai]:
Locality Name (eg, city) [ShangHai]:
Organization Name (eg, company) [Default Company Ltd]:KKBC
Organizational Unit Name (eg, section) [dev]:
Common Name (eg, your name or your server's hostname) []:h1.hylexus.tech
Email Address []:hylexus@163.com

Please enter the following 'extra' attributes
to be sent with your certificate request
A challenge password []:
An optional company name []:
[root@h1 ssl]# ll
total 8
-rw-r--r--. 1 root root 700 Nov  9 09:02 httpd.csr
-rw-------. 1 root root 887 Nov  9 08:59 httpd.key
[root@h1 ssl]#
3.3 颁发证书
此处使用私有CA颁发,并且本人的CA和httpd在同一台主机上。
# 由于此处CA和httpd在同一台主机上,所有直接将颁发的证书放置到了/etc/httpd/ssl/httpd.crt目录
[root@h1 conf.d]# openssl ca -in /etc/httpd/ssl/httpd.csr -out /etc/httpd/ssl/httpd.crt -days 365
Using configuration from /etc/pki/tls/openssl.cnf
Check that the request matches the signature
Signature ok
Certificate Details:
        Serial Number: 2 (0x2)
        Validity
            Not Before: Nov  9 01:42:54 2016 GMT
            Not After : Nov  9 01:42:54 2017 GMT
        Subject:
            countryName               = CN
            stateOrProvinceName       = ShangHai
            organizationName          = KKBC
            organizationalUnitName    = dev
            commonName                = h1.hylexus.tech
            emailAddress              = hylexus@163.com
        X509v3 extensions:
            X509v3 Basic Constraints:
                CA:FALSE
            Netscape Comment:
                OpenSSL Generated Certificate
            X509v3 Subject Key Identifier:
                30:70:8A:E4:EA:0A:0F:24:DA:80:78:E8:D8:D0:1C:B9:77:D8:0E:46
            X509v3 Authority Key Identifier:
                keyid:D8:E5:FB:17:23:6D:A6:ED:FB:D1:D6:82:B5:97:FF:2D:E8:05:E0:67

Certificate is to be certified until Nov  9 01:42:54 2017 GMT (365 days)
Sign the certificate? [y/n]:y


1 out of 1 certificate requests certified, commit? [y/n]y
Write out database with 1 new entries
Data Base Updated


# 看下此时的ssl目录
[root@h1 ssl]# ll /etc/httpd/ssl/
total 12
# 私有CA颁发的证书
-rw-r--r--. 1 root root 3852 Nov  9 09:43 httpd.crt
# 此时这个证书颁发请求可以删了
-rw-r--r--. 1 root root  700 Nov  9 09:02 httpd.csr
# 私钥
-rw-------. 1 root root  887 Nov  9 08:59 httpd.key
[root@h1 ssl]#
3.4 httpd配置
此处虚拟主机简单配置如下:
<VirtualHost *:80>
# 此处的ServerName确保和你的证书颁发请求中的一致
    ServerName h1.hylexus.tech
    DocumentRoot "/web/html/h1.hylexus.tech"
    CustomLog /var/log/httpd/h1.hylexus.tech/acc-log combined
</VirtualHost>
注意修改hosts文件,将域名加进去,不然httpd启动会出错的:
[root@h1 conf.d]# cat /etc/hosts
# ………………
127.0.0.1       localhost.localdomain localhost h1.hylexus.tech
192.168.161.128 h1 h1.hylexus.tech
# ………………
先确保使用http协议能访问的虚拟主机之后再继续下文。
先用http协议访问 http://h1.hylexus.tech试试。成功后继续下文。
3.5 ssl配置
/etc/httpd/conf.d/ssl.conf
这个文件是安装了mod_ssl模块之后生成的。编辑之前最好备份……
修改以下三处即可,其余的按需配置:
LoadModule ssl_module modules/mod_ssl.so

Listen 443

SSLPassPhraseDialog  builtin

SSLSessionCache         shmcb:/var/cache/mod_ssl/scache(512000)
SSLSessionCacheTimeout  300

SSLMutex default

SSLRandomSeed startup file:/dev/urandom  256
SSLRandomSeed connect builtin

SSLCryptoDevice builtin

<VirtualHost h1.hylexus.tech:443>

# 修改01
ServerName h1.hylexus.tech:443
# 修改02
DocumentRoot "/web/html/h1.hylexus.tech"

ErrorLog logs/ssl_error_log
TransferLog logs/ssl_access_log
LogLevel warn

# 修改03
SSLEngine on

SSLProtocol all -SSLv2

SSLCipherSuite DEFAULT:!EXP:!SSLv2:!DES:!IDEA:!SEED:+3DES

SSLCertificateFile /etc/httpd/ssl/httpd.crt

SSLCertificateKeyFile /etc/httpd/ssl/httpd.key

<Files ~ "\.(cgi|shtml|phtml|php3?)$">
    SSLOptions +StdEnvVars
</Files>
<Directory "/var/www/cgi-bin">
    SSLOptions +StdEnvVars
</Directory>

SetEnvIf User-Agent ".*MSIE.*" \
         nokeepalive ssl-unclean-shutdown \
         downgrade-1.0 force-response-1.0

CustomLog logs/ssl_request_log \
          "%t %h %{SSL_PROTOCOL}x %{SSL_CIPHER}x \"%r\" %b"

</VirtualHost>
3.6 访问
此处由于我们配置的是基于域名h1.hylexus.tech的虚拟主机。所以再你的机器上修改hosts文件以识别这个乱写的域名。
当然,要是你的域名直接是可用的就不用修改hosts文件了。
# C:/Windows/System32/drivers/etc/hosts
192.168.161.128 h1.hylexus.tech
用浏览器访问 https://h1.hylexus.tech 结果如下:
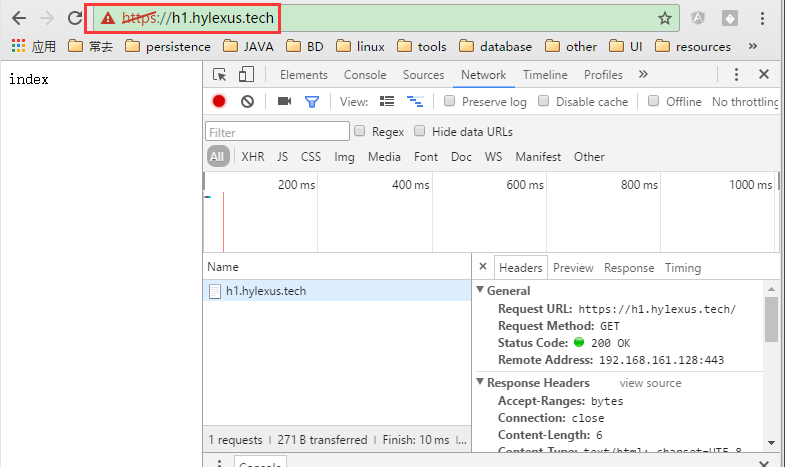
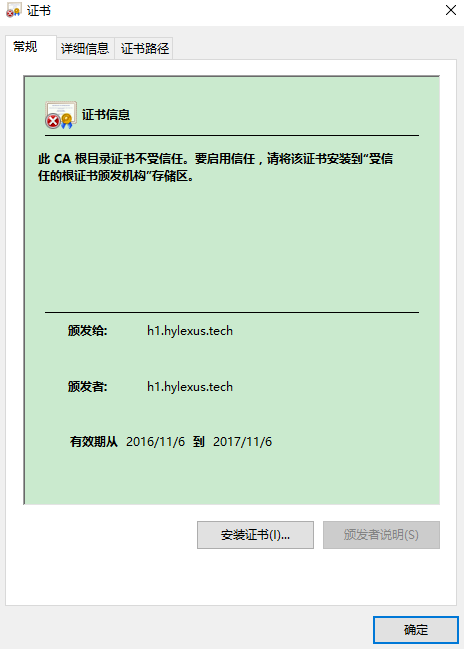
由于证书是用私有CA颁发的,所以提示证书不可信,点击高级选项继续或者添加例外即可。
也可以把私有CA的证书(/etc/pki/CA/cacert.pem重命名为.crt文件)导入的浏览器所在机器。


 1873
1873

 被折叠的 条评论
为什么被折叠?
被折叠的 条评论
为什么被折叠?
 到【灌水乐园】发言


