EJB3.0环境搭建+HelloWorld实现(JBoss7.1.1_Eclipse Juno)

I、环境搭建


一、所需环境

1、 JDK1.6 及以上版本)

2、 Eclipse(本人使用 Juno 版)

3、 JBoss 7.1.1  下载地址:http://download.jboss.org/jbossas/7.1/jboss-as-7.1.1.Final/jboss-

as-7.1.1.Final.zip


二、安装 JBoss

1、 将下载的压缩文件解压到本地目录,注意:解压目录不要包含中文以及空格等字符。

2、 配置 JBoss 环境变量。变量名:JBOSS_HOME,变量值:第一步中的解压目录。(此

步骤不是必须的,但是建议进行配置,否则以后打开 Eclipse 后会出现无法找到 JBoss

环境变量的提示)。

3

三、安装 JBoss Tools

● Juno  版 : 使用  Eclipse Marketplace  安装  JBoss Tools 。 具 体 操 作 : help->Eclipse

image

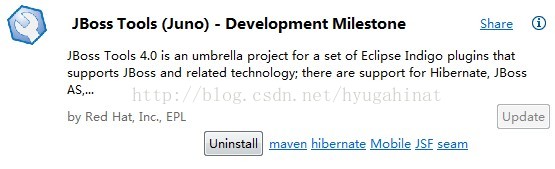
Marketplace->搜索 JBoss Tools,单击 Install,根据提示安装。


Indigo 版本:

1、下载 JBoss Tools:下载地址:

http://sourceforge.net/projects/jboss/files/JBossTools/JBossTools3.3.x/jbosstools- 3.3.1.Final.aggregate-Update-2012-07-14_23-57-15-H211.zip

2、具体操作:help->Install New Software->Add->Archive 选择刚才下载的.zip 文件。根

据提示进行安装。

四、配置 JBoss

1、转到 Server 选项卡:

image


4、 右键点击 New->Server

5、 选择默认的 JBoss As 7.1 ,点击 finish.

image

6、 右键点击新建的 JBoss 服务器->Start,启动服务器。


image

7、用浏览器访问 http://127.0.0.1:8080/,若出现下图,则说明配置成功。


IIHello World 实现


1、 新建工程:

image

image

注意:EJB module version 一栏请选择 3.0 版本。


点击 Next,将 Generate ejb-jar.xml deployment descriptor 一栏勾上,以便由 Eclipse 自动创建

xml 部署文件。

image

点击完成。完成 EJB 工程的创建。

2、 添加客户端所需的 Jar 包。配置构建路径,在 Libraries 选项卡单击添加外部 Jar,选择

JBoss 安装目录 jboss-as-7.1.1.Final\bin\client 下的 jboss-client.jar 文件,完成 Jar 文件的

添加。

image

image


3、 创建 Session Bean。在 ejbModule 根目录下,创建 session bean 3.x


image


image

包名为 com.jerrylab.business,类名为 HelloWorldBean,类型为 Stateless,选中 Remote


完成 Session Bean 的创建。

此时 IDE 会自动完成两个 java 文件的创建。其中 HelloWorldBeanRemote.java 是远程接

口,HelloWorldBean 是接口的实现。

image


在 HelloWorldBeanRemote.java 中添加以下代码:

package com.jerrylab.business;


import javax.ejb.Remote;


@Remote

public interface HelloWorldBeanRemote {

public String sayHello();

}


在 HelloWorldBean.java 中添加以下代码:

package com.jerrylab.business;


import javax.ejb.Stateless;


/**

* Session Bean implementation class HelloWorldBean

*/

@Stateless

public class HelloWorldBean implements HelloWorldBeanRemote {


/**

* Default constructor.

*/

public HelloWorldBean() {

// TODO Auto-generated constructor stub

}


@Override

public String sayHello()

{

// TODO Auto-generated method stub

return "Hello World!!!";

}


}

4、 将 EJB 部署到 JBoss 服务器。选中 JBoss 服务器,右键点击 Add and Remove…

image

image

添加 HelloWorldEJB。点击完成。


image

控制台中出现下列文字,说明 EJB 部署成功。


5、 建立客户端工具类。

所有的命名服务都是在 javax.naming.Context 接口的实现上完成的。

新建一个叫做 ClientUtility 的类,包名 com.jerry.clientutility


image

添加下列代码:

package com.jerrylab.clientutility;


import java.util.Properties;  import javax.naming.Context;  import javax.naming.InitialContext;

import javax.naming.NamingException;


public class ClientUtility {


private static Context initialContext;


private static final String PKG_INTERFACES =

"org.jboss.ejb.client.naming";


public static Context getInitialContext() throws NamingException {

if (initialContext == null) {

Properties properties = new Properties(); properties.put(Context.URL_PKG_PREFIXESPKG_INTERFACES);


initialContext new InitialContext(properties);

}

return initialContext;

}

}

6、创建客户端类。

建立一个远程的 Java 程序(带有 main()方法)来访问部署到服务器中的 EJB


image

类名Client,包名com.jerrylab.client


添加以下代码:


package com.jerrylab.client;


import javax.naming.Context;

import javax.naming.NamingException;


import com.jerrylab.business.HelloWorldBean;

import com.jerrylab.business.HelloWorldBeanRemote;

import com.jerrylab.clientutility.ClientUtility;


public class Client {


public static void main(String[] args) { HelloWorldBeanRemote bean = doLookup();

System.out.println(bean.sayHello()); // 4. Call business logic

}


private static HelloWorldBeanRemote doLookup() { Context context = null;

HelloWorldBeanRemote bean = nulltry {

// 1. Obtaining Context

context = ClientUtility.getInitialContext();

// 2. Generate JNDI Lookup name

String lookupName = getLookupName();

// 3. Lookup and cast

bean = (HelloWorldBeanRemote) context.lookup(lookupName);


catch (NamingException e) { e.printStackTrace();

}

return bean;

}


private static String getLookupName() {

/*

The app name is the EAR name of the deployed EJB without .ear suffix. Since we haven't deployed the application as a .ear,

the app name for us will be an empty string

*/

String appName = "";


/* The module name is the JAR name of the deployed EJB without the .jar suffix.

*/

String moduleName = "HelloWorldSessionBean";


/*AS7 allows each deployment to have an (optional) distinct name. This can be an empty string if distinct name is not specified.

*/

String distinctName = "";

// The EJB bean implementation class name

String beanName = HelloWorldBean.class.getSimpleName();


// Fully qualified remote interface name

final String interfaceName = HelloWorldBeanRemote.class.getName();


// Create a look up string name

String name = "ejb:" + appName + "/" + moduleName + "/" + distinctName + "/" + beanName + "!" + interfaceName;


return name;

}

}


7、配置 EJB 客户端上下文属性。

在 ejbModule 目录下创建一个 jboss-ejb-client.properties 文件,并在其中添加以下几行:


remote.connectionprovider.create.options.org.xnio.Options.SSL_ENABLED=false remote.connections=default

remote.connection.default.host=localhost remote.connection.default.port = 4447

remote.connection.default.connect.options.org.xnio.Options.SASL_POLICY_NOAN ONYMOUS=false

8、运行 Client.java,类型为 Java Application

控制台中输出:“Hello World!!”(如果运行不成功,可以尝试重启 JBoss 服务器)


  • 7
    点赞
  • 17
    收藏
    觉得还不错? 一键收藏
  • 3
    评论

“相关推荐”对你有帮助么?

  • 非常没帮助
  • 没帮助
  • 一般
  • 有帮助
  • 非常有帮助
提交
评论 3
添加红包

请填写红包祝福语或标题

红包个数最小为10个

红包金额最低5元

当前余额3.43前往充值 >
需支付:10.00
成就一亿技术人!
领取后你会自动成为博主和红包主的粉丝 规则
hope_wisdom
发出的红包
实付
使用余额支付
点击重新获取
扫码支付
钱包余额 0

抵扣说明:

1.余额是钱包充值的虚拟货币,按照1:1的比例进行支付金额的抵扣。
2.余额无法直接购买下载,可以购买VIP、付费专栏及课程。

余额充值