


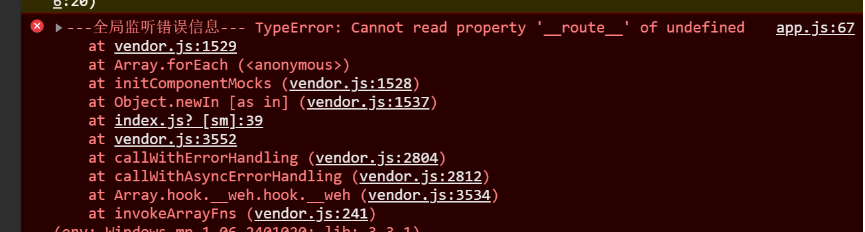
1、【微信开发者工具报错】routeDone with a webviewId XXX that is not the current page
解决方案:
在app.json 中添加 “lazyCodeLoading”: “requiredComponents”
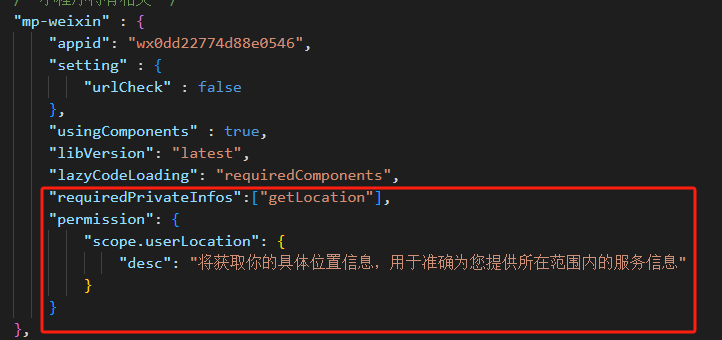
uniapp的话加到manifest.json下的mp-weixin
"mp-weixin" : {
    "appid": "wx0dd22774d88e0546",
     "setting" : {
         "urlCheck" : false
     },
     "usingComponents" : true,
     "libVersion": "latest",
     "lazyCodeLoading": "requiredComponents",//添加此行代码
     "requiredPrivateInfos":["getLocation"],
     "permission": {
         "scope.userLocation": {
             "desc": "将获取你的具体位置信息,用于准确为您提供所在范围内的服务信息"
         }
     }
 },
2、【微信开发者工具报错】[ project.config.json 文件内容错误] project.config.json: libVersion 字段需为 string, string
解决方案:添加"libVersion": "latest",
外部链接文章:解决方案文章
3、【微信开发者工具报错】安装pinia后编译项目报错“hasInjectionContext“ is not exported by “node_modules/vue-demi/lib/index.mjs“
解决方案:将pinia的版本改成2.0.36 固定版本
外部链接文章:解决方案文章
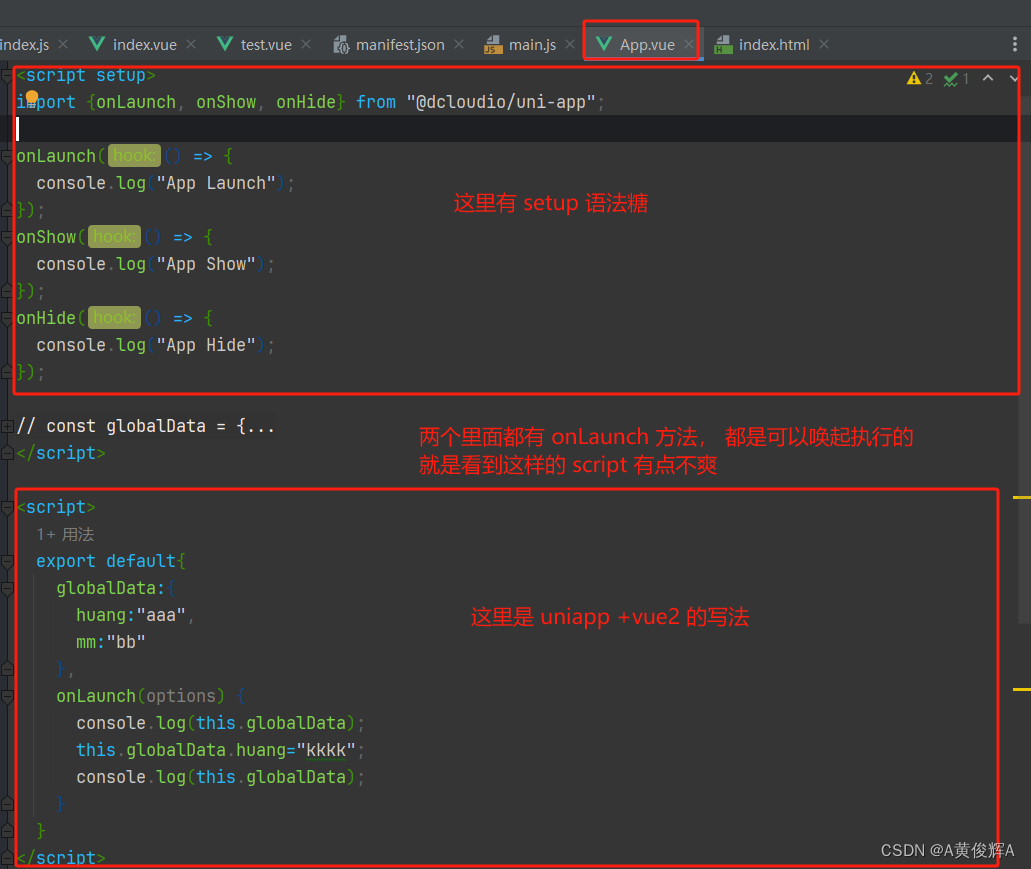
4、【微信开发者工具报错】<script> and <script setup> must have the same language type解决
因为想在app.vue 中添加globalData 而产生了报错 ,
解决方案:需要添加 lang='ts'
在添加globalData的时候发现 globalData 只能在App.vue中使用vue2的方式使用 vue3的ts中不能使用 想要全局变量还可以放在pinia中
<script lang='ts' >
  export default {
    name: 'CustomName',
    inheritAttrs: false,
    customOptions: {},
    globalData:{
	    baseUrl:'https://api-policy.dev.v2.chinawip.com'
	  }
  }
</script>
<script setup lang='ts' >
// ............
</script>
外部链接文章:解决方案文章
5、uniapp+vue3+setup语法糖开发微信小程序时不能定义globalData的解决方法
解决方案:setup语法糖和 vue2的语法混合使用 例如如上边的定义globalData的使用
**外部链接文章:解决方案文章
6、vscode px转rpx成功解决办法
vscode 安装 插件我安装的px to rpx 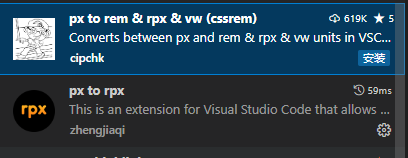
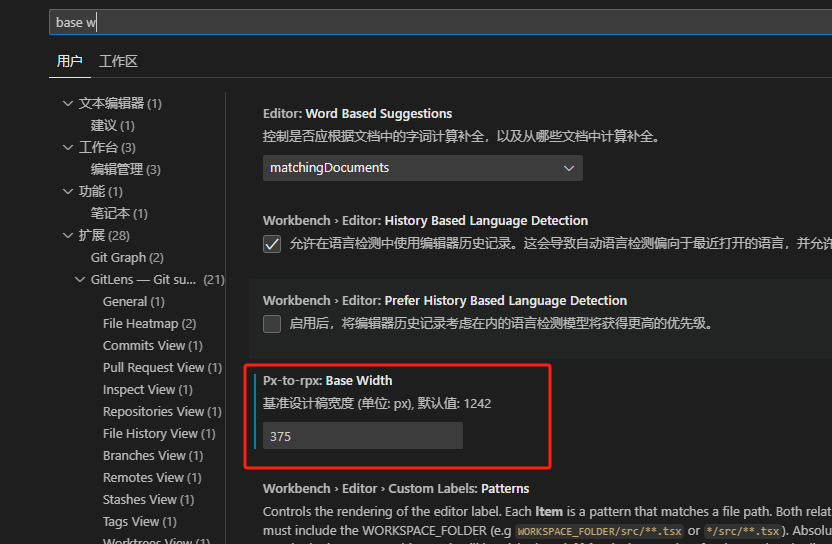
然后去设置里配置一下,改为375即全部配置完成。
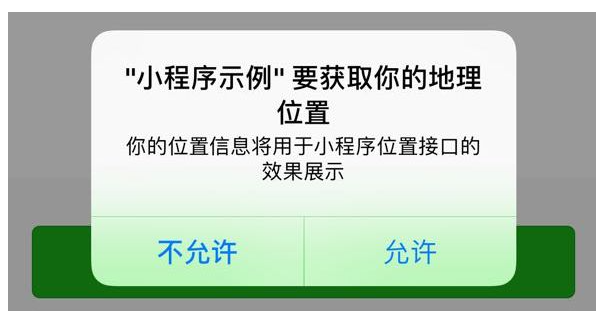
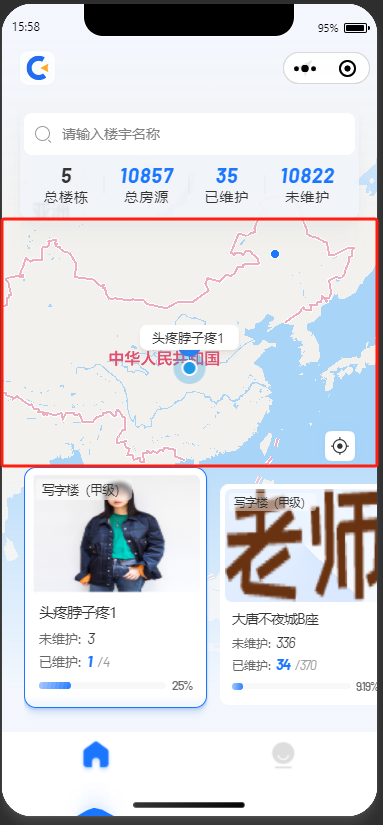
7、微信小程序getLocation报错 getLocation:fail the api need to be declared in the requiredPrivateInfos field in
在开发地图时使用到了uni.getLocation,此时需要在uniapp的下 添加 :加到manifest.json下的mp-weixin添加"requiredPrivateInfos":["getLocation"],这样就会出现下边的弹窗
还需要添加 "permission": { "scope.userLocation": { "desc": "将获取你的具体位置信息,用于准确为您提供所在范围内的服务信息" } },这样才能使用
uni.getLocation({
      //type: 'wgs84',
      type: 'gcj02',
      success: (res:any)=>{
        // console.log(res);res.latitude res.longitude

      },
      fail: (res)=>{
        console.log('用户拒绝授权获取位置信息,使用默认经纬度');

      },
      complete: (res)=>{
        // console.log(res);
        // 根据位置数据更新页面数据
      }
    });
8、在使用scroll-view实现横向滚动时不能的滚动的解决方法
1、在scroll-view标签上加上样式属性:display: flex; white-space:nowrap;
2、scroll-view标签下的一级栏目标签需要加上样式属性:display: inline-block;
只有结合上面两步,才能实现横向滚动。
<!-- 下列代码未加规范,仅供参考,请勿模仿 -->
<scroll-view scroll-x style='display: flex;white-space:nowrap;' class=''>
  <view style='width:200rpx;height: 200rpx;display: inline-block;background-color: red;'></view>
  <view style='width:200rpx;height: 200rpx;display: inline-block;background-color: blue;'></view>
  <view style='width:200rpx;height: 200rpx;display: inline-block;background-color: green;'></view>
  <view style='width:200rpx;height: 200rpx;display: inline-block;background-color: orange;'></view>
  <view style='width:200rpx;height: 200rpx;display: inline-block;background-color: yellow;'></view>
  <view style='width:200rpx;height: 200rpx;display: inline-block;background-color: black;'></view>
</scroll-view>
9 、Pinia报错: “getActivePinia was called with no active Pinia. Did you forget to install pinia?“pinia访问其他store的action报错:未初始化调用getActivePinia()
因为想在app.vue中引入store 而导致的报错 ,所以不能在app.vue中引入store中的数据 。
总结 在app.vue中使用pinia store时, pinia插件还没被vue框架初始化。
如果想解决 试试下边的两篇文章的方法
10、小程序正式版报错600002 url not in domain list
原因是没有在小程序后台配置服务器域名
外部链接文章:解决方案文章
11、JSON 注释问题 解决红色波浪线
在vscode面板中,点击右小角设置按钮→点击设置→在搜索设置中搜索“文件关联”→找到Files: Associations的配置项→点击添加项→把 manifest.json 和 pages.json 设置为 jsonc即可;
12、微信小程序uniapp+vue3+ts+pinia的环境搭建
外部链接文章:微信小程序uniapp+vue3+ts+pinia的环境搭建
13、uniapp中获取位置信息处理
外部链接文章:uniapp中获取位置信息处理
- 页面中使用
  const isShowLocationControl = ref(false)//是否展示定位控件
  const defaultLatitude = "34.343119"
  const defaultLongitude = "108.93963"
  const isOpenSetting = ref(false); // 是否打开设置界面
  // 获取定位,兼容用户拒绝授权及相关处理(获取用户当前的授权状态 => 未同意授权位置时,引导用户打开设置界面,重新选择授权功能 => 允许后重新获取位置)
  const doGetLocation = async () => {
    isOpenSetting.value = false;
    uni.getSetting({
        success: (settingRes) => {
          console.log(settingRes)
          // 判断用户未同意授权位置时,提示并引导用户去打开设置界面,用户可重新选择授权功能
          if (!isOpenSetting.value && typeof(settingRes.authSetting['scope.userLocation']) != 'undefined' && !settingRes.authSetting['scope.userLocation']) {
            uni.showModal({
              title: '需要授权获取您的位置信息',
              content: '你的位置信息将用于为您提供更合适您的服务',
              success: (data) => {
                if (data.confirm) {
                  isOpenSetting.value = true;
                  // 打开设置界面
                  uni.openSetting({
                    success: (response) => {
                      if(response.authSetting['scope.userLocation']){
                        console.log('重新授权获取位置信息-同意');
                        // 重新获取定位
                        getLocation();
                      }else{
                        console.log('重新授权获取位置信息-未同意');
                        doGetLocationAfter({
                          latitude : defaultLatitude,
                          longitude : defaultLongitude,
                          isOpenSetting : isOpenSetting.value,
                        })
                      }
                    },
                    fail:()=>{
                      console.log('openSetting接口调用失败的回调函数');
                    }
                  })
                } else if (data.cancel) {
                  console.log('showModal接口:用户点击取消未打开设置界面');
                  doGetLocationAfter({
                    latitude : defaultLatitude,
                    longitude : defaultLongitude,
                    isOpenSetting : isOpenSetting.value,
                  })
                }
              },
              fail: function(){
                console.log('showModal接口:调用失败的回调函数');
              }
            });
          }else{
            // 重新获取定位
            getLocation();
          }
        }
      })
  }
   // 获取位置
  const getLocation = () =>{
    uni.getLocation({
      //type: 'wgs84',
      type: 'gcj02',
      success: (res:any)=>{
        // console.log(res);
        doGetLocationAfter({
          latitude : res.latitude,
          longitude : res.longitude,
          isOpenSetting : isOpenSetting.value,
        })
        if(!isShowLocationControl.value){
          isShowLocationControl.value = true
        }
      },
      fail: (res)=>{
        console.log('用户拒绝授权获取位置信息,使用默认经纬度');
        isShowLocationControl.value = false
        doGetLocationAfter({
          latitude : defaultLatitude,
          longitude : defaultLongitude,
          isOpenSetting : isOpenSetting.value,
        })
        // 根据位置数据更新页面数据
      },complete: (res)=>{
        // console.log(res);
        // 根据位置数据更新页面数据
      }
    });
  }
  // 最终获取到的信息数据
  const doGetLocationAfter = (data:{latitude:string,longitude:string,isOpenSetting:boolean}) =>{
    if(data.latitude != houseListParams.value.latitude || data.longitude != houseListParams.value.longitude){
      houseListParams.value.latitude = data.latitude;
      houseListParams.value.longitude = data.longitude;
      // 根据位置数据更新页面数据
      getHouseList()
    }else{
      // console.log('位置信息无变化');
      getHouseList()
    }
  }
- 封装组件
// import { doGetLocation } from '@/utils/getLocation.js';

let isOpenSetting:any;

/**
 * 获取定位,兼容用户拒绝授权及相关处理(获取用户当前的授权状态 => 未同意授权位置时,引导用户打开设置界面,重新选择授权功能 => 允许后重新获取位置)
 */
export function doGetLocation(callback:any){
	isOpenSetting = false; // 是否打开设置界面
	// 获取用户当前的授权状态
	uni.getSetting({
		success: (settingRes) => {
			console.log(settingRes)
			console.log(isOpenSetting)
			// 判断用户未同意授权位置时,提示并引导用户去打开设置界面,用户可重新选择授权功能
			if (!isOpenSetting && typeof(settingRes.authSetting['scope.userLocation']) != 'undefined' && !settingRes.authSetting['scope.userLocation']) {
				uni.showModal({
					title: '需要授权获取您的位置信息',
					content: '你的位置信息将用于为您提供更合适您的服务',
					success: (data) => {
						if (data.confirm) {
							isOpenSetting = true;
							// 打开设置界面
							uni.openSetting({
								success: (response) => {
									if(response.authSetting['scope.userLocation']){
										console.log('重新授权获取位置信息-同意');
										// 重新获取定位
										getLocation((data:any)=>{
											callback({
												isOpenSetting:isOpenSetting,
												...data
											})
										});
									}else{
										console.log('重新授权获取位置信息-未同意');
										callback({
											isOpenSetting:isOpenSetting,
											latitude : '',
											longitude : '',
										})
									}
								},
								fail:()=>{
									console.log('openSetting接口调用失败的回调函数');
								}
							})
						} else if (data.cancel) {
							console.log('showModal接口:用户点击取消未打开设置界面');
							callback({
								isOpenSetting:isOpenSetting,
								latitude : '',
								longitude : '',
							})
						}
					},
					fail: function(){
						console.log('showModal接口:调用失败的回调函数');
					}
				});
			}else{
				// 重新获取定位
				getLocation((data:any)=>{
					callback({
						isOpenSetting:isOpenSetting,
						...data
					})
				});
			}
		}
	})
}

/**
 * 获取位置
 */
export function getLocation(callback:any){
	uni.getLocation({
		//type: 'wgs84',
		type: 'gcj02',
		success: (res)=>{
			console.log(res);
			callback({
				latitude : res.latitude,
				longitude : res.longitude,
			})
		},
		fail: (res)=>{
			console.log('用户拒绝授权获取位置信息,使用默认经纬度0 0');
			callback({
				latitude : '',
				longitude : '',
			})
		},complete: (res)=>{
			// console.log(res);
			// 根据位置数据更新页面数据
		}
	});
}
14、uniapp 使用lottiefiles动画
 <!-- canvas 的 width和height 必须设置 -->
<canvas id="Mycanvas" ref="canvas" type="2d" :style="{width:windowWidth+'px',height:windowHeight+'px'}" style="position: absolute;top: 0;z-index: -1;"></canvas>
import { onLoad } from '@dcloudio/uni-app';
import lottie from 'lottie-miniprogram';
import animationData from "@/assets/myAnimation.json"
//获取设备的宽高进行等比例放大缩小
const windowWidth = uni.getWindowInfo().windowWidth
const windowHeight = windowWidth/375*812
onLoad(() => {
  init()
})
const init = () => {
  uni.createSelectorQuery().select('#Mycanvas').node(res => {
    const canvas = res.node
    //因为ui给的json文件的宽高是375*812的 所以这里把animationData的宽高给重新改了一下
    animationData.h = windowHeight
    animationData.w = windowWidth
    //此处的canvas的宽高也必须设置 ,
    // 页面中和此处的canvas必须设置宽高 不然会导致动画样式错误  这是我在开发中遇到的问题
    canvas.width = windowWidth//设置宽高
    canvas.height = windowHeight
    setTimeout(()=>{
      const context = canvas.getContext('2d')
      lottie.setup(canvas)//要执行动画,必须调用setup,传入canvas对象
      lottie.loadAnimation({//微信小程序给的接口
        loop: true,//是否循环播放(选填)
        autoplay: true,//是否自动播放(选填)
        animationData,
        // path:"",//lottie json包的网络链接,可以防止小程序的体积过大,要注意请求域名要添加到小程序的合法域名中
        rendererSettings:{
          context,//es6语法:等同于context:context(必填)
          // preserveAspectRatio:"fill"
        }
      })
    })
  }).exec()
}
外部链接文章:解决方案文章1
15、uniapp 微信小程序地图map组件样式自定义
16、在小程序中使用网络字体,和使用字体后ios生效,安卓不生效的问题
	@font-face {
	  font-family: 'Barlow';
	  src: url('https://img.cyeyi.com/realtor-mini/fonts/Barlow-Medium.ttf');
	}
我是使用的网络字体的方法后发现ios生效,安卓不生效,原因是跨域的问题导致的
外部链接文章:解决方案文章1
解决方案文章2
解决方案文章3
17、小程序获取机型
 // 获取系统信息
  const systemInfo = uni.getSystemInfoSync();

 // 获取设备机型
 const platform = systemInfo.platform;
 const paddingTop = ref(0)
 // 判断机型
 if (platform == 'ios') {
   console.log('当前设备是 ios');
   paddingTop.value = 0
 } else if (platform == 'android') {
   console.log('当前设备是 android');
   paddingTop.value = 12
 } else if (platform == 'windows') {
   console.log('当前设备是 windows');
   paddingTop.value = 0
 }else if (platform == 'mac') {
   console.log('当前设备是 mac');
   paddingTop.value = 0
 } else {
   console.log('当前设备是其他类型');
   paddingTop.value = 0
 }
18、MapContext.includePoints(Object object)用于将地图标记展示在可视区域内
官网地址
因为地图是整个页面,但是想展示的地图标记想展示在可视区域内所以就是使用了地图的includePoints方法,这个方法中有个padding属性
padding:坐标点形成的矩形边缘到地图边缘的距离,单位像素。格式为[上,右,下,左]。开发者工具暂不支持padding参数。
let includePoints = data.map((item:HouseModel) => {
   return {
     latitude:Number(item.latitude),
     longitude:Number(item.longitude)
   }
 })
 mapContext.includePoints({
   points:includePoints,
   padding:[225,18,280,18]
 })
19、自定义展示地图标记上的气泡文字
<map :id="mapId" :scale="14" class="map" :latitude="houseListParams.latitude" :longitude="houseListParams.longitude" :markers="covers" :show-location="true" @markertap="markerClick">
<view class="locationControl" v-if="isShowLocationControl" @click="controltap"><image class="locationControlImg" :src="globalDataStore.imgUrl + 'locationControl.png'"></image></view>
<!-- 自定义展示气泡 -->
<cover-view slot="callout" style="line-height: normal;">
<cover-view class="customCallout" :marker-id="markerIdStyle.markerId">
<!--   解决ios文字展示不全 paddingTop 安卓展示问题-->
<cover-view class="content" :style="{paddingTop: paddingTop+'rpx'}">{{markerIdStyle.markerTitle}} </cover-view>
</cover-view>
</cover-view>
</map>
在自定义过程中遇到的问题:
-
苹果手机文字末尾展示不全的现象
解决方法:我在文字的末尾添加了 让文字尽可能的展示出来 -
文字在ios上展示的没有问题,在安卓机上的高度展示有问题,内容整体靠上
解决方法:针对不同的机型 设置文字的上padding (padding-top),来解决安卓机上文字展示的问题
20、封装requeset
import useglobalDataStore from "@/store/globalData"
const baseUrl = useglobalDataStore().baseUrl;
// globalData获取baseUrl
// const baseUrl = getApp().globalData.baseUrl;
let tokenAbnormal = false;
let apiList = <any>[];
let errorNum = 0;
const MAX_NUM = 3;
interface OptionsModel {
	url : string
	data ?: any,
	method ?: "OPTIONS" | "GET" | "HEAD" | "POST" | "PUT" | "DELETE" | "TRACE" | "CONNECT",
	callback ?: (value : any) => void;
}

class Request {

	// api在原型上,实例可以调用
	// private 只能在内部调用,外部是无法调用到api这个函数的
	private api<T>(options : OptionsModel) : Promise<T> {

		return new Promise((resolve, reject) => {

			let header : any = { 'content-type': 'application/json' }

			let token = uni.getStorageSync("TOKEN");
			if (token) {
				header.Authorization = token
			}

			uni.request({
				url: baseUrl + options.url,
				data: options.data,
				method: options.method || 'GET',
				header,
				timeout: 30000,
				dataType: 'json',
				responseType: 'text',
				success: (result : UniApp.RequestSuccessCallbackResult) => {

					let res = result.data as AnyObject // 拿到响应体

					if (res.code == 200) {
						if (options.callback) {
							options.callback(res.data)
							return
						}
						resolve(res.data)

					} else if (res.code == 401) { // 代表未登录,或者是token过期,提示去登录页
						uni.removeStorageSync('TOKEN')
						apiList.push({ url: options.url, method: options.method || 'GET', data: options.data, header, timeout: 30000, callback: resolve })
						if (!tokenAbnormal) {
							errorNum++
							tokenAbnormal = true
							uni.login({
								success: (resLogin) => {
									console.log(resLogin, 'login');
									this.post({
										url: `/realtor-mini-api/api/login`,
										data: { code: resLogin.code }
									}).then(resLoginData => {
										console.log(resLoginData, 'token');
										uni.setStorageSync('TOKEN', resLoginData.token)
									})
								}
							})
							setTimeout(() => {
								if (errorNum < MAX_NUM) {
									apiList.forEach(item => {
										this.api(item)
									})
								}
								tokenAbnormal = false;
								apiList = []
							}, 1000);
						}
					} else {

						reject(res)

					}

				},
				fail: (error) => {
					reject(error)
				},
				complete: () => { }
			});

		})

	}


	get<T>(options : OptionsModel) {
		return this.api<T>({ ...options, method: 'GET' })
	}

	post<T>(options : OptionsModel) {
		return this.api<T>({ ...options, method: 'POST' })
	}

	put<T>(options : OptionsModel) {
		return this.api<T>({ ...options, method: 'PUT' })
	}

	delete<T>(options : OptionsModel) {
		return this.api<T>({ ...options, method: 'DELETE' })
	}

}

export default Request
使用
import Request from "@/utils/request";

export interface LoginModel {
  token: string
}

export interface UserInfoModel {
  user_details: {
    mobile: number | string | null
  },
  realtor_details: {
    name: string | null,
    is_admin: number | null
    admin_name: string
  }
}

class UserRequest extends Request {
  // 获取token
  login(code: string) {
    return this.post<LoginModel>({
      url: `/realtor-mini-api/api/login`,
      data:{code}
    })
  }
  // 获取用户详情,需要请求头携带token
  getUserInfo () {
    return this.get<UserInfoModel>({
      url: `/realtor-mini-api/api/user/details`
    })
  }
  // 用户-授权手机号码登录
  saveMobile(code: string | number) {
    return this.post<null>({
      url: `/realtor-mini-api/api/phone`,
      data:{code}
    })
  }
  // 用户-退出登录
  logout() {
    return this.post<null>({
      url: `/realtor-mini-api/api/logout`,
    })
  }
}

export default new UserRequest
import userApi from '@/api/user';
await userApi.saveMobile(e.detail.code)
21、uniap vue3 组件使用uni.createSelectorQuery() 获取dom报错
由于vue3中没有this,所以使用uni.createSelectorQuery().in(this)时,会报错
使用 getCurrentInstance 获取组件实例
使用 uni.createSelectorQuery() 批量查询时,结果是按照查询的顺序返回的
- 使用案例
import { getCurrentInstance } from 'vue'
const appInstance = getCurrentInstance()

onMounted(() => {
	let query = uni.createSelectorQuery().in(appInstance)
	query
		.select('.scroll_view')
		.boundingClientRect((rect) => {
			top.value = rect.top || 0
		})
		.exec()
})


 被折叠的 条评论
为什么被折叠?
被折叠的 条评论
为什么被折叠?
 到【灌水乐园】发言


