


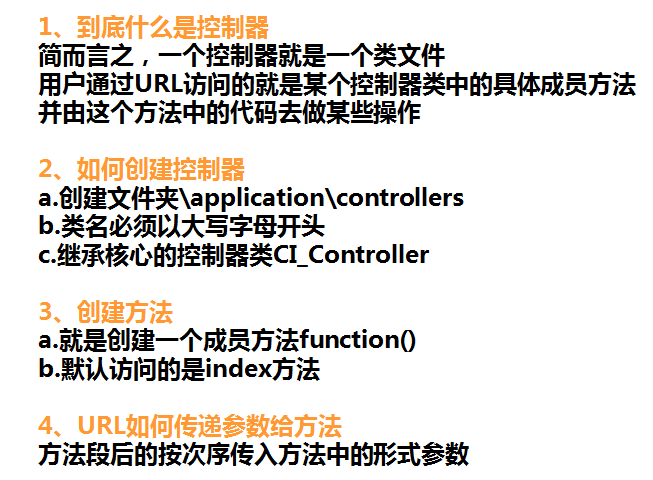
1.CI中的控制器
通过CI创建自己的工程,只需要将CI压缩包中的application目录、system目录和index.php文件拷贝到自己的工程目录就可以了。自己的代码完全在application目录中编辑,system目录不要修改,以后CI出了新版本的时候,只需要替换掉system文件的内容就可以了,如果自行修改,升级就会遇到麻烦。
拷贝完成后,通过URL打开新工程的首页:http://localhost:8080/testCodeIgniter/
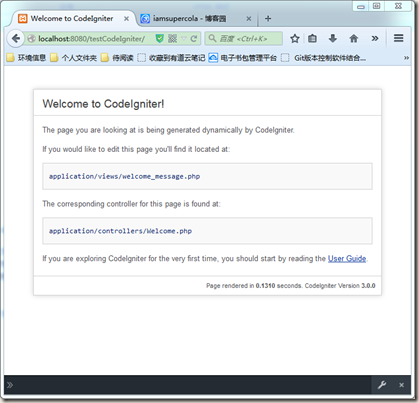
通过这个页面,CI提示我们当前展示的视图是在welcome_message.php文件定义的,当前使用的控制器是Welcome.php
打开/application/controllers/Welcome.php文件,这个文件只有一个index方法,方法中加载了视图welcome_message
<?php
defined('BASEPATH') OR exit('No direct script access allowed');

class Welcome extends CI_Controller
{
    /**
     * Index Page for this controller.
     *
     * Maps to the following URL
     *         http://example.com/index.php/welcome
     *    - or -
     *         http://example.com/index.php/welcome/index
     *    - or -
     * Since this controller is set as the default controller in
     * config/routes.php, it's displayed at http://example.com/
     *
     * So any other public methods not prefixed with an underscore will
     * map to /index.php/welcome/<method_name>
     * @see http://codeigniter.com/user_guide/general/urls.html
     */
    public function index()
    {
        $this->load->view('welcome_message');
    }
}
?>视图文件welcome_message.php在/application/views目录下
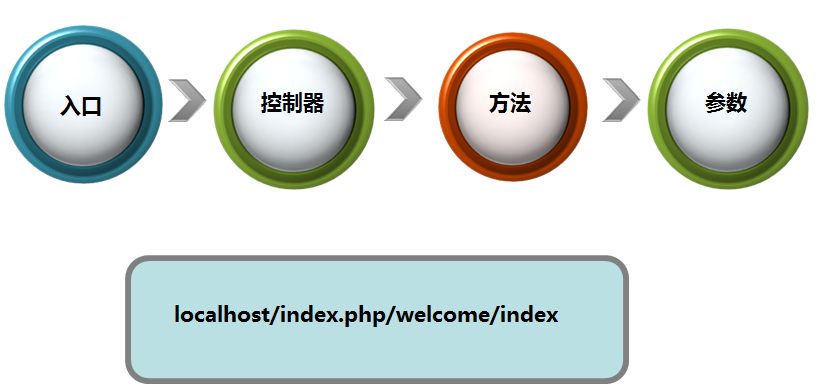
通过URL访问控制器使用pathinfo,格式为:协议://域名/入口文件/控制器/方法名,对于私有方法、保护方法或以下划线开头的方法,不能通过pathinfo访问
在上面的控制文件Welcome.php中新增test方法:
public function test()
{
    echo "这是Welcome控制器的test方法";
}通过pathinfo(http://localhost:8080/testCodeIgniter/index.php/Welcome/test)就可以调用到Welcome控制器的test方法
新建一个user控制器,包括一个index方法
<?php
class User extends CI_Controller
{
    public function index()
    {
        echo 'user---index';
    }
}
?>
控制器需要从CI_Controller类继承
通过pathinfo可以访问user控制器的index方法:http://localhost:8080/testCodeIgniter/index.php/user/index
注:兄弟连视频中提到pathinfo中区分大小写,经过使用CI3.0版本测试,是不区分大小写的
2. CI中的视图
控制器加载视图
CI通过控制器加载视图时,通过调用
$this->load->view('/user/index');视图文件名是index.php,此时,不需要添加文件后缀,文件路径是基于application/views目录的相对路径
视图文件可以是php原生代码,不需要HTML代码
控制器中可以加载多个视图,可以根据文档的结构从上至下依次加载视图
<?php
    echo "这是user视图";
?>
控制器分配变量
两种方法:
一. 单个变量
$this->load->vars('title', '这是标题');二. 分配一批变量
$data['title'] = '这是标题';
$data['list'] = $list;
$this->load->vars($data);对于这两种分配方式,在视图中都可以用$title和$list来访问变量,此处只是示例,真实的项目,数据应从模型中获取.
3. CI中的模型
模型文件的名称必须是小写,因为在system/core/loader.php的model方法中,会将传入的模型名称转成小写再去寻找对应的文件,但是类名必须是首字母大写并且拼装“_model”,拼装后的结果应与模型文件的文件名一致,只是首字母大写,例如:文件名是user_model.php,类名应该是User_model。
– user_model.php文件
<?php
    class User_model extends CI_Model
    {

        function __construct()
        {
            parent::__construct();
        }

        function getAllUser()
        {
            $this->load->database();
            $result = $this->db->get('blog_user');
            return $result->result();
        }
    }
?>
在控制器中这样调用
// 加载模型,通过第二个参数还可以指定别名,后面的代码使用别名访问
$this->load->model('user_model');
// 加载完成后,超级对象就生成了user_model属性,它是User_model类型的对象
$list = $this->user_model->getAllUser();
// 将数据传给视图
$this->load->view('user_view', array('list'=>$list));
原则上,除了关系表,每张实体表都应该对应一个模型


 98
98

 被折叠的 条评论
为什么被折叠?
被折叠的 条评论
为什么被折叠?
 到【灌水乐园】发言


