参考了众多网上的例子,同样,代码还是需要自己写一遍才能通透,NSFileManger作为处理文件的类,有许多需要我们注意的地方,
打开模拟器,我们能发现一个项目里面有这三个文件夹
 **Library:**存储程序的默认设置或其它状态信息
 **Library/Caches:**存放缓存文件,保存应用的持久化数据,用于应用升级或者应用关闭后的数据保存,不会被itunes同步,所以为了减少同步的时间,可以考虑将一些比较大的文件而又不需要备份的文件放到这个目录下。
 **tmp:**提供一个即时创建临时文件的地方,但不需要持久化,在应用关闭后,该目录下的数据将删除,也可能系统在程序不运行的时候清除。
part1 获取各个文件夹的路径
1>App沙盒路径
//1 获取App应用的 沙盒路径
    NSString *dirHome = NSHomeDirectory();
    NSLog(@"dirHome ===== %@",dirHome)
    // /Users/Aotu/Library/Developer/CoreSimulator/Devices/67A66FFF-FBF1-4C11-B6AD-60E1C928E7AD/data/Containers/Data/Application/1093374C-FD0F-4EDF-BD15-6468776D1AB2
2> Documents路径
 //2 获取Documents 目录路径
    //方法1.拼接
    NSString *dirDoc = [NSHomeDirectory() stringByAppendingPathComponent:@"Documents"];
    NSLog(@"dirDoc =====  %@",dirDoc);

    //方法2.拼接
    NSArray *paths = NSSearchPathForDirectoriesInDomains(NSDocumentDirectory, NSUserDomainMask, YES);
    NSString *dirDoc1 = paths[0];
    NSLog(@"dirDoc =====  %@",dirDoc1);

    //创建一个文件的保存路径 (保存在Documents路径下)
    //拼接
    NSString *dirFile = [dirDoc stringByAppendingPathComponent:@"MyFiled.txt"];
    NSLog(@"dirFile =====  %@",dirFile); //有路径 不代表文件夹存在 文件还未创建 创建文件的问题稍后继续
3>Library 目录路径
 //3 获取Library 目录路径
    NSString *dirLib = [NSHomeDirectory() stringByAppendingPathComponent:@"Library"];
    NSArray *paths1 = NSSearchPathForDirectoriesInDomains(NSLibraryDirectory, NSUserDomainMask, YES);
    NSString *dirLib1 = paths1[0];
    NSLog(@"dirLib1 =====  %@",dirLib1);

    //3.1 获取Library下的 Cache目录
    NSArray *paths2 = NSSearchPathForDirectoriesInDomains(NSCachesDirectory, NSUserDomainMask, YES);
    NSString *dirCache = paths2[0];
    NSLog(@"dirCache =====  %@",dirCache);
4 获取Tmp目录
//4 获取Tmp目录
    //方法一
    NSString *dirtmp = [NSHomeDirectory() stringByAppendingPathComponent:@"tmp"];
    //方法二
    NSString *dirtmp2 = NSTemporaryDirectory();
    NSLog(@"dirtmp =====  %@",dirtmp2);
5 如何创建文件夹
 //5 如何创建文件夹
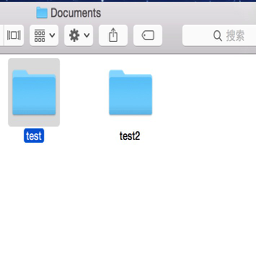
    //5.1 在Documents文件夹下创建文件夹 test
    NSArray *pathDoc = NSSearchPathForDirectoriesInDomains(NSDocumentDirectory, NSUserDomainMask, YES);
    NSString *dirDocPath = pathDoc[0];
    NSFileManager *fileManager = [NSFileManager defaultManager];
    NSString *dirDocPathTest = [dirDocPath stringByAppendingPathComponent:@"test"];
      //创建
    BOOL res = [fileManager createDirectoryAtPath:dirDocPathTest withIntermediateDirectories:YES attributes:nil error:nil];
    if (res) {
        NSLog(@"创建成功");
        NSLog(@"dirDocPathTest ====== %@ ",dirDocPathTest);
    }else{
        NSLog(@"创建失败");
    }
未完待续
好了 到家了 继续
5.1 创建文件
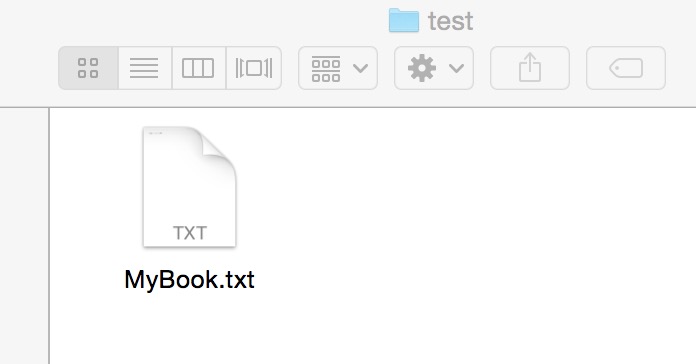
 //5.2 在创建好的test文件夹里 创建txt文件 mybook.txt
       //构建路径文件
    NSString *dirDocTestMyBook = [dirDocPathTest stringByAppendingPathComponent:@"MyBook.txt"];
    NSData *data = [@"天南一号" dataUsingEncoding:NSUTF8StringEncoding];
    BOOL res1 = [fileManager createFileAtPath:dirDocTestMyBook contents:data attributes:nil];
    if (res1) {
        NSLog(@"ok");
        NSLog(@"dirDocPathTest ===== %@",dirDocTestMyBook);
    }else{
        NSLog(@"no");
    }
5.3 写入内容
//5.3 直接将内容写入test文件夹下的mybook.txt下
    BOOL res2 = [@"非常帅  (╯‵□′)╯︵┻━┻" writeToFile:dirDocTestMyBook atomically:YES encoding:NSUTF8StringEncoding error:nil];
    if (res2) {
        NSLog(@"ok");
        //读取刚才写入的内容
        NSString *MyBookStr = [NSString stringWithContentsOfFile:dirDocTestMyBook encoding:NSUTF8StringEncoding error:nil];
        NSLog(@"读取到的文字 ====  %@",MyBookStr);
        //删除文件
//        BOOL res3 = [fileManager removeItemAtPath:dirDocTestMyBook error:nil];
//        if (res3) {
//            NSLog(@"delete is  ok ");
//        }

    }else{
        NSLog(@"no");
    }
文件的简单操作如下,下面结合NSURLSession 下载文件并保存显示
    //5.4 下载图片 并保存到test文件夹下
    NSURLRequest *request = [NSURLRequest requestWithURL:[NSURL URLWithString:@"http://tupian.enterdesk.com/2013/lxy/12/30/2/5.jpg"]];
    NSURLSessionConfiguration *sessionConfiguration = [NSURLSessionConfiguration defaultSessionConfiguration];
    NSURLSession *session = [NSURLSession sessionWithConfiguration:sessionConfiguration delegate:self delegateQueue:nil];
    NSURLSessionDownloadTask *downLoadTask = [session downloadTaskWithRequest:request];
    [downLoadTask resume];
    _progress.progress = 0;


-(void)URLSession:(NSURLSession *)session downloadTask:(NSURLSessionDownloadTask *)downloadTask didFinishDownloadingToURL:(NSURL *)location{
    NSLog(@"下载完成,文件保存在临时tem里  location %@",location);

    //从tmp文件夹里 复制文件 放到test2文件夹 且删除tmp文件夹下内容

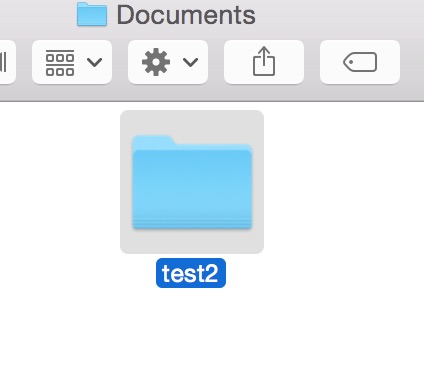
    //创建test2文件夹
    NSFileManager *fileManger = [NSFileManager defaultManager];
    NSArray *docUrls = [fileManger URLsForDirectory:NSDocumentDirectory inDomains:NSUserDomainMask];
    NSURL *docUrl = docUrls[0];
    NSURL *test2 = [NSURL URLWithString:[NSString stringWithFormat:@"%@/test2",docUrl]];
    BOOL res = [fileManger createDirectoryAtURL:test2 withIntermediateDirectories:YES attributes:nil error:nil];

    //构建Documents 下test2 下 文件的路径
    NSURL *downloadUrl = [test2 URLByAppendingPathComponent:[location lastPathComponent]];


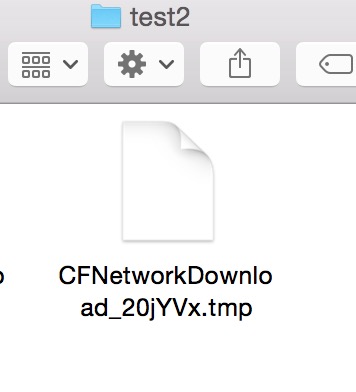
    //ps:这一步之前,我都没在tmp文件夹里看到 下载下来的.tmp文件  直到执行下面的复制 才发现tmp文件夹内出现文件,且以后再运行 都不会生成tmp文件  暂时还不知是为何 个人猜测是否是NSURLSessionDownloadeTask 的缓存机制 ??

    //从tmp复制到Documents文件夹
    NSError*error;
    [fileManger copyItemAtURL:location toURL:downloadUrl error:&error];
    if (error == nil) {
        dispatch_async(dispatch_get_main_queue(), ^{
            _imgn.image = [UIImage imageWithContentsOfFile:[downloadUrl path]];
        });
    }

    //最后 删除tmp中的文件
//    [fileManger removeItemAtURL:location error:nil];

}

-(void)URLSession:(NSURLSession *)session downloadTask:(NSURLSessionDownloadTask *)downloadTask didWriteData:(int64_t)bytesWritten totalBytesWritten:(int64_t)totalBytesWritten totalBytesExpectedToWrite:(int64_t)totalBytesExpectedToWrite{

    dispatch_async(dispatch_get_main_queue(), ^{

            _progress.progress = totalBytesWritten/(float)totalBytesExpectedToWrite;
    });


}
总结;NSFileManger 一般使用单例,其对象就是做创建/删除等对文件及文件夹的操作,而文件夹及文件的路径,则需要我们自己拼装好.
下面放出代码传送(果然还是要自己动手写,才能记得牢)
https://github.com/tianNanYiHao/C-demo/tree/master/%E7%BD%91%E7%BB%9C%E8%AF%B7%E6%B1%82/FileManger%20%E6%96%87%E4%BB%B6%E6%93%8D%E4%BD%9C/FileManger%20%E6%96%87%E4%BB%B6%E6%93%8D%E4%BD%9C
祝大家周末愉快!
END


 本文详细介绍了NSFileManager类在iOS开发中的使用方法,包括获取文件夹路径、创建文件和文件夹、文件读写操作,并通过实际代码示例展示了如何下载文件并保存到指定位置。同时强调了文件路径拼装的重要性,以及在不同场景下选择合适的方法来提高效率。


 被折叠的 条评论
为什么被折叠?


