


当你想把自己在csdn上写的文章转为hexo上可以发布的文章或是将文章写入自己的数据库时,可以用到
将所有博客数据写入数据库
获取你的文章的分页接口:
在浏览自己的所有文章时,我们不难发现,文章的数据是往下滑动到底时,才会刷新出新的数据,
那么此时肯定是发送了一个请求来获取后面的分页数据:

这时,我们再查看他的请求url:

尝试查看下他的res.data:
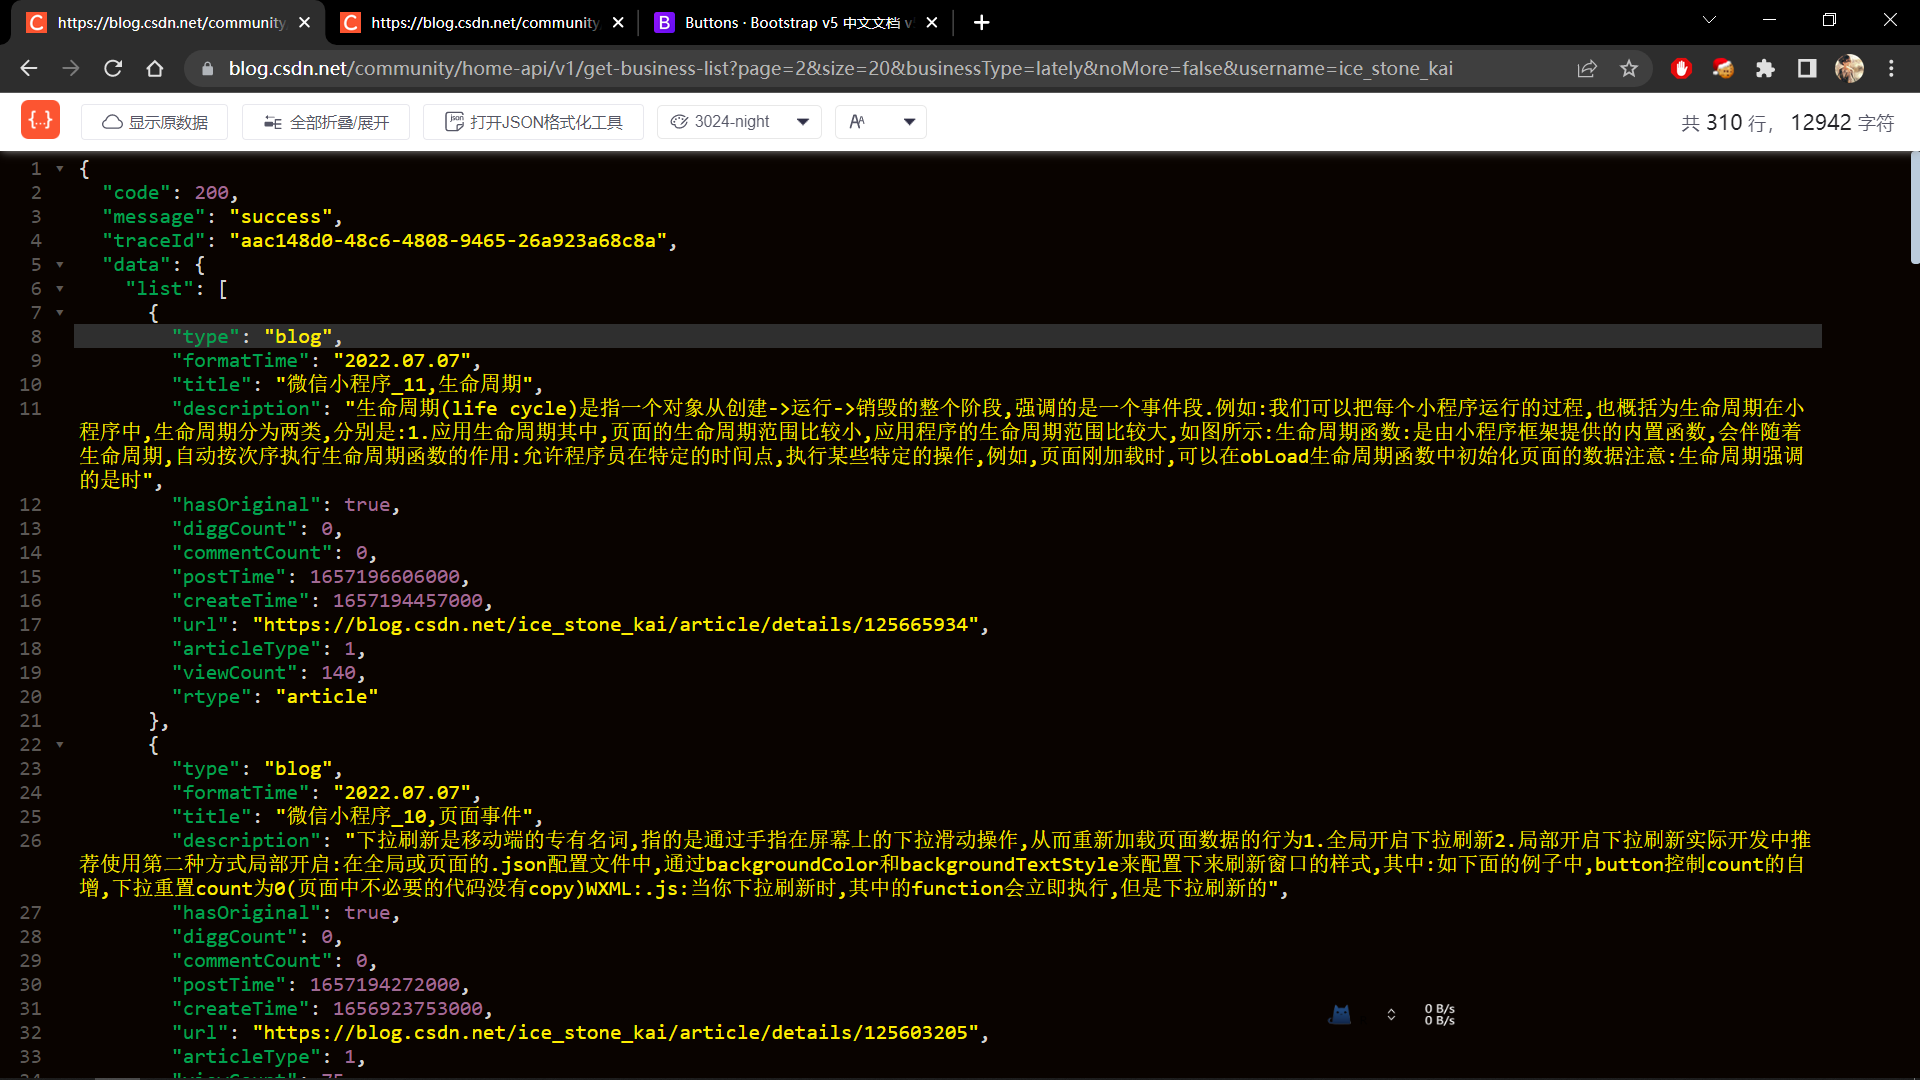
那么,在这个url中,page,size这两个参数可以调整,其他的参数还没有尝试
接口为:
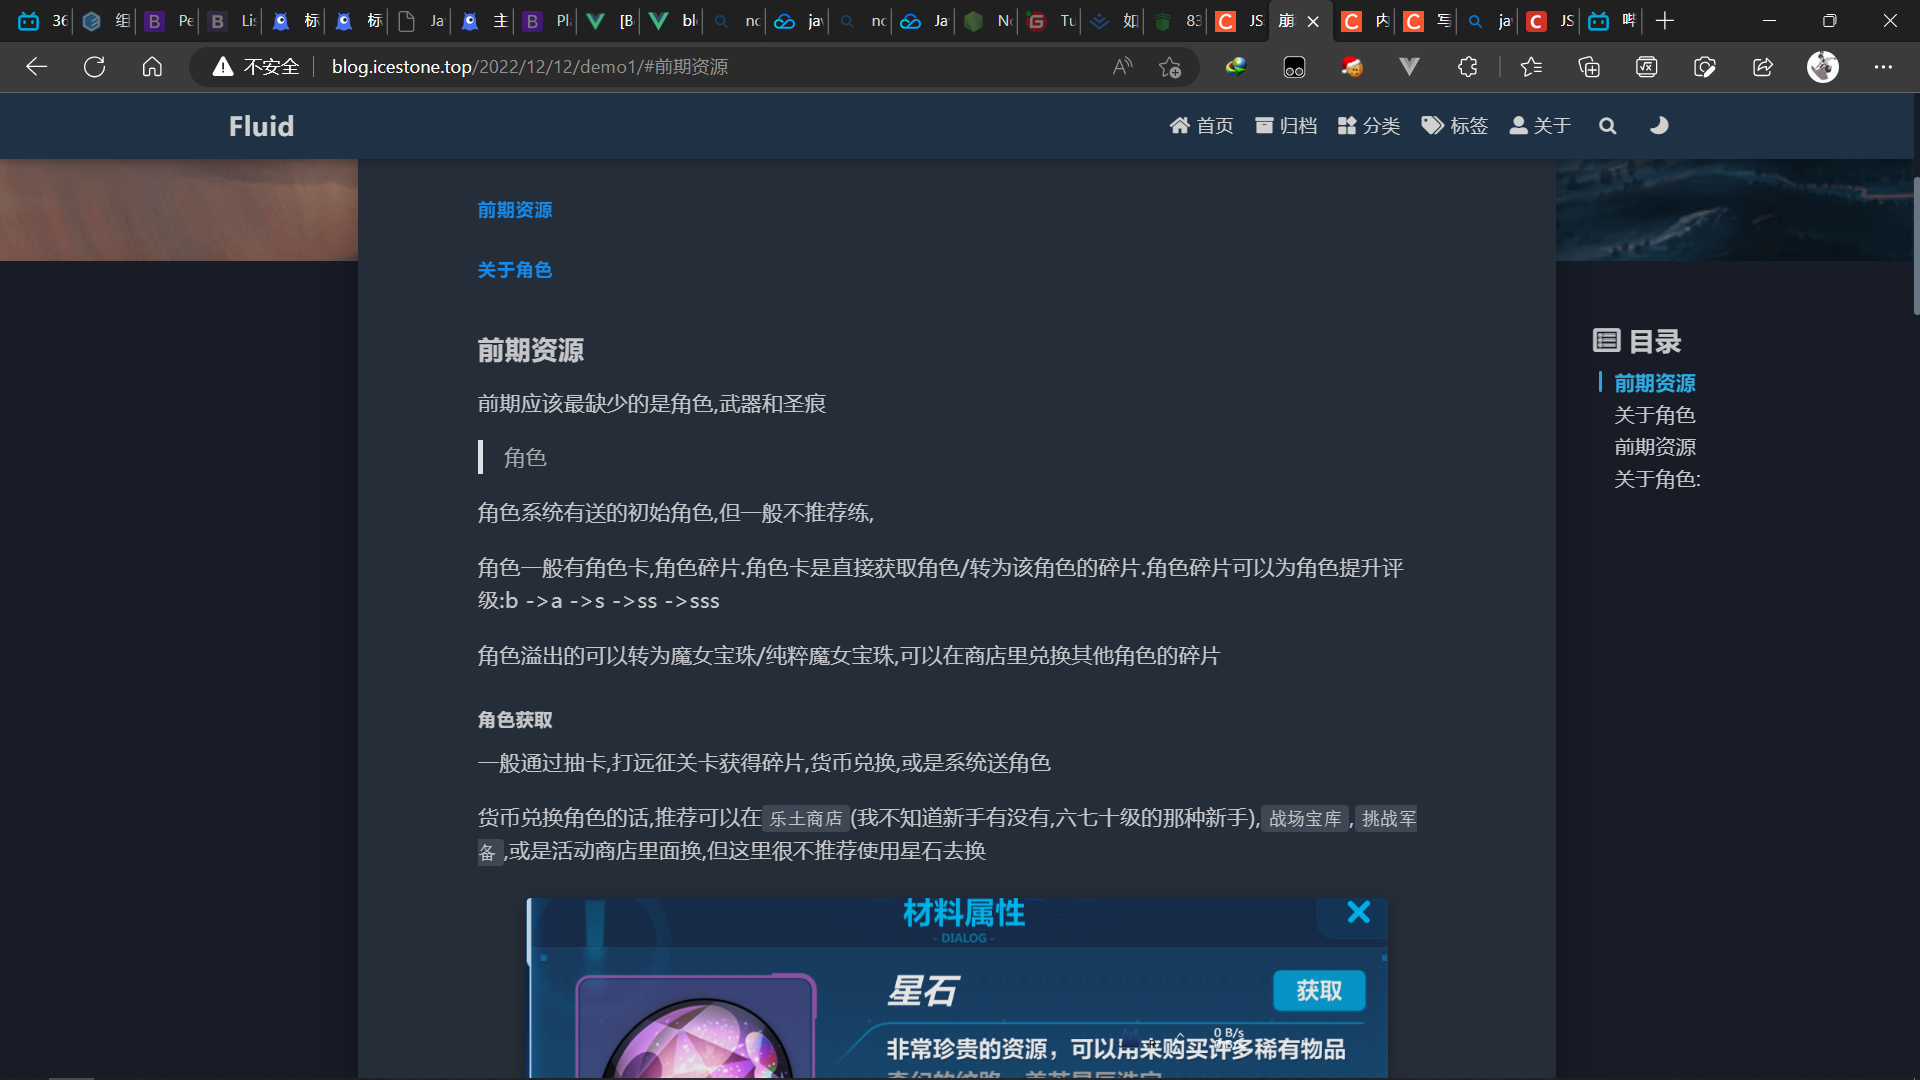
https://blog.csdn.net/community/home-api/v1/get-business-list?page=2&size=20&businessType=lately&noMore=false&username=你的用户名
将接口请求到的数据写入数据库:
这里我使用的是nodejs和mysql,
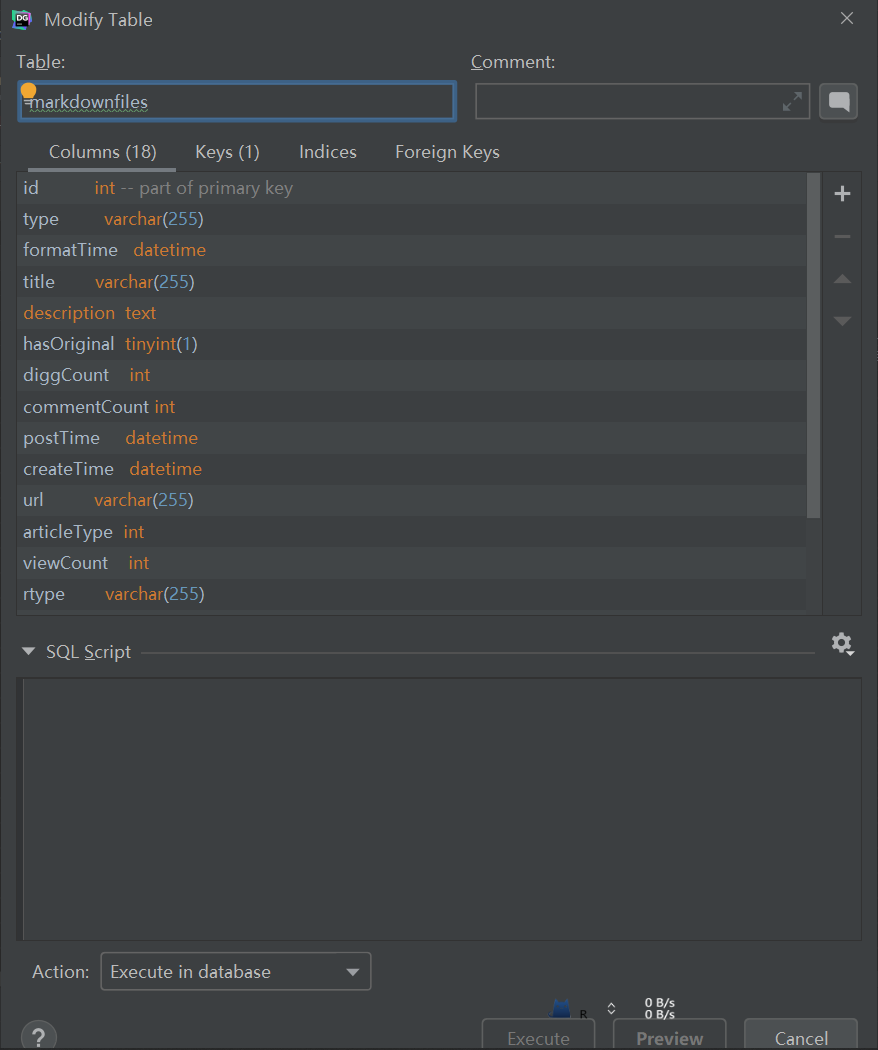
- database schema:
const {
DataTypes
} = require('sequelize')
const seq = require('../db/sql')
const markdownFile = seq.define('markdownFile', {
//id会被sequelize自动创建,管理
type: {
type: DataTypes.STRING,
allowNull: true,
},
formatTime: {
type: DataTypes.DATE,
allowNull: true,
},
title: {
type: DataTypes.STRING,
allowNull: true,
},
description: {
type: DataTypes.TEXT,
allowNull: true,
},
hasOriginal: {
type: DataTypes.BOOLEAN,
allowNull: true,
},
diggCount: {
type: DataTypes.INTEGER,
allowNull: true,
},
commentCount: {
type: DataTypes.INTEGER,
allowNull: true,
},
postTime: {
type: DataTypes.DATE,
allowNull: true,
},
createTime: {
type: DataTypes.DATE,
allowNull: true,
},
url: {
type: DataTypes.STRING,
allowNull: true,
},
articleType: {
type: DataTypes.INTEGER,
allowNull: true,
},
viewCount: {
type: DataTypes.INTEGER,
allowNull: true,
},
rtype: {
type: DataTypes.STRING,
allowNull: true,
},
content: {
type: DataTypes.TEXT,
allowNull: true,
default: '暂无内容'
},
email: {
type: DataTypes.STRING,
allowNull: true,
default: '拥有者邮箱'
}
});
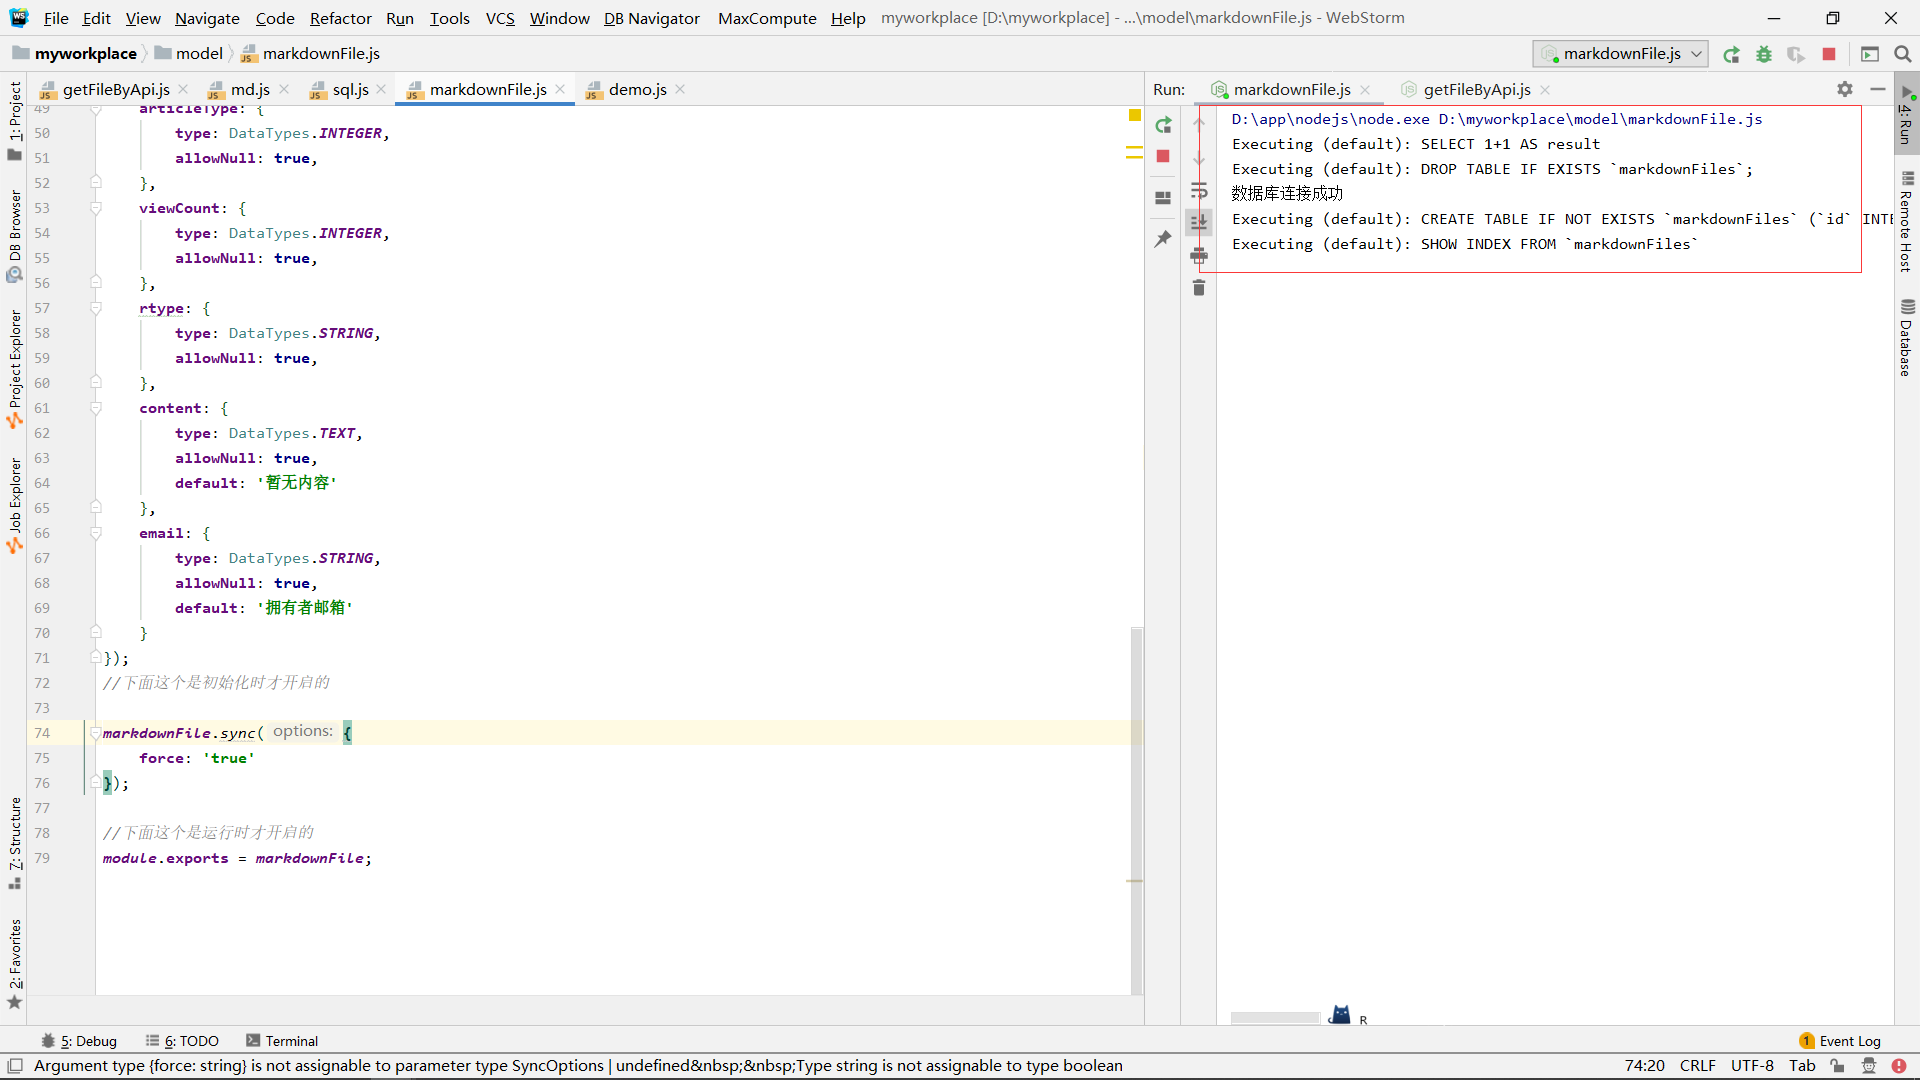
//下面这个是初始化时才开启的
/*markdownFile.sync({
force: 'true'
});*/
//下面这个是运行时才开启的
module.exports = markdownFile;
这里的schema是按照需求写的,具体需要哪些字段,是看通过接口请求得到的文章数据中,有哪些字段
- 连接mysql的sql.js
这里的sql.js代码按照自己的配置来连接,其中functiontest为连接时测试是否成功
//本机数据库连接配置
const {Sequelize} = require('sequelize')
//实例化对象
const seq = new Sequelize('markdownfile', 'root', '123456', {
// const seq = new Sequelize('markdownfile', 'root','1df4490cbd872e80', {
    dialect: 'mysql',
    port: 3306
});

async function test() {
    try {
        await seq.authenticate()
        console.log('数据库连接成功')
    } catch (error) {
        console.error('数据库连接失败:  ', error)
    }
}
test();
module.exports = seq;
此时,只需要使用https包,请求api,并将数据写入数据库
下面是需要运行的代码:
//根据csdn的api接口获取文章列表
const markdownFile = require('./model/markdownFile')
const {
	create
} = require('./service/md')

const https = require("https");
const config = {
	url1: 'https://blog.csdn.net/community/home-api/v1/get-business-list?page=',
	url2: '&size=20&businessType=lately&noMore=false&username=ice_stone_kai',
	page: {
		num: '1',
		size: '20'
	},
	html: '',
	json: {}

};
//使用http
https.get(`${config.url1}10${config.url2}`, res => {
	res.on('data', function (chunk) {
		config.html += chunk;
	});
	res.on('end', () => {
		config.json = JSON.parse(config.html);
		console.log('data:');
		const dataList = config.json.data.list;
			dataList.forEach(item => {
				create(item);
			});
	})
});
其中create为:
const https = require("https");
const markdownFile = require('../model/markdownFile');
class md {
    async create(obj) {
        // console.log(obj)
        const {
            type,
            formatTime,
            title,
            description, hasOriginal,
            diggCount,
            commentCount,
            postTime,
            createTime,
            url,
            articleType,
            viewCount,
            rtype,
            email
        } = obj;
        // await md.getData(url)
        return await markdownFile.create({
            type,
            formatTime,
            title,
            description, hasOriginal,
            diggCount,
            commentCount,
            postTime,
            createTime,
            url,
            articleType,
            viewCount,
            rtype,
            email
        })
    }
}
module.exports = new md;
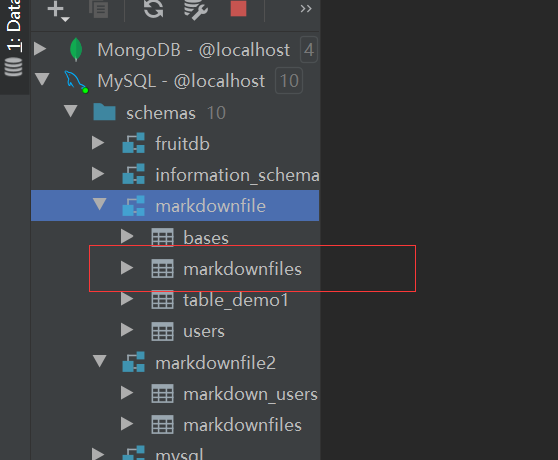
数据库创建:
将schema那部分代码的注释取消:
markdownFile.sync({
    force: 'true'
});
右键,run
进入datagrip查看:
创建完成之后,刚刚的代码一定要再加上注释,或者把force的部分加上注释:
/*
markdownFile.sync({
    force: 'true'
});
*/
它的意思是,不管数据库是否存在,都会强制再创建一个新的目标数据库
通过api写入数据库:
这里我们是通过分页的接口来获取数据的,那么就需要修改page的参数来请求不同的分页数据,所以,我们这里page为1开始:
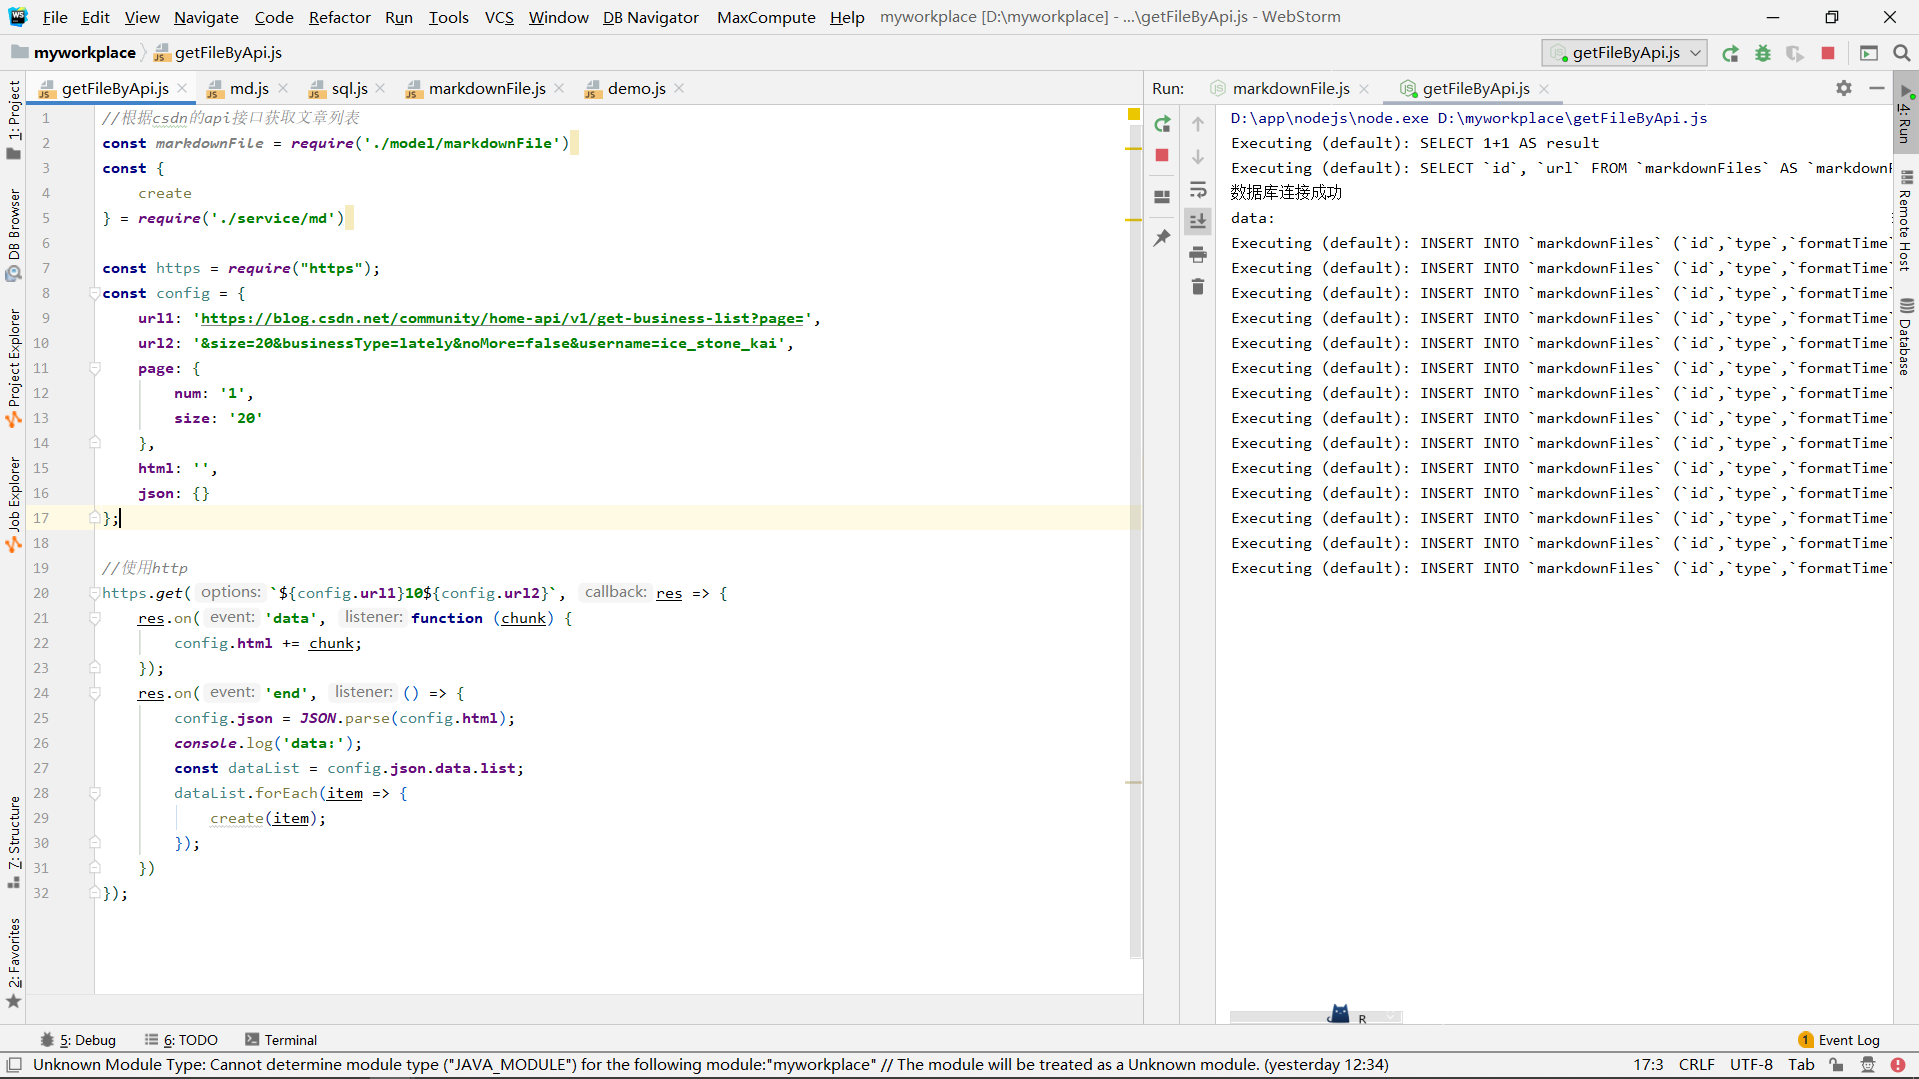
查看数据库:
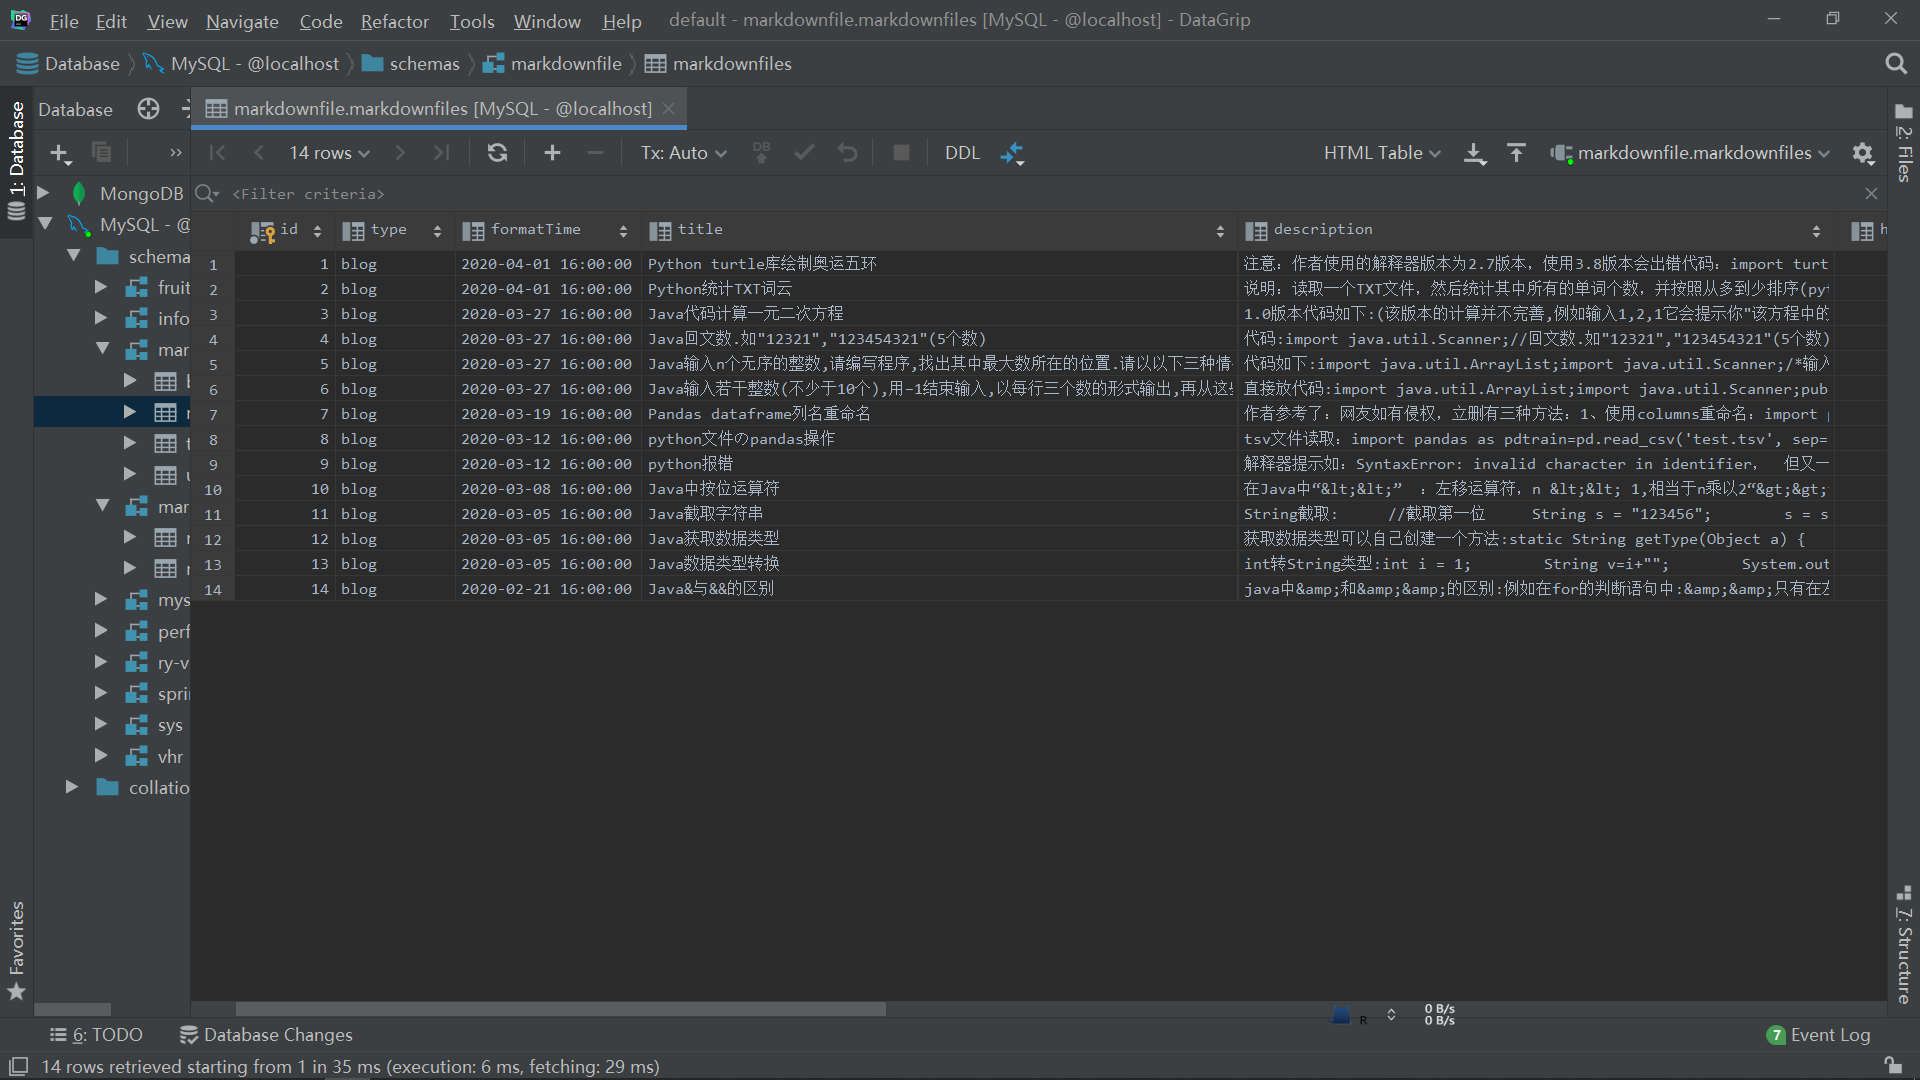
写入了,这里你有多少分页数据就修改page的参数即可
我的分页数据有10页,所以这里修改page的参数从1,2,一直到10,
别问为什么不用遍历来异步获取数据,不会
将数据库中的单个文章数据写入markdown文件:
此时我们的数据库:
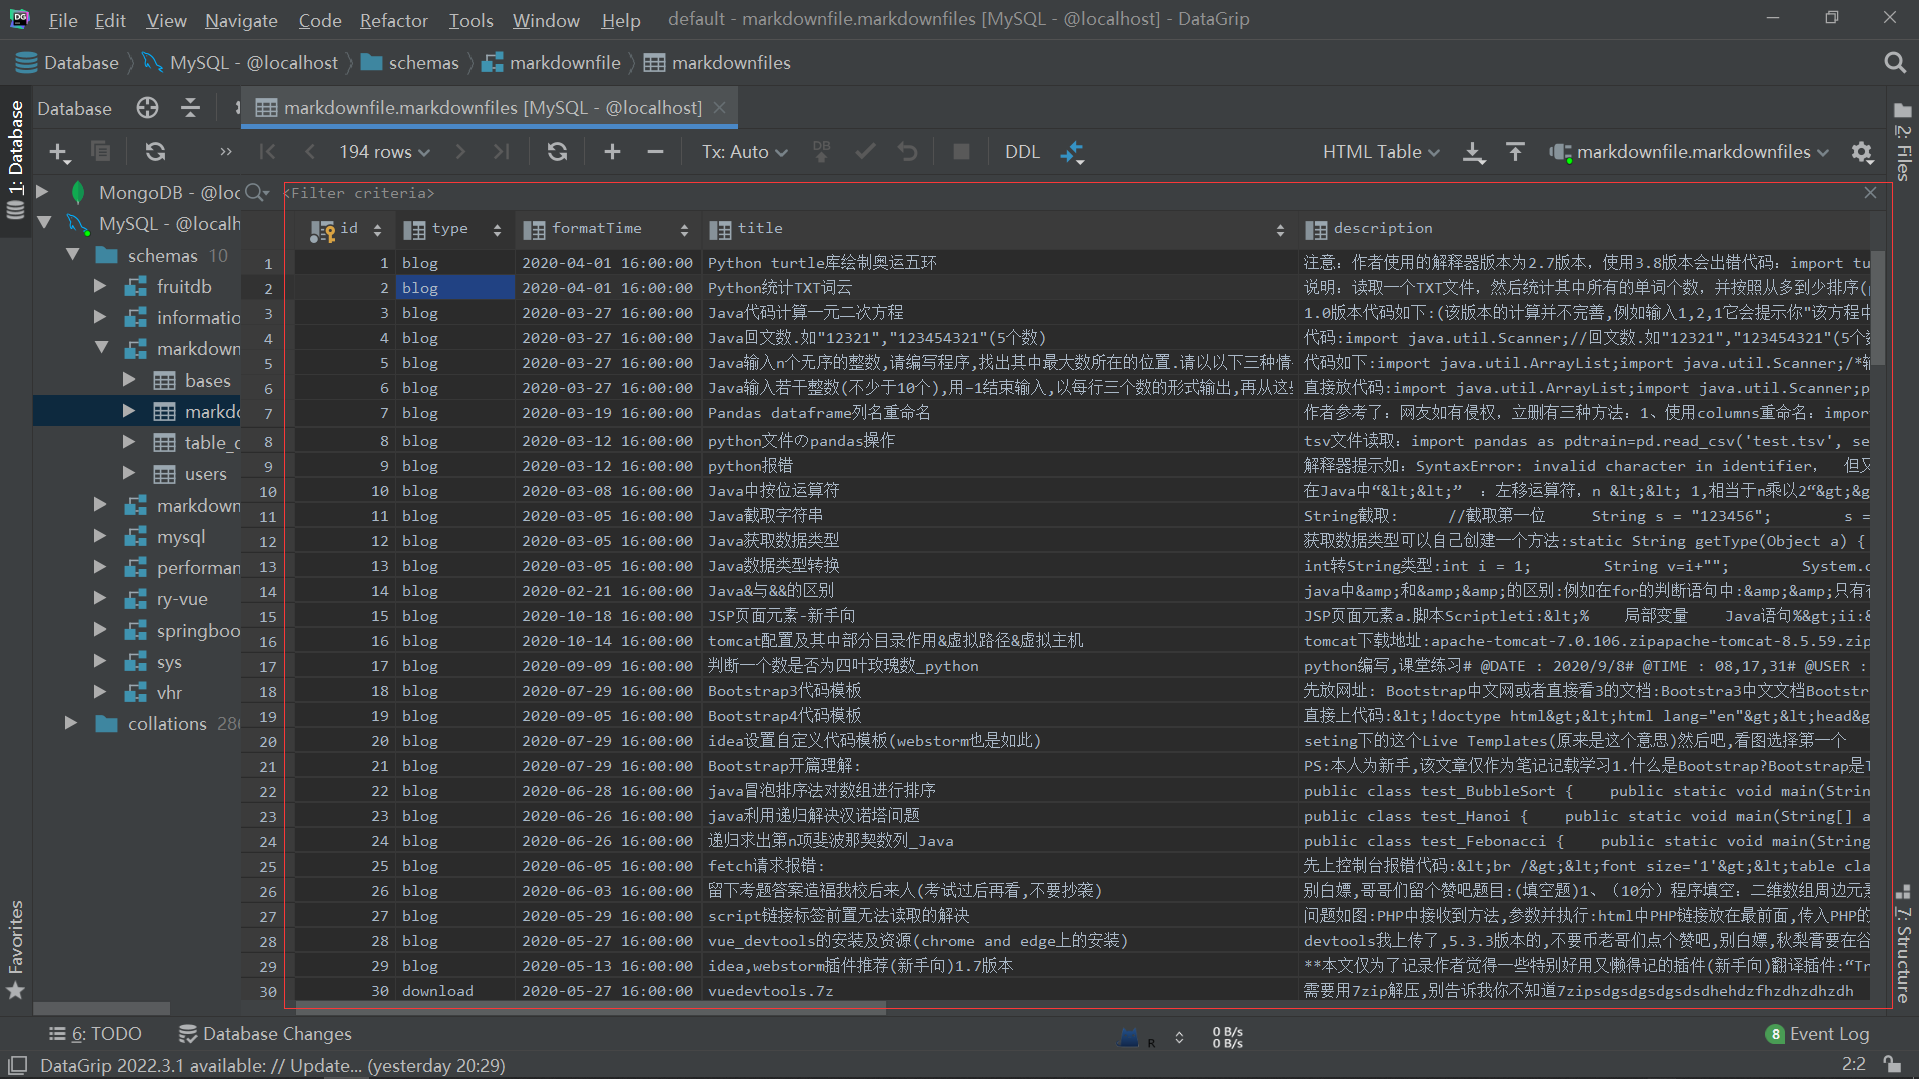
注意此时数据库中的数据字段并没有文章数据:
数据库的item获取文章数据:
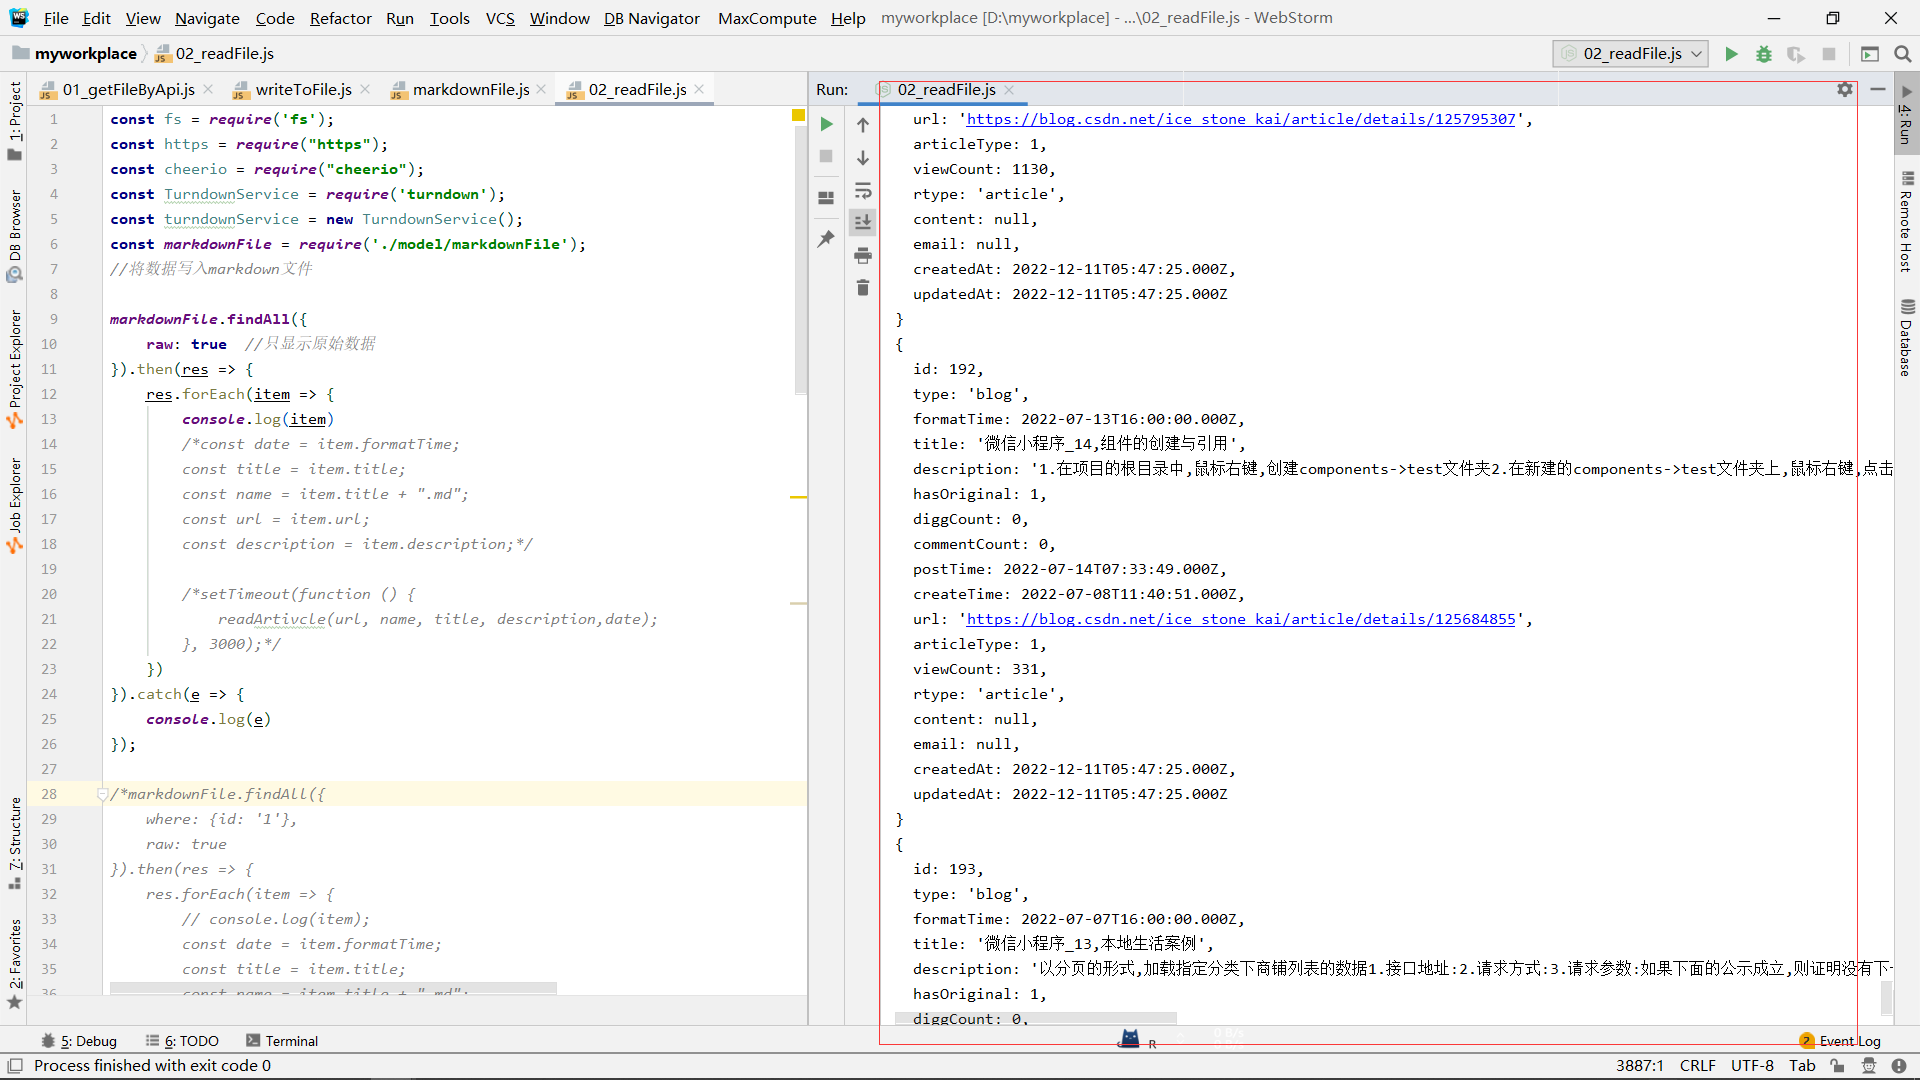
尝试下面代码,便利查看数据库所有数据:
const fs = require('fs');
const https = require("https");
const cheerio = require("cheerio");
const TurndownService = require('turndown');
const turndownService = new TurndownService();
const markdownFile = require('./model/markdownFile');
//将数据写入markdown文件

markdownFile.findAll({
	raw: true  //只显示原始数据
}).then(res => {
	res.forEach(item => {
		console.log(item)
	})
}).catch(e => {
	console.log(e)
});
通过url获取文章数据:
注意这里的代码可能导入的一些库没有写上去
const cheerio = require("cheerio");
readArtivcle('https://blog.csdn.net/ice_stone_kai/article/details/125666593');
function readArtivcle(url) {
let html = '';
https.get(`${url}`, res => {
res.on('data', function (chunk) {
html += chunk;
});
res.on('end', () => {
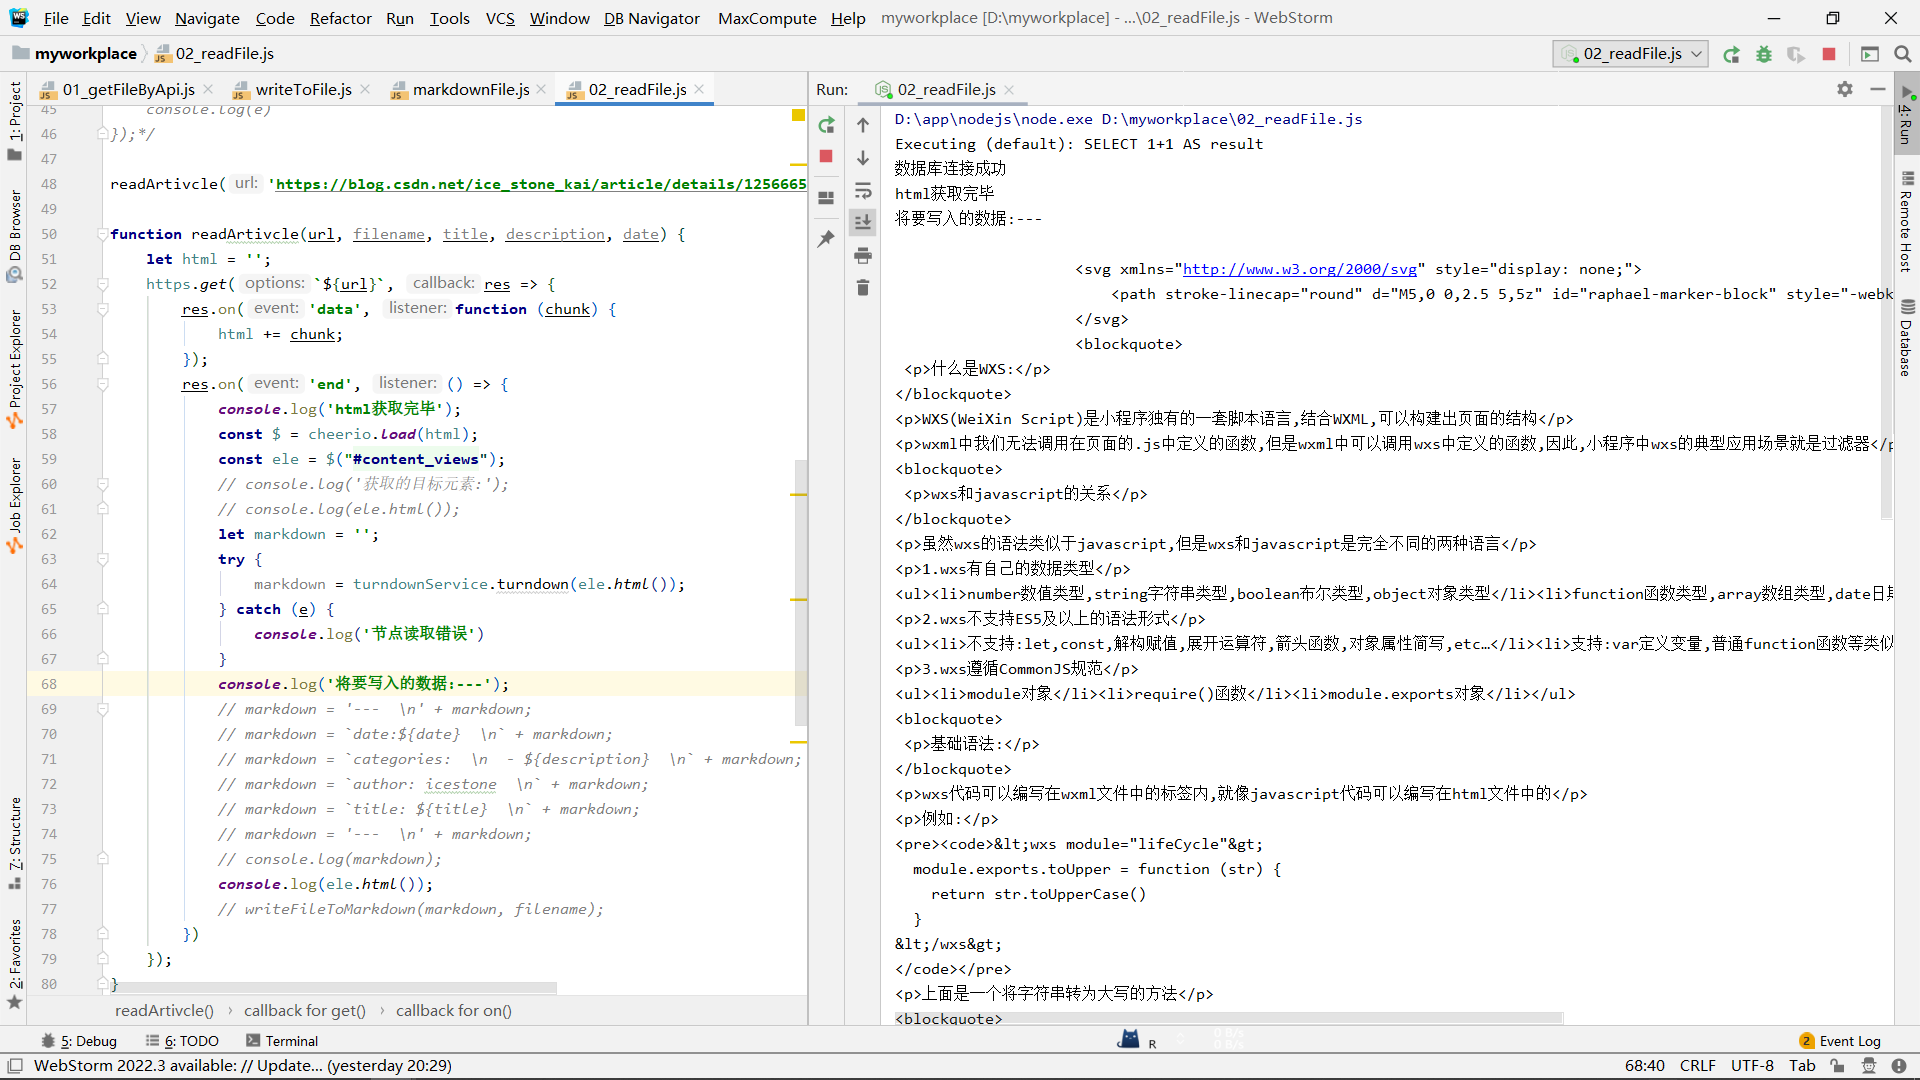
console.log('html获取完毕');
const $ = cheerio.load(html);
const ele = $("#content_views");
console.log('将要写入的数据:---');
console.log(ele.html());
})
});
}
这里使用cheerio来操作网页的dom.
html转markdown
此时我们会发现获取的数据可能并不那么理想,我们要写入的,应该是markdown格式的文件,那么就可以使用一些库来将htmlk转markdown:
function readArtivcle(url, filename, title, description, date) {
	let html = '';
	https.get(`${url}`, res => {
		res.on('data', function (chunk) {
			html += chunk;
		});
		res.on('end', () => {
			console.log('html获取完毕');
			const $ = cheerio.load(html);
			const ele = $("#content_views");
			let markdown = '';
			try {
				markdown = turndownService.turndown(ele.html());
			} catch (e) {
				console.log('节点读取错误')
			}
			console.log('将要写入的数据:---');
			console.log(markdown);
		})
	});
}

这里就转为了markdown格式的字符串
markdown写入文件:
代码:
readArtivcle('https://blog.csdn.net/ice_stone_kai/article/details/125666593');

function readArtivcle(url, filename, title, description, date) {
	let html = '';
	https.get(`${url}`, res => {
		res.on('data', function (chunk) {
			html += chunk;
		});
		res.on('end', () => {
			console.log('html获取完毕');
			const $ = cheerio.load(html);
			const ele = $("#content_views");
			let markdown = '';
			try {
				markdown = turndownService.turndown(ele.html());
			} catch (e) {
				console.log('节点读取错误')
			}
			writeFileToMarkdown(markdown, 'demo1.md');
		})
	});
}


function writeFileToMarkdown(str, filename) {
	fs.access(`./demo/${filename}`, fs.constants.F_OK, (err) => {
		console.log(`first judgement: ${filename} ${err ? 'is not exist' : 'is exist'}`);
		if (err) {
			console.log(`${filename} is not exist,so I will create it`);
			fs.writeFile(`./demo/${filename}`, '', (error) => {
				//创建失败
				if (error) {
					console.log(`file id no's exist,and create error:${error}`)
				}
				//创建成功
				console.log(`file id no's exist,but create success!`);
				//自己调用下自己,写入str
				writeFileToMarkdown(str, filename)
			})
		} else {
			fs.writeFile(`./demo/${filename}`, str, err => {
				if (err) {
					console.log('file write error');
					console.log(err)
				} else {
					console.log('file write success');
				}
			})
		}
	});
}
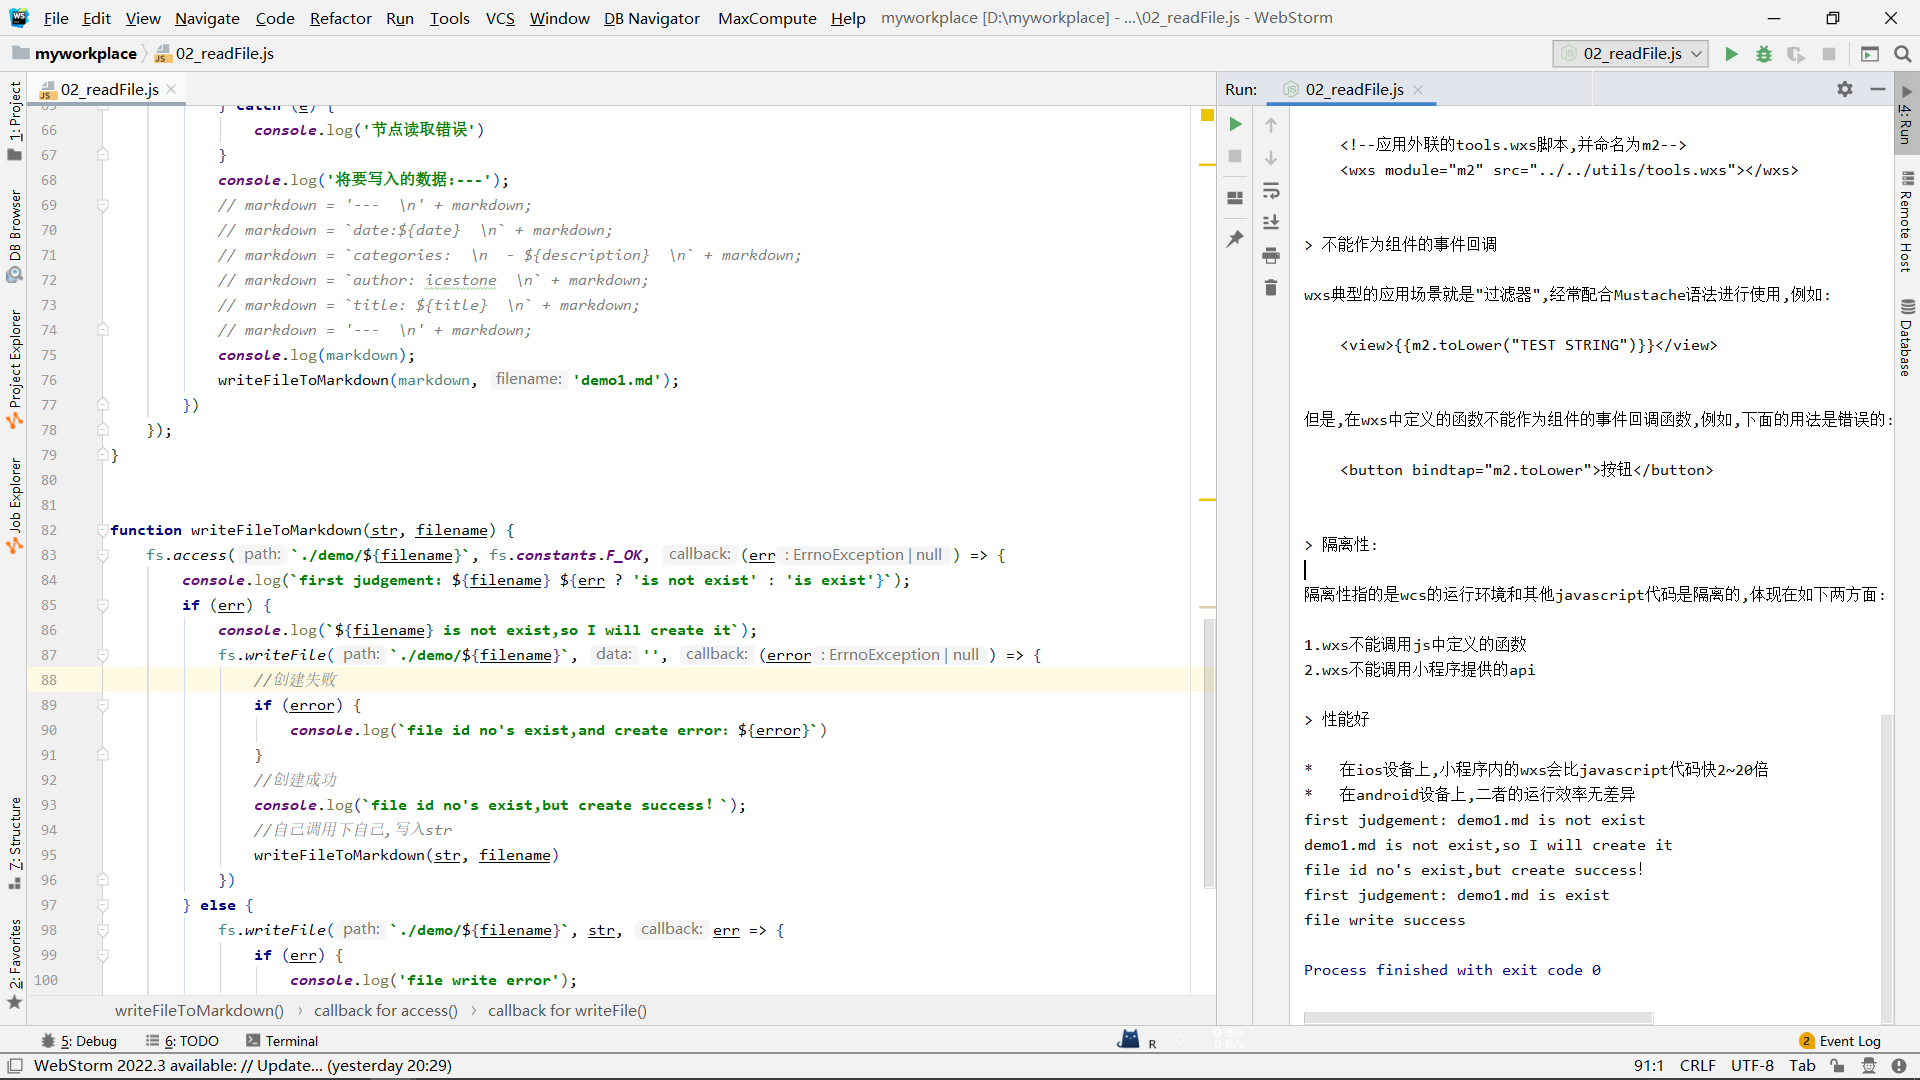
这里的writeFileToMarkdown第一个参数接受需要写入的字符串,第二个参数接受该文件的文件名,这里的文件名需要带文件的扩展名(.md),当文件不存在时,会先创建一次目标文件,然后自己调用一次自己,再写入
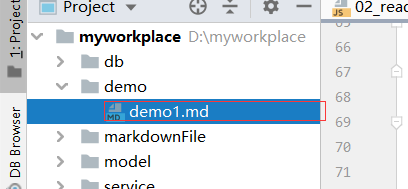
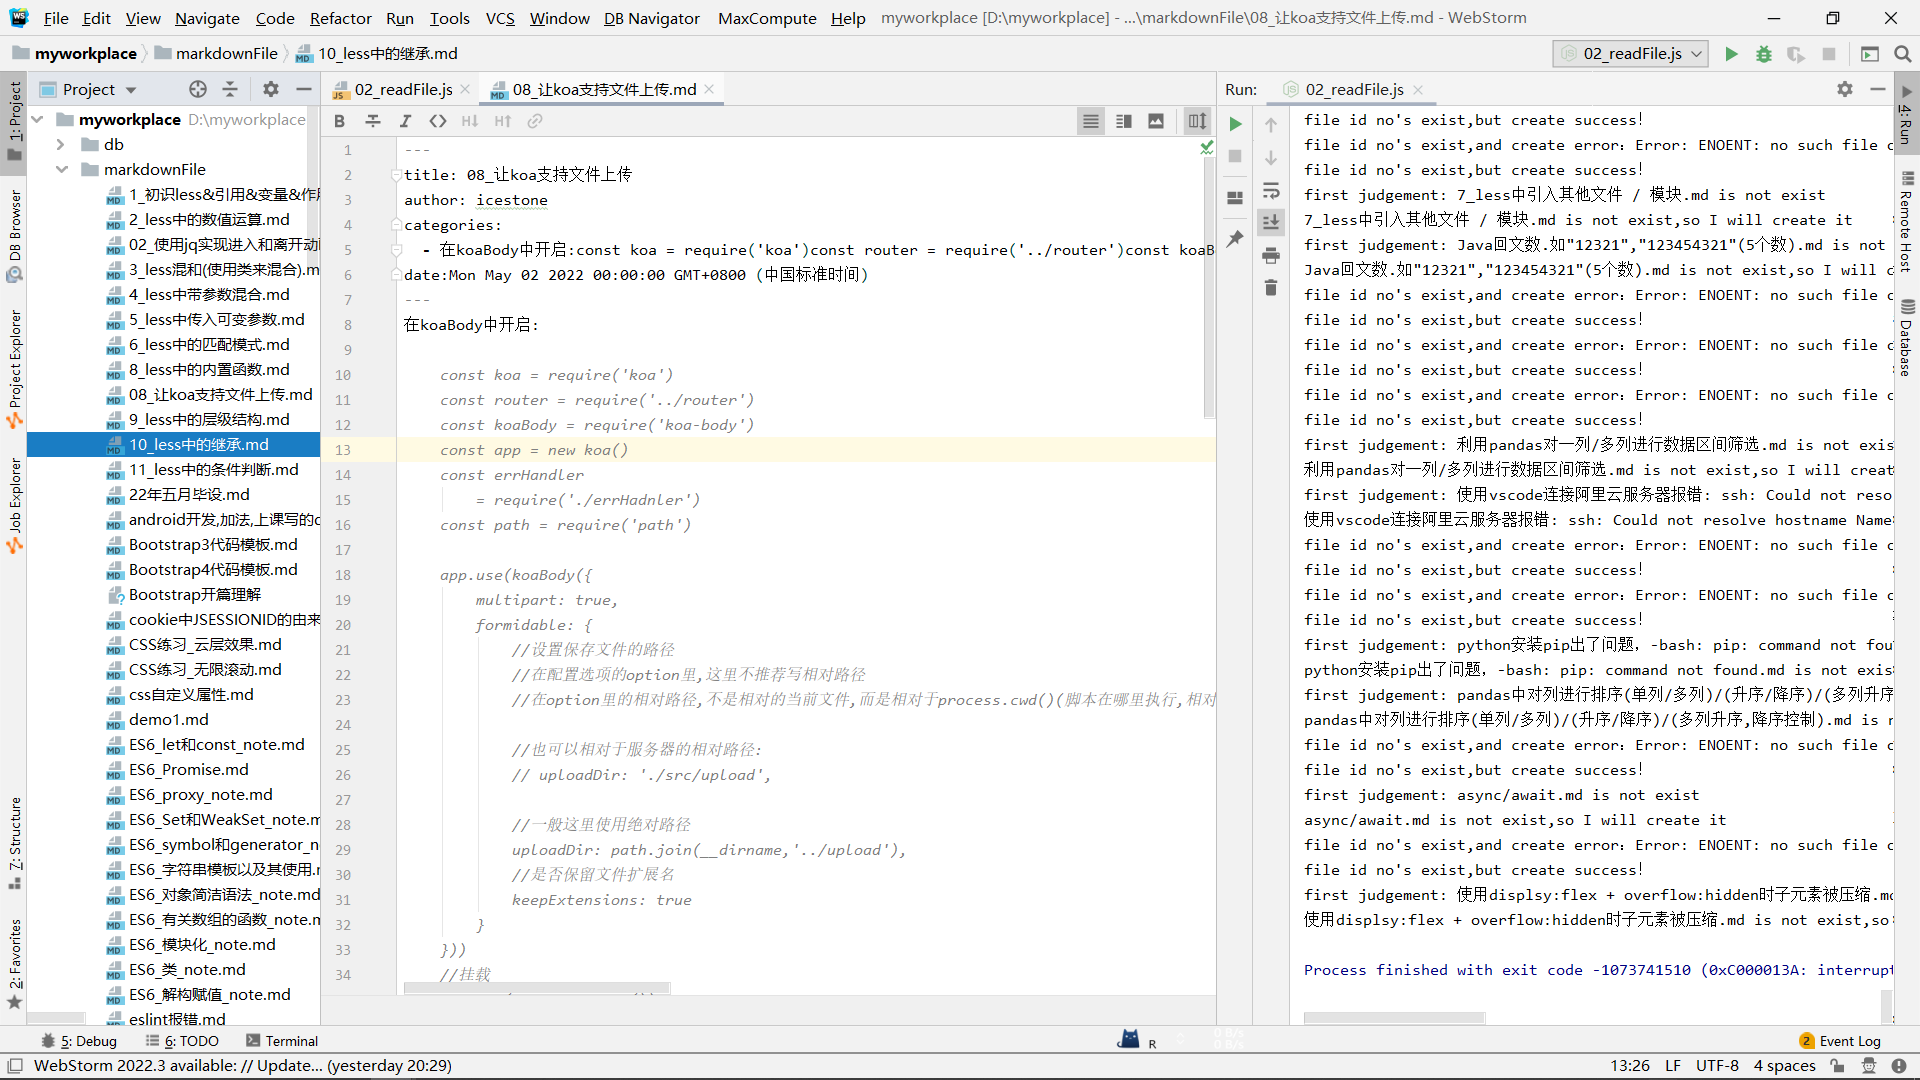
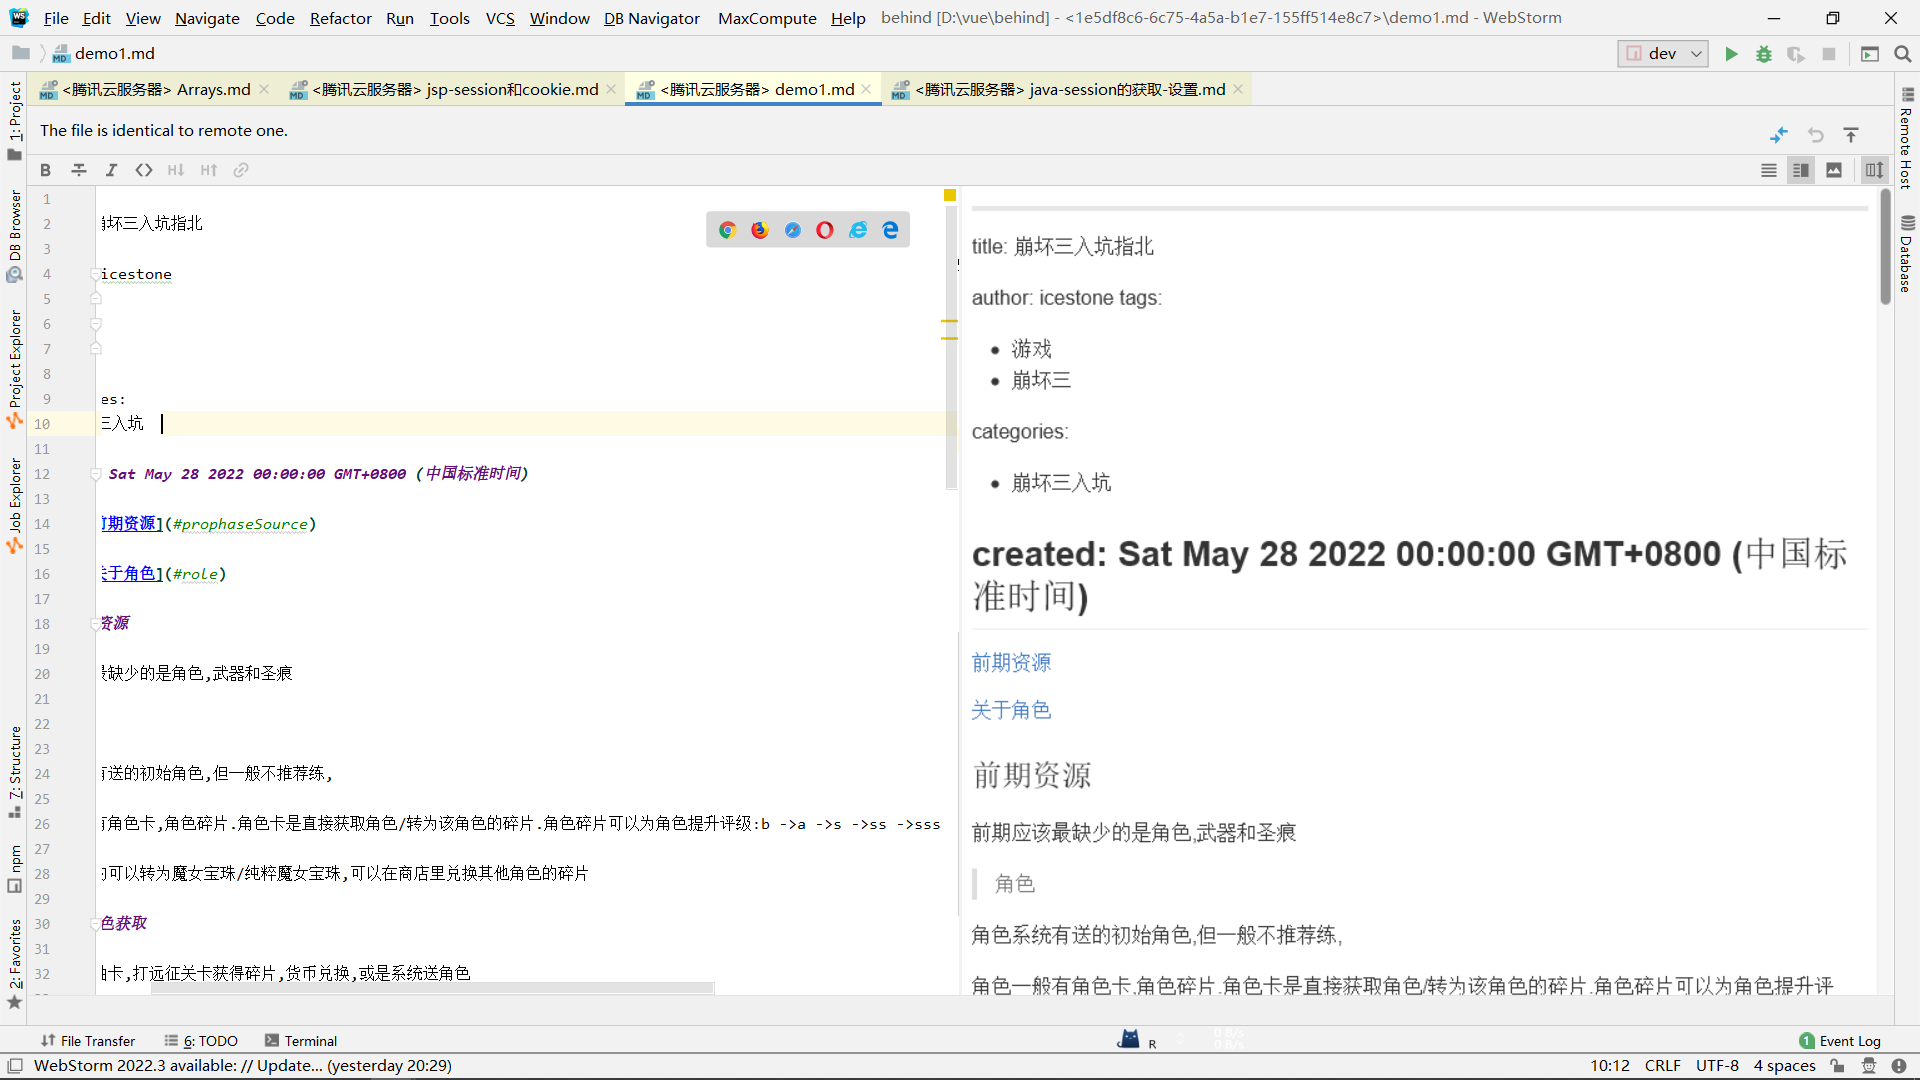
那么查看markdown文件:
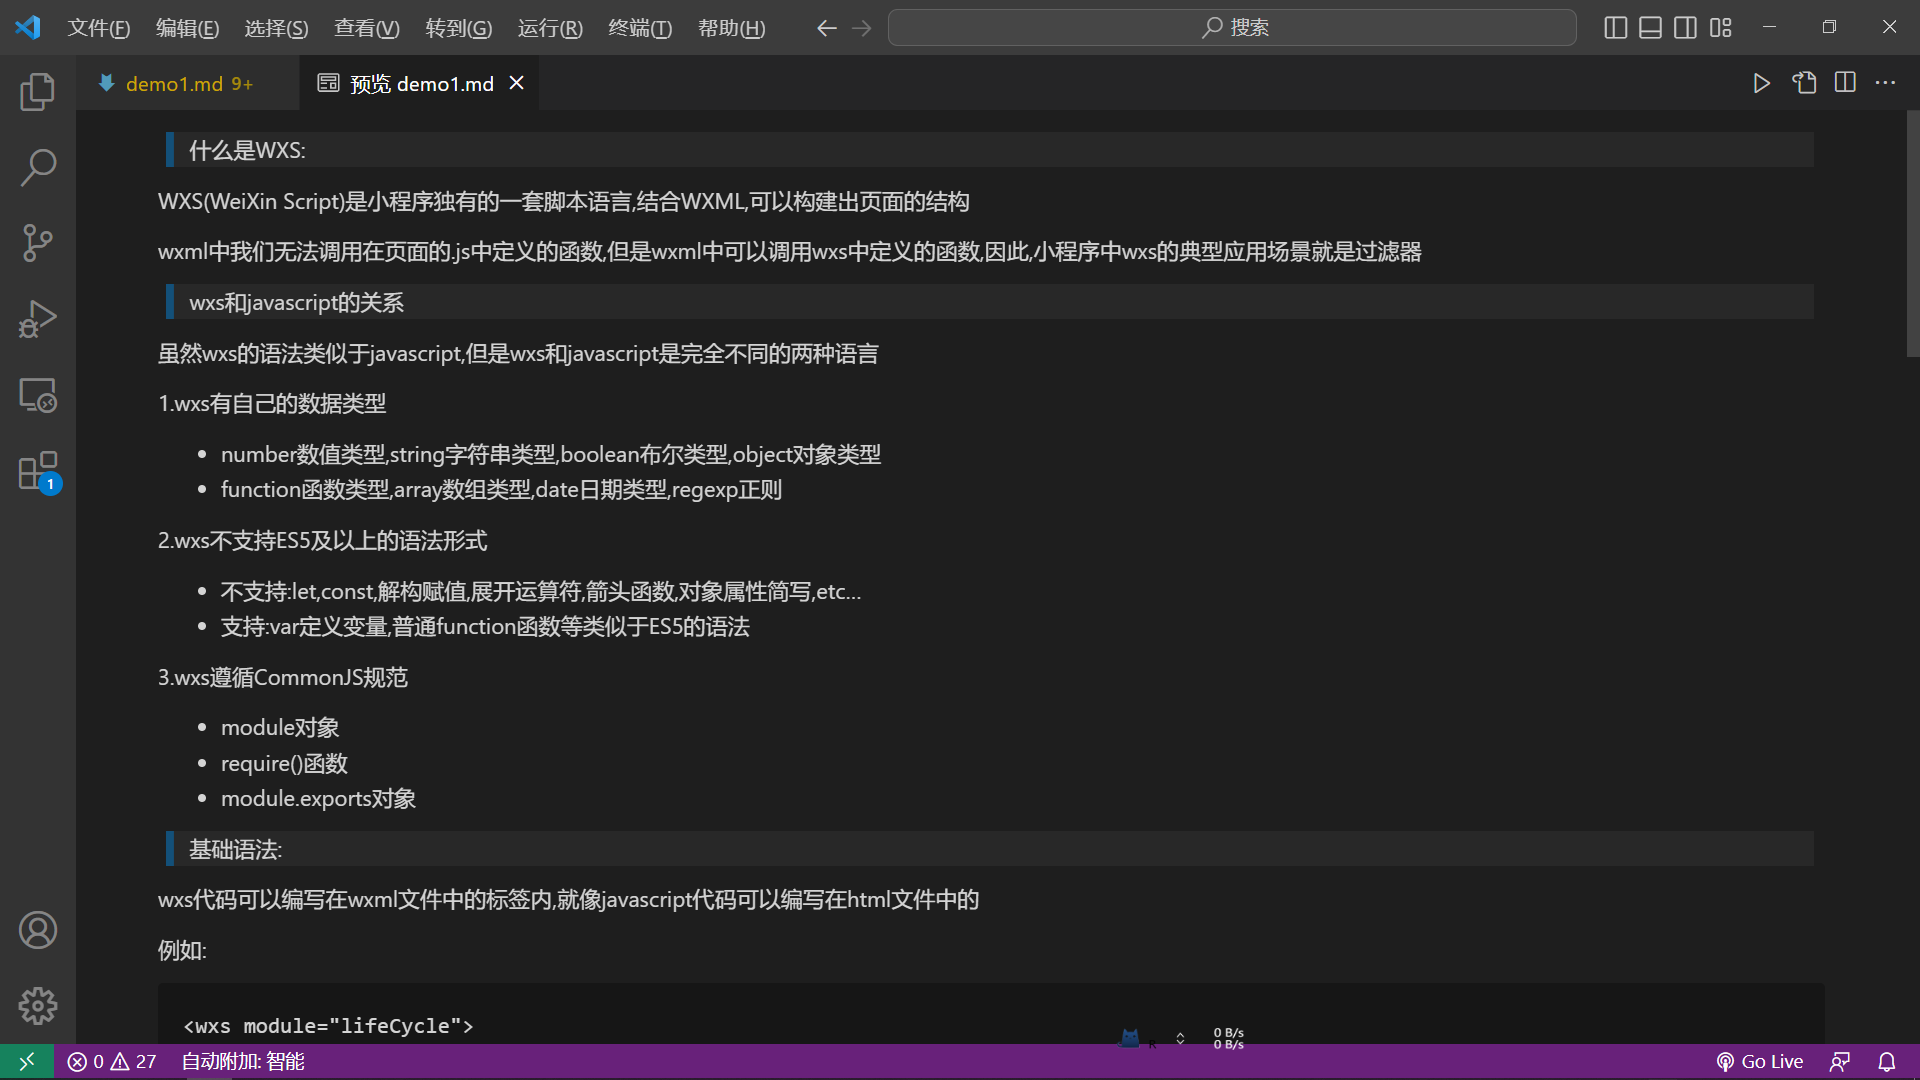
在浏览器中查看原来的网页:

还行,但是打开markdown文件你会发现,它的头部并没有像是hexo博客的那种格式:
hexo应该是:

那么我们尝试添加一下:
const fs = require('fs');
const https = require("https");
const cheerio = require("cheerio");
const TurndownService = require('turndown');
const turndownService = new TurndownService();
const markdownFile = require('./model/markdownFile');
//将数据写入markdown文件

markdownFile.findAll({
	raw: true  //只显示原始数据
}).then(res => {
	res.forEach(item => {
		console.log(item)
		const date = item.formatTime;
		const title = item.title;
		const name = item.title + ".md";
		const url = item.url;
		const description = item.description;

		setTimeout(function () {
			readArtivcle(url, name, title, description,date);
		}, 3000);
	})
}).catch(e => {
	console.log(e)
});

function readArtivcle(url, filename, title, description, date) {
	let html = '';
	https.get(`${url}`, res => {
		res.on('data', function (chunk) {
			html += chunk;
		});
		res.on('end', () => {
			console.log('html获取完毕');
			const $ = cheerio.load(html);
			const ele = $("#content_views");
			let markdown = '';
			try {
				markdown = turndownService.turndown(ele.html());
			} catch (e) {
				console.log('节点读取错误')
			}
			console.log('将要写入的数据:---');
			markdown = '---  \n' + markdown;
			markdown = `date:${date}  \n` + markdown;
			markdown = `categories:  \n  - ${description}  \n` + markdown;
			markdown = `author: icestone  \n` + markdown;
			markdown = `title: ${title}  \n` + markdown;
			markdown = '---  \n' + markdown;
			console.log(markdown);
			writeFileToMarkdown(markdown, filename);
		})
	});
}


function writeFileToMarkdown(str, filename) {
	fs.access(`./markdownFile/${filename}`, fs.constants.F_OK, (err) => {
		console.log(`first judgement: ${filename} ${err ? 'is not exist' : 'is exist'}`);
		if (err) {
			console.log(`${filename} is not exist,so I will create it`);
			fs.writeFile(`./markdownFile/${filename}`, '', (error) => {
				//创建失败
				if (error) {
					console.log(`file id no's exist,and create error:${error}`)
				}
				//创建成功
				console.log(`file id no's exist,but create success!`);
				//自己调用下自己,写入str
				writeFileToMarkdown(str, filename)
			})
		} else {
			fs.writeFile(`./markdownFile/${filename}`, str, err => {
				if (err) {
					console.log('file write error');
					console.log(err)
				} else {
					console.log('file write success');
				}
			})
		}
	});
}
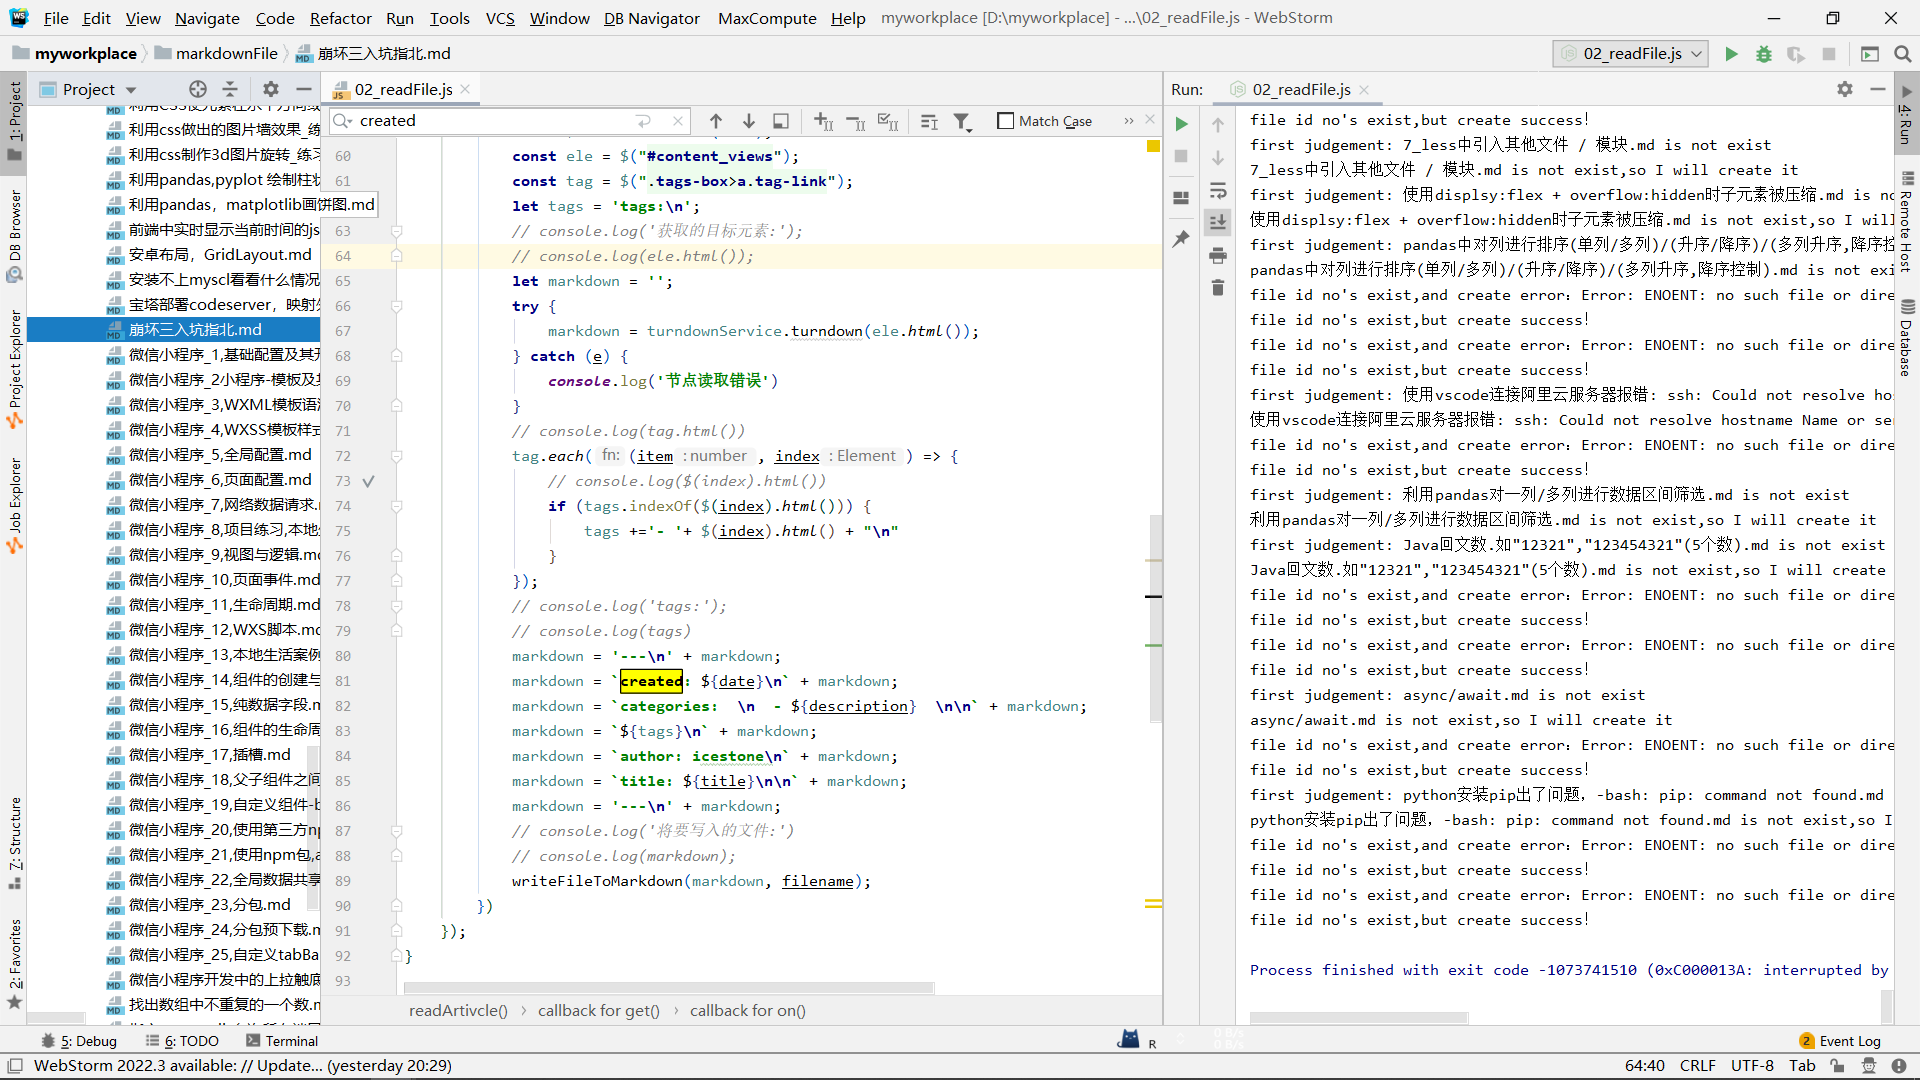
注意,这里代码跑起来不会停,你估计文章写完了,就把它停了就ok:
但是,此时把markdown文章放进hexokinase的博客目录下,你会发现,文章的tag可能有些问题:

查看hexo中是怎样写的:
title: jsp_session和cookie
author: icestone
tags:
  - jsp
  - java
categories:
  - jsp下的session和cookie
date: 2022-11-15 21:38:00
---
它的头部应该是这样的,那么我们就需要在通过url获取文章页面时,获取tag标签所在的dom节点中的html:
	const tag = $(".tags-box>a.tag-link");
	let tags = 'tags:\n';
	let markdown = '';
	try {
		markdown = turndownService.turndown(ele.html());
	} catch (e) {
		console.log('节点读取错误')
	}
	tag.each((item, index) => {
		if (tags.indexOf($(index).html())) {
		tags +='- '+ $(index).html() + "\n"
		}
	});
那么修改之后的代码为:
const fs = require('fs');
const https = require("https");
const cheerio = require("cheerio");
const TurndownService = require('turndown');
const turndownService = new TurndownService();
const markdownFile = require('./model/markdownFile');
//将数据写入markdown文件

markdownFile.findAll({
	raw: true  //只显示原始数据
}).then(res => {
	res.forEach(item => {
		// console.log(item)
		// const date = timeTrans(item.formatTime);
		const date = item.formatTime;
		const title = item.title;
		const name = item.title + ".md";
		const url = item.url;
		const description = item.description;

		setTimeout(function () {
			readArtivcle(url, name, title, description, date);
		}, 3000);
	})
}).catch(e => {
	console.log(e)
});

function readArtivcle(url, filename, title, description, date) {
	let html = '';
	https.get(`${url}`, res => {
		res.on('data', function (chunk) {
			html += chunk;
		});
		res.on('end', () => {
			console.log('html获取完毕');
			const $ = cheerio.load(html);
			const ele = $("#content_views");
			const tag = $(".tags-box>a.tag-link");
			let tags = 'tags:\n';
			let markdown = '';
			try {
				markdown = turndownService.turndown(ele.html());
			} catch (e) {
				console.log('节点读取错误')
			}
			tag.each((item, index) => {
				if (tags.indexOf($(index).html())) {
					tags +='- '+ $(index).html() + "\n"
				}
			});
			markdown = '---\n' + markdown;
			markdown = `created: ${date}\n` + markdown;
			markdown = `categories:  \n  - ${description}  \n\n` + markdown;
			markdown = `${tags}\n` + markdown;
			markdown = `author: icestone\n` + markdown;
			markdown = `title: ${title}\n\n` + markdown;
			markdown = '---\n' + markdown;
			writeFileToMarkdown(markdown, filename);
		})
	});
}


function writeFileToMarkdown(str, filename) {
	fs.access(`./markdownFile/${filename}`, fs.constants.F_OK, (err) => {
		console.log(`first judgement: ${filename} ${err ? 'is not exist' : 'is exist'}`);
		if (err) {
			console.log(`${filename} is not exist,so I will create it`);
			fs.writeFile(`./markdownFile/${filename}`, '', (error) => {
				//创建失败
				if (error) {
					console.log(`file id no's exist,and create error:${error}`)
				}
				//创建成功
				console.log(`file id no's exist,but create success!`);
				//自己调用下自己,写入str
				writeFileToMarkdown(str, filename)
			})
		} else {
			fs.writeFile(`./markdownFile/${filename}`, str, err => {
				if (err) {
					console.log('file write error');
					console.log(err)
				} else {
					console.log('file write success');
				}
			})
		}
	});
}

function timeTrans(time, type) {
	let date = new Date(new Date(time).getTime() + 8 * 3600 * 1000)
	date = date.toJSON();
	if (type === 1) {
		date = date.substring(0, 10)
	} else {
		date = date.substring(0, 19).replace('T', ' ')
	}
	return date
}
run:
将一篇markdown文章copy进hexo的目录:
hexo clean一下并重启:
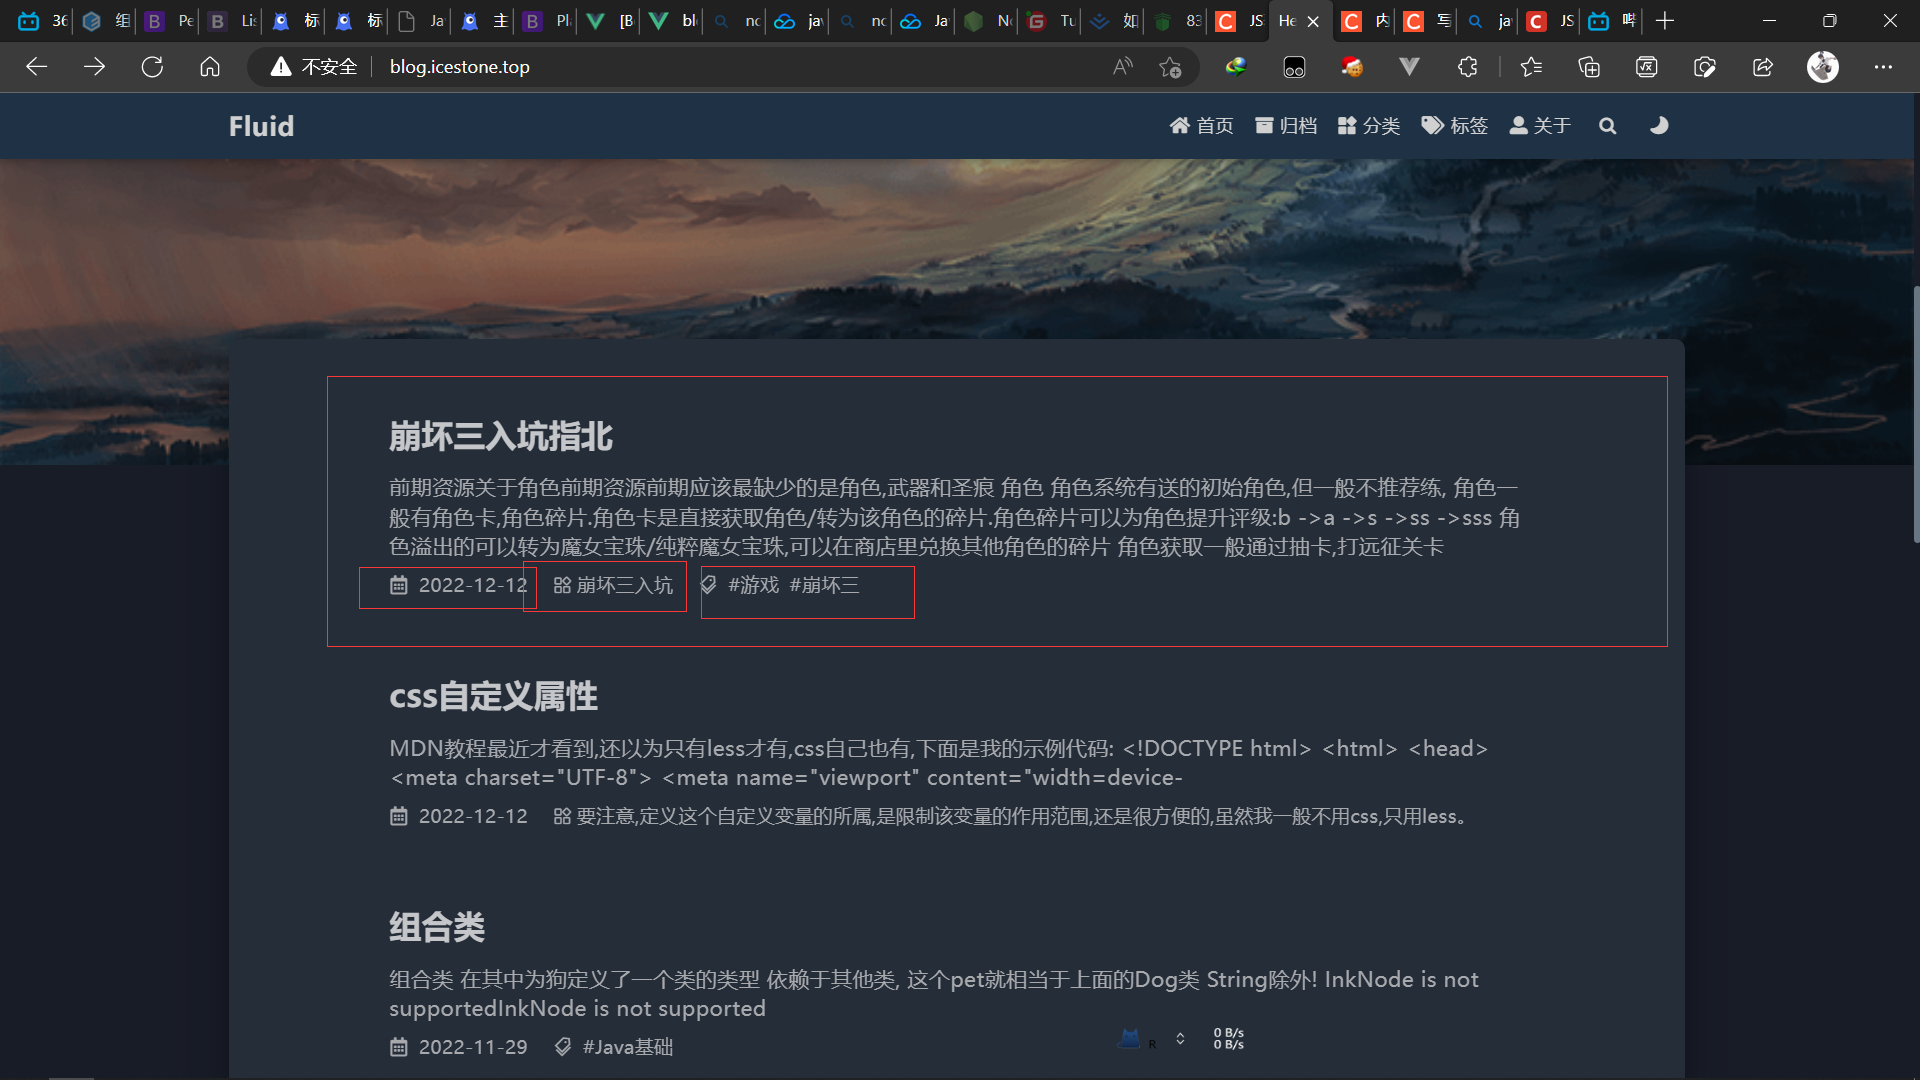
没有问题
将文章copy进hexo:
一般hexo的文章放在:hexo文件目录/source/_posts:
ok,没得问题,就是描述那里的文字太长了


 554
554


 被折叠的 条评论
为什么被折叠?
被折叠的 条评论
为什么被折叠?
 到【灌水乐园】发言


