


网上参考了很多大牛的博客,很多说训练自己的数据集,其实是在用官方的API训练公开的PASCAL VOC2012或者PASCAL VOC2007数据集。
根据项目需求,我们自定义了标签数据集,按照Pascal_VOC的格式进行制作,这样可以大大的减少工作量。也可以实用官方的脚本。
Pre:Tensorflow环境安装+Object Detection API的安装(网上教程很多,稍后补上教程)
环境:训练环境Ubuntu16.04+GTX1080Ti+python3.5+tensorflow1.4.0
标记制作环境:windows
一、准备数据集
1、物体识别所需PASCAL_VOC数据集格式解释:
1)JPEGImages文件夹
文件夹里包含了训练图片和测试图片,混放在一起
3)ImageSets文件夹
Main存放的是图像物体识别的数据,里面有XX_train.txtXX_val.txtMain。在本次使用API时候用不到XX_train.txt这些文件夹,只需要里面的test.txt , train.txt, val.txt ,trainval.txt.这四个文件我们后面会生成 。
2、搞定JPEGSImages文件夹
把图片放到JPEGSImages里面,在VOC里面,图片文件名都是2007_000001.jpg类似这样的,我们也统一格式,把我们的图片名字重命名成这样的。通过cv2读取视频,然后截取视频帧,按照此规则进行保存。import cv2
cap = cv2.VideoCapture("video.mp4")
c = 1
timeF = 100 #每间隔100帧保存一张图片
tot =1
while True:
rval,frame = cap.read()
if(c % timeF == 0 ):
print('tot=',tot)
cv2.imwrite('out/'+str(tot).zfill(6)+'.jpg',frame)
tot = tot + 1
c+=1
cv2.waitKey(1)
cap.release()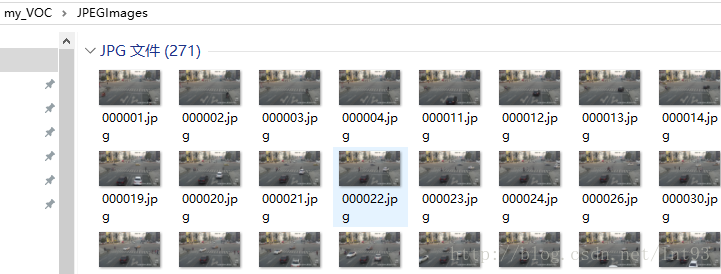
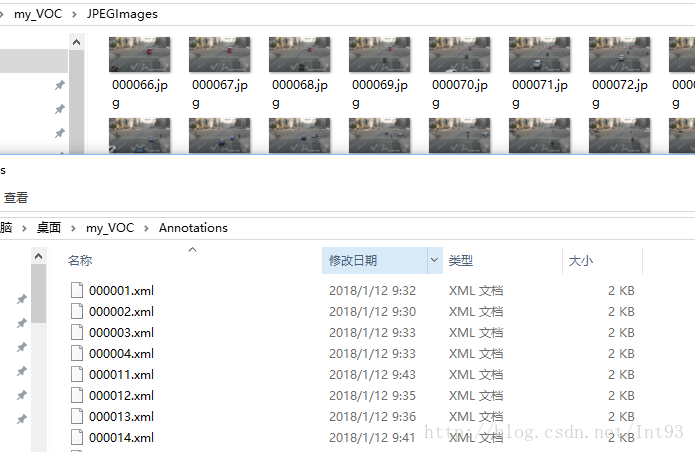
3、搞定Annatations文件夹
网上很多教程,但是我觉得都很麻烦,手动标注,会自动生成图片信息的xml文件1)在这里下载:https://tzutalin.github.io/labelImg/,至于怎么用相信你打开就知道了
2)保存的路径就是我们的Annatations文件夹,别保存别的地方去了,,,
3)一张张的慢慢画框。。。。。。。。。
4、搞定ImageSets文件夹中的Main文件夹中的四个文件
import os
import random

trainval_percent = 0.66
train_percent = 0.5
xmlfilepath = 'Annotations'
txtsavepath = 'ImageSets\Main'
total_xml = os.listdir(xmlfilepath)
print(total_xml)
num=len(total_xml)
list=range(num)
tv=int(num*trainval_percent)
tr=int(tv*train_percent)
trainval= random.sample(list,tv)
train=random.sample(trainval,tr)

ftrainval = open('ImageSets/Main/trainval.txt', 'w')
ftest = open('ImageSets/Main/test.txt', 'w')
ftrain = open('ImageSets/Main/train.txt', 'w')
fval = open('ImageSets/Main/val.txt', 'w')

for i  in list:
    name=total_xml[i][:-4]+'\n'
    if i in trainval:
        ftrainval.write(name)
        if i in train:
            ftrain.write(name)
        else:
            fval.write(name)
    else:
        ftest.write(name)

ftrainval.close()
ftrain.close()
fval.close()
ftest .close()
至此,我们自己按照标准VOC数据集样例的制作已经完成
制作好的数据集在各个环境下是通用的。我们转到Ubuntu环境下进行训练
二、训练环境准备
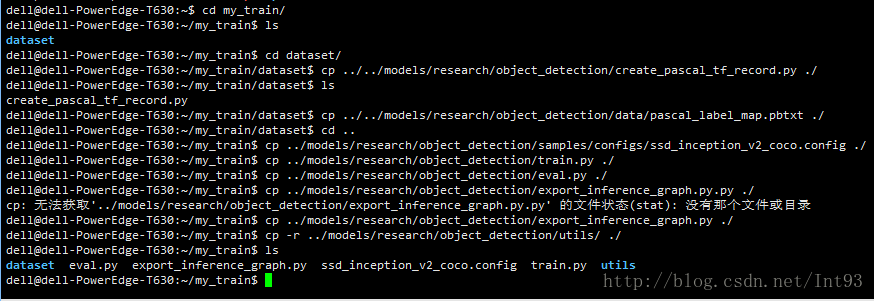
1、训练环境文件结构

根目录新建一个my_train,里面文件目录如下:
1)、dataset:存放训练数据集
my_VOC:是我刚刚自定义的数据集文件,copy到dataset目录下。
create_pascal_tf_record.py:这是官方API提供的将标准VOC文件转为tfrecord的脚本,我们需要对此进行修改。
复制 cp {...model的路径}/models/research/object_detection/create_pascal_tf_record.py ./
pascal_label_map.pbtxt:这是需要识别的物体标签,我们需要自定义修改
复制 cp {...model的路径}/models/research/object_detection/data/pascal_local_map.pbtxt ./
2)、复制一系列文件

train.py:启动模型训练的脚本
3)、下载复制ssd_inception_v2预训练模型
my_train目录下新建models文件夹,将ssd_inception解压到models中。
4)、新建record文件夹,用于存放TFrecord数据。

2、针对具体需求环境进行修改相关文件
1)、修改dataset中的create_pascal_tf_record.py
这个关系到是否能够将pascal_voc 转为tf_record
修改的地方在代码里进行了中文注释
from __future__ import absolute_import
from __future__ import division
from __future__ import print_function

import hashlib
import io
import logging
import os

from lxml import etree
import PIL.Image
import tensorflow as tf

from object_detection.utils import dataset_util
from object_detection.utils import label_map_util

#执行参数,我们可以在这里修改,也可以在执行时候带上参数修改,建议带上参数修改
flags = tf.app.flags
flags.DEFINE_string('data_dir', '', 'Root directory to raw PASCAL VOC dataset.')
flags.DEFINE_string('set', 'train', 'Convert training set, validation set or '
                    'merged set.')
flags.DEFINE_string('annotations_dir', 'Annotations',
                    '(Relative) path to annotations directory.')
flags.DEFINE_string('year', 'VOC2007', 'Desired challenge year.')
flags.DEFINE_string('output_path', '', 'Path to output TFRecord')
flags.DEFINE_string('label_map_path', 'data/pascal_label_map.pbtxt',
                    'Path to label map proto')
flags.DEFINE_boolean('ignore_difficult_instances', False, 'Whether to ignore '
                     'difficult instances')
FLAGS = flags.FLAGS

SETS = ['train', 'val', 'trainval', 'test']
#增加我们自己的数据集my_VOC
YEARS = ['VOC2007', 'VOC2012', 'my_VOC']


def dict_to_tf_example(data,
                       dataset_directory,
                       label_map_dict,
                       ignore_difficult_instances=False,
                       image_subdirectory='JPEGImages'):
  #确定照片的路径,这个我调试了很久,一直找未找此路径的文件,建议将路径输出,看看是否正确。
  #这里有个大坑,官方的XML标注里面,filename字段是后面有文件类型的,但是用labelImg标注是没有的
  #我们在img_path里手动拼接   +'.jpg'
  img_path = os.path.join('my_VOC',data['folder'], data['filename']+'.jpg')
  full_path = os.path.join(dataset_directory, img_path)
  #手动输入查看路径是否正确
  print('full_path',full_path)
  with tf.gfile.GFile(full_path, 'rb') as fid:
    encoded_jpg = fid.read()
  encoded_jpg_io = io.BytesIO(encoded_jpg)
  image = PIL.Image.open(encoded_jpg_io)
  if image.format != 'JPEG':
    raise ValueError('Image format not JPEG')
  key = hashlib.sha256(encoded_jpg).hexdigest()

  width = int(data['size']['width'])
  height = int(data['size']['height'])

  xmin = []
  ymin = []
  xmax = []
  ymax = []
  classes = []
  classes_text = []
  truncated = []
  poses = []
  difficult_obj = []
  for obj in data['object']:
    difficult = bool(int(obj['difficult']))
    if ignore_difficult_instances and difficult:
      continue

    difficult_obj.append(int(difficult))

    xmin.append(float(obj['bndbox']['xmin']) / width)
    ymin.append(float(obj['bndbox']['ymin']) / height)
    xmax.append(float(obj['bndbox']['xmax']) / width)
    ymax.append(float(obj['bndbox']['ymax']) / height)
    classes_text.append(obj['name'].encode('utf8'))
    classes.append(label_map_dict[obj['name']])
    truncated.append(int(obj['truncated']))
    poses.append(obj['pose'].encode('utf8'))

  example = tf.train.Example(features=tf.train.Features(feature={
      'image/height': dataset_util.int64_feature(height),
      'image/width': dataset_util.int64_feature(width),
      'image/filename': dataset_util.bytes_feature(
          data['filename'].encode('utf8')),
      'image/source_id': dataset_util.bytes_feature(
          data['filename'].encode('utf8')),
      'image/key/sha256': dataset_util.bytes_feature(key.encode('utf8')),
      'image/encoded': dataset_util.bytes_feature(encoded_jpg),
      'image/format': dataset_util.bytes_feature('jpeg'.encode('utf8')),
      'image/object/bbox/xmin': dataset_util.float_list_feature(xmin),
      'image/object/bbox/xmax': dataset_util.float_list_feature(xmax),
      'image/object/bbox/ymin': dataset_util.float_list_feature(ymin),
      'image/object/bbox/ymax': dataset_util.float_list_feature(ymax),
      'image/object/class/text': dataset_util.bytes_list_feature(classes_text),
      'image/object/class/label': dataset_util.int64_list_feature(classes),
      'image/object/difficult': dataset_util.int64_list_feature(difficult_obj),
      'image/object/truncated': dataset_util.int64_list_feature(truncated),
      'image/object/view': dataset_util.bytes_list_feature(poses),
  }))
  return example


def main(_):
  if FLAGS.set not in SETS:
    raise ValueError('set must be in : {}'.format(SETS))
  if FLAGS.year not in YEARS:
    raise ValueError('year must be in : {}'.format(YEARS))

  data_dir = FLAGS.data_dir
  #新增我们的数据集到years中
  years = ['VOC2007','VOC2012','my_VOC']
  if FLAGS.year != 'merged':
    years = [FLAGS.year]
  print('data_dir=',data_dir)
  print('years=',years)
  writer = tf.python_io.TFRecordWriter(FLAGS.output_path)

  label_map_dict = label_map_util.get_label_map_dict(FLAGS.label_map_path)

  for year in years:
    logging.info('Reading from PASCAL %s dataset.', year)
    #修改成如下代码,这里只需要用到Main下面的train.txt,val.txt等4个文件
    #原来的代码是用了官方下面的XX_train.txt等文件
    examples_path = os.path.join(data_dir, year, 'ImageSets', 'Main/'
                                  + FLAGS.set + '.txt')
    annotations_dir = os.path.join(data_dir, year, FLAGS.annotations_dir)
    examples_list = dataset_util.read_examples_list(examples_path)
    for idx, example in enumerate(examples_list):
      if idx % 100 == 0:
        logging.info('On image %d of %d', idx, len(examples_list))
      path = os.path.join(annotations_dir, example + '.xml')
      with tf.gfile.GFile(path, 'r') as fid:
        xml_str = fid.read()
      xml = etree.fromstring(xml_str)
      data = dataset_util.recursive_parse_xml_to_dict(xml)['annotation']

      tf_example = dict_to_tf_example(data, FLAGS.data_dir, label_map_dict,
                                      FLAGS.ignore_difficult_instances)
      writer.write(tf_example.SerializeToString())

  writer.close()


if __name__ == '__main__':
  tf.app.run()
这个里面是根据我们开始标记的类型进行修改,样例如下
item {
  id: 1
  name: 'car'
}

item {
  id: 2
  name: 'suv'
}
3)、执行生成TFrecord文件,生成pascal_train.record、pascal_val.record
dell@dell-PowerEdge-T630:~/my_train$ python3 dataset/create_pascal_tf_record.py \
--data_dir=/home/dell/my_train/dataset \
--year=my_VOC \
--set=train \
--output_path=/home/dell/my_train/record/pascal_train.record \
--label_map_path=/home/dell/my_train/dataset/pascal_label_map.pbtxt
dell@dell-PowerEdge-T630:~/my_train$ python3 dataset/create_pascal_tf_record.py \
--data_dir=/home/dell/my_train/dataset \
--year=my_VOC \
--set=val \
--output_path=/home/dell/my_train/record/pascal_val.record \
--label_map_path=/home/dell/my_train/dataset/pascal_label_map.pbtxt
4)、修改模型配置文件 ssd_inception_v2_coco.config
具体修改地方中文注释
model {
  ssd {
    num_classes: 12    #根据你的pascal_label_map的数量进行修改
    …………
train_config: {
  batch_size: 24
  optimizer {
    rms_prop_optimizer: {
      learning_rate: {
        exponential_decay_learning_rate {
          initial_learning_rate: 0.004
          decay_steps: 800720
          decay_factor: 0.95
        }
      }
      momentum_optimizer_value: 0.9
      decay: 0.9
      epsilon: 1.0
    }
  }
  #此处为预加载模型的位置
  fine_tune_checkpoint: "models/ssd_inception_v2_coco_11_06_2017/model.ckpt"
  from_detection_checkpoint: true
  #训练的步数
  num_steps: 200000
  data_augmentation_options {
    random_horizontal_flip {
    }
  }
  data_augmentation_options {
    ssd_random_crop {
    }
  }
}

train_input_reader: {
  tf_record_input_reader {
    #训练输入的文件
    input_path: "record/pascal_train.record"
  }
 #自定义加载的标签集
  label_map_path: "dataset/pascal_label_map.pbtxt"
}

eval_config: {
  num_examples: 8000
  # Note: The below line limits the evaluation process to 10 evaluations.
  # Remove the below line to evaluate indefinitely.
  max_evals: 10
}

eval_input_reader: {
  tf_record_input_reader {
    #验证数据的文件
    input_path: "record/pascal_val.record"
  }
  #加载自定义的标签
  label_map_path: "dataset/pascal_label_map.pbtxt"
  shuffle: false
  num_readers: 1
  num_epochs: 1
}
主要是进行执行参数的修改,也可以在执行时候跟上参数,或者直接修改默认参数为我们的参数
flags.DEFINE_string('train_dir', 'train',
                    'Directory to save the checkpoints and training summaries.')

flags.DEFINE_string('pipeline_config_path', 'ssd_inception_v2_coco.config',
                    'Path to a pipeline_pb2.TrainEvalPipelineConfig config '
                    'file. If provided, other configs are ignored')

flags.DEFINE_string('train_config_path', '',
                    'Path to a train_pb2.TrainConfig config file.')
三、执行训练
在my_train目录下执行。
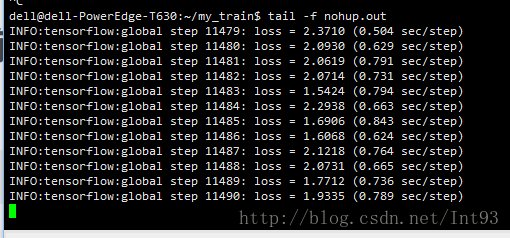
nohup python3 train.py --logtostderr &查看训练详情:nohup将输出日志定义到nohup.out中,通过tail -f nohup 查看日志情况
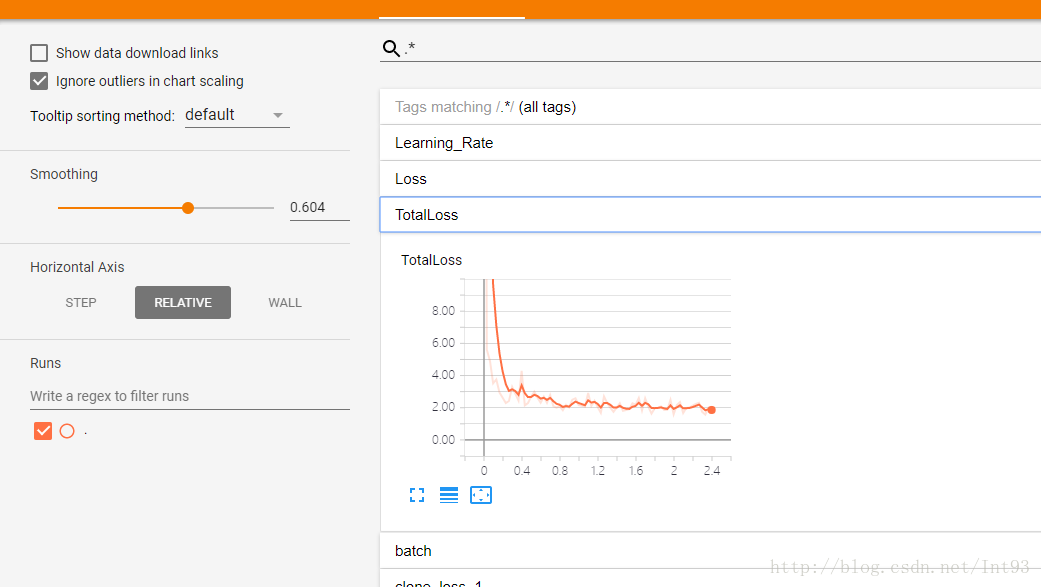
通过tensorboard查看训练曲线

待补充


 3500
3500

 被折叠的 条评论
为什么被折叠?
被折叠的 条评论
为什么被折叠?
 到【灌水乐园】发言


