


1 安装包下载
mysql5.6下载地址:
http://dev.mysql.com/downloads/mysql/
这里选择Linux版本:

使用Navicat管理远程Linux服务器上的MySQL数据库 http://www.linuxidc.com/Linux/2011-09/42285.htm
ftp://mirror.switch.ch/mirror/mysql/Downloads/MySQL-5.6/
2 mysql的安装
从官网下载的rpm64位的安装包:
MySQL-5.6.16-1.linux_glibc2.5.x86_64.rpm-bundle.tar,
(1)使用命令:
tar xvf MySQL-5.6.16-1.linux_glibc2.5.x86_64.rpm-bundle.tar
将其解压缩,解压后的文件目录为:
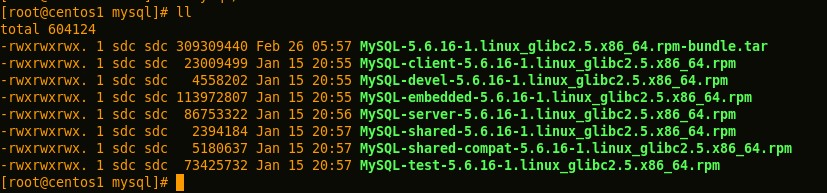
看文件名就大体知道每个包是干嘛用的,不再解释。
(2)查看系统是否安装了MySQL,使用命令:
#rpm -qa | grep mysql
卸载已安装的MySQL,卸载mysql命令如下:
#rpm -e -nodeps mysql-libs-5.1.61-4.el6.x86_64
将/var/lib/mysql文件夹下的所有文件都删除干净。
(3)使用如下命令安装Server和Client:
rpm -ivh MySQL-server-5.6.16-1.linux_glibc2.5.x86_64.rpm
rpm -ivh MySQL-client-5.6.16-1.linux_glibc2.5.x86_64.rpm
(4)使用如下命令查看当前mysql的状态:
service mysql status
如果运行中,则会提示:

(5)如果没有运行,则使用如下命令启动:
service mysql start
可以顺便把启动命令加入到linux的启动项中,开机即启动mysql服务,命令如下:
chkconfig --add mysql
chkconfig mysql on
使用命令chkconfig –list查看下,此操作都是root权限。
(6)给mysql设置root密码,使用如下命令:
mysql -u root -p
会提示输入密码,初始root密码保存在'/root/.mysql_secret'文件中
接着输入mysql>SET PASSWORD = PASSWORD('123456');
(7)登陆进入之后,来个命令瞅瞅效果:

下面是mysql安装后三个主要的目录及其功能:
/var/lib/mysql 数据库文件
/usr/share/mysql 命令及配置文件
/usr/bin mysqladmin、mysqldump等命令
3 navicat安装
上面的mysql是安装在我本机的vmWare上面的,centOS版本的系统,我想在本机win7上操作mysql,就得需要一个图形化的客户端,这样更方便。navicat这么牛掰的东西,直接拿来用吧。我本机是64位,网上搜64位的破解版没找到,就弄了个32位的,不影响使用。
1、申请阿里云Linux服务器
昨天在阿里云申请了一个免费试用5天的Linux云服务器。
操作系统:Red Hat Enterprise Linux Server 5.4 64位。
CPU:1核
内存:512M
硬盘空间:20G
带宽:1Mbps。
今天在这台云服务器上安装了基本环境(JDK、Tomcat和MySQL)。本文主要在阿里云Linux云服务器安装MySQL全过程,以及对安装时遇到的问题进行记录。
2、下载MySQL服务器和客户端
访问MySQL的官网,进入其下载页面(http://dev.mysql.com/downloads/mysql/#downloads),选择MySQL Community Server,在“Select Platform”下拉框中选择“Oracle & Red Hat Linux 4 & 5”。
因为是64位的操作系统,所以选择下载如下rpm包:
(1)MySQL-server-5.6.10-1.rhel5.x86_64.rpm:MySQL服务器;
(2)MySQL-client-5.6.10-1.rhel5.x86_64.rpm:MySQL客户端;
(3)MySQL-devel-5.6.10-1.rhel5.x86_64.rpm:Mysql开发依赖包。
将这些rpm包通过FTP上传到Linux服务器的某个目录,例如:/root/software。
也可在Linux服务器上通过wget命令取得这些rpm包,Linux命令如下:
") wget –c http:
//
dev.mysql.com/get/Downloads/MySQL-5.6/MySQL-server-5.6.10-1.rhel5.x86_64.rpm/from/
http://cdn.mysql.com
wget –c http:
//
dev.mysql.com/get/Downloads/MySQL-5.6/MySQL-client-5.6.10-1.rhel5.x86_64.rpm/from/
http://cdn.mysql.com
wget –c http:
//
dev.mysql.com/get/Downloads/MySQL-5.6/MySQL-devel-5.6.10-1.rhel5.x86_64.rpm/from/
http://cdn.mysql.co
wget –c http:
//
dev.mysql.com/get/Downloads/MySQL-5.6/MySQL-server-5.6.10-1.rhel5.x86_64.rpm/from/
http://cdn.mysql.com
wget –c http:
//
dev.mysql.com/get/Downloads/MySQL-5.6/MySQL-client-5.6.10-1.rhel5.x86_64.rpm/from/
http://cdn.mysql.com
wget –c http:
//
dev.mysql.com/get/Downloads/MySQL-5.6/MySQL-devel-5.6.10-1.rhel5.x86_64.rpm/from/
http://cdn.mysql.co
3、安装MySQL服务器和客户端
3.1 安装MySQL服务器
下载完成后使用如下命令开始安装MySQL服务器:
rpm
-
ivh MySQL
-
server
-
5.6
.
10
-
1
.rhel5.x86_64.rpm
3.1.1 安装依赖包libaio
在运行第一条安装MySQL服务器时会提示依赖包libaio.so.1没有安装,错误提示如下:
error: Failed dependencies: libaio.so.
1
()(64bit) is needed by MySQL
-
server
-
5.6
.
10
-
1
.rhel5.x86_64 libaio.so.
1
(LIBAIO_0.
1
)(64bit) is needed by MySQL
-
server
-
5.6
.
10
-
1
.rhel5.x86_64libaio.so.
1
(LIBAIO_0.
4
)(64bit) is needed by MySQL
-
server
-
5.6
.
10
-
1
.rhel5.x86_64
需要使用yum命令快速安装依赖包libaio,运行如下命令:
yum install libaio
运行该命令时会发现在这台云服务器上无法通过yum快速安装软件,搜索了一些资料,原来是阿里云安装的是Red Hat5.4的64位系统,但是提供的是CentOS 32位的系统。错误信息参考如下:
Setting up Install Process No
package
libaio available.Nothing to
do
网上找到的一个解决方案是将yum替换成CentOS的版本,我尝试了下是可行的。过程如下:
(1)通过rpm命令查看有哪些yum包,然后进行卸载
笔者在云服务器进行的操作如下:
[root@AY130221101729bc93912 software]# rpm
-
qa
|
grep yumyum
-
3.2
.
22
-
20
.el5yum
-
metadata
-
parser
-
1.1
.
2
-
3
.el5[root@AY130221101729bc93912 software]# rpm
-
e
--
nodeps yum
-
3.2
.
22
-
20
.el5warning:
/
etc
/
yum.conf saved as
/
etc
/
yum.conf.rpmsave[root@AY130221101729bc93912 software]# rpm
-
e
--
nodeps yum
-
metadata
-
parser
-
1.1
.
2
-
3
.el5
(2)通过wget命令在163的镜像上下载CentOS的yum包
参考命令如下:
wget http:
//
mirrors.163.com/centos/5/os/x86_64/CentOS/yum-3.2.22-40.el5.centos.noarch.rpm
wget http:
//
mirrors.163.com/centos/5/os/x86_64/CentOS/yum-metadata-parser-1.1.2-4.el5.x86_64.rpm
wget http:
//
mirrors.163.com/centos/5/os/x86_64/CentOS/yum-fastestmirror-1.1.16-21.el5.centos.noarch.rpm
说明:可能版本会有一些不同,请大家在http://mirrors.163.com/centos/5/os/x86_64/CentOS/下查找yum-3xxx开头、yum-metadata开头和yum-fastestmirror开头的rpm包下载。
(3)安装yum相关的rpm包
使用如下命令安装在(2)中下载的rpm包:
rpm
-
ivh yum
-*
(4)下载CentOS-Base.repo
找一个CentOS的包资源配置库,名为CentOS-Base.repo,放到/etc/yum.repos.d/路径:
[root@AY130221101729bc93912 software]# cd
/
etc
/
yum.repos.d
/
[root@AY130221101729bc93912 yum.repos.d]# wget http:
//
www.linuxidc.com/files/2011/05/06/CentOS-Base.repo
--
2013
-
02
-
22
08
:
58
:
27
--
http:
//
www.linuxidc.com/files/2011/05/06/CentOS-Base.repo
Resolving www.linuxidc.com") 60.191
.
129.94
Connecting to www.linuxidc.com
|
60.191
.
129.94
|
:
80
connected.HTTP request sent, awaiting response
200
OKLength:
1426
(
1
.4K) [application
/
octet
-
stream]Saving to: `CentOS
-
Base.repo
'
100
%
[
==========================================================================================>
]
1
,
426
--
.
-
K
/
s in 0s
2013
-
02
-
22
08
:
58
:
28
(
124
MB
/
s)
-
`CentOS
-
Base.repo
'
saved [1426/1426]
60.191
.
129.94
Connecting to www.linuxidc.com
|
60.191
.
129.94
|
:
80
connected.HTTP request sent, awaiting response
200
OKLength:
1426
(
1
.4K) [application
/
octet
-
stream]Saving to: `CentOS
-
Base.repo
'
100
%
[
==========================================================================================>
]
1
,
426
--
.
-
K
/
s in 0s
2013
-
02
-
22
08
:
58
:
28
(
124
MB
/
s)
-
`CentOS
-
Base.repo
'
saved [1426/1426]
(5)生成缓存文件到/var/cache/yum目录
[root@AY130221101729bc93912 yum.repos.d]# yum makecacheLoaded plugins: fastestmirrorDetermining fastest mirrorsaddons
|
1.9
kB
00
:
00
addons
/
filelists_db
|
568
B
00
:
00
addons
/
other_db base ……
3641
/
3641
base
3641
/
3641
Metadata Cache Created
<</SPAN>p align="justify"></</SPAN>p>
(6)安装依赖包libaio
第(5)步做完后,此时可以成功运行yum install libaio命令,参考执行情况如下:
[root@AY130221101729bc93912 yum.repos.d]# yum install libaio Loaded plugins: fastestmirrorLoading mirror speeds from cached hostfileSetting up Install ProcessResolving Dependencies……Complete
3.1.2 安装MySQL Server的rpm包
依赖包安装完成后,可以执行rpm -ivh MySQL-server-5.6.10-1.rhel5.x86_64.rpm包安装MySQL的服务器端。参考执行情况如下(省略了部分内容):
[root@AY130221101729bc93912 software]# rpm
-
ivh MySQL
-
server
-
5.6
.
10
-
1
.rhel5.x86_64.rpm Preparing ########################################### [
100
%
]
1
:MySQL
-
server ########################################### [
100
%
]
2013
-
02
-
22
09
:
03
:
18
0
[Warning] TIMESTAMP with implicit DEFAULT value is deprecated. Please use
--
explicit_defaults_for_timestamp server option (see documentation
for
more details).…….A random root password has been set. You will find it in
'
/root/.mysql_secret
'
.
2013
-
02
-
22
09
:
03
:
25
4132
[Note] Binlog end
2013
-
02
-
22
09
:
03
:
25
4132
[Note] InnoDB: FTS optimize thread exiting.……
安装完成后会生成root用户的随机密码,请使用“cat /root/.mysql_secret”或类似命令进行查看。
3.2 安装MySQL客户端
服务端安装完成后,使用如下命令安装MySQL客户端,命令如下:
rpm
-
ivh MySQL
-
client
-
5.5
.
28
-
1
.rhel5.i386.rpm
3.3 安装MySQL开发依赖包
接着安装MySQL-devel-5.5.28-1.rhel5.i386.rpm,命令如下:
rpm
-
ivh MySQL
-
devel
-
5.5
.
28
-
1
.rhel5.i386.rpm
3.4 MySQL的几个重要目录
(1)数据库目录
/var/lib/mysql/
(2)配置文件
/usr/share/mysql(mysql.server命令及配置文件)
(3)相关命令
/usr/bin(mysqladmin mysqldump等命令)
(4)启动脚本
/etc/rc.d/init.d/(启动脚本文件mysql的目录)
若想查看MySQL安装到哪个目录,可使用“whereis mysql”命令查看,参考执行结果如下所示:
[root@AY130221101729bc93912 mysql]# whereis mysqlmysql:
/
usr
/
bin
/
mysql
/
usr
/
include
/
mysql
/
usr
/
share
/
mysql
/
usr
/
share
/
man
/
man1
/
mysql.
1
.gz
3.5 启动MySQL
安装完成后mysql是没有启动的,运行mysql命令会提示如下错误:
[root@AY130221101729bc93912 software]# mysqlERROR
2002
(HY000): Can
'
t connect to local MySQL server through socket
'
/
var
/
lib
/
mysql
/
mysql.sock
'
(2)
可使用如下命令启动MySQL:
service mysql start
或者使用如下命令:
/
etc
/
init.d
/
mysql start
3.6 登录MySQL
使用mysql命令登录MySQL服务器,运行MySQL的命令时,会提示需要设置root用户密码,提示信息如下:
[root@AY130221101729bc93912 mysql]# mysql
-
u root
-
pEnter password: Welcome to the MySQL monitor. Commands end with ; or \g.Your MySQL connection id is
5
Server version:
5.6
.
10
Copyright (c)
2000
,
2013
, Oracle and
/
or its affiliates. All rights reserved.Oracle is a registered trademark of Oracle Corporation and
/
or itsaffiliates. Other names may be trademarks of their respectiveowners.Type
'
help;
'
or
'
\h
'
for
help. Type
'
\c
'
to clear the current input statement.mysql
>
show databases;ERROR
1820
(HY000): You must SET PASSWORD before executing
this
statement
可使用SET PASSWORD命令修改root用户的密码,参考如下:
mysql
>
SET PASSWORD
=
PASSWORD(
'
root123456
'
);Query OK,
0
rows affected (
0.00
sec)mysql
>
show databases;
+--------------------+
|
Database
|
+--------------------+
|
information_schema
|
|
mysql
|
|
performance_schema
|
|
test
|
+--------------------+
3.7 设置开机自启动
设置开机自启动的方法有很多,例如使用chkconfig命令,另外也可以在/etc/rc.local文件中加上如下MySQL的启动命令,例如:
/
etc
/
init.d
/
mysql start
设置完成后重启系统,使用natstat –nat命令可看到MySQL的3306端口:
netstat
-
natActive Internet connections (servers and established)Proto Recv
-
Q Send
-
Q Local Address Foreign Address State tcp
0
0
127.0
.
0.1
:
8005
0.0
.
0.0
:
*
LISTEN tcp
0
0
0.0
.
0.0
:
8009
0.0
.
0.0
:
*
LISTEN tcp
0
0
0.0
.
0.0
:
3306
0.0
.
0.0
:
*
LISTEN


 1456
1456

 被折叠的 条评论
为什么被折叠?
被折叠的 条评论
为什么被折叠?
 到【灌水乐园】发言


