


构建CE平台
上一篇《Windows Embedded CE 6.0开发初体验》之“跑个应用程序先”:
http://blog.csdn.net/aawolf/archive/2007/10/19/1833230.aspx
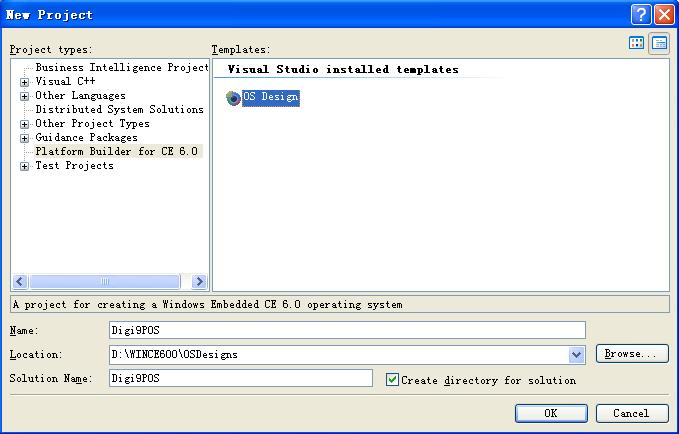
接下来的一节会有非常多的图,因为我们要在Visual Studio 2005里创建一个CE 6.0的平台(Platform)了。创建CE平台的方法和创建普通工程的方法类似。在完成了Platform Builder之后,我们打开Visual Studio 2005后,选择File-New-Project菜单:
<shapetype id="_x0000_t75" stroked="f" filled="f" path="m@4@5l@4@11@9@11@9@5xe" o:preferrelative="t" o:spt="75" coordsize="21600,21600"><stroke joinstyle="miter"></stroke><formulas><f eqn="if lineDrawn pixelLineWidth 0"></f><f eqn="sum @0 1 0"></f><f eqn="sum 0 0 @1"></f><f eqn="prod @2 1 2"></f><f eqn="prod @3 21600 pixelWidth"></f><f eqn="prod @3 21600 pixelHeight"></f><f eqn="sum @0 0 1"></f><f eqn="prod @6 1 2"></f><f eqn="prod @7 21600 pixelWidth"></f><f eqn="sum @8 21600 0"></f><f eqn="prod @7 21600 pixelHeight"></f><f eqn="sum @10 21600 0"></f></formulas><path o:connecttype="rect" gradientshapeok="t" o:extrusionok="f"></path><lock aspectratio="t" v:ext="edit"></lock></shapetype><shape id="图片_x0020_1" style="VISIBILITY: visible; WIDTH: 414.75pt; HEIGHT: 265.5pt; mso-wrap-style: square" type="#_x0000_t75" o:spid="_x0000_i1042"><imagedata o:title="build01" src="file:///C:%5CUsers%5Cv-nim%5CAppData%5CLocal%5CTemp%5Cmsohtmlclip1%5C01%5Cclip_image001.jpg"></imagedata></shape>
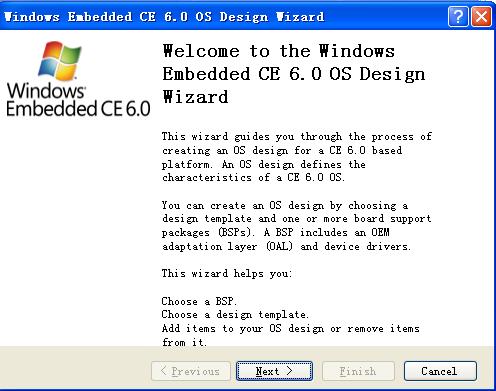
在New Project对话框中,选择Platform Builder for CE 6.0,这个项目不安装PB 6.0是没有的,项目模板里只有OS Design一项。选择这一项,为要创建的平台命名为“Digi9POS”,工程的位置选择默认即可。点击OK之后,我们会看到下面的欢迎界面:
<shape id="图片_x0020_2" style="VISIBILITY: visible; WIDTH: 266.25pt; HEIGHT: 210pt; mso-wrap-style: square" type="#_x0000_t75" o:spid="_x0000_i1041"><imagedata o:title="build02" src="file:///C:%5CUsers%5Cv-nim%5CAppData%5CLocal%5CTemp%5Cmsohtmlclip1%5C01%5Cclip_image002.jpg"><font size="3"></font></imagedata></shape>
点击Next,进入下面的界面:
<shape id="图片_x0020_3" style="VISIBILITY: visible; WIDTH: 280.5pt; HEIGHT: 218.25pt; mso-wrap-style: square" type="#_x0000_t75" o:spid="_x0000_i1040"><imagedata o:title="build03" src="file:///C:%5CUsers%5Cv-nim%5CAppData%5CLocal%5CTemp%5Cmsohtmlclip1%5C01%5Cclip_image003.jpg"><font size="3"></font></imagedata></shape>
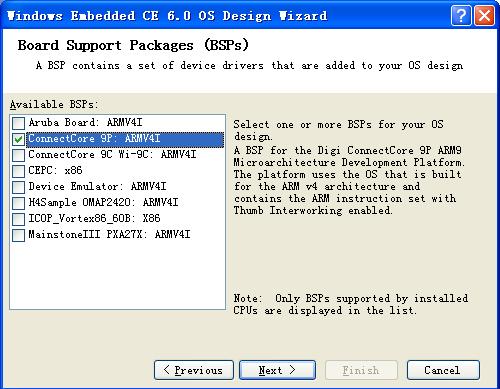
在这个界面中,我们需要选择该平台所用的BSP(板级支持包),一般来说,一个平台只会针对一个硬件平台,而BSP与硬件平台是一一对应的关系。在这里我们选择“ConnectCore 9P”这个BSP,支持的CPU类型是ARMV4I。
点击Next:
<shape id="图片_x0020_4" style="VISIBILITY: visible; WIDTH: 312.75pt; HEIGHT: 245.25pt; mso-wrap-style: square" type="#_x0000_t75" o:spid="_x0000_i1039"><imagedata o:title="build04" src="file:///C:%5CUsers%5Cv-nim%5CAppData%5CLocal%5CTemp%5Cmsohtmlclip1%5C01%5Cclip_image004.jpg"><font size="3"></font></imagedata></shape>
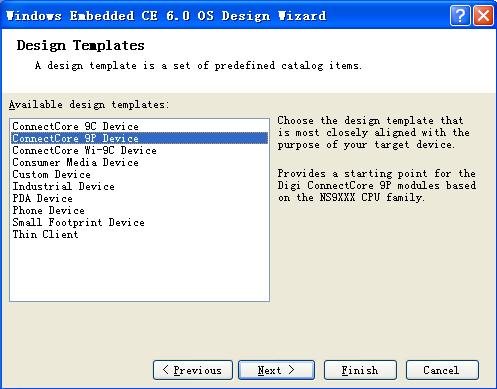
接下来选择的是设备类型,有很多默认设备类型的模板,比如:PDA Device、Phone Device等。这些设计模板已经根据不同的设备类型进行了预先的定制,加入了适当的组件。如果想完全从头设计一个平台,可以选择“Custom Device”,在这里我们选择“ConnectCore 9P Device”,可见Digi为我们提供的不仅仅只有BSP,还有平台设计模板。点击Next:
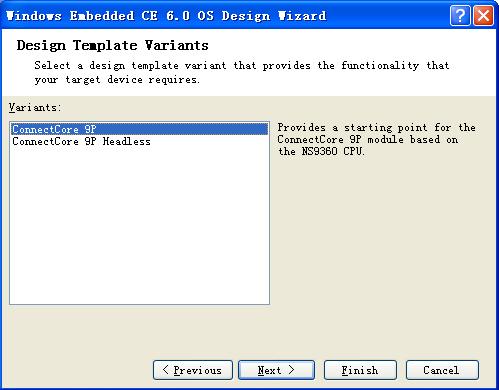
<shape id="图片_x0020_5" style="VISIBILITY: visible; WIDTH: 342pt; HEIGHT: 267pt; mso-wrap-style: square" type="#_x0000_t75" o:spid="_x0000_i1038"><imagedata o:title="build05" src="file:///C:%5CUsers%5Cv-nim%5CAppData%5CLocal%5CTemp%5Cmsohtmlclip1%5C01%5Cclip_image005.jpg"><font face="Calibri" size="3"></font></imagedata></shape>
接下来选择的是:是否支持显示设备,如果选择ConnectCore 9P,则可以通过VGA输出获取图形界面的显示,如果选择ConnectCore 9P Headless,则不会有VGA输出,我们只能靠板子上的LED获取信息了。Headless设备对于某些工作场合还是非常适用的。
到这里,我们就可以点击Finish按钮,完成平台定制向导了。如果此时结束向导,则平台会按照默认值进行定制。但是为了让大家了解,平台定制的过程中会包括哪些组件,我们会将这个向导一直走完。需要提醒的是,在向导中选择的组件,我们同样可以在IDE中进行选择。继续Next:
<shape id="图片_x0020_6" style="VISIBILITY: visible; WIDTH: 374.25pt; HEIGHT: 293.25pt; mso-wrap-style: square" type="#_x0000_t75" o:spid="_x0000_i1037"><imagedata o:title="build06" src="file:///C:%5CUsers%5Cv-nim%5CAppData%5CLocal%5CTemp%5Cmsohtmlclip1%5C01%5Cclip_image006.jpg"><font face="Calibri" size="3"></font></imagedata></shape>
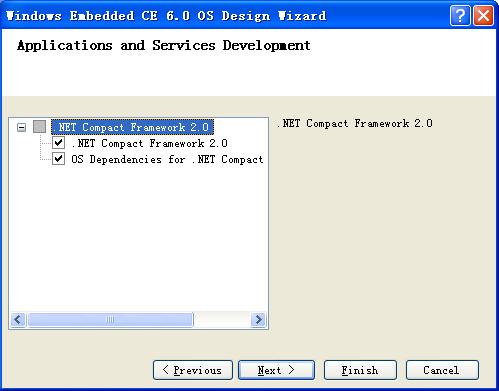
接下来选择的是.NET Compact Framework,很重要的组件。在CE 6.0之前,PB中内置的是.NET CF 1.0 SP2,而到了CE 6.0的时代,我们终于可以看到.NET CF 2.0了。不过想看到.NET CF 3.5,恐怕还需要点时间。保持默认值,继续Next:
<shape id="图片_x0020_7" style="VISIBILITY: visible; WIDTH: 372.75pt; HEIGHT: 292.5pt; mso-wrap-style: square" type="#_x0000_t75" o:spid="_x0000_i1036"><imagedata o:title="build07" src="file:///C:%5CUsers%5Cv-nim%5CAppData%5CLocal%5CTemp%5Cmsohtmlclip1%5C01%5Cclip_image007.jpg"><font face="Calibri" size="3"></font></imagedata></shape>
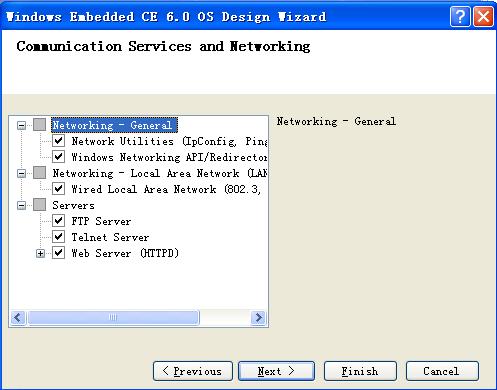
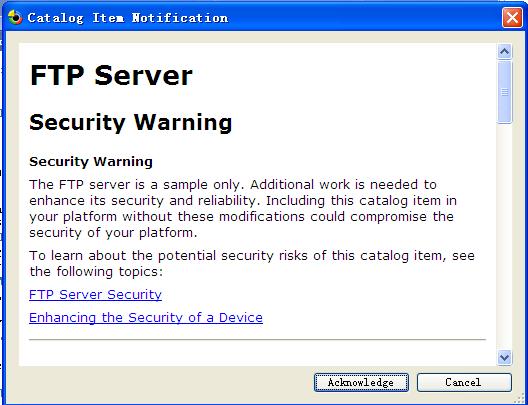
下面是关于网络设置的选择,我们添加了对局域网LAN的支持,还有FTP Server、Telnet Server和Web Server。其中FTP Server会引发一个安全警告,不过我们需要这个组件来下载编译好的Image文件。保持默认,继续Next:
<shape id="图片_x0020_8" style="VISIBILITY: visible; WIDTH: 374.25pt; HEIGHT: 294.75pt; mso-wrap-style: square" type="#_x0000_t75" o:spid="_x0000_i1035"><imagedata o:title="build08" src="file:///C:%5CUsers%5Cv-nim%5CAppData%5CLocal%5CTemp%5Cmsohtmlclip1%5C01%5Cclip_image008.jpg"><font size="3"></font></imagedata></shape>
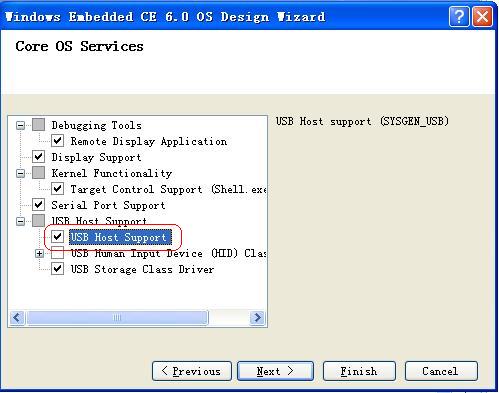
下面是关于Debug工具、显示支持和USB Host支持的。这里我们要选择“USB Host Support”(图中红色部分),这个选项允许我们的设备称为USB Host,可以访问一些通过USB接口连接的外部设备,比如鼠标、U盘等。Next……
<shape id="图片_x0020_9" style="VISIBILITY: visible; WIDTH: 373.5pt; HEIGHT: 293.25pt; mso-wrap-style: square" type="#_x0000_t75" o:spid="_x0000_i1034"><imagedata o:title="build09" src="file:///C:%5CUsers%5Cv-nim%5CAppData%5CLocal%5CTemp%5Cmsohtmlclip1%5C01%5Cclip_image009.jpg"><font size="3"></font></imagedata></shape>
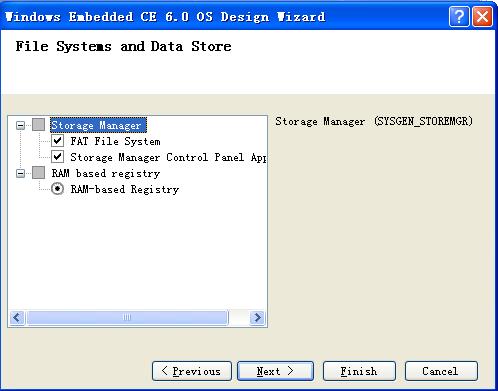
接下来是文件系统,设备支持FAT文件系统,注册表是基于RAM的。Next……
<shape id="图片_x0020_10" style="VISIBILITY: visible; WIDTH: 375.75pt; HEIGHT: 293.25pt; mso-wrap-style: square" type="#_x0000_t75" o:spid="_x0000_i1033"><imagedata o:title="build10" src="file:///C:%5CUsers%5Cv-nim%5CAppData%5CLocal%5CTemp%5Cmsohtmlclip1%5C01%5Cclip_image010.jpg"><font size="3"></font></imagedata></shape>
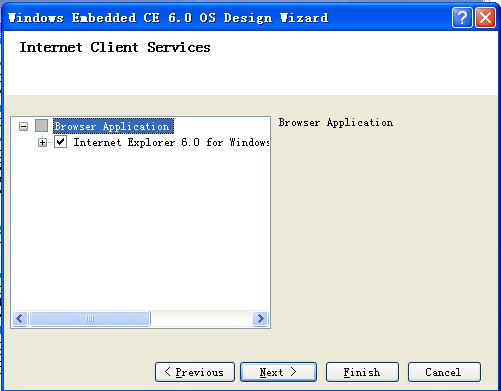
浏览器软件,IE 6.0,Next……
<shape id="图片_x0020_11" style="VISIBILITY: visible; WIDTH: 374.25pt; HEIGHT: 291pt; mso-wrap-style: square" type="#_x0000_t75" o:spid="_x0000_i1032"><imagedata o:title="build11" src="file:///C:%5CUsers%5Cv-nim%5CAppData%5CLocal%5CTemp%5Cmsohtmlclip1%5C01%5Cclip_image011.jpg"><font size="3"></font></imagedata></shape>
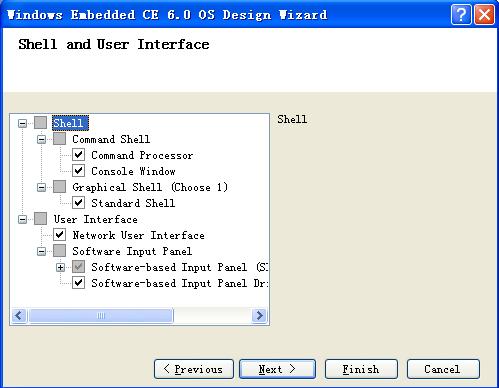
接下来是Shell,会有命令行窗口,使用标准的Shell,会包括软键盘(SIP),我们在这里选择了两个尺寸的键盘。Next……
<shape id="图片_x0020_12" style="VISIBILITY: visible; WIDTH: 372.75pt; HEIGHT: 294pt; mso-wrap-style: square" type="#_x0000_t75" o:spid="_x0000_i1031"><imagedata o:title="build12" src="file:///C:%5CUsers%5Cv-nim%5CAppData%5CLocal%5CTemp%5Cmsohtmlclip1%5C01%5Cclip_image012.jpg"><font size="3"></font></imagedata></shape>
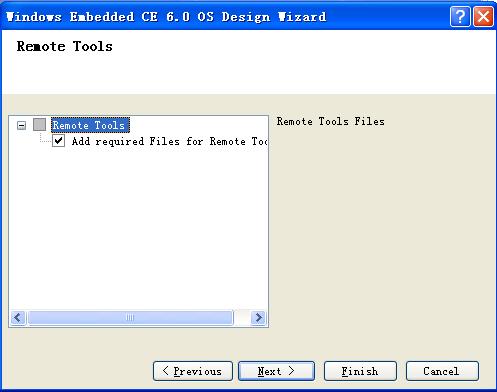
Remote Tools 的支持文件,Next……
<shape id="图片_x0020_13" style="VISIBILITY: visible; WIDTH: 374.25pt; HEIGHT: 293.25pt; mso-wrap-style: square" type="#_x0000_t75" o:spid="_x0000_i1030"><imagedata o:title="build13" src="file:///C:%5CUsers%5Cv-nim%5CAppData%5CLocal%5CTemp%5Cmsohtmlclip1%5C01%5Cclip_image013.jpg"><font size="3"></font></imagedata></shape>
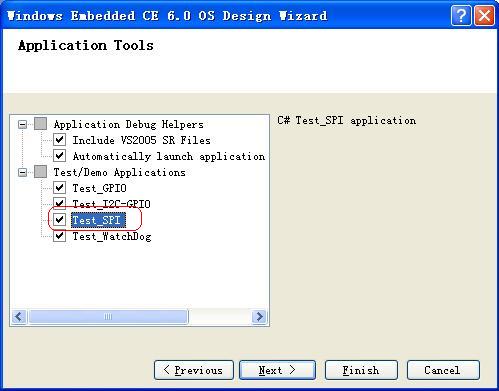
接下来是应用程序支持,支持Visual Studio 2005调试器的选项必须被选择,下面部分是Digi提供的应用程序Demo,用来控制GPIO、I2C等硬件接口,Test_SPI不是默认选择的,在这里我们将这个应用选择上。Next……
<shape id="图片_x0020_14" style="VISIBILITY: visible; WIDTH: 373.5pt; HEIGHT: 292.5pt; mso-wrap-style: square" type="#_x0000_t75" o:spid="_x0000_i1029"><imagedata o:title="build14" src="file:///C:%5CUsers%5Cv-nim%5CAppData%5CLocal%5CTemp%5Cmsohtmlclip1%5C01%5Cclip_image014.jpg"><font size="3"></font></imagedata></shape>
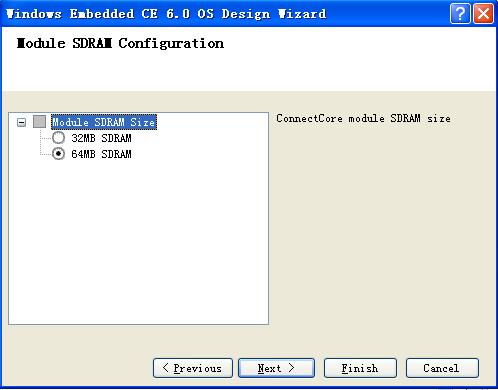
设置内存尺寸,因为我们的开发板是64M内存,所以在这里别无选择,Next……怎么还没完啊?
<shape id="图片_x0020_15" style="VISIBILITY: visible; WIDTH: 373.5pt; HEIGHT: 293.25pt; mso-wrap-style: square" type="#_x0000_t75" o:spid="_x0000_i1028"><imagedata o:title="build15" src="file:///C:%5CUsers%5Cv-nim%5CAppData%5CLocal%5CTemp%5Cmsohtmlclip1%5C01%5Cclip_image015.jpg"><font size="3"></font></imagedata></shape>
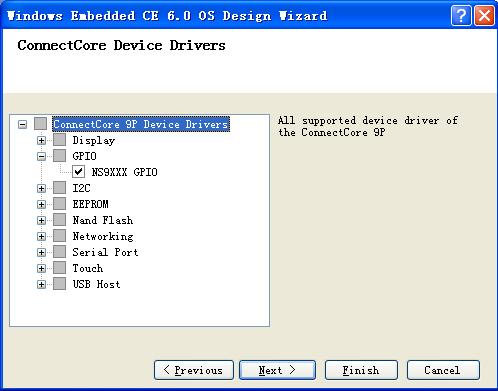
硬件驱动程序,保持原状就好了……Next
<shape id="图片_x0020_16" style="VISIBILITY: visible; WIDTH: 375pt; HEIGHT: 294.75pt; mso-wrap-style: square" type="#_x0000_t75" o:spid="_x0000_i1027"><imagedata o:title="build16" src="file:///C:%5CUsers%5Cv-nim%5CAppData%5CLocal%5CTemp%5Cmsohtmlclip1%5C01%5Cclip_image016.jpg"><font face="Calibri" size="3"></font></imagedata></shape>
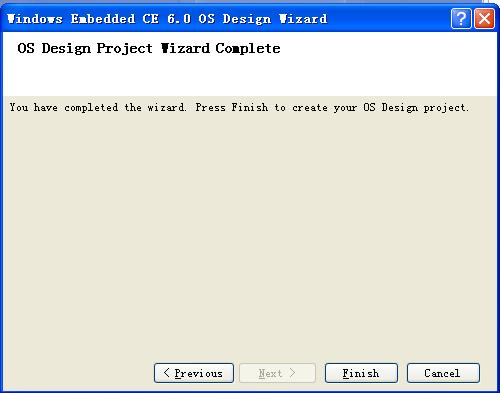
呼,看到这个界面,说明我们完成了整个创建向导。赶紧点击Finish……
<shape id="图片_x0020_17" style="VISIBILITY: visible; WIDTH: 313.5pt; HEIGHT: 240pt; mso-wrap-style: square" type="#_x0000_t75" o:spid="_x0000_i1026"><imagedata o:title="build17" src="file:///C:%5CUsers%5Cv-nim%5CAppData%5CLocal%5CTemp%5Cmsohtmlclip1%5C01%5Cclip_image017.jpg"><font size="3"></font></imagedata></shape>
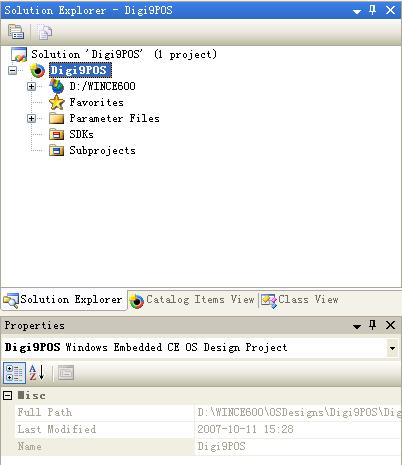
因为我们选择了FTP Server组件,所以会有一个安全警告出来,点击Acknowledge按钮。接下来,我们就可以看到熟悉的IDE开发环境了。默认的IDE布局与原有Platform Builder类似,工程文件列表、类列表和Catalog Item列表都放置在IDE左侧,但是我们也可以通过拖拽的方式来修改IDE布局。
下图是Solution Explorer的截图,这就是定制平台工程中所包括的所有文件。
<shape id="图片_x0020_18" style="VISIBILITY: visible; WIDTH: 235.5pt; HEIGHT: 272.25pt; mso-wrap-style: square" type="#_x0000_t75" o:spid="_x0000_i1025"><imagedata o:title="build18" src="file:///C:%5CUsers%5Cv-nim%5CAppData%5CLocal%5CTemp%5Cmsohtmlclip1%5C01%5Cclip_image018.jpg"><font size="3"></font></imagedata></shape>
下一节中,我们将认识PB中最重要的主角之一:Catalog Items。敬请期待……
下一篇《Windows Embedded CE 6.0开发初体验》之”平台定制”


 2141
2141

 被折叠的 条评论
为什么被折叠?
被折叠的 条评论
为什么被折叠?
 到【灌水乐园】发言


