


Mahout版本:0.7,hadoop版本:1.0.4,jdk:1.7.0_25 64bit。
在上篇blog中的最后终端的信息可以看到,svd算法一共有5个Job任务。下面通过Mahout中DistributedLanczosSolver源代码来一个个分析:
为了方便后面的数据随时对照,使用wine.dat修改后的数据,如下(5行,13列):
14.23,1.71,2.43,15.6,127,2.8,3.06,0.28,2.29,5.64,1.04,3.92,1065
13.2,1.78,2.14,11.2,100,2.65,2.76,0.26,1.28,4.38,1.05,3.4,1050
13.16,2.36,2.67,18.6,101,2.8,3.24,0.3,2.81,5.68,1.03,3.17,1185
14.37,1.95,2.5,16.8,113,3.85,3.49,0.24,2.18,7.8,0.86,3.45,1480
13.24,2.59,2.87,21,118,2.8,2.69,0.39,1.82,4.32,1.04,2.93,735
1.首先,算法使用main方法进行调用,看到main方法中只用一句:
ToolRunner.run(new DistributedLanczosSolver().job(), args);if (cleansvd) {
double maxError = Double.parseDouble(AbstractJob.getOption(parsedArgs, "--maxError"));
double minEigenvalue = Double.parseDouble(AbstractJob.getOption(parsedArgs, "--minEigenvalue"));
boolean inMemory = Boolean.parseBoolean(AbstractJob.getOption(parsedArgs, "--inMemory"));
return run(inputPath,
outputPath,
outputTmpPath,
workingDirPath,
numRows,
numCols,
isSymmetric,
desiredRank,
maxError,
minEigenvalue,
inMemory);
}然后进入run方法,这个run方法是调用142行的方法,这个方法中还有一个run方法以及另外一个Job,如下:
public int run(Path inputPath,
                 Path outputPath,
                 Path outputTmpPath,
                 Path workingDirPath,
                 int numRows,
                 int numCols,
                 boolean isSymmetric,
                 int desiredRank,
                 double maxError,
                 double minEigenvalue,
                 boolean inMemory) throws Exception {
    int result = run(inputPath, outputPath, outputTmpPath, workingDirPath, numRows, numCols,
        isSymmetric, desiredRank);
    if (result != 0) {
      return result;
    }
    Path rawEigenVectorPath = new Path(outputPath, RAW_EIGENVECTORS);
    return new EigenVerificationJob().run(inputPath,
                                          rawEigenVectorPath,
                                          outputPath,
                                          outputTmpPath,
                                          maxError,
                                          minEigenvalue,
                                          inMemory,
                                          getConf() != null ? new Configuration(getConf()) : new Configuration());
}public int run(Path inputPath,
Path outputPath,
Path outputTmpPath,
Path workingDirPath,
int numRows,
int numCols,
boolean isSymmetric,
int desiredRank) throws Exception {
DistributedRowMatrix matrix = new DistributedRowMatrix(inputPath, outputTmpPath, numRows, numCols);
matrix.setConf(new Configuration(getConf() != null ? getConf() : new Configuration()));
LanczosState state;
if (workingDirPath == null) {
state = new LanczosState(matrix, desiredRank, getInitialVector(matrix));
} else {
HdfsBackedLanczosState hState =
new HdfsBackedLanczosState(matrix, desiredRank, getInitialVector(matrix), workingDirPath);
hState.setConf(matrix.getConf());
state = hState;
}
solve(state, desiredRank, isSymmetric);
Path outputEigenVectorPath = new Path(outputPath, RAW_EIGENVECTORS);
serializeOutput(state, outputEigenVectorPath);
return 0;
}DistributedRowMatrix matrix = new DistributedRowMatrix(inputPath, outputTmpPath, numRows, numCols,true);LanczosState state= new LanczosState(matrix, desiredRank, getInitialVector(matrix)); public Vector getInitialVector(VectorIterable corpus) {
Vector initialVector = new DenseVector(corpus.numCols());
initialVector.assign(1.0 / Math.sqrt(corpus.numCols()));
return initialVector;
}2. solve函数:
这个solve函数是LanczosSolver中的,而且好长,这里就一点点贴代码了:
VectorIterable corpus = state.getCorpus();
    log.info("Finding {} singular vectors of matrix with {} rows, via Lanczos",
        desiredRank, corpus.numRows());
    int i = state.getIterationNumber();
    Vector currentVector = state.getBasisVector(i - 1);
    Vector previousVector = state.getBasisVector(i - 2);
    double beta = 0;
Matrix triDiag = state.getDiagonalMatrix();13/10/28 16:52:56 INFO lanczos.LanczosSolver: Finding 3 singular vectors of matrix with 5 rows, via Lanczospublic LanczosState(VectorIterable corpus, int desiredRank, Vector initialVector) {
this.corpus = corpus;
this.desiredRank = desiredRank;
intitializeBasisAndSingularVectors();
setBasisVector(0, initialVector);
scaleFactor = 0;
diagonalMatrix = new DenseMatrix(desiredRank, desiredRank);
singularValues = Maps.newHashMap();
iterationNumber = 1;
}protected void intitializeBasisAndSingularVectors() {
basis = Maps.newHashMap();
singularVectors = Maps.newHashMap();
}
public void setBasisVector(int i, Vector basisVector) {
basis.put(i, basisVector);
}while (i < desiredRank) {
startTime(TimingSection.ITERATE);
Vector nextVector = isSymmetric ? corpus.times(currentVector) : corpus.timesSquared(currentVector);
log.info("{} passes through the corpus so far...", i);
if (state.getScaleFactor() <= 0) {
state.setScaleFactor(calculateScaleFactor(nextVector));
}
nextVector.assign(new Scale(1.0 / state.getScaleFactor()));
if (previousVector != null) {
nextVector.assign(previousVector, new PlusMult(-beta));
}{0:0.2773500981126146,1:0.2773500981126146,2:0.2773500981126146,3:0.2773500981126146,4:0.2773500981126146,5:0.2773500981126146,6:0.2773500981126146,7:0.2773500981126146,8:0.2773500981126146,9:0.2773500981126146,10:0.2773500981126146,11:0.2773500981126146,12:0.2773500981126146}3.timesSquared函数:
times函数对应的是DistributedRowMatrix中的timesSquared方法,看这个方法:
public Vector timesSquared(Vector v) {
  try {
   Configuration initialConf = getConf() == null ? new Configuration() : getConf();
   Path outputVectorTmpPath = new Path(outputTmpBasePath,
       new Path(Long.toString(System.nanoTime())));
   Configuration conf =
     TimesSquaredJob.createTimesSquaredJobConf(initialConf,
                          v,
                          rowPath,
                          outputVectorTmpPath);
   JobClient.runJob(new JobConf(conf));
   Vector result = TimesSquaredJob.retrieveTimesSquaredOutputVector(conf);
   if (!keepTempFiles) {
    FileSystem fs = outputVectorTmpPath.getFileSystem(conf);
    fs.delete(outputVectorTmpPath, true);
   }
   return result;
  } catch (IOException ioe) {
   throw new IllegalStateException(ioe);
  }
}public static Configuration createTimesSquaredJobConf(Configuration initialConf,
Vector v,
int outputVectorDim,
Path matrixInputPath,
Path outputVectorPathBase,
Class<? extends TimesSquaredMapper> mapClass,
Class<? extends VectorSummingReducer> redClass)
throws IOException {
JobConf conf = new JobConf(initialConf, TimesSquaredJob.class);
conf.setJobName("TimesSquaredJob: " + matrixInputPath);
FileSystem fs = FileSystem.get(matrixInputPath.toUri(), conf);
matrixInputPath = fs.makeQualified(matrixInputPath);
outputVectorPathBase = fs.makeQualified(outputVectorPathBase);
long now = System.nanoTime();
Path inputVectorPath = new Path(outputVectorPathBase, INPUT_VECTOR + '/' + now);
SequenceFile.Writer inputVectorPathWriter = new SequenceFile.Writer(fs,
conf, inputVectorPath, NullWritable.class, VectorWritable.class);
Writable inputVW = new VectorWritable(v);
inputVectorPathWriter.append(NullWritable.get(), inputVW);
Closeables.close(inputVectorPathWriter, false);
URI ivpURI = inputVectorPath.toUri();
DistributedCache.setCacheFiles(new URI[] {ivpURI}, conf);
conf.set(INPUT_VECTOR, ivpURI.toString());
conf.setBoolean(IS_SPARSE_OUTPUT, !v.isDense());
conf.setInt(OUTPUT_VECTOR_DIMENSION, outputVectorDim);
FileInputFormat.addInputPath(conf, matrixInputPath);
conf.setInputFormat(SequenceFileInputFormat.class);
FileOutputFormat.setOutputPath(conf, new Path(outputVectorPathBase, OUTPUT_VECTOR_FILENAME));
conf.setMapperClass(mapClass);
conf.setMapOutputKeyClass(NullWritable.class);
conf.setMapOutputValueClass(VectorWritable.class);
conf.setReducerClass(redClass);
conf.setCombinerClass(redClass);
conf.setOutputFormat(SequenceFileOutputFormat.class);
conf.setOutputKeyClass(NullWritable.class);
conf.setOutputValueClass(VectorWritable.class);
return conf;
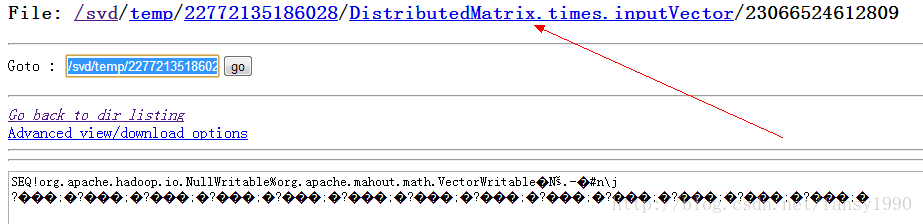
}看到上面的代码,首先新建了一个临时文件,并且把v存入了这个文件中,(如下图),假如在Closeables.close()函数后面设置断点,然后再去读取这个文件,一定读到的是v(未验证);
4. TimesSquareMapper:
这个mapper使用的是之前的job模式,何谓之前的job模式?看下面的:
public static class TimesSquaredMapper<T extends WritableComparable> extends MapReduceBase
      implements Mapper<T,VectorWritable, NullWritable,VectorWritable> {

    private Vector outputVector;
    private OutputCollector<NullWritable,VectorWritable> out;
    private Vector inputVector;

    Vector getOutputVector() {
      return outputVector;
    }

    void setOut(OutputCollector<NullWritable,VectorWritable> out) {
      this.out = out;
    }

    @Override
    public void configure(JobConf conf) {
      try {
        URI[] localFiles = DistributedCache.getCacheFiles(conf);
        Preconditions.checkArgument(localFiles != null && localFiles.length >= 1,
                                    "missing paths from the DistributedCache");
        Path inputVectorPath = new Path(localFiles[0].getPath());

        SequenceFileValueIterator<VectorWritable> iterator =
            new SequenceFileValueIterator<VectorWritable>(inputVectorPath, true, conf);
        try {
          inputVector = iterator.next().get();
        } finally {
          Closeables.closeQuietly(iterator);
        }

        int outDim = conf.getInt(OUTPUT_VECTOR_DIMENSION, Integer.MAX_VALUE);
        outputVector = conf.getBoolean(IS_SPARSE_OUTPUT, false)
                     ? new RandomAccessSparseVector(outDim, 10)
                     : new DenseVector(outDim);
      } catch (IOException ioe) {
        throw new IllegalStateException(ioe);
      }
    }

    @Override
    public void map(T rowNum,
                    VectorWritable v,
                    OutputCollector<NullWritable,VectorWritable> out,
                    Reporter rep) throws IOException {
      setOut(out);
      double d = scale(v);
      if (d == 1.0) {
        outputVector.assign(v.get(), Functions.PLUS);
      } else if (d != 0.0) {
        outputVector.assign(v.get(), Functions.plusMult(d));
      }
    }

    protected double scale(VectorWritable v) {
      return v.get().dot(inputVector);
    }

    @Override
    public void close() throws IOException {
      if (out != null) {
        out.collect(NullWritable.get(), new VectorWritable(outputVector));
      }
    }

}configure:初始化inputVector和outputVector变量,inputVector 变量就是13个1除以根号13,outputVector就是newDenseVector(outDim) ,其中outDim 就是列数,即13。
map函数,就是读入每条输入数据,首先算出和inputVector的点积,就是每个项对应相乘,然后全部加起来得到一个double值,即上面的d变量,可以看到一半d肯定不是1也不是0.0,所以就执行outputVector.assign(v.get(), Functions.plusMult(d)),这个就是把每个项对应和d相乘再加上本身,然后把对应的项和outputVector相加,使用excel得到下面的结果:

编写一个仿制的mapper,可以得到下面的输出结果:
{0:24097.67923459054,1:3603.6391684175815,2:4409.1866916950685,3:29000.9726699959,4:196025.39417749547,5:5354.570778504749,6:5452.009276298623,7:502.5912992367036,8:3717.017225965077,9:10171.220875310022,10:1745.9573083425073,11:5977.050374141945,12:2019219.3908164862}5.VectorSummingReducer:
这个也是和mapper一样的,使用的之前job的模式:
public static class VectorSummingReducer extends MapReduceBase
      implements Reducer<NullWritable,VectorWritable,NullWritable,VectorWritable> {

    private Vector outputVector;

    @Override
    public void configure(JobConf conf) {
      int outputDimension = conf.getInt(OUTPUT_VECTOR_DIMENSION, Integer.MAX_VALUE);
      outputVector = conf.getBoolean(IS_SPARSE_OUTPUT, false)
                   ? new RandomAccessSparseVector(outputDimension, 10)
                   : new DenseVector(outputDimension);
    }

    @Override
    public void reduce(NullWritable n,
                       Iterator<VectorWritable> vectors,
                       OutputCollector<NullWritable,VectorWritable> out,
                       Reporter reporter) throws IOException {
      while (vectors.hasNext()) {
        VectorWritable v = vectors.next();
        if (v != null) {
          outputVector.assign(v.get(), Functions.PLUS);
        }
      }
      out.collect(NullWritable.get(), new VectorWritable(outputVector));
    }
}这里附加一个mapper的仿制代码吧:
package mahout.fansy.svd;

import java.io.IOException;
import java.util.Iterator;
import java.util.List;
import java.util.Map;

import org.apache.hadoop.io.NullWritable;
import org.apache.hadoop.io.Writable;
import org.apache.hadoop.mapred.OutputCollector;
import org.apache.mahout.math.DenseVector;
import org.apache.mahout.math.Vector;
import org.apache.mahout.math.VectorWritable;
import org.apache.mahout.math.function.Functions;

import com.google.common.collect.Lists;

import mahout.fansy.utils.read.ReadArbiKV;

public class TimesSquareMapperFollow {

	/**
	 * TimesSquareMapper 仿制代码
	 */
	private Vector outputVector;
    private Vector inputVector;
	public static void main(String[] args) throws IOException {
		TimesSquareMapperFollow ts=new TimesSquareMapperFollow();
//		ts.getInputVector();
		ts.map();
		ts.close();
	}

	public List<VectorWritable> getInputVector() throws IOException{
		List<VectorWritable> list=Lists.newArrayList();
		String path="hdfs://ubuntu:9000/svd/input/wine";
		Map<Writable,Writable> map=ReadArbiKV.readFromFile(path);
		Iterator iter = map.entrySet().iterator();
		while (iter.hasNext()) {
		    Map.Entry entry = (Map.Entry) iter.next();
		    VectorWritable val = (VectorWritable)entry.getValue();
		    list.add(val);
		}
		path="hdfs://ubuntu:9000/svd/temp/22772135186028/DistributedMatrix.times.inputVector/23066524612809";
		Map<Writable,Writable> input=ReadArbiKV.readFromFile(path);
		inputVector=((VectorWritable)input.get(null)).get();
		outputVector=new DenseVector(13);
		return list;
	}
	/*
	 * 仿造map函数
	 */
	public void map() throws IOException{
		List<VectorWritable >list=getInputVector();
		for(VectorWritable v:list){
			double d = scale(v);
		      if (d == 1.0) {
		        outputVector.assign(v.get(), Functions.PLUS);
		      } else if (d != 0.0) {
		        outputVector.assign(v.get(), Functions.plusMult(d));
		      }
		}

	}

	protected double scale(VectorWritable v) {
	      return v.get().dot(inputVector);
	    }
	/*
	 * 仿造close函数
	 */
	public void close(){
		System.out.println("outputVector:");
		System.out.println(outputVector);
	}
}
分享,成长,快乐
转载请注明blog地址:http://blog.csdn.net/fansy1990


 493
493


 被折叠的 条评论
为什么被折叠?
被折叠的 条评论
为什么被折叠?
 到【灌水乐园】发言


