


官方文档:http://dangdangdotcom.github.io/elastic-job/elastic-job-lite/00-overview/intro/
该说的文档上都说了;在过程中遇到一些错误记下了
环境:zookeeper版本 zookeeper-3.4.6 或3.4.6以上 不然会莫名其妙的报错
我是maven 搭建的项目 需要包(当然spring的包是不可少的当然你用java来操作的话就不需要spring的包了):
	    <dependency>
               <artifactId>elastic-job-common-core</artifactId>
               <groupId>com.dangdang</groupId>
               <version>2.1.5</version>
         </dependency>

        <dependency>
            <artifactId>elastic-job-lite-core</artifactId>
            <groupId>com.dangdang</groupId>
            <version>2.1.5</version>
        </dependency>

        <dependency>
            <artifactId>elastic-job-lite-spring</artifactId>
            <groupId>com.dangdang</groupId>
            <version>2.1.5</version>
        </dependency>
spring-job配置(参数配置就不讲了官方文档都有配置;关键点是配置是配置的数据源作业维度操作历史记录看你自己了需要配你就配不需要就不配 event-trace-rdb-data-source="dataSource"):
<?xml version="1.0" encoding="UTF-8"?>
<beans xmlns="http://www.springframework.org/schema/beans"
    xmlns:xsi="http://www.w3.org/2001/XMLSchema-instance"
    xmlns:context="http://www.springframework.org/schema/context"
    xmlns:reg="http://www.dangdang.com/schema/ddframe/reg"
    xmlns:job="http://www.dangdang.com/schema/ddframe/job"
    xsi:schemaLocation="http://www.springframework.org/schema/beans
                        http://www.springframework.org/schema/beans/spring-beans.xsd
                        http://www.springframework.org/schema/context
                        http://www.springframework.org/schema/context/spring-context.xsd
                        http://www.dangdang.com/schema/ddframe/reg
                        http://www.dangdang.com/schema/ddframe/reg/reg.xsd
                        http://www.dangdang.com/schema/ddframe/job
                        http://www.dangdang.com/schema/ddframe/job/job.xsd
                        ">

    <!--配置作业注册中心   -->
    <reg:zookeeper id="regCenter" server-lists="localhost:2181" namespace="erp-job" base-sleep-time-milliseconds="1000" max-sleep-time-milliseconds="3000" max-retries="3" />
    <!-- 0 0 0 * * ? -->
    <job:simple id="customerFollowElasticJob" class="com.isz.erp.job.CustomerFollowElasticJob" registry-center-ref="regCenter" cron="0 0 0 * * ?"
    	sharding-total-count="2"    description="这里是描述" event-trace-rdb-data-source="dataSource"/>
    <!-- 配置作业-->
</beans>
java代码实现:
package com.isz.erp.job;

import org.springframework.beans.factory.annotation.Autowired;

import com.dangdang.ddframe.job.api.ShardingContext;
import com.dangdang.ddframe.job.api.simple.SimpleJob;


/**
 * @Description:
 * @date: 2017年9月8日 下午5:53:56
 */
public class CustomerFollowElasticJob  implements SimpleJob{


	@Override
	public void execute(ShardingContext context) {


		testShareData(context.getShardingItem(), context.getShardingTotalCount(), 100, context.getTaskId());
	}


	/**
	* @Description: 测试分片数据 参数一当前分片 参数二分片总数 参数三 总条数
	* @return void
	* @date 2017年9月7日 下午5:24:41
	 */
	public void testShareData(int sharItem,int sharCount,int dataCount,String taskId ){

		if(sharItem==(sharCount-1)){//如果总分片数据==当前分片 说明是最后数据
			System.out.println("分片...."+taskId+"......."+sharItem+"执行数据:"+((dataCount/sharCount)*sharItem)+"到"+((dataCount/sharCount)*(sharItem==0?1:sharItem+1)+(dataCount%sharCount)));
		}else{
			System.out.println("分片...."+taskId+"........"+sharItem+"执行数据:"+((dataCount/sharCount)*sharItem)+"到"+(dataCount/sharCount)*(sharItem==0?1:sharItem+1));
		}
	}

	public static void main(String[] args) {

		//97条数据
		int dataCount=97;

		//5片
		int share=5;

		System.out.println("每个分片执行:"+97/5+"条数数据");

		System.out.println("最后一个分片执行:"+((97/5)+(dataCount%share))+"条数数据");

	}

}
package test.dubbo;

import org.apache.commons.logging.Log;
import org.apache.commons.logging.LogFactory;
import org.springframework.context.support.ClassPathXmlApplicationContext;

/**
 *
 * @描述: 启动Dubbo服务用的MainClass.
 * @作者:
 * @创建时间:
 * @版本: 1.0
 */
public class DubboProvider {

	private static final Log log = LogFactory.getLog(DubboProvider.class);

	@SuppressWarnings("resource")
	public static void main(String[] args) {
		try {


			ClassPathXmlApplicationContext context = new ClassPathXmlApplicationContext(
					"classpath:spring/spring-context.xml");
			context.start();
		} catch (Exception e) {
			log.error("== DubboProvider context start error:", e);
		}
		synchronized (DubboProvider.class) {
			while (true) {
				try {
					DubboProvider.class.wait();
				} catch (InterruptedException e) {
					log.error("== synchronized error:", e);
				}
			}
		}
	}

}
启动服务后你应该就可以看到控制太打印的信息了..........................到此程序就玩了
可能要用到的工具:
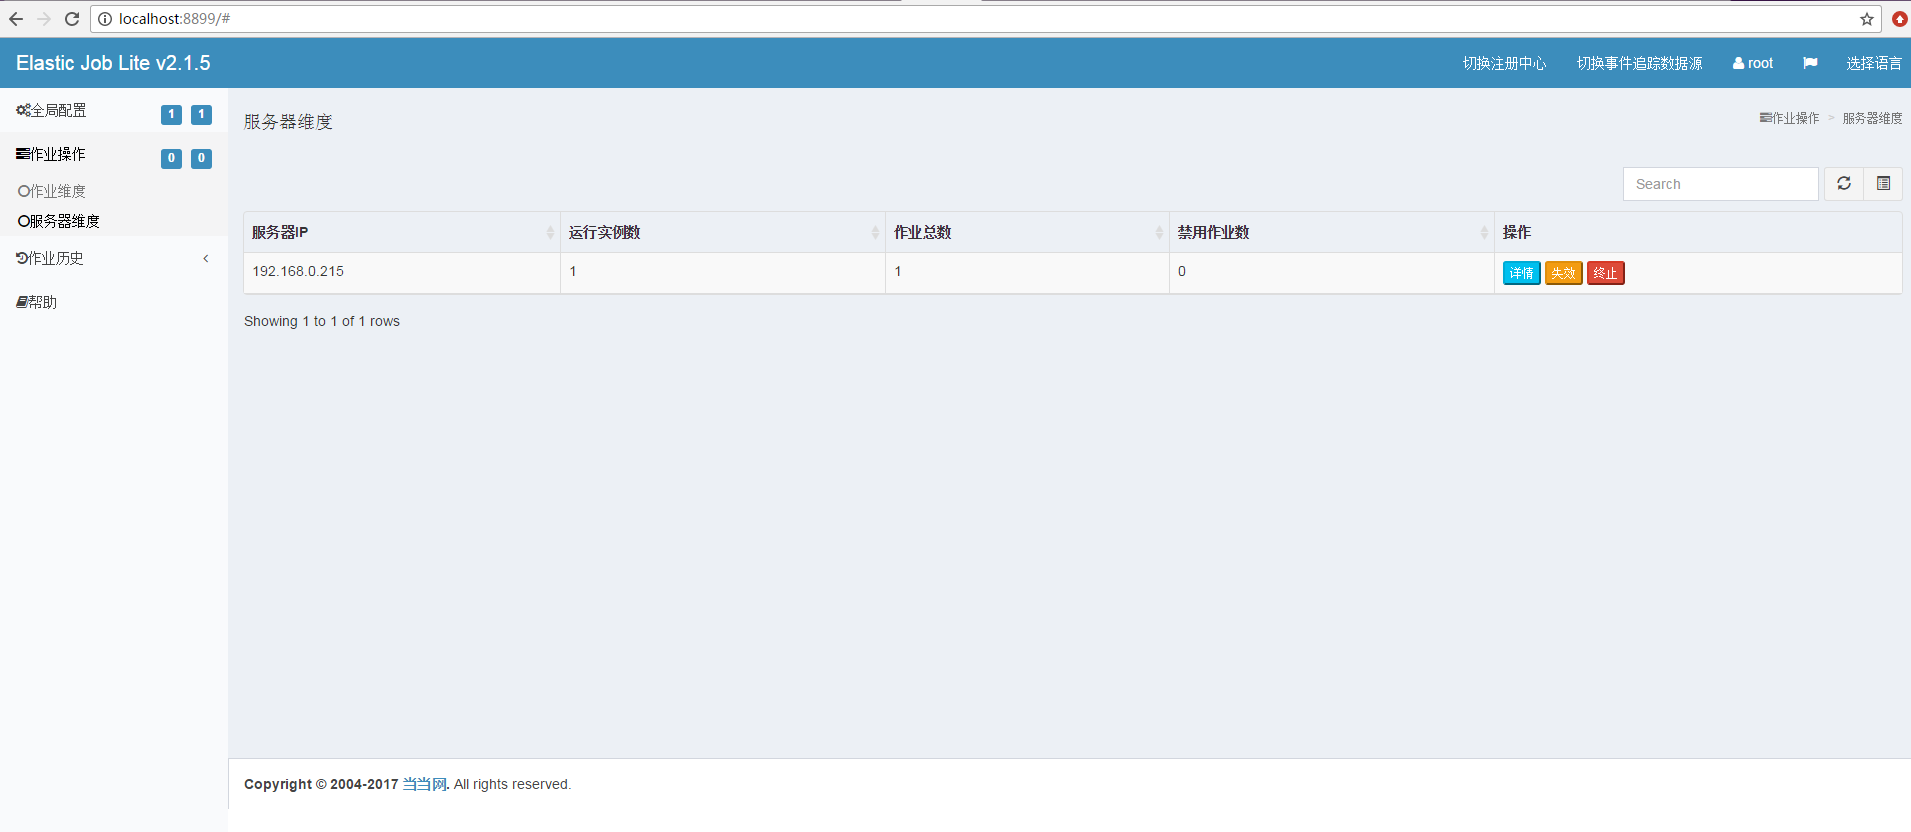
官网上下载:elastic-job-lite-console-2.1.5 可以看到以下信息(相关参数官网上都有介绍相信你也看的懂是什么)
目录里bin下面有个start.bat如果是linux启动start.sh就好了 然后在浏览器上输入:http://localhost:8899/ 你就会看到如下信息
还可以下载:ZooInspector 看一下节点信息:


就这样完了。。。。。。。。。。。。。。。


 518
518


 被折叠的 条评论
为什么被折叠?
被折叠的 条评论
为什么被折叠?
 到【灌水乐园】发言


