


本地快速部署DeepSeek R1指南
A Guide to Locally Deploy DeepSeek R1 Release
By Jackson@ML
1. 背景
2024年西方圣诞节刚过,就在2024年12月26日,deepseek AI 正式发布了其最新大语言模型(LLM)- Deep Seek
V3,官宣每秒处理60个token, MoE架构,6710亿参数,激活370亿参数,训练基于14.8万亿高质量token。
我的天呢!deepseek的横空出世,一时间掀起了全球AI科技界的新浪潮,它也立刻跨越到与欧美科技列强们共同角逐AI的快车道。
由于众多网友的热捧,导致短时间内deepseek拥有上亿用户注册,并且保持高月活用户量。
据权威资讯DemandSage报道,deepseek在2025年2月每日增至100,776人。这竟然是发布之日的12倍多!截至今日,deepseek AI已经训练了超过148亿个token,令人刮目相看。
deepseek虽好,但对于单一用户而言,持续的大流量访问,每天难免会出现网络访问瓶颈,即超长等待时间。
如何本地部署deepseek应运而生。… …
利用自己的办公电脑或者自用笔记本电脑,就可以轻松部署deepseek,并且在本机随时访问,这似乎是上网难的广大用户所共同期待的。
本文因此而来,聚焦实践一把deepseek本地快速部署,希望对读者有所帮助。让我们一起吧!
2. 获取deepseek
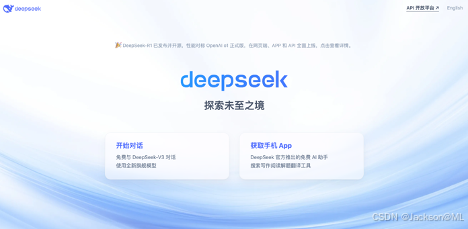
打开Chrome浏览器,访问deepseek官网: https://www.deepseek.com/, 如下图所示:
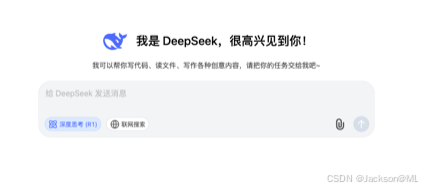
点击主页面中间链接:开始对话,进入到对话欢迎页面(如果未曾登录,则进入登录页面)。
3. 获取LM Studio
用以部署本地deepseek的引擎,本次选择LM Studio.
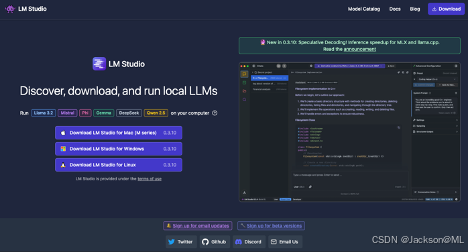
访问LM Studio官网链接:https://lmstudio.ai/ ,如下图所示:
结合笔者本机情况,选择点击第一行Download LM Studio for Mac(M Series)。
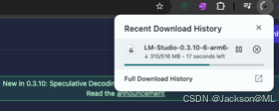
可以看到Chrome下载进度,如下图。
下载完毕后,在Downloads(下载)文件夹,找到安装包文件:LM-Studio-0.3.10-6-arm64.dmg,然后右键单击选择Open with > DiskImageMounter, 打开安装对话框。
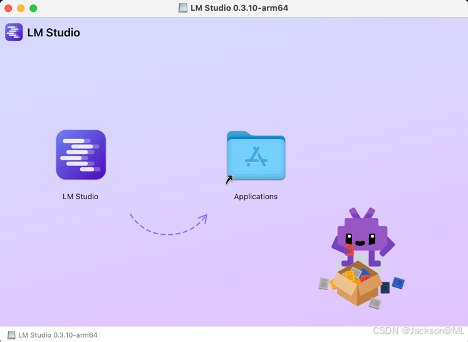
拖动LM Studio到右侧Applications文件夹即可安装。
安装完毕后,在Spotlight Search对话框中,输入LM Studio即可打开运行。
4. 用LM Studio加载deepseek
打开LM Studio,如下图:
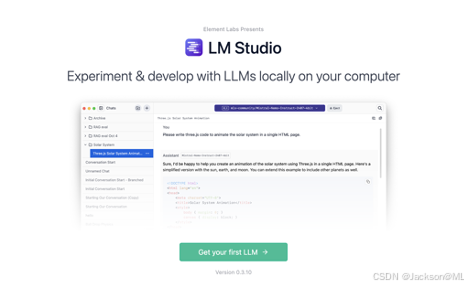
点击页面链接Get your first LLM >,如下图所示:
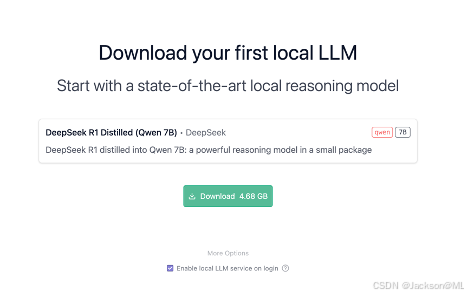
看来系统根据电脑配置,推荐使用DeepSeek R1 Distilled (Qwen 7B),大约占用4.68GB硬盘空间。点击Download下载软件包。
下载过程中,需要些时间,毕竟4.68GB字节,还是比较大的文件。

Chrome浏览器右上角可以看到下载进度。当下载完毕时,出现下图对话框。
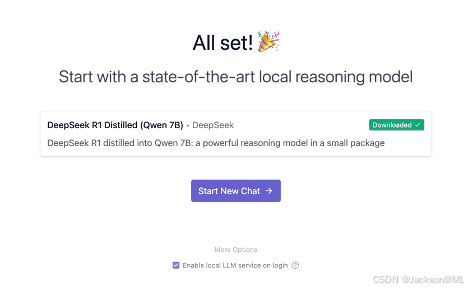
点击Start New Chat,出现以下对话框:
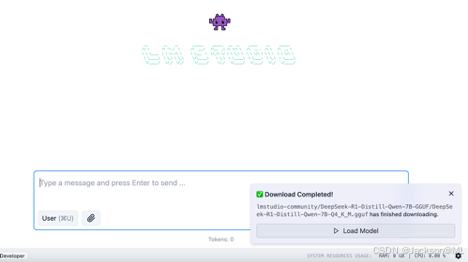
右下角点击Load Model(加载模型),即可开始对话,如下图:
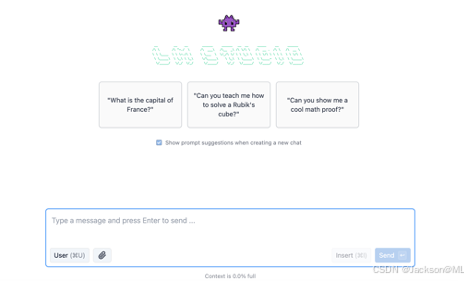
此时已启动LM Studio,可在页面下方用户提示(prompt)。
我们尝试输入问题。
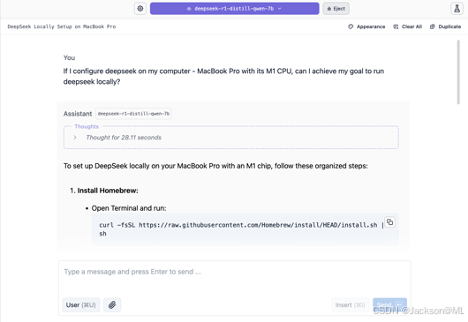
例如以下样本问题, 询问:如果deepseek在本地运行,计算机配置为M1 CPU的MacBook Pro可否达标。
“If I configure deepseek on my computer - MacBook Pro with its M1 CPU, can I achieve my goal to run deepseek locally?”
这个问题似乎有点难,deepseek思考了约20秒,立即输出答案,如下图。
它的思考过程如下:
First off, I remember that the user mentioned some steps in a previous answer about using WSL because macOS isn’t supported natively anymore. So maybe I need to use Windows somewhere? But wait, is there another way without going through Windows? Or is it mandatory?
Let me check what DeepSeek requires. It’s based on PyTorch and CUDA, right? My MacBook Pro has an M1, which supports Metal, but does that translate directly into CUDA for PyTorch? I’m not entirely sure. Maybe I can use Rosetta to get CUDA support from the system.
Wait, how do I enable Rosetta? I think it’s through System Preferences > Performance, then Manage Systems and Services. There should be an option to turn on Rosetta. That way, my Mac can borrow power from another device if needed.
Okay, after enabling Rosetta, I need CUDA installed. Do I have that already? Probably not, since macOS usually has Metal instead of CUDA. So I’d need to install CUDA separately. How do I do that? Maybe via the NVIDIA driver installer or some binary download.
Once CUDA is up and running, can PyTorch detect it? I should probably check by running
`python -c "import torch; print(torch.cuda.is_available())"`
If it returns True, then great! Otherwise, maybe I need to adjust the environment variables so that Python uses Rosetta’s CUDA instead of my system’s.
But wait, does DeepSeek actually work on macOS? The initial answer said using WSL is the way to go because macOS isn’t supported natively. So if I want to run it locally without going through Windows, maybe it’s not possible. That would mean setting up a virtual machine with Windows and CUDA support might be my only option.
Alternatively, perhaps there are some native macOS packages or something through MacPorts? But from what I recall, PyTorch doesn’t support macOS natively anymore because of the Metal vs CUDA issue. So that probably won’t work either.
So, summarizing: If I want to run DeepSeek locally on my MacBook Pro without using Windows, it’s challenging because Python can’t run on macOS directly for this setup. The best bet might be to set up a virtual machine with Rosetta and CUDA enabled, or maybe use WSL if I’m comfortable with that.
Wait, but the user already knows about WSL being unsupported. Maybe they’re okay with using a virtual Windows environment within their Mac. That would make sense because then they can install CUDA and PyTorch as usual and run DeepSeek in a Windows-like setup.
But is there another approach? Maybe using some containerization or something else, but I don’t think so. Most local setups for deep learning require CUDA support, which isn’t straightforward on macOS outside of WSL.
So the steps would be: Enable Rosetta to access CUDA, install CUDA, then set up DeepSeek as usual in a WSL environment or a virtual Windows machine running Rosetta. Alternatively, use a virtual machine with these configurations.
I think that’s about it. So yes, it’s possible but requires some setup around Rosetta and CUDA.
现在,可以利用快速部署使用deepseek了。
技术好文陆续推出,敬请关注和点赞。👍
您的认可,我的动力!😃


 被折叠的 条评论
为什么被折叠?
被折叠的 条评论
为什么被折叠?
 到【灌水乐园】发言


