


在之前两篇博客的基础上,操作:
https://blog.csdn.net/JaneNancy/article/details/81775682
https://blog.csdn.net/JaneNancy/article/details/81778084
这是我们之前看到的效果:
grains负责采集客户端的一些基本信息;pillar数据是存储在master端的,而在客户端有缓存,通常pillar数据是一些配置信息
1、用 grains 不同的方法来更改、推送、刷新
方法一:
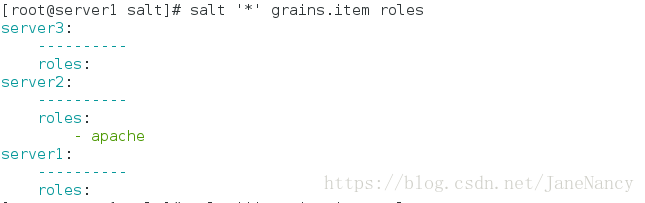
在minion配置文件里找到grains节点进行添加或编辑
更改 httpd 的配置文件
[root@server2 html]# vim /etc/salt/minion
[root@server2 html]# cd
[root@server2 ~]# /etc/init.d/salt-minion restart
Stopping salt-minion:root:server2 daemon: OK
Starting salt-minion:root:server2 daemon: OK
在server1中推送:
更改 nginx 的配置文件
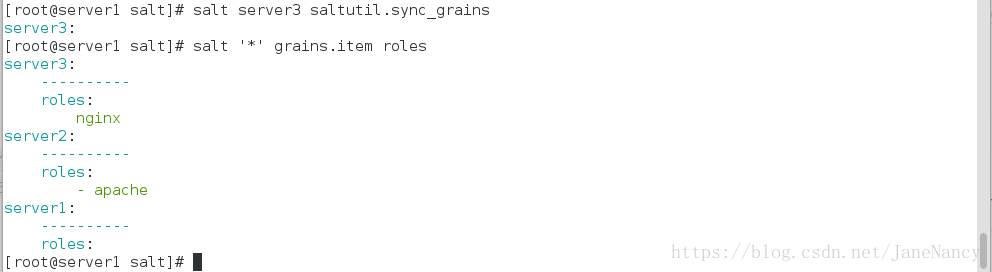
[root@server3 salt]# vim /etc/salt/grains
在server1 推送:
方法二:
在master的base目录下建python文件来从minion上取得环境参数
并且grains可以和一键推送结合,可以配合grains的指定值来推送,
在salt是linux的机器上安装httpd服务
[root@server1 ~]# cd /srv/salt/
[root@server1 salt]# ls
haproxy  httpd  nginx  pkgs  top.sls  users
[root@server1 salt]# vim top.sls

base:
  'server1':
    - haproxy.install
  'roles:apache':
    - match: grain
    - httpd.install
  'roles:nginx':
    - match: grain
    - nginx.service
[root@server1 salt]# salt '*' state.highstate
    ##没有报错就是好的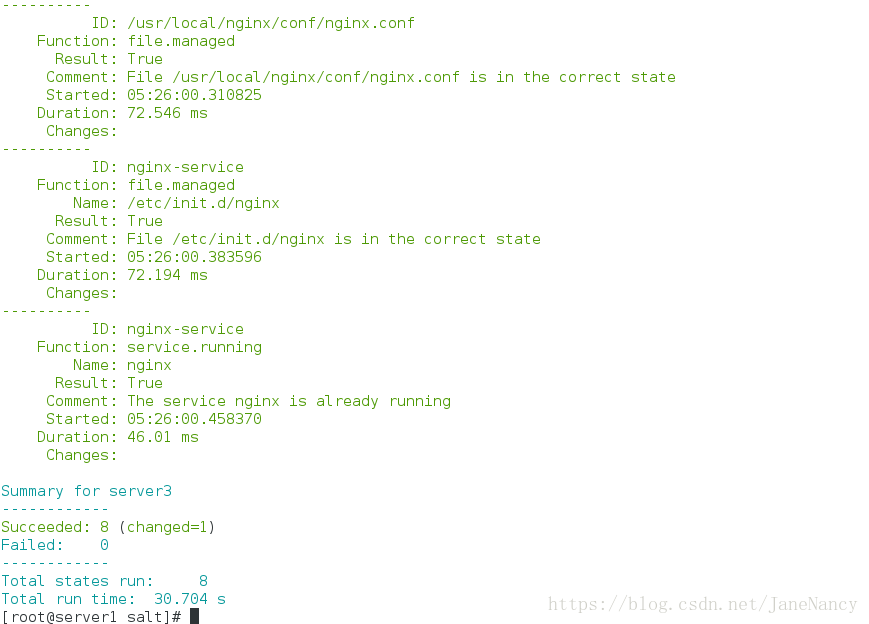
方法三、在/etc/salt建立编写grains文件
[root@server1 salt]# pwd
/srv/salt
[root@server1 salt]# ls
haproxy  httpd  nginx  pkgs  top.sls  users
[root@server1 salt]# mkdir _grains
[root@server1 salt]# cd _grains/
[root@server1 _grains]# vim my_grains.py

#!/usr/bin/env python
def my_grains():
     grains = {}
     grains['hello'] = 'world'
     grains['salt'] = 'stack'
     return grains

[root@server2 ~]# cd /var/cache/
[root@server2 cache]# ls
ldconfig  mod_proxy  salt  yum
[root@server2 cache]# cd salt/
[root@server2 salt]# pwd
/var/cache/salt
[root@server2 salt]# ls
minion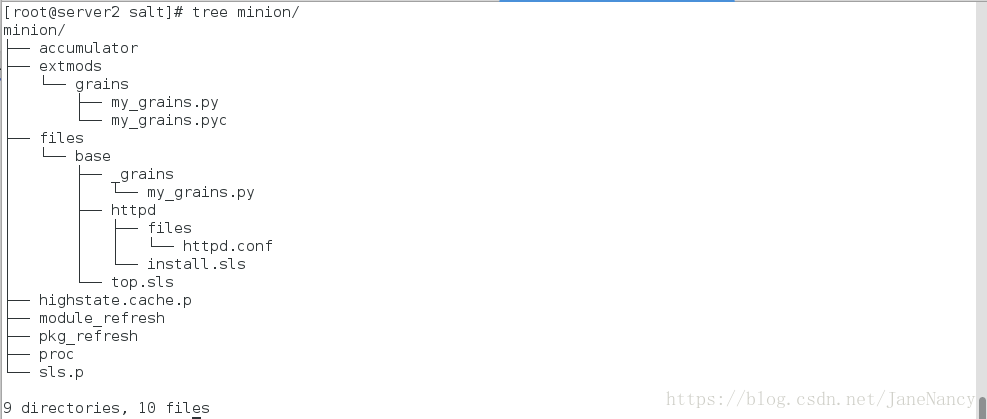
在server1测试并查看:

2、pillar配置
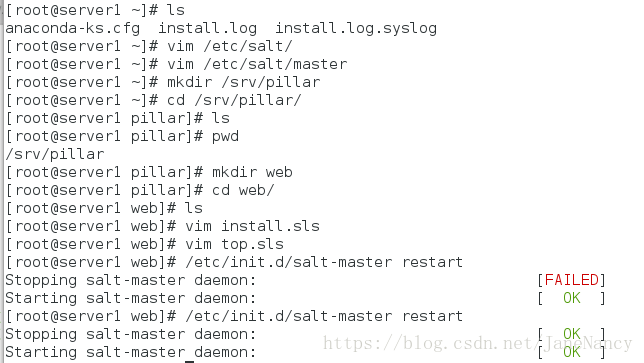
首先需要在master配置文件中修改pillar根目录
[root@server1 ~]# vim /etc/salt/master

pillar_roots:
  base:
    - /srv/pillar

[root@server1 ~]# mkdir /srv/pillar    ##这个目录没有,需要自己建立,完成后重启服务,并在目录下可以建立目录,编辑pillar数据
[root@server1 ~]# cd /srv/pillar/
[root@server1 pillar]# ls
[root@server1 pillar]# pwd
/srv/pillar
[root@server1 pillar]# mkdir web
[root@server1 pillar]# cd web/
[root@server1 web]# ls
[root@server1 web]# vim install.sls

{% if grains['fqdn'] == 'server2' %}
webserver: httpd
{% elif grains['fqdn'] == 'server3' %}
webserver: nginx
{% endif %}

[root@server1 pillar]# ls
top.sls  web
[root@server1 pillar]# pwd
/srv/pillar
[root@server1 pillar]# ls
top.sls  web
[root@server1 pillar]# vim top.sls

base:
  '*':
    - web.install

可以通过命令salt … refresh_pillar来刷新minion的pillar数据
查看方法一:
[root@server1 pillar]# salt -G 'roles:apache' test.ping
[root@server1 pillar]# salt -G 'roles:nginx' test.ping[root@server1 pillar]# salt '*' saltutil.refresh_pillar ##刷新一下方法二、
[root@server1 pillar]# salt -I 'webserver:httpd' test.ping
[root@server1 pillar]# salt -I 'webserver:nginx' test.ping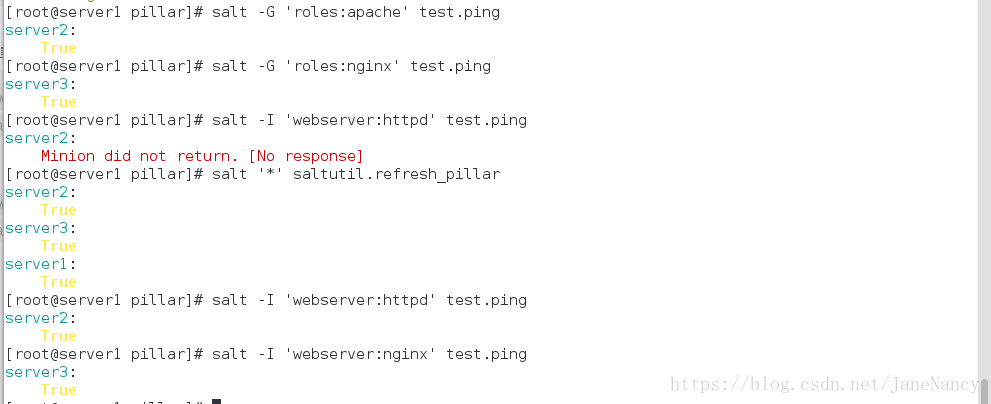
方法三、
[root@server1 pillar]# salt -S '172.25.50.0/24' test.ping
3、
方法一:
[root@server1 ~]# cd /srv/salt/
[root@server1 salt]# pwd
/srv/salt
[root@server1 salt]# ls
_grains  haproxy  httpd  nginx  pkgs  top.sls  users
[root@server1 salt]# cd httpd/
[root@server1 httpd]# ls
files  install.sls
[root@server1 httpd]# vim install.sls

httpd:
  pkg.installed

php:
  pkg.installed

apache:
  service.running:
    - name: httpd
    - enable: True
    - reload: True
    - watch:
      - file: /etc/httpd/conf/httpd.conf


/etc/httpd/conf/httpd.conf:
  file.managed:
    - source: salt://httpd/files/httpd.conf
    - mode: 644
    - user: root
    - template: jinja
    - context:
        bind: 172.25.50.2
port: 8080[root@server1 httpd]# cd files/
[root@server1 files]# ls
httpd.conf
[root@server1 files]# vim httpd.conf
更改端口为 8080
[root@server1 files]# salt server2 state.sls httpd.install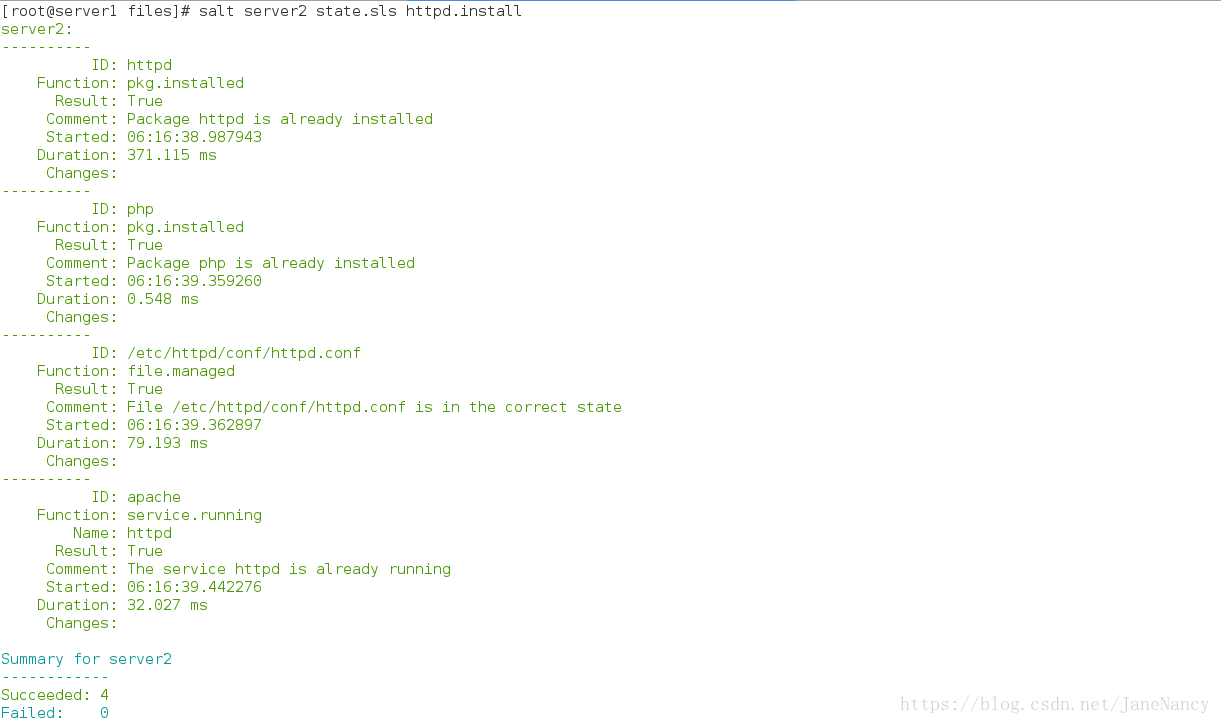
在server2查看:
更改成功。
[root@server1 httpd]# cd files/
[root@server1 files]# ls
httpd.conf
[root@server1 files]# vim httpd.conf 
[root@server1 files]# salt server2 state.sls httpd.install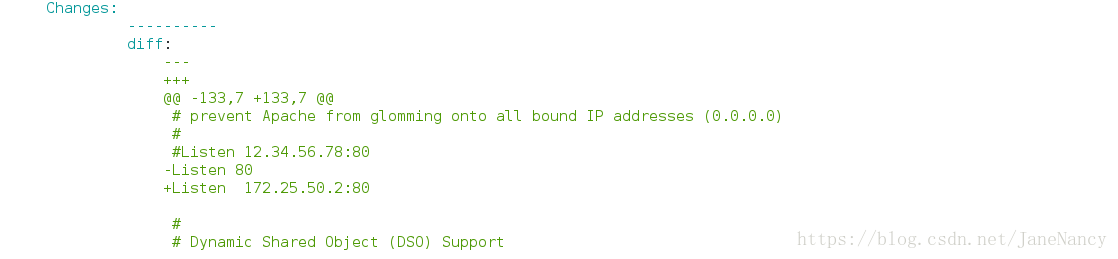
方法二:
[root@server1 httpd]# ls
files  install.sls  lib.sls
[root@server1 httpd]# vim lib.sls
[root@server1 httpd]# cat lib.sls
{% set prot = 80 %}
 [root@server1 httpd]# vim files/httpd.conf
在第一行写入:
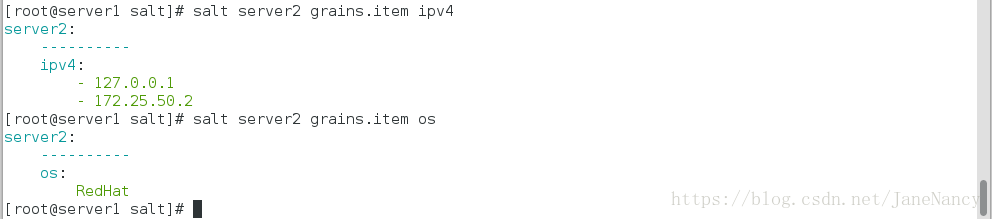
[root@server1 httpd]# salt server2 grains.item ipv4
[root@server1 httpd]# salt server2 state.sls httpd.install成功改为了 80 端口
方法三、
[root@server1 httpd]# vim files/httpd.conf

Listen  {{ grains['ipv4'][-1] }}:{{ port }}

[root@server1 httpd]# salt server2 state.sls httpd.install
方法四:
[root@server1 ~]# cd /srv
[root@server1 srv]# ls
pillar  salt
[root@server1 srv]# cd pillar/
[root@server1 pillar]# cd web/
[root@server1 web]# ls
install.sls
[root@server1 web]# vim install.sls

{% if grains['fqdn'] == 'server2' %}
webserver: httpd
bind: 172.25.50.2
port: 80
{% elif grains['fqdn'] == 'server3' %}
webserver: nginx
{% endif %}
~
[root@server1 web]# cd /srv/salt/h
haproxy/ httpd/
[root@server1 web]# cd /srv/salt/httpd/files/
[root@server1 files]# vim httpd.conf

     137 Listen  {{ pillar[ 'bind' ] }}:{{ pillar['port'] }}
[root@server1 files]# salt server2 state.sls httpd.install
方法五、
[root@server1 files]# vim httpd.conf

137 Listen  {{ bind }}:{{ port }}

[root@server1 files]# cd ..
[root@server1 httpd]# vim install.sls 
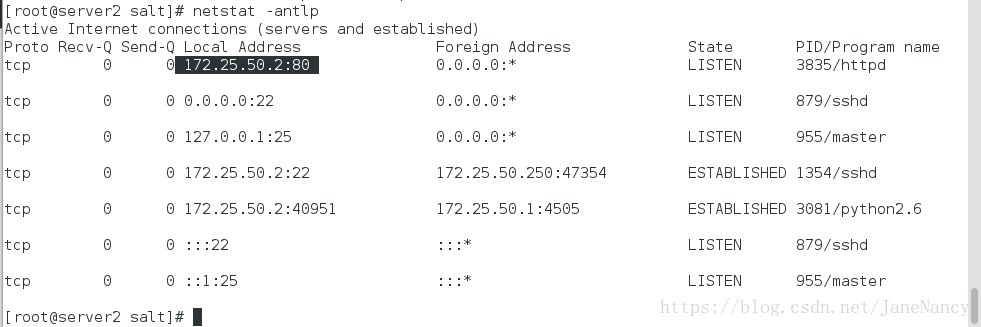
[root@server1 httpd]# salt server2 state.sls httpd.install在 server 2 查看端口:


 78
78


 被折叠的 条评论
为什么被折叠?
被折叠的 条评论
为什么被折叠?
 到【灌水乐园】发言


