


 这篇博客指导如何在Visual Studio Code中创建一个自定义的Tree View扩展。首先介绍了在侧边栏添加Explorer视图,然后详细讲解了实现Tree Data Provider的步骤,包括提供节点依赖数据的方法。接着说明了注册TreeDataProvider、更新Tree View内容、设置标题和图标以及添加按钮的步骤。最后提到了测试扩展的注意事项,需要关闭VSCode并使用npm测试。
https://code.visualstudio.com/api
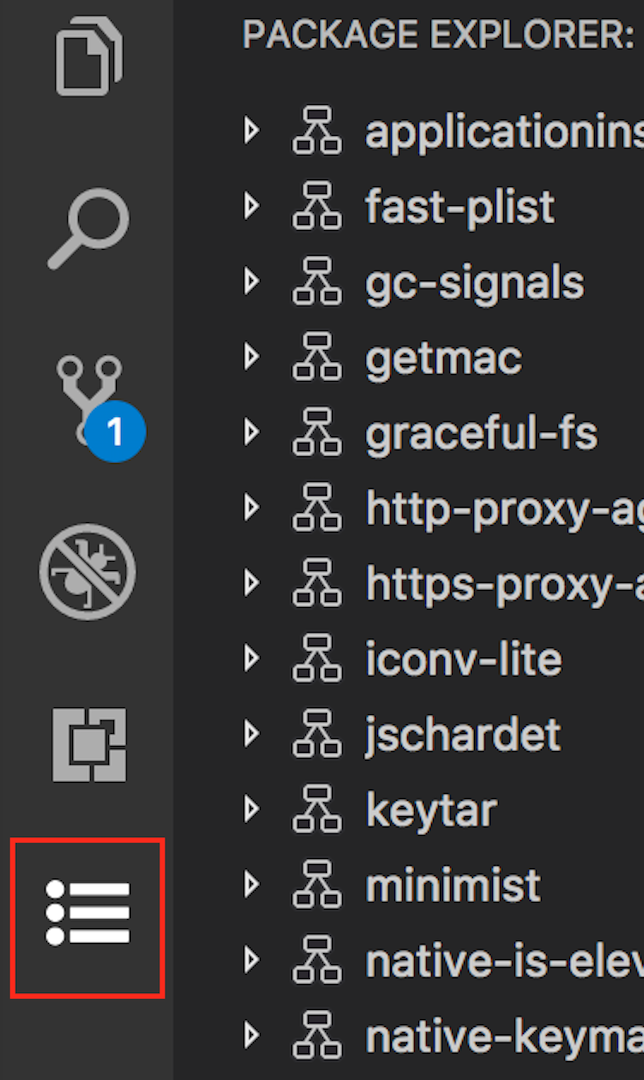
- 在Explorer里增加了一个view
https://code.visualstudio.com/api/extension-guides/tree-view

Step1: Here's the package.json for the first version of our extension:
explorer: Explorer view in the Side Bar
		"views": {
			"explorer": [
				{
					"id": "GeneratedViews",
					"name": "Generated Views"
				}
			]
		}
Step2: Tree Data Provider
implement the TreeDataProvider. Our TreeDataProvider will provide node dependencies data, but you can have a data provider that provides other types of data.
There are two necessary methods in this API that you need to implement:
getChildren(element?: T): ProviderResult<T[]>- Implement this to return the children for the givenelementor root (if no element is passed).getTreeItem(element: T): TreeItem | Thenable<TreeItem>- Implement this to return the UI representation (TreeItem) of the element that gets displayed in the view.
and need to Registering the TreeDataProvider :
vscode.window.createTreeView('nodeDependencies', {
  treeDataProvider: new NodeDependenciesProvider(vscode.workspace.rootPath)
});
Step3: Updating Tree View content (Refresh)
Step4: Set view title & icon
You have to specify the following required fields:
id- The name of the new view container you're creating.title- The name that will show up at the top of the view container.icon- An image that will be displayed for the view container when in the Activity Bar.
"contributes": {
  "viewsContainers": {
    "activitybar": [
      {
        "id": "package-explorer",
        "title": "Package Explorer",
        "icon": "media/dep.svg"
      }
    ]
  }
}
Step5: Add icon & button to view
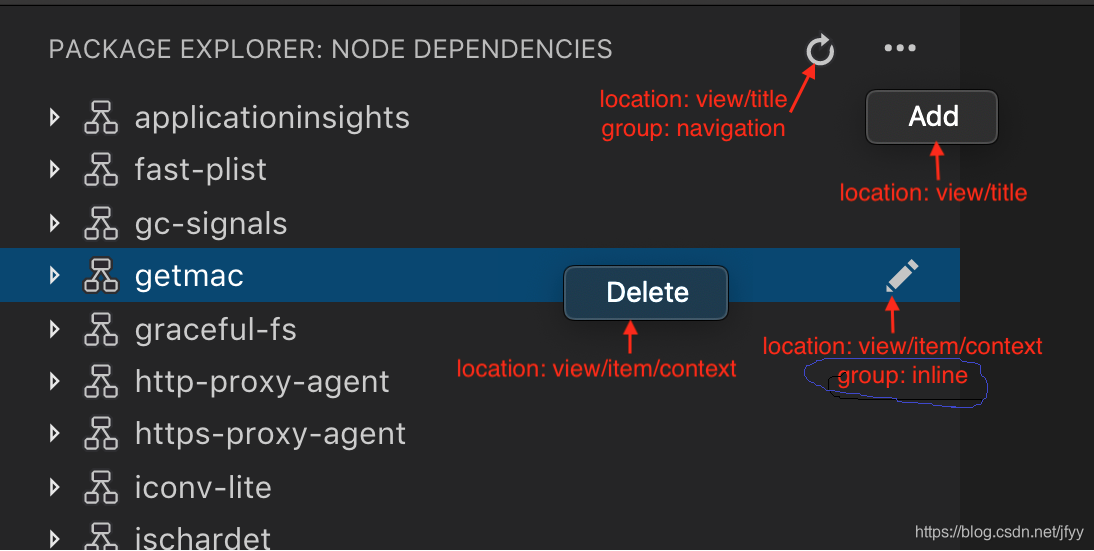
"contributes": {
  "commands": [
    {
      "command": "nodeDependencies.refreshEntry",
      "title": "Refresh",
      "icon": {
        "light": "resources/light/refresh.svg",
        "dark": "resources/dark/refresh.svg"
      }
    },
    {
      "command": "nodeDependencies.addEntry",
      "title": "Add"
    },
    {
      "command": "nodeDependencies.editEntry",
      "title": "Edit",
      "icon": {
        "light": "resources/light/edit.svg",
        "dark": "resources/dark/edit.svg"
      }
    },
    {
      "command": "nodeDependencies.deleteEntry",
      "title": "Delete"
    }
  ],
  "menus": {
    "view/title": [
      {
        "command": "nodeDependencies.refreshEntry",
        "when": "view == nodeDependencies",
        "group": "navigation"
      },
      {
        "command": "nodeDependencies.addEntry",
        "when": "view == nodeDependencies"
      }
    ],
    "view/item/context": [
      {
        "command": "nodeDependencies.editEntry",
        "when": "view == nodeDependencies && viewItem == dependency",
        "group": "inline"
      },
      {
        "command": "nodeDependencies.deleteEntry",
        "when": "view == nodeDependencies && viewItem == dependency"
      }
    ]
  }
}-
Testing Extensions
https://code.visualstudio.com/api/working-with-extensions/testing-extension
注意
- 是必须关闭vscode应用后执行:run npm test
- Debug时启动选Extension test
- 新建TestSuit文件名以.test.js结尾,方法用test命名


 1万+
1万+

 被折叠的 条评论
为什么被折叠?
被折叠的 条评论
为什么被折叠?
 到【灌水乐园】发言


