原文:http://blog.csdn.net/chaijunkun/article/details/6925889
今天在做一个项目的时候用到了Spring的定时计划任务。这是Spring的特色功能,可以根据设置在特定的时间或间隔时间做特定的事。
下面给出一个例子:
- package net.csdn.blog.chaijunkukn;
-
- import java.text.SimpleDateFormat;
- import java.util.Calendar;
- import java.util.Locale;
-
- public class TimerTask {
- public void printTimeStamp(){
- Calendar ca= Calendar.getInstance();
- ca.setTimeInMillis(System.currentTimeMillis());
- SimpleDateFormat sdf= new SimpleDateFormat("yyyy-MM-dd HH:mm:ss.SSS ", Locale.CHINA);
-
- System.out.print(sdf.format(ca.getTime()));
- }
- public TimerTask(){
- this.printTimeStamp();
- System.out.println("计划任务被初始化了");
- }
- public void doTask(){
- this.printTimeStamp();
- System.out.print("计划任务被执行,线程id:");
- System.out.println(Thread.currentThread().getId());
- }
- }
根据Spring关于定时任务的规范,任务执行方法应为无参数无返回的方法,因此按照规范上面的例子中声明了doTask方法。上面的例子很简单,Spring作为IoC容器,构造TimerTask实例时会调用无参构造函数,此类会在实例化时在控制台输出当前时间和构造信息。当定时任务被触发时,也会在控制台显示当前时间和任务被执行的提示信息。
下面是配置(需要声明的是,本实例基于J2EE工程,使用了log4j,配置文件只是工程中的一部分):
- <?xml version="1.0" encoding="utf-8"?>
- <beans xmlns="http://www.springframework.org/schema/beans"
- xmlns:xsi="http://www.w3.org/2001/XMLSchema-instance"
- xsi:schemaLocation="http://www.springframework.org/schema/beans
- http://www.springframework.org/schema/beans/spring-beans-2.5.xsd">
-
- <bean id="timer"
- class="org.springframework.scheduling.quartz.SchedulerFactoryBean">
- <property name="triggers">
- <list>
- <ref bean="timerTaskTrigger" />
- </list>
- </property>
- </bean>
-
- <bean id="timerTaskTrigger" class="org.springframework.scheduling.quartz.CronTriggerBean">
- <property name="jobDetail">
- <ref bean="timerTaskJobDetail" />
- </property>
- <property name="cronExpression">
-
- <value>0/3 * * * * ?</value>
- </property>
- </bean>
-
- <bean id="timerTaskJobDetail"
- class="org.springframework.scheduling.quartz.MethodInvokingJobDetailFactoryBean">
- <property name="targetObject">
- <ref bean="timerTaskInstance" />
- </property>
- <property name="targetMethod">
- <value>doTask</value>
- </property>
- <property name="concurrent" value="false" />
- </bean>
-
- <bean id="timerTaskInstance" class="net.csdn.blog.chaijunkukn.TimerTask" />
- </beans>
web.xml的配置:
- <?xml version="1.0" encoding="UTF-8"?>
- <web-app id="WebApp_ID" version="2.4"
- xmlns="http://java.sun.com/xml/ns/j2ee" xmlns:xsi="http://www.w3.org/2001/XMLSchema-instance"
- xsi:schemaLocation="http://java.sun.com/xml/ns/j2ee http://java.sun.com/xml/ns/j2ee/web-app_2_4.xsd">
- <display-name>TaskTest</display-name>
- <servlet>
- <servlet-name>springapp</servlet-name>
- <servlet-class>org.springframework.web.servlet.DispatcherServlet</servlet-class>
- <init-param>
- <param-name>contextConfigLocation</param-name>
- <param-value>/WEB-INF/classes/applicationContext*.xml</param-value>
- </init-param>
- <load-on-startup>1</load-on-startup>
- </servlet>
-
- <servlet-mapping>
- <servlet-name>springapp</servlet-name>
- <url-pattern>*.htm</url-pattern>
- </servlet-mapping>
-
- <filter>
- <filter-name>EncodingFilter</filter-name>
- <filter-class>com.ku6.tech.wap.filter.EncodingFilter</filter-class>
- <init-param>
- <param-name>encoding</param-name>
- <param-value>utf-8</param-value>
- </init-param>
- <init-param>
- <param-name>forceEncoding</param-name>
- <param-value>true</param-value>
- </init-param>
- </filter>
-
- <filter-mapping>
- <filter-name>EncodingFilter</filter-name>
- <url-pattern>*.htm</url-pattern>
- </filter-mapping>
-
- <error-page>
- <error-code>404</error-code>
- <location>/error.jsp</location>
- </error-page>
-
- <welcome-file-list>
- <welcome-file>index.jsp</welcome-file>
- </welcome-file-list>
-
- <listener>
- <listener-class>org.springframework.web.context.ContextLoaderListener</listener-class>
- </listener>
-
- <context-param>
- <param-name>contextConfigLocation</param-name>
- <param-value>/WEB-INF/classes/applicationContext*.xml</param-value>
- </context-param>
- </web-app>
配置的部分就是这样,然后我使用MyEclipse 9.1关联上Tomcat服务器。一切都是默认的设置,然后将本引用部署并启动Tomcat服务器。
这时候问题来了,我的任务类居然被创建了两次,下面是截取的部分日志数据:
- 2011-11-01 19:09:02,568 INFO [main] - org.springframework.orm.hibernate3.HibernateTransactionManager.afterPropertiesSet(421) | Using DataSource [org.apache.commons.dbcp.BasicDataSource@f2ff9b] of Hibernate SessionFactory for HibernateTransactionManager
- 2011-11-01 19:09:02,756 INFO [main] - org.springframework.web.servlet.view.freemarker.FreeMarkerConfigurer.postProcessTemplateLoaders(124) | ClassTemplateLoader for Spring macros added to FreeMarker configuration
- 2011-11-01 19:09:03.878 计划任务被初始化了
- 2011-11-01 19:09:03,987 INFO [main] - org.quartz.core.SchedulerSignalerImpl.<init>(63) | Initialized Scheduler Signaller of type: class org.quartz.core.SchedulerSignalerImpl
- 2011-11-01 19:09:03,987 INFO [main] - org.quartz.core.QuartzScheduler.<init>(214) | Quartz Scheduler v.1.6.1-RC1 created.
- ...
- 2011-11-01 19:09:05,140 WARN [main] - org.hibernate.cache.EhCacheProvider.buildCache(86) | Could not find configuration [org.hibernate.cache.StandardQueryCache]; using defaults.
- 2011-11-01 19:09:05,218 INFO [main] - org.springframework.orm.hibernate3.HibernateTransactionManager.afterPropertiesSet(421) | Using DataSource [org.apache.commons.dbcp.BasicDataSource@85b4c5] of Hibernate SessionFactory for HibernateTransactionManager
- 2011-11-01 19:09:05,218 INFO [main] - org.springframework.web.servlet.view.freemarker.FreeMarkerConfigurer.postProcessTemplateLoaders(124) | ClassTemplateLoader for Spring macros added to FreeMarker configuration
- 2011-11-01 19:09:05.249 计划任务被初始化了
- 2011-11-01 19:09:05,249 INFO [main] - org.quartz.core.SchedulerSignalerImpl.<init>(63) | Initialized Scheduler Signaller of type: class org.quartz.core.SchedulerSignalerImpl
- 2011-11-01 19:09:05,249 INFO [main] - org.quartz.core.QuartzScheduler.<init>(214) | Quartz Scheduler v.1.6.1-RC1 created.
- ...
- 2011-11-1 19:09:05 org.apache.catalina.startup.Catalina start
- 信息: Server startup in 9451 ms
- 2011-11-01 19:09:06.013 计划任务被执行,线程id:17
- 2011-11-01 19:09:06.013 计划任务被执行,线程id:39
- 2011-11-01 19:09:09.021 计划任务被执行,线程id:19
- 2011-11-01 19:09:09.021 计划任务被执行,线程id:40
从上面的日志中可以看出,
在2011-11-01 19:09:03.878 定时计划任务类产生了一个实例
在2011-11-01 19:09:05.249 定时 计划任务类又产生了一个实例
起初我对它并不关心,但是下面的问题却是不可接受的,计划任务确实是差不多每隔3秒钟被调度的,但是每次调度执行了任务方法两次。设想一下,这仅仅是个开销很小的例子,但是如果这个方法执行的是一个非常耗时耗资源的任务,好不容易执行完一次后又要执行一次,这是对计算资源的极大浪费。于是查找了一天的原因,最后在国外的一个论坛上找到了解决的办法(http://forum.springsource.org/showthread.php?33311-IoC-Container-initializes-my-app-twice)。
楼主roncox和我遇到了同样的问题,他和我的配置差不多,同样也贴出了配置文件。虽然其他人没有解决问题,但是他自己解决了,并提供了最后的解决方法:
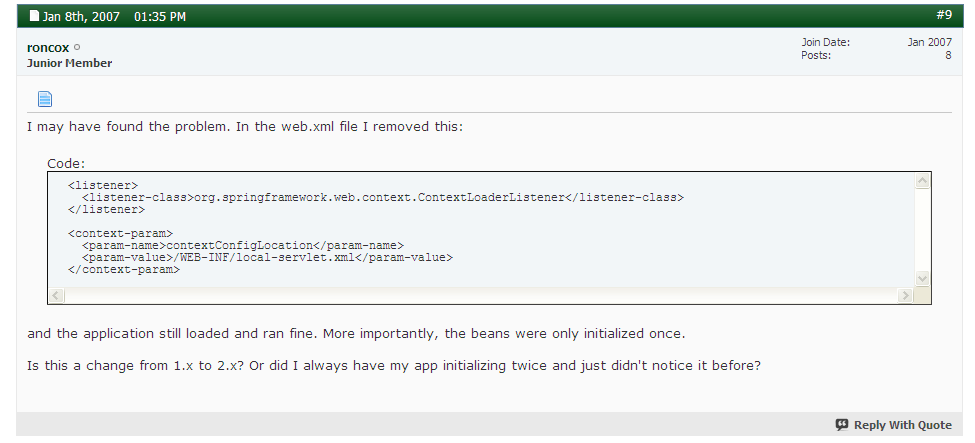
解决办法就是将web.xml配置文件中的如下节点删掉:
- <listener>
- <listener-class>org.springframework.web.context.ContextLoaderListener</listener-class>
- </listener>
-
- <context-param>
- <param-name>contextConfigLocation</param-name>
- <param-value>/WEB-INF/classes/applicationContext*.xml</param-value>
- </context-param>
修改之后程序运行一切正常。个人推测,由于org.springframework.web.context.ContextLoaderListener和org.springframework.web.servlet.DispatcherServlet都能够加载applicationContext*.xml(“*”是通配符,表示所有以“applicationContext”开头的xml文件)。而两个类殊途同归,最终都将这些配置文件交给了Spring框架的Ioc容器进行实例化。因此每个类都会被实例化两次。
2012年1月10日补充:今天做项目自习研究了一下spring的配置文件,发现之前说的不完全正确,不应该删除web.xml中的如下节点
- <listener>
- <listener-class>org.springframework.web.context.ContextLoaderListener</listener-class>
- </listener>
-
- <context-param>
- <param-name>contextConfigLocation</param-name>
- <param-value>/WEB-INF/classes/applicationContext*.xml</param-value>
- </context-param>
因为该节点指派的applicationContext*.xml是用于实例化除servlet之外的所有对象的,可以说项目中绝大多数的service和dao层操作都由ContextLoaderListener传递给Spring来进行实例化。
在web应用中,web.xml还经常出现如下的配置:
-
- <servlet>
-
-
- <servlet-name>spring</servlet-name>
- <servlet-class>org.springframework.web.servlet.DispatcherServlet</servlet-class>
- <init-param>
- <param-name>contextConfigLocation</param-name>
- <param-value>classpath:servletContext.xml</param-value>
- </init-param>
-
- <load-on-startup>1</load-on-startup>
- </servlet>
- <servlet-mapping>
- <servlet-name>spring</servlet-name>
- <url-pattern>*.do</url-pattern>
- </servlet-mapping>
这个是用来处理所有servlet的,没有它就无法通过请求地址来调用相应的Controller。
这里我明确地指示了要加载类路径下的servletContext.xml,如果不指定,则会按照注释中所描述地那样自动加载spring-servlet.xml
无论是servletContext.xml还是applicationContext*.xml都可以按照<beans>...<bean id="XXX" class="XXX" />...</beans>这样的形式来配置。
问题来了,有时候不注重对象初始化的分类,尤其是使用<context:component-scan base-package="controller" />这样的包扫描形式统一初始化,
很容易造成满足条件的对象被初始化两次,那么在计划任务的时候被执行两次也就不奇怪了。其实说来说去,还是要提醒大家,不同的配置文件其作用是不一样的,
不要将所有的初始化操作都放到一个配置文件中,更不要重复配置。不仅浪费资源,还很容易导致莫名其妙的故障。
另外,有相关文章还提到过是Tomcat服务器的问题,修改conf目录下的server.xml。修改节点Host,将appBase属性由默认的“webapps”设置为空("")即可,如下所示:
- <Host name="localhost" appBase="" unpackWARs="true" autoDeploy="true"
- xmlValidation="false" xmlNamespaceAware="false">
-
- <Context docBase="/usr/local/apache-tomcat-6.0.29/webapps/semwinner"
- path="" reloadable="true"></Context>
- <Context docBase="/usr/local/apache-tomcat-6.0.29/webapps/emarboxmanager"
- path="/admin" reloadable="true"></Context>
- </Host>
但是本人尝试之后并没有起作用。可能不适用于我遇到的这个问题。写出上面解决方法的作者认为web应用程序默认都是放在webapps这个目录下的,如果不把“webapps“去掉,这里会调用一次quartz的任务调度,在接下来的“<Context path”中又会调用一次quartz的任务调度,所以就重复了2次。两个方法都写出来,供朋友们参考。
第二种解决方法来自http://nkliuliu.iteye.com/blog/816335
本人这个问题最后解决发现,的确是由 web应用程序默认都是放在webapps这个目录下的,如果不把“webapps“去掉,这里会调用一次quartz的任务调度,在接下来的“<Context path”中又会调用一次quartz的任务调度 这个原因导致。
而且本人刚开始执行3次,tomcat的webapp下面XXX.WAR包解压之后,war包没有删除,相当webapp目录下有 XXX 和XXX.war 所以XXX和XXX.war各执行一次,当删除XXX.war时,就只执行了2次,分别是 tomcat的server.xml中appBase和Context docBase,再删除
<Context docBase= 就只执行一次了。
以上本人验证成功!
如果webapp下面有多个不同的war包,那么把server.xml中appBase 的内容去掉,应该也是可以。这点没试过,待验证!


 本文详细介绍了在使用Spring框架实现定时任务时遇到的问题及解决方法,包括配置示例、日志解析、问题原因分析及最终解决方案。重点讨论了如何避免定时任务执行多次,以减少不必要的计算资源浪费。


 被折叠的 条评论
为什么被折叠?
被折叠的 条评论
为什么被折叠?
 到【灌水乐园】发言


