


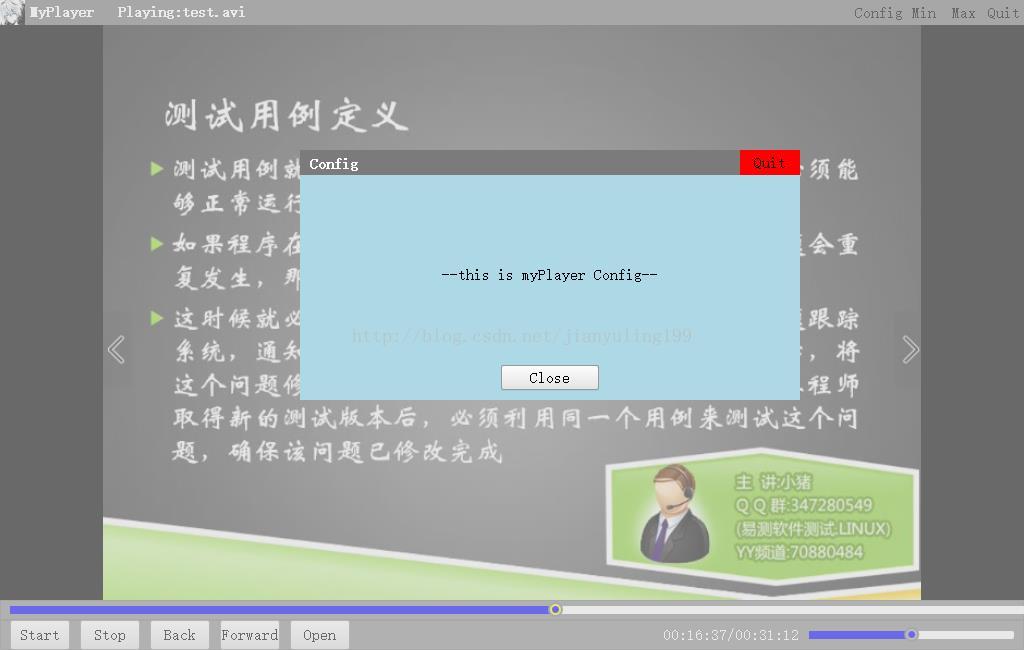
最近这段时间在学习QML,期间阅读了安晓辉的《Qt Quick核心编程》,书写的很好,但是啃起来很费劲,书籍读起来的确比较枯燥,所以后面直接采用了前人的实际编程代码来进行学习,遇到不理解的再查阅书籍和相关的帮助文档,最后有了这个播放器的小Demo,可供初学者快速入门的学习之用,实现了目前线上比较主流的播放器涉及的一些功能和方法。播放器的实现是在参考了很多人的编写代码的基础上进行重写的,程序的主界面重写了标题栏,添加了右键菜单的功能,按钮的图标全部用文字代替(因为懒得找图片了),后期有兴趣的可以继续扩展修改下去。

此外播放器还添加的播放器设置窗口,窗体弹出采用了特殊的动画效果(Qt实现的动画效果还是很酷炫的,哈哈),弹出的配置窗体自动在程序主界面生成蒙层,主界面此时不可控,只有设置窗体关闭后主窗体才能响应用户操作。设置窗体只实现了一个整体框架,具体的配置功能方面,有兴趣的可以继续完善下去。
项目结构
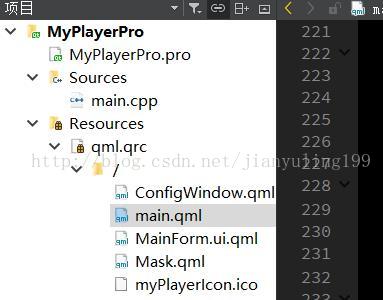
下面是程序的主代码,实现的相关功能都有相应的注释,方便各位初学者理解学习。
main.qml
import QtQuick 2.0
import QtMultimedia 5.0
import QtQuick.Controls 1.2
import QtQuick.Controls.Styles 1.2
import QtQuick.Layouts 1.1
import QtQuick.Dialogs 1.2
import QtQuick.Window 2.2


Window{
    id:myPlayer
    width: 1024
    height: 650
    visible: true
    title:"MyPlayer:" + getVedioName(fd.fileUrl.toString())
    flags: Qt.Window | Qt.FramelessWindowHint
    property int isMaxStatus //存储窗口是否最大化

    //蒙层
    Mask{
        id: mainWinMask
        visible: false
    }


    //config窗体
    // 弹出层
    ConfigWindow {
        id: cfgWin
        width: 500; height: 250
        x: myPlayer.x + 300; y:myPlayer.y + 150;
        //anchors.centerIn: parent  // 注意:使用位移动画不能用anchors定位方式
        //z: 101
        opacity: 1
        visible: false;
        //radius: 5
        //
        Text{
            text: '--this is myPlayer Config--'
            anchors.bottom: parent.bottom
            anchors.centerIn: parent
        }
        Button {
            id: btnClose
            anchors.horizontalCenter: parent.horizontalCenter
            anchors.bottom: parent.bottom
            anchors.bottomMargin: 10
            text:"Close"
            width: 98
            onClicked: cfgWin.hide()
        }
    }
//    //测试窗体
//    NeedShowWindow{
//        id:needShowWindowPanel
//    }
    //获取影音名称
    function getVedioName(str)
    {
        var url=fd.fileUrl.toString();
        var strList=new Array();
        strList=url.split("/");
        var name=strList[strList.length-1];
        return name;
    }

    //标题栏区域
    Rectangle {
            id: mainTitle                       //创建标题栏
            anchors.top: parent.top             //对标题栏定位
            anchors.left: parent.left
            anchors.right: parent.right
            height: 25                          //设置标题栏高度
            color: "#7B7B7B"                    //设置标题栏背景颜色

            MouseArea { //为窗口添加鼠标事件
                anchors.fill: parent
                acceptedButtons: Qt.LeftButton //只处理鼠标左键
                property point clickPos: "0,0"
                onPressed: { //接收鼠标按下事件
                        clickPos  = Qt.point(mouse.x,mouse.y)
                }
                onPositionChanged: { //鼠标按下后改变位置
                        //鼠标偏移量
                        var delta = Qt.point(mouse.x-clickPos.x, mouse.y-clickPos.y)

                        //如果mainwindow继承自QWidget,用setPos
                        myPlayer.setX(myPlayer.x+delta.x)
                        myPlayer.setY(myPlayer.y+delta.y)
                }
            }
            Row{
                anchors.left: parent.left
                anchors.verticalCenter: parent.verticalCenter
                spacing: 5
                //窗口图片
                Image{
                    source: "qrc:/myPlayerIcon.ico"
                    sourceSize.width: 30
                    sourceSize.height: 25
                }
                //窗口标题
                Text{
                    anchors.top:parent.top
                    anchors.topMargin: 4
                    text: getVedioName(fd.fileUrl.toString()) ? "MyPlayer   Playing:" + getVedioName(fd.fileUrl.toString()) : "MyPlayer"
                    color:"white"
                    font.bold: true
                    font.pixelSize: 15
                }
            }
            Row{
                anchors.right: parent.right
                anchors.top:parent.top
                width:170
                height: 25

                //设置
                Button{
                    id:cfgButton
                    width: 50
                    height: 25
                    style:ButtonStyle{
                        background: Rectangle{
                            border.width: control.hovered ? 2 : 1
                            border.color: (control.hovered || control.pressed) ? "white" : "#7B7B7B"
                            color: (control.hovered || control.pressed) ? "white" : "#7B7B7B"
                            Text {
                                id: cfgButtonTxt
                                text: qsTr("Config")
                                anchors.centerIn: parent
                                color: "black"
                            }
                        }
                    }
                    onClicked: {
                        mainWinMask.visible = true;
                        //animationType: ["fade", "width", "height", "size", "flyDown", "flyUp", "flyLeft", "flyRight"]
                        cfgWin.animationType = "fade";
                        cfgWin.show();
                        console.log("myplaer x:" + myPlayer.x + " y:" + myPlayer.y)
                    }
                }

                //最小化
                Button{
                    id:minButton
                    width: 40
                    height: 25
最低0.47元/天 解锁文章


 391
391

 被折叠的 条评论
为什么被折叠?
被折叠的 条评论
为什么被折叠?
 到【灌水乐园】发言


