


今天项目中完成了一个界面,主要的框架式ViewPager加Fragment,在一个Fragment里边包含GridView显示网络图片

ViewPager+Fragment
首先需要一个继承自FragmentPagerAdapter的类,另外是需要一个继承自FragmentActivity的类,第一个是提供数据源,也就是控制Fragments,然后实现ViewPager的addOnPageChangeListener方法,并且在里边计算标签栏底部的引导线位移的位置。还有就是点击标签改变字体颜色,位移底部引导线。
上代码
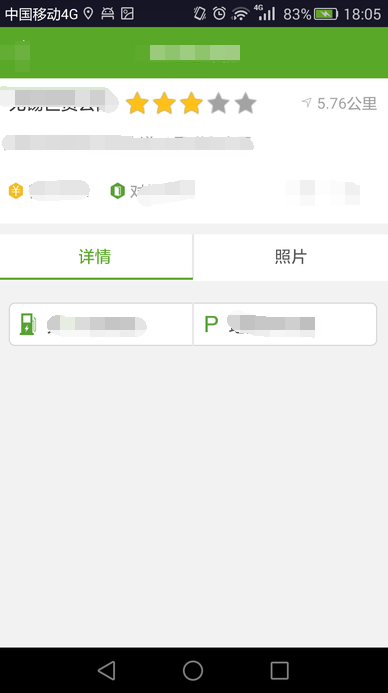
顶部标签布局top_tab.xml
<LinearLayout xmlns:android="http://schemas.android.com/apk/res/android"
    android:layout_width="match_parent"
    android:layout_height="wrap_content"
    android:background="#ffffff"
    android:orientation="vertical">

    <LinearLayout
        android:id="@+id/id_switch_tab_ll"
        android:layout_width="match_parent"
        android:layout_height="40dp"
        android:baselineAligned="false"
        android:orientation="horizontal"
       >

        <LinearLayout
            android:id="@+id/id_tab_Detail_ll"
            android:layout_width="0dp"
            android:layout_height="match_parent"
            android:layout_weight="1"
            android:clickable="true"
            android:gravity="center"
            android:orientation="horizontal"
           >

            <TextView
                android:id="@+id/id_detail_tv"
                android:layout_width="wrap_content"
                android:layout_height="wrap_content"
                android:gravity="center"
                android:text="详情"
                android:textColor="#5aa828"
                android:textSize="15sp" />
        </LinearLayout>

        <View
            android:layout_width="2dp"
            android:layout_height="40dp"
            android:background="#e8e8e8" />

        <LinearLayout
            android:id="@+id/id_tab_photo_ll"
            android:layout_width="0dp"
            android:layout_height="match_parent"
            android:layout_weight="1"
            android:gravity="center"
            android:orientation="horizontal"
            android:saveEnabled="false">

            <TextView
                android:id="@+id/id_photo_tv"
                android:layout_width="wrap_content"
                android:layout_height="wrap_content"
                android:gravity="center"
                android:text="照片"
                android:textColor="#555555"
                android:textSize="15sp" />
        </LinearLayout>


    </LinearLayout>

    <ImageView
        android:id="@+id/id_tab_line_iv"
        android:layout_width="wrap_content"
        android:layout_height="2dp"
        android:background="@color/wave_text"
        android:padding="10dp"/>

    <View
        android:layout_width="match_parent"
        android:layout_height="1dp"
        android:background="#ffffff"
        android:padding="10dp" />

</LinearLayout>
主界面布局activity_charge_detail.xml
 <include layout="@layout/top_tab" />

    <android.support.v4.view.ViewPager
        android:id="@+id/id_viewpager"
        android:layout_width="match_parent"
        android:layout_height="wrap_content"
        android:layout_marginTop="10dp" />
定义一个继承自FragmentPagerAdapter的类,管理Fragment
public class ChargeDetailFragmentsAdapter extends FragmentPagerAdapter{
    private List<Fragment> mFragments;

    public ChargeDetailFragmentsAdapter(FragmentManager fm,List<Fragment> fragments) {
        super(fm);

        mFragments=fragments;
    }

    @Override
    public Fragment getItem(int arg0) {
        // TODO Auto-generated method stub
        return mFragments.get(arg0);
    }

    @Override
    public int getCount() {
        // TODO Auto-generated method stub
        return mFragments.size();
    }


}
定义两个Fragment,ChargeDetailFragment,ChargePhotosFragment,然后在主Activity里进行操作,主Activity继承FragmentActivity
public class ChargeDetailActivity extends FragmentActivity  {

    /**
     * ViewPager的当前选中页
     */
    private int currentIndex;
    /**
     * 屏幕的宽度
     */
    private int screenWidth;
    /**
     * Tab显示内容TextView
     */
    private TextView mTabDetailTv, mTabPhotoTv;
    /**
     * Tab的那个引导线
     */
    private ImageView mTabLineIv;


    @Override
    protected void onCreate(Bundle savedInstanceState) {
        super.onCreate(savedInstanceState);
        setContentView(R.layout.activity_charge_detail);
        setupViews();
        initTabLineWidth();
        //构造适配器
        List<Fragment> fragments = new ArrayList<Fragment>();
        fragments.add(new ChargeDetailFragment());
        fragments.add(new ChargePhotosFragment());

        ChargeDetailFragmentsAdapter adapter = new ChargeDetailFragmentsAdapter(getSupportFragmentManager(), fragments);

        //设定适配器
        final ViewPager vp = (ViewPager) findViewById(R.id.id_viewpager);
        vp.setAdapter(adapter);

        vp.addOnPageChangeListener(new ViewPager.OnPageChangeListener() {
            /**
             * state滑动中的状态 有三种状态(0,1,2) 1:正在滑动 2:滑动完毕 0:什么都没做。
             */
            @Override
            public void onPageScrollStateChanged(int state) {

            }

            /**
             * position :当前页面,及你点击滑动的页面 offset:当前页面偏移的百分比
             * offsetPixels:当前页面偏移的像素位置
             */
            @Override
            public void onPageScrolled(int position, float offset,
                                       int offsetPixels) {
                lineViewClick(position, offset);
            }

            @Override
            public void onPageSelected(int position) {
                textViewClick(position);
            }

        });

        findViewById(R.id.id_tab_Detail_ll).setOnClickListener(new View.OnClickListener() {
            @Override
            public void onClick(View v) {
                vp.setCurrentItem(0);
            }
        });
        findViewById(R.id.id_tab_photo_ll).setOnClickListener(new View.OnClickListener() {
            @Override
            public void onClick(View v) {
                vp.setCurrentItem(1);
            }
        });
    }

    //根绝viewpager变化,下划线改变位置
    private void lineViewClick(int pos, float offset) {
        LinearLayout.LayoutParams lp = (LinearLayout.LayoutParams) mTabLineIv
                .getLayoutParams();

        L.e("offset:", offset + "");
        /**
         * 利用currentIndex(当前所在页面)和position(下一个页面)以及offset来
         * 设置mTabLineIv的左边距 滑动场景:
         * 记2个页面,
         * 从左到右分别为0,1
         * 0->1;  1->0
         */

        if (currentIndex == 0 && pos == 0)// 0->1
        {
            lp.leftMargin = (int) (offset * (screenWidth * 1.0 / 2) + currentIndex
                    * (screenWidth / 2));

        } else if (currentIndex == 1 && pos == 0) // 1->0
        {
            lp.leftMargin = (int) (-(1 - offset)
                    * (screenWidth * 1.0 / 2) + currentIndex
                    * (screenWidth / 2));

        }
        mTabLineIv.setLayoutParams(lp);
    }

    //根据viewpager变化,标签改变位置
    private void textViewClick(int pos) {
        resetTextView();
        switch (pos) {
            case 0:
                mTabDetailTv.setTextColor(getResources().getColor(R.color.wave_text));
                break;
            case 1:
                mTabPhotoTv.setTextColor(getResources().getColor(R.color.wave_text));
                break;

        }
        currentIndex = pos;
    }


    private void setupViews() {
        mTabDetailTv = (TextView) this.findViewById(R.id.id_detail_tv);
        mTabPhotoTv = (TextView) this.findViewById(R.id.id_photo_tv);

        mTabLineIv = (ImageView) this.findViewById(R.id.id_tab_line_iv);
    }


    /**
     * 设置滑动条的宽度为屏幕的1/2(根据Tab的个数而定)
     */
    private void initTabLineWidth() {
        DisplayMetrics dpMetrics = new DisplayMetrics();
        getWindow().getWindowManager().getDefaultDisplay()
                .getMetrics(dpMetrics);
        screenWidth = dpMetrics.widthPixels;
        LinearLayout.LayoutParams lp = (LinearLayout.LayoutParams) mTabLineIv
                .getLayoutParams();
        lp.width = screenWidth / 2;
        mTabLineIv.setLayoutParams(lp);
    }

    /**
     * 重置颜色
     */
    private void resetTextView() {
        mTabDetailTv.setTextColor(getResources().getColor(R.color.txt_gray));

        mTabPhotoTv.setTextColor(getResources().getColor(R.color.txt_gray));

    }
}
这个功能主要注意的是计算底部直线位移位置。
GrideView使用
这个难点不多,不过一个比较纠结的事情是,作为子布局,好像不能使用LinearLayout,要不然行距比较大,使用RelativeLayout就正常了,现在还不知道为什么。。。
访问网络图片,使用的是Volley第三方库
使用GridView的Fragment代码
public class ChargePhotosFragment extends Fragment {


    public ChargePhotosFragment() {
        // Required empty public constructor
    }

    @Override
    public void onCreate(Bundle savedInstanceState) {
        super.onCreate(savedInstanceState);

    }

    @Override
    public View onCreateView(LayoutInflater inflater, ViewGroup container,
                             Bundle savedInstanceState) {
       View view = inflater.inflate(R.layout.fragment_charge_photos, container, false);
        GridView gridView = (GridView) view.findViewById(R.id.id_gridView);
        gridView.setAdapter(new ImageAdapter(getActivity()));
        return view;
    }

    private class ImageAdapter extends BaseAdapter {
        private Context mContext;

        public ImageAdapter(Context context) {
            this.mContext = context;
        }

        @Override
        public int getCount() {
            return 6;
        }

        @Override
        public Object getItem(int position) {
            return null;
        }

        @Override
        public long getItemId(int position) {
            // TODO Auto-generated method stub
            return 0;
        }

        @Override
        public View getView(int position, View convertView, ViewGroup parent) {

            if (convertView == null) {
                convertView = LayoutInflater.from(getActivity()).inflate(R.layout.gridview_item, null);

            }
            final ImageView imageView = ViewHolder.get(convertView, R.id.imageView);


            RequestQueue mQueue = Volley.newRequestQueue(mContext);

            ImageRequest imageRequest = new ImageRequest(
                    "http://article.fd.zol-img.com.cn/t_s640x2000/g5/M00/04/0C/ChMkJlZzfxiIAmYDAAtzF_G-oB0AAGSPAIJtIMAC3Mv324.jpg",
                    new Response.Listener<Bitmap>() {
                        @Override
                        public void onResponse(Bitmap response) {
                            imageView.setImageBitmap(response);
                        }
                    }, 0,0, Bitmap.Config.RGB_565, new Response.ErrorListener() {
                @Override
                public void onErrorResponse(VolleyError error) {
                    imageView.setImageBitmap(null);
                }
            });
            mQueue.add(imageRequest);

            return convertView;
        }


    }


}
fragment_charge_photos.xml
<LinearLayout xmlns:android="http://schemas.android.com/apk/res/android"
    xmlns:tools="http://schemas.android.com/tools" android:layout_width="match_parent"
    android:layout_height="match_parent"
    android:background="#f2f2f2"
    android:orientation="vertical">

    <GridView
        android:id="@+id/id_gridView"
        android:layout_width="match_parent"
        android:layout_height="match_parent"
       android:horizontalSpacing="10dp"
        android:numColumns="auto_fit"
        android:columnWidth="120dp"
        android:stretchMode="columnWidth"
        android:verticalSpacing="10dp" />

</LinearLayout>
gridview_item.xml
外部布局使用RelativeLayout 好像没什么问题,LinearLayout貌似有问题,不知道是程序问题还是其他问题。。。
<?xml version="1.0" encoding="utf-8"?>
<RelativeLayout xmlns:android="http://schemas.android.com/apk/res/android"
     android:layout_width="match_parent"
    android:layout_height="wrap_content">
    <ImageView
        android:id="@+id/imageView"
        android:layout_width="wrap_content"
        android:layout_height="wrap_content"
        android:layout_centerInParent="true"
        />
</RelativeLayout>
在另外的测试机上发现还是有问题,现在两种解决方法,一个是宽高写死,不用wrap_content,另一个就是这样
<?xml version="1.0" encoding="utf-8"?>
<ImageView xmlns:android="http://schemas.android.com/apk/res/android"
    android:id="@+id/imageView"
     android:layout_width="wrap_content"
    android:layout_height="wrap_content"
    android:layout_gravity="center"
    android:scaleType="centerCrop"
    >

</ImageView>
先记下来吧,以后有时间再研究
另外提供一个类,因为ListView或者GridView设置Adapter的方法都类似,一般都是定义一个ViewHolder,为了简化,定义一个工具类,当然,这个也是网上找到的
public class ViewHolder {
    public static  <T extends View> T get(View view, int id) {
        SparseArray<View> viewHolder = (SparseArray<View>) view.getTag();
        if (viewHolder == null) {
            viewHolder = new SparseArray<View>();
            view.setTag(viewHolder);
        }
        View childView = viewHolder.get(id);
        if (childView == null) {
            childView = view.findViewById(id);
            viewHolder.put(id, childView);
        }
        return (T) childView;
    }
}
GridView的一些特殊属性:
1.android:numColumns=”auto_fit” //GridView的列数设置为自动
2.android:columnWidth=”90dp ” //每列的宽度,也就是Item的宽度
3.android:stretchMode=”columnWidth”//缩放与列宽大小同步
4.android:verticalSpacing=”10dp” //两行之间的边距
5.android:horizontalSpacing=”10dp” //两列之间的边距
6.android:cacheColorHint=”#00000000” //去除拖动时默认的黑色背景
7.android:listSelector=”#00000000” //去除选中时的黄色底色
8.android:scrollbars=”none” //隐藏GridView的滚动条
9.android:fadeScrollbars=”true” //设置为true就可以实现滚动条的自动隐藏和显示
10.android:fastScrollEnabled=”true” //GridView出现快速滚动的按钮(至少滚动4页才会显示)
11.android:fadingEdge=”none” //GridView衰落(褪去)边缘颜色为空,缺省值是vertical。(可以理解为上下边缘的提示色)
12.android:fadingEdgeLength=”10dip” //定义的衰落(褪去)边缘的长度
13.android:stackFromBottom=”true” //设置为true时,你做好的列表就会显示你列表的最下面
14.android:transcriptMode=”alwaysScroll” //当你动态添加数据时,列表将自动往下滚动最新的条目可以自动滚动到可视范围内
15.android:drawSelectorOnTop=”false” //点击某条记录不放,颜色会在记录的后面成为背景色,内容的文字可见(缺省为false)
源码
源码下载
参考博客
Android ViewPager和Fragment实现顶部导航界面滑动效果
Android GridView属性集合
使用Volley加载网络图片
GridView组件的使用


 8741
8741

 被折叠的 条评论
为什么被折叠?
被折叠的 条评论
为什么被折叠?
 到【灌水乐园】发言


