


最后界面如下:

制作思路:首先在一个Activity中做出左右fragment(碎片的意思),然后再在左边的fragment中加入ListView控件,再用编程的方法给ListView控件设置条目,即“新闻1,新闻2,新闻3,....”,注意给ListView设置条目,不能手动修改什么设计输入进去,只能用程序的方式写进去。 具体看后面的代码:
一、在Activity中做出左右fragment
第一步:新建一个工程。
第二步:新建一个LeftFragment 后,把它java文件中其它自动产生的代码都清除,只留下onCreateView()函数。不清除最后生成APP后会闪退。
public class LeftFragment extends Fragment {
@Override
public View onCreateView(LayoutInflater inflater, ViewGroup container,
Bundle savedInstanceState) {
return inflater.inflate(R.layout.fragment_left, container, false);
}
}
第三步:新建一个RightFragment后,把它java文件中其它自动产生的代码都清除,只留下onCreateView()函数。不清除最后生成APP后会闪退。
public class RightFragment extends Fragment {
@Override
public View onCreateView(LayoutInflater inflater, ViewGroup container,
Bundle savedInstanceState) {
return inflater.inflate(R.layout.fragment_right, container, false);
}
}
第四步:修改fragment_left.xml中的代码为如下代码,它原来是constraint布局,现在要改为线性布局, 修改原因是constraint布局很难做。
<?xml version="1.0" encoding="utf-8"?>
<LinearLayout xmlns:android="http://schemas.android.com/apk/res/android"
xmlns:tools="http://schemas.android.com/tools"
android:layout_width="match_parent"
android:layout_height="match_parent"
android:orientation="vertical"
tools:context=".LeftFragment">
<Button
android:id="@+id/button"
android:layout_width="wrap_content"
android:layout_height="wrap_content"
android:layout_gravity="center_horizontal"
android:text="Button" />
</LinearLayout>
第五步:修改fragment_right.xml中的代码为如下代码,它原来是constraint布局,现在要改为线性布局, 修改原因是constraint布局很难做。
<?xml version="1.0" encoding="utf-8"?>
<LinearLayout xmlns:android="http://schemas.android.com/apk/res/android"
xmlns:tools="http://schemas.android.com/tools"
android:layout_width="match_parent"
android:layout_height="match_parent"
android:orientation="vertical"
android:background="#00ff00"
tools:context=".RightFragment">
<TextView
android:layout_width="wrap_content"
android:layout_height="wrap_content"
android:layout_gravity="center_horizontal"
android:textSize="20sp"
android:text="This is right fragment"
/>
</LinearLayout>
第六步: 修改主界面的布局为线性布局,代码如下:
<?xml version="1.0" encoding="utf-8"?>
<LinearLayout xmlns:android="http://schemas.android.com/apk/res/android"
xmlns:app="http://schemas.android.com/apk/res-auto"
xmlns:tools="http://schemas.android.com/tools"
android:layout_width="match_parent"
android:layout_height="match_parent"
android:orientation="horizontal"
tools:context=".MainActivity"
>
<fragment
android:id="@+id/left_fragment"
android:name="com.jintingbo.myapplication16.LeftFragment"
android:layout_width="0dp"
android:layout_weight="0.5"
android:layout_height="match_parent"
tools:layout="@layout/fragment_left" />
<fragment
android:id="@+id/right_fragment"
android:name="com.jintingbo.myapplication16.RightFragment"
android:layout_width="0dp"
android:layout_weight="0.5"
android:layout_height="match_parent"
tools:layout="@layout/fragment_right" />
</LinearLayout>
第七步:运行后就可以看到左右界面的图了;
二、在上面的基础上,为fragment_left.xml添加ListView控件。
第一步:打开fragment_left.xml文件,并转到Design(设计)模式, 从Legacy中拉一个ListView控件,会自动生成代码如下:
<ListView
    android:id="@+id/list_view"
    android:layout_width="match_parent"
    android:layout_height="match_parent" />
第二步:在宿主Activity中写代码设置碎片中的条目
要为ListView控件添加条目,用手动修的方法办不到,这与其它语言中的ListView不一样,只能通过代码的方式来解决,并且这个代码必须写在它的宿主Activity中,不能写在fragment_left.xml对应的LeftFragment.java文件中,具体代码如下:
public class MainActivity extends AppCompatActivity {
    String[]  nameList ={"新闻1","新闻2","新闻3","新闻4","新闻5","新闻6"};
    private ListView listview;

    @Override
    protected void onCreate(Bundle savedInstanceState) {
        super.onCreate(savedInstanceState);
        setContentView(R.layout.activity_main);
        listview =(ListView)findViewById(R.id.list_view); //碎片在宿主中的地位也就相当于是一个控件,所以可以用findView()
        addString();
    }
    private void addString(){
        ArrayAdapter<String> adapter =new ArrayAdapter<String>(this,android.R.layout.simple_list_item_1,nameList);
        listview.setAdapter(adapter);
    }

}
从上面的代码可以看到,要把条目写入到ListView中,必须通过ArrayAdapter才可以实现。三、补充安卓系统自带的List View资料
在安卓系统自带的List View里,有simple_list_item_1、simple_list_item_2、two_line_list_item等。以下对这些布局进行简要介绍:
1、simple_list_item_1
(单行显示)此布局显示最为简单,其中只有一个TextView,id为:
android:id="@android:id/text1"
显示样式为:

2、simple_list_item_2和two_line_list_item
(双行显示)每一个item包含两个TextView,id为
android:id="@android:id/text1"
android:id="@android:id/text2"
显示样式为: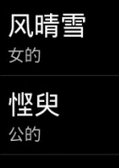
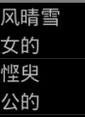
3、two_line_list_item
(双行显示)每一个item包含两个TextView,id为
android:id="@android:id/text1"
android:id="@android:id/text2"
显示样式为:
4、simple_list_item_checked:单选check;
simple_list_item_multiple_choice:多选;
simple_list_item_single_choice:单选项
setListAdapter(new SimpleAdapter(this,data,android.R.layout.simple_list_item_multiple_choice,
new String[]{"item1"}, //每行显示一组姓名
new int[]{android.R.id.text1} //名字在text1上显示
));
设置ListView选择模式
/*
* CHOICE_MODE_SINGLE 单选
* CHOICE_MODE_MULTIPLE 多选
* CHOICE_MODE_NONE 缺省
*/
getListView().setChoiceMode(ListView.CHOICE_MODE_MULTIPLE);
四、补充ListView的点击事件:
package com.example.myapplication;
import android.support.v7.app.AppCompatActivity;
import android.os.Bundle;
import android.view.View;
import android.widget.AdapterView;
import android.widget.ArrayAdapter;
import android.widget.ListView;
import android.widget.TextView;
import android.widget.Toast;
import java.util.ArrayList;
public class MainActivity extends AppCompatActivity implements AdapterView.OnItemClickListener {
@Override
protected void onCreate(Bundle savedInstanceState) {
super.onCreate(savedInstanceState);
setContentView(R.layout.activity_main);
//获取 listview 对象
ListView listView=findViewById(R.id.lv_main);
//准备简单数组
String []data={"新闻1","新闻2","新闻3","新闻4","新闻5","新闻6"};
//准备适配器Adapter
ArrayAdapter<String> adapter=new ArrayAdapter<String>(this,android.R.layout.simple_list_item_1 ,data);
//将适配器关联到listview
listView.setAdapter(adapter);
//监听item事件
listView.setOnItemClickListener(this);
}
@Override
public void onItemClick(AdapterView<?> parent, View view, int position, long id) {
position=position+1;
TextView textView=findViewById(R.id.textView);
textView.setText("这是新闻"+position);
//Toast.makeText(this,"点击第"+position+"行",Toast.LENGTH_SHORT).show();
}
}
-------------------------------------------------------------------------
Android中AdapterView的OnItemClickListener参数详解

public void onItemClick(AdapterView<?> parent, View view, int position, long id)
ListView是由适配器做成的,适配器不止一个,所以必须要有一个适配器的指针;
Item 是由position 做成的,position就代表了是第几个Item;
id 是你的这个Item在ListView中的第几个位置,它与position常常是同一个值 ,但是站的角度不一样,它是人看到的情况,而position是制作者登它的情况。
第一个参数parent: 它是适配器指针。比如有X, Y两个listview,X里有1,2,3,4这4个item,Y里有a,b,c,d这4个item。
你现在点了b这个item。那么这个时候parent就指向的是Y这个适配器;如果是点了3呢?那么你的parent就是指向的X这个适配器。
第二个参数view:比如你点了b这一个条目,那么这个view就代表了b的对应的条目的视图,即b所对应的item视图;
第三个参数position: position 是b在Y适配器里的位置(生成listview时,适配器一个一个的做item,然后把他们按顺序排好队,在放到listview里,意思就是这个b是第position号做好的);
第四个参数id: 是b在listview Y里的第几行的位置(很明显是第2行),大部分时候position和id的值是一样的,如果需要的话。
官方解释
position The position of the view in the adapter.
id The row id of the item that was clicked.
======================================
Fragment中ListView的更加简便的写法:
package com.jintingbo.myapplication;

import android.content.Context;
import android.os.Bundle;
import android.support.v4.app.Fragment;
import android.view.LayoutInflater;
import android.view.View;
import android.view.ViewGroup;
import android.widget.AdapterView;
import android.widget.ArrayAdapter;
import android.widget.ListView;
import android.widget.Toast;

//这个类一定要继承AdapterView.OnItemClickListener的点击事件
public class LeftFragment extends Fragment implements AdapterView.OnItemClickListener {
    //新闻标题和新闻内容,我改用List<String>后,发现ArrayAdapte<String>不能用,所以还是用数组。
    public String[] neiRong={"aaaa","bbbb","cccc","dddd","eeee"};
    String[] mDatas={"新闻11","新闻22","新闻33","新闻4","新闻5"};

    @Override
    public void onAttach(Context context) {
        super.onAttach(context);
        //这是生命周期中的函数,经常是把初始数据写在这里
    }

    @Override
    public View onCreateView(LayoutInflater inflater, ViewGroup container,
                             Bundle savedInstanceState) {
        //将碎片的XML文件转换为视图用inflate()
        View fragmentView= inflater.inflate(R.layout.fragment_left, container, false);
        //求碎片视图中的ListView控件还是使用findViewById();
        final ListView lv = (ListView) fragmentView.findViewById(R.id.listView1);
        //定义适配器的目的还是为了将字符串数组与碎片中的ListView结合起来,形成新闻条目的显示。
        //第一个参数为getActivity()的原因,是因为碎片纳入活动后,ListView它就是主活动中的视图了。
        ArrayAdapter<String> ada=new ArrayAdapter<String>(getActivity(),
                android.R.layout.simple_list_item_1,
                mDatas
        );
        lv.setAdapter(ada);
        //点击事件
        lv.setOnItemClickListener(this);
        //最后返回的是碎片形成的视图
        return fragmentView;
    }

    @Override
    public void onItemClick(AdapterView<?> parent, View view, int position, long id) {
        Toast.makeText(getActivity(),neiRong[position],Toast.LENGTH_LONG).show();
    }
}
-----------------------------
activity_main.xml
-----------------------------
<?xml version="1.0" encoding="utf-8"?>
<LinearLayout xmlns:android="http://schemas.android.com/apk/res/android"
    xmlns:app="http://schemas.android.com/apk/res-auto"
    xmlns:tools="http://schemas.android.com/tools"
    android:layout_width="match_parent"
    android:layout_height="match_parent"
    android:orientation="horizontal"
    tools:context=".MainActivity">

    <fragment
        android:id="@+id/left_fragment"
        android:name="com.jintingbo.myapplication.LeftFragment"
        android:layout_width="0dp"
        android:layout_weight="1"
        android:layout_height="match_parent"
        tools:layout="@layout/fragment_left"
        />
    <FrameLayout
        android:id="@+id/right_layout"
        android:layout_width="0dp"
        android:layout_weight="1"
        android:layout_height="match_parent">
        <fragment
            android:id="@+id/right_fragment"
            android:name="com.jintingbo.myapplication.RightFragment"
            android:layout_width="match_parent"
            android:layout_height="match_parent"
            tools:layout="@layout/fragment_right"
            />
    </FrameLayout>


</LinearLayout>
--------------------------------
fragment_left.xml
---------------------------------
<?xml version="1.0" encoding="utf-8"?>
<LinearLayout xmlns:android="http://schemas.android.com/apk/res/android"
    xmlns:tools="http://schemas.android.com/tools"
    android:layout_width="match_parent"
    android:layout_height="match_parent"
    tools:context=".LeftFragment">

    <ListView
        android:id="@+id/listView1"
        android:layout_width="match_parent"
        android:layout_height="match_parent" />

</LinearLayout>
------------------------------
fragment.right.xml
------------------------------
<?xml version="1.0" encoding="utf-8"?>
<LinearLayout xmlns:android="http://schemas.android.com/apk/res/android"
    xmlns:tools="http://schemas.android.com/tools"
    android:layout_width="match_parent"
    android:layout_height="match_parent"
    android:background="#00ff00"
    tools:context=".LeftFragment">

    <!-- TODO: Update blank fragment layout -->
    <TextView
        android:id="@+id/textView1"
        android:textSize="30sp"
        android:gravity="center_horizontal"
        android:text="庭博诗集"
        android:layout_width="wrap_content"
        android:layout_height="wrap_content" />

</LinearLayout>
------------------------------


 2165
2165


 被折叠的 条评论
为什么被折叠?
被折叠的 条评论
为什么被折叠?
 到【灌水乐园】发言


