


1. 进程和线程
进程:有独立的内存空间和系统资源
线程:进程中执行运算的最小单位,可以完成一个独立的顺序控制流程
2. 多线程
在一个进程中同时运行了多个线程,用来完成不同的工作,则称之为“多线程”。
多个线程交替占用CPU资源,而非真正的并行执行。
2.1 java中创建线程的两种方式
1.继承java.lang.Thread类

2.实现java.lang.Runnable接口
2.2 使用线程的步骤
1.定义线程
2.创建线程对象
3.启动线程
4.终止线程
2.3 继承Thread类创建线程
public class MyRunnable extends Thread{

    @Override
    public void run() {
        System.out.println("这是一个线程");
    }

    public static void main(String[] args) {

        Thread thread = new MyRunnable();
        thread.start();

    }

}
优点:1.编写简单,可以直接操作线程
2.适用于单继承
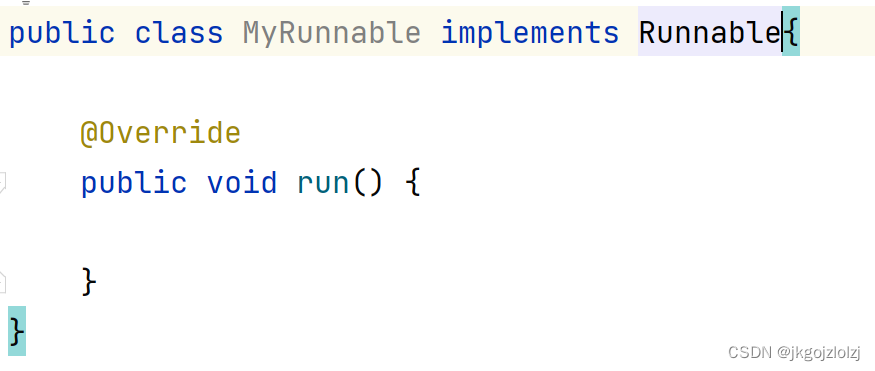
2.4 实现Runnable接口创建线程
public class MyRunnable implements Runnable{

    @Override
    public void run() {
        System.out.println("这是一个线程");
    }

    public static void main(String[] args) {

        Runnable runnable = new MyRunnable();

        Thread thread = new Thread(runnable);
        thread.start();

        Thread thread1 = new Thread(runnable);
        thread1.start();

    }

}
优点:1.避免单继承局限性
2.便于共享资源
推荐使用实现Runnable接口的方式创建线程。
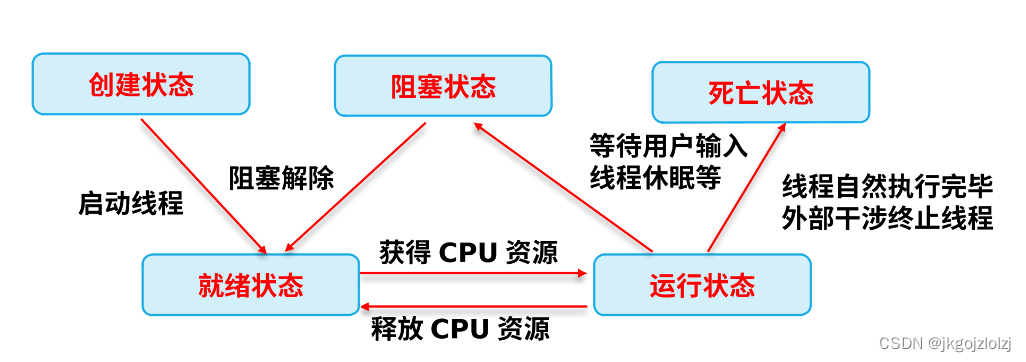
2.5 线程的状态
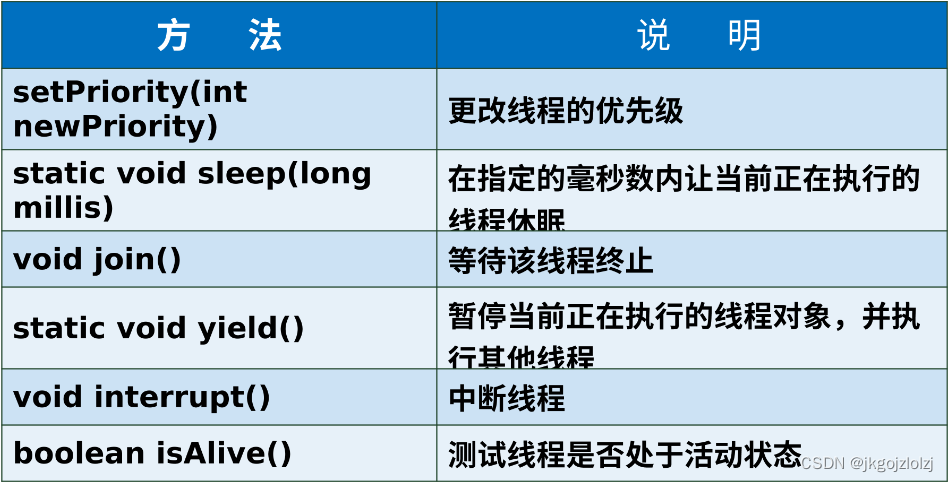
2.6 线程调度
线程调度按照指定机制为多个线程分配CPU的使用权
2.6.1 setPriority() (设置线程优先级)
线程优先级最小为1,最大为10
public class MyRunnable implements Runnable{

    @Override
    public void run() {
        System.out.println("这是一个线程");
    }

    public static void main(String[] args) {

        Runnable runnable = new MyRunnable();

        Thread thread = new Thread(runnable);
        thread.setPriority(10);
        thread.start();

        Thread thread1 = new Thread(runnable);
        thread1.setPriority(1);
        thread1.start();

    }

}
2.6.2 sleep() (设置线程休眠时间)
public void run() {
        System.out.println("这是一个线程");
        try {
            Thread.sleep(2000);
        } catch (InterruptedException e) {
            throw new RuntimeException(e);
        }
    }
2.6.3 join()
public void run() {
        System.out.println("这是一个线程");
        try {
            Thread.currentThread().join();
        } catch (InterruptedException e) {
            throw new RuntimeException(e);
        }
        System.out.println("结束该线程");
        try {
            Thread.sleep(2000);
        } catch (InterruptedException e) {
            throw new RuntimeException(e);
        }
    }
2.7 锁机制
2.7.1 使用synchronized修饰的方法控制对类成员变量的访问

3. 等待和唤醒
//BunStore类
public class BunStore extends Thread{

    private List<String> list;

    public BunStore(List<String> list){
        this.list = list;
    }

    public void run(){
        while (true){

            synchronized (list){
                if (list.size() > 0){
                    try {
                        list.wait();
                    } catch (InterruptedException e) {
                        throw new RuntimeException(e);
                    }
                }

                list.add("生产了一个包子");

                System.out.println("包子铺生产了一个包子");

                list.notify();
            }

        }

    }


}

//Customer类
public class Customer extends Thread{

    private List<String> list;

    public Customer(List<String> list){
        this.list = list;
    }

    public void run(){
        while (true){
            synchronized (list){

                if (list.size() == 0){
                    try {
                        list.wait();

                    } catch (InterruptedException e) {
                        throw new RuntimeException(e);
                    }
                }

                list.remove(0);

                System.out.println("消费者吃了一个包子");

                list.notify();


            }
        }

    }


}

//Test测试类
public class Test {

    public static void main(String[] args) {

        List<String> list = new ArrayList<>();

        BunStore bunStore = new BunStore(list);
        Customer customer = new Customer(list);


        customer.start();
        bunStore.start();

    }

}
4. volatile关键字
同一个案例
不加volatile关键字
//MyVolatile类
public class MyVolatile extends Thread{

    private boolean flag = false;

    public boolean isFlag() {
        return flag;
    }

    public void setFlag(boolean flag) {
        this.flag = flag;
    }

    @Override
    public void run() {
        try {
            Thread.sleep(1000);
        } catch (InterruptedException e) {
            throw new RuntimeException(e);
        }

        this.flag = true;
        System.out.println("flag=" + flag);

    }
}


//Test测试类

public class Test {

    public static void main(String[] args) {

        //创建线程对象
        MyVolatile myVolatile = new MyVolatile();
        myVolatile.start();


        while (true){

            if (myVolatile.isFlag()){

                System.out.println("执行");
            }

        }

    }

}
结果为:

添加关键字volatile
//MyVolatile类
public class MyVolatile extends Thread{

    private volatile boolean flag = false;

    public boolean isFlag() {
        return flag;
    }

    public void setFlag(boolean flag) {
        this.flag = flag;
    }

    @Override
    public void run() {
        try {
            Thread.sleep(1000);
        } catch (InterruptedException e) {
            throw new RuntimeException(e);
        }

        this.flag = true;
        System.out.println("flag=" + flag);

    }
}


//Test测试类

public class Test {

    public static void main(String[] args) {

        //创建线程对象
        MyVolatile myVolatile = new MyVolatile();
        myVolatile.start();


        while (true){

            if (myVolatile.isFlag()){

                System.out.println("执行");
            }

        }

    }

}
结果为:
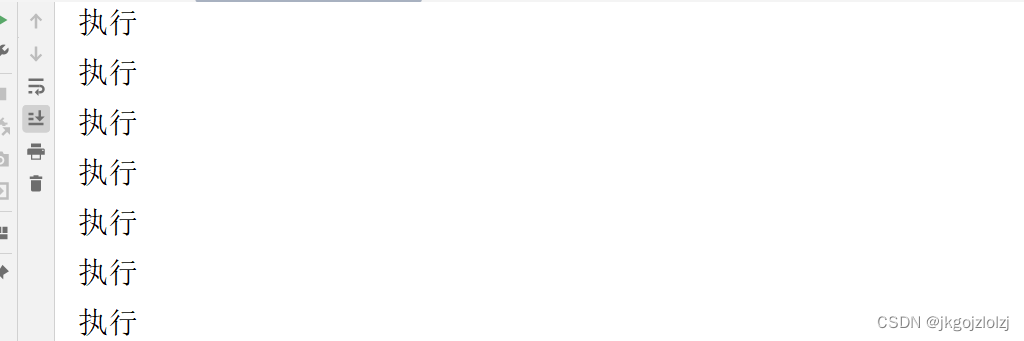
flag可以拿到更改后的值
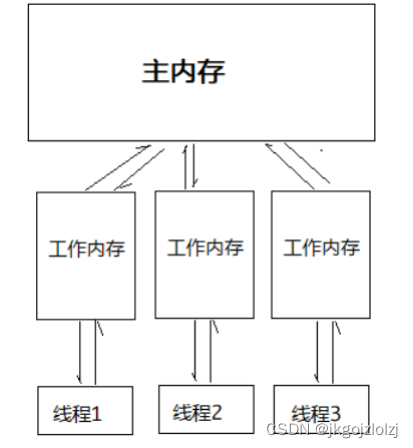
4.1 JMM
JMM(Java Memory Model)Java内存模型,是java虚拟机规范中所定义的一种内存模型。
4.2 问题分析
未使用volatile关键字时,分析此时的程序运行情况
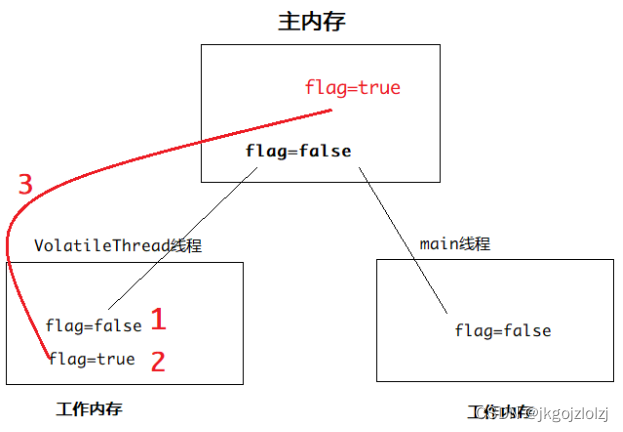
1.第一个线程从主内存中读取到数据,将读取到的数据放入对应的工作内存中
2.第一个线程从主内存中读取到数据后,将flag的值改为true,但还没有将更改的值写入主内存
3.此时,第二个线程也从主内存中读取到了flag = false
4.第二个线程中存在循环,而flag一直为false,所以一直在做循环,无法跳出
使用volatile关键字
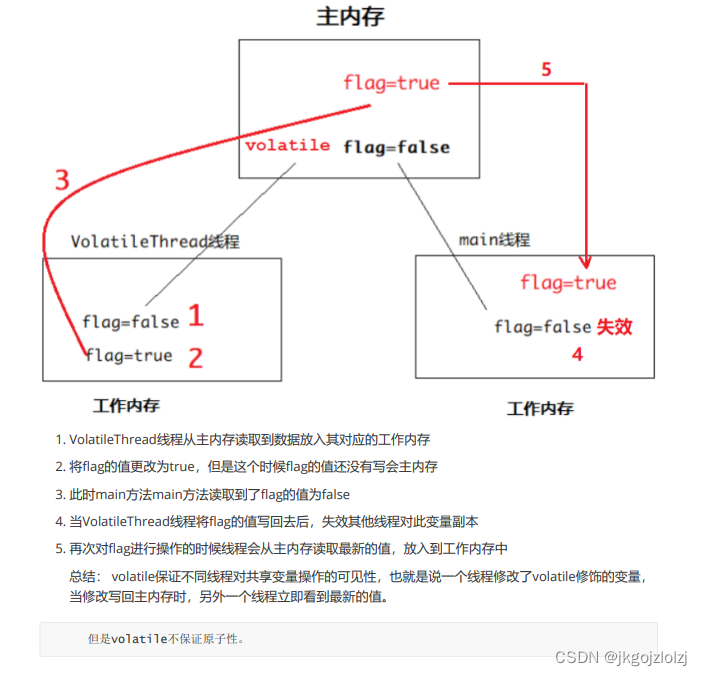
5. 原子性
5.1 错误实例
public class VolatileThread implements Runnable{
    //定义数据类型为int的变量
    private int count;

    @Override
    public void run() {
        for (int i = 0; i < 5000; i++) {
            count ++;
            System.out.println("count=" + count);
        }
    }

}

public class Test {

    public static void main(String[] args) {
        VolatileThread volatileThread = new VolatileThread();

        //启动100个线程
        for (int i = 0; i < 100; i++) {
            new Thread(volatileThread).start();
        }
    }

}
结果为:
不准确
5.2 正确案例
给count++操作加锁
public class VolatileThread implements Runnable{
    //定义数据类型为int的变量
    private int count;

    private static final Object obj = new Object();

    @Override
    public void run() {
        for (int i = 0; i < 5000; i++) {
            synchronized (obj){
                count ++;
                System.out.println("count=" + count);
            }
        }
    }

}

public class Test {

    public static void main(String[] args) {
        VolatileThread volatileThread = new VolatileThread();

        //启动100个线程
        for (int i = 0; i < 100; i++) {
            new Thread(volatileThread).start();
        }
    }

}
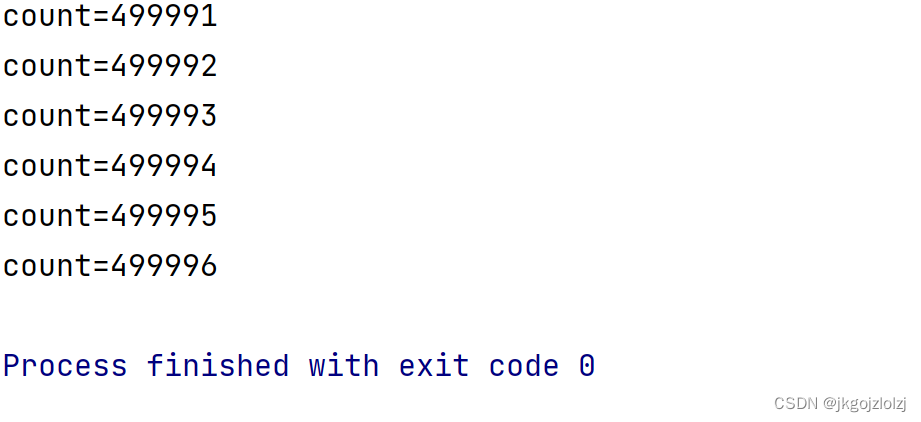
结果:
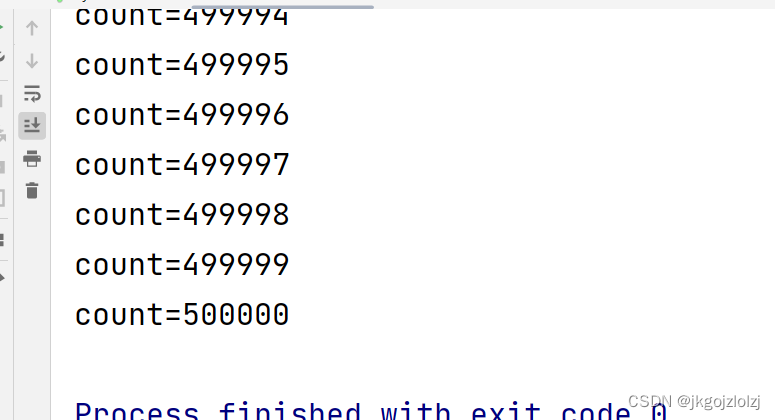
5.3 问题原理
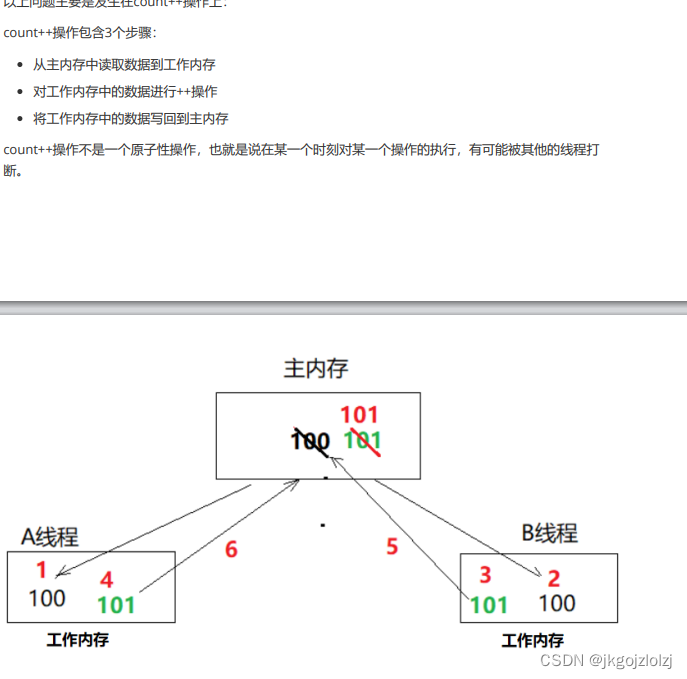
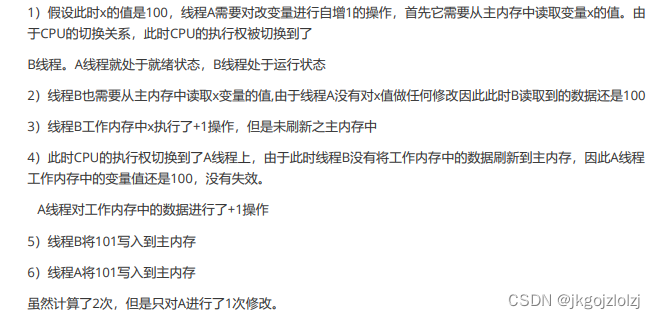
6. 并发包
6.1 ConcurrentHashMap
使用Map创建集合
public class CommonDB {

    //创建一个Map集合
    public static Map<String,String> map = new HashMap<>();

}

public class HashMapTest extends Thread{

    @Override
    public void run() {
        for (int i = 0; i < 500000; i++) {
            CommonDB.map.put(this.getName() + (i + 1), this.getName() + i + 1);
        }
        System.out.println(this.getName() + " 结束!");
    }

}

public class Test {

    public static void main(String[] args) throws InterruptedException {

        HashMapTest a1 = new HashMapTest();
        HashMapTest a2 = new HashMapTest();
        a1.setName("线程1");
        a2.setName("线程2");

        a1.start();
        a2.start();

        Thread.sleep(1000*3);

        System.out.println("Map大小:" + CommonDB.map.size());
    }

}
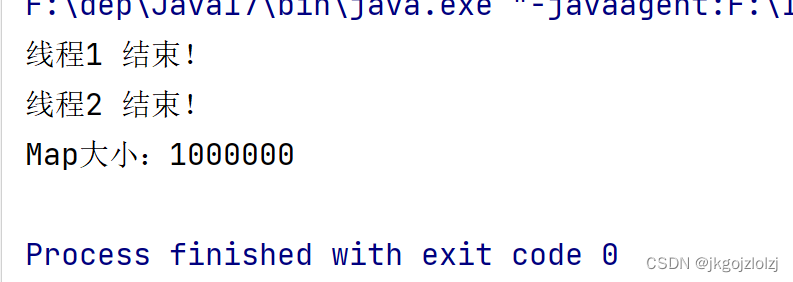
结果:
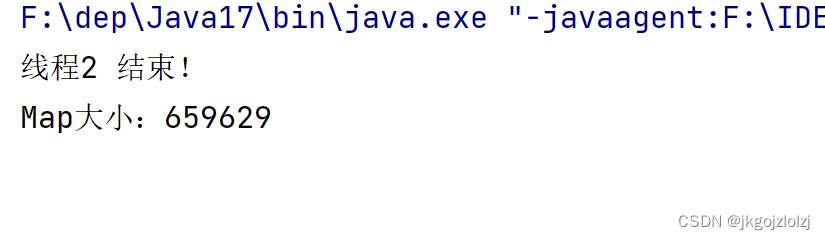
无法得到预期的结果
使用Hashtable创建集合
public class CommonDB {

    //创建一个Hashtable集合
    public static Hashtable<String,String> map = new Hashtable<>();

}

public class HashMapTest extends Thread{

    @Override
    public void run() {
        for (int i = 0; i < 500000; i++) {
            CommonDB.map.put(this.getName() + (i + 1), this.getName() + i + 1);
        }
        System.out.println(this.getName() + " 结束!");
    }

}

public class Test {

    public static void main(String[] args) throws InterruptedException {

        HashMapTest a1 = new HashMapTest();
        HashMapTest a2 = new HashMapTest();
        a1.setName("线程1");
        a2.setName("线程2");

        a1.start();
        a2.start();

        Thread.sleep(1000*3);

        System.out.println("Map大小:" + CommonDB.map.size());
    }

}
结果:
相比之下,线程安全了很多
使用ConcurrentHashMap创建集合
public class CommonDB {

    //创建一个ConcurrentHashMap集合
    public static ConcurrentHashMap<String,String> map = new ConcurrentHashMap<>();

}

public class HashMapTest extends Thread{

    @Override
    public void run() {
        for (int i = 0; i < 500000; i++) {
            CommonDB.map.put(this.getName() + (i + 1), this.getName() + i + 1);
        }
        System.out.println(this.getName() + " 结束!");
    }

}

public class Test {

    public static void main(String[] args) throws InterruptedException {

        HashMapTest a1 = new HashMapTest();
        HashMapTest a2 = new HashMapTest();
        a1.setName("线程1");
        a2.setName("线程2");

        a1.start();
        a2.start();

        Thread.sleep(1000*3);

        System.out.println("Map大小:" + CommonDB.map.size());
    }

}
结果:
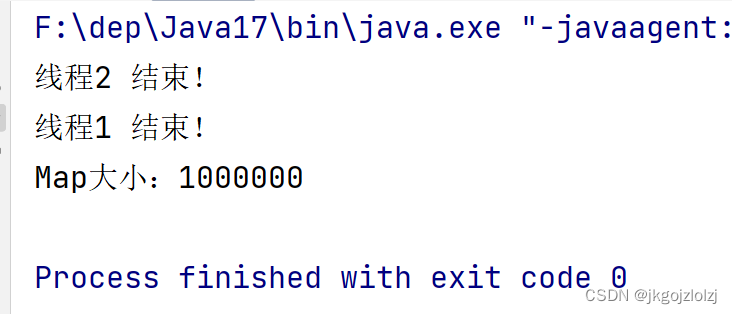
使用ConcurrentHashMap创建集合与使用Hashtable创建集合线程都比较安全
经过测试,使用ConcurrentHashMap创建集合比使用Hashtable创建集合性能高一点
6.2 CountDownLatch
CountDownLatch允许一个或多个线程等待其他线程完成操作,再执行自己。
public CountDownLatch(int count)// 初始化一个指定计数器的CountDownLatch对象
重要方法
public void await() throws InterruptedException// 让当前线程等待
public void countDown() // 计数器进行减1
案例
public class ThreadA extends Thread {
    private CountDownLatch down ;
    public ThreadA(CountDownLatch down) {
        this.down = down;
    }
    @Override
    public void run() {
        System.out.println("A");
        try {
            down.await();
        } catch (InterruptedException e) {
            e.printStackTrace();
        }
        System.out.println("C");
    }
}

public class ThreadB extends Thread {
    private CountDownLatch down ;
    public ThreadB(CountDownLatch down) {
        this.down = down;
    }
    @Override
    public void run() {
        System.out.println("B");
        down.countDown();
    }
}


public class Demo {
    public static void main(String[] args) {
        CountDownLatch down = new CountDownLatch(1);//创建1个计数器
        new ThreadA(down).start();
        new ThreadB(down).start();
    }
}
结果:
按照
A
B
C
的顺序打印。
6.3 CyclicBarrier
构造方法
public CyclicBarrier(int parties, Runnable barrierAction)
重要方法
public int await();
案例
public class PersonThread extends Thread {
    private CyclicBarrier cbRef;

    public PersonThread(CyclicBarrier cbRef) {
        this.cbRef = cbRef;
    }

    @Override
    public void run() {
        try {
            Thread.sleep((int) (Math.random() * 1000));
            System.out.println(Thread.currentThread().getName() + " 到了! ");
            cbRef.await();
        } catch (InterruptedException e) {
            e.printStackTrace();
        } catch (BrokenBarrierException e) {
            e.printStackTrace();
        }
    }
}

public class MeetingThread extends Thread {
    @Override
    public void run() {
    	System.out.println("好了,人都到了,开始开会......");
    }
}


public class Demo {
	public static void main(String[] args) {
		CyclicBarrier cbRef = new CyclicBarrier(5, new MeetingThread());//等待5个线程执行完毕,再执行MeetingThread
        PersonThread p1 = new PersonThread(cbRef);
        PersonThread p2 = new PersonThread(cbRef);
        PersonThread p3 = new PersonThread(cbRef);
        PersonThread p4 = new PersonThread(cbRef);
        PersonThread p5 = new PersonThread(cbRef);
        p1.start();
        p2.start();
        p3.start();
        p4.start();
        p5.start();
	}
}
6.4 Semaphore
构造方法
public Semaphore(int permits)

public Semaphore(int permits, boolean fair)
重要方法
public void acquire() throws InterruptedException
public void release()
案例
public class Service {
    private Semaphore semaphore = new Semaphore(1);//1表示许可的意思,表示最多允许1个线程执行acquire()和release()之间的内容
    public void testMethod() {
        try {
            semaphore.acquire();
            System.out.println(Thread.currentThread().getName()
                    + " 进入 时间=" + System.currentTimeMillis());
            Thread.sleep(1000);
            System.out.println(Thread.currentThread().getName()
                    + " 结束 时间=" + System.currentTimeMillis());
            semaphore.release();
			//acquire()和release()方法之间的代码为"同步代码"
        } catch (InterruptedException e) {
            e.printStackTrace();
        }
    }
}


public class ThreadA extends Thread {
    private Service service;
    public ThreadA(Service service) {
        super();
        this.service = service;
    }
    @Override
    public void run() {
        service.testMethod();
    }
}

public class Demo {
    public static void main(String[] args) {
        Service service = new Service();
		//启动5个线程
        for (int i = 1; i <= 5; i++) {
            ThreadA a = new ThreadA(service);
            a.setName("线程 " + i);
            a.start();//5个线程会同时执行Service的testMethod方法,而某个时间段只能有1个线程执行
        }
    }
}
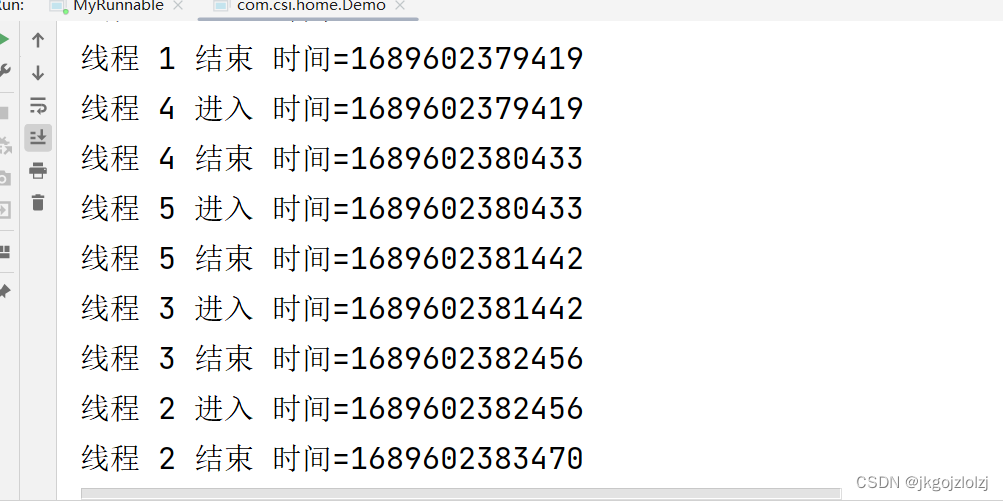
结果:
6.5 Exchanger
Exchanger(交换者)是一个用于线程间协作的工具类。Exchanger用于进行线程间的数据交换
构造方法
public Exchanger()
重要方法
public V exchange(V x)
案例
public class ThreadA extends Thread {
    private Exchanger<String> exchanger;
    public ThreadA(Exchanger<String> exchanger) {
        super();
        this.exchanger = exchanger;
    }
    @Override
    public void run() {
        try {
            System.out.println("线程A欲传递值'礼物A'给线程B,并等待线程B的值...");
            System.out.println("在线程A中得到线程B的值=" + exchanger.exchange("礼物A"));
        } catch (InterruptedException e) {
            e.printStackTrace();
        }
    }
}

public class ThreadB extends Thread {
    private Exchanger<String> exchanger;
    public ThreadB(Exchanger<String> exchanger) {
        super();
        this.exchanger = exchanger;
    }
    @Override
    public void run() {
        try {
            System.out.println("线程B欲传递值'礼物B'给线程A,并等待线程A的值...");
            System.out.println("在线程B中得到线程A的值=" + exchanger.exchange("礼物B"));
        } catch (InterruptedException e) {
            e.printStackTrace();
        }
    }
}

public class Demo {
    public static void main(String[] args) throws InterruptedException {
        Exchanger<String> exchanger = new Exchanger<String>();
        ThreadA a = new ThreadA(exchanger);
        ThreadB b = new ThreadB(exchanger);
        a.start();
        b.start();
    }
}
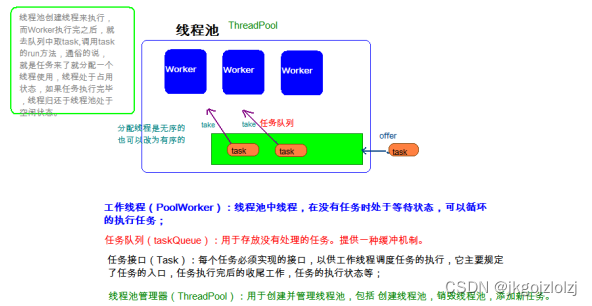
7. 线程池
线程池:其实就是一个容纳多个线程的容器,其中的线程可以反复使用,省去了频繁创建线程对象的操 作,无需反复创建线程而消耗过多资源。
合理利用线程池能够带来三个好处:
1.降低资源消耗。减少了创建和销毁线程的次数,每个工作线程都可以被重复利用,可执行多个任务。
**2.提高响应速度。当任务到达时,任务可以不需要的等到线程创建就能立即执行。 **
3.提高线程的可管理性。可以根据系统的承受能力,调整线程池中工作线线程的数目,防止因为消耗过多 的内存,而把服务器累趴下(每个线程需要大约1MB内存,线程开的越多,消耗的内存也就越大,最后 死机)。
7.1 线程池的使用
public class Demo04 {
    public static void main(String[] args) throws ExecutionException,
            InterruptedException {
        ExecutorService pool = Executors.newFixedThreadPool(3);
        SumCallable sc = new SumCallable(100);
        Future<Integer> fu = pool.submit(sc);
        Integer integer = fu.get();
        System.out.println("结果: " + integer);
        SumCallable sc2 = new SumCallable(200);
        Future<Integer> fu2 = pool.submit(sc2);
        Integer integer2 = fu2.get();
        System.out.println("结果: " + integer2);
        pool.shutdown();
    }
}

public class SumCallable implements Callable<Integer> {
    private int n;
    public SumCallable(int n) {
        this.n = n;
    }
    @Override
    public Integer call() throws Exception {
// 求1-n的和?
        int sum = 0;
        for (int i = 1; i <= n; i++) {
            sum += i;
        }
        return sum;
    }
}
8. 死锁
8.1 什么是死锁
在多线程程序中,使用了多把锁,造成线程之间相互等待.程序不往下走了。
8.2 产生死锁的条件
1.有多把锁
2.有多个线程
3.有同步代码块嵌套
8.3 案例
public class Demo05 {
    public static void main(String[] args) {
        MyRunnable mr = new MyRunnable();
        new Thread(mr).start();
        new Thread(mr).start();
    }
}
class MyRunnable implements Runnable {
    Object objA = new Object();
    Object objB = new Object();
    /*
    嵌套1 objA
    嵌套1 objB
    嵌套2 objB
    嵌套1 objA
    */
    @Override
    public void run() {
        synchronized (objA) {
            System.out.println("嵌套1 objA");
            synchronized (objB) {// t2, objA, 拿不到B锁,等待
                System.out.println("嵌套1 objB");
            }
        }
        synchronized (objB) {
            System.out.println("嵌套2 objB");
            synchronized (objA) {// t1 , objB, 拿不到A锁,等待
                System.out.println("嵌套2 objA");
            }
        }
    }
}


 1万+
1万+


 被折叠的 条评论
为什么被折叠?
被折叠的 条评论
为什么被折叠?
 到【灌水乐园】发言


