


修改返回按钮:
UIImage *backImage = [UIImageimageNamed:@"navback"]; [[UIBarButtonItemappearance]setBackButtonBackgroundImage:[backImageresizableImageWithCapInsets:UIEdgeInsetsMake(0, backImage.size.width,0,0)] forState:UIControlStateNormalbarMetrics:UIBarMetricsDefault]; [[UIBarButtonItemappearance]setBackButtonTitlePositionAdjustment:UIOffsetMake(-233,0)forBarMetrics:UIBarMetricsDefault];
tableview快速创建:#pragma mark-tableview delegate
- (CGFloat)tableView:(UITableView *)tableView heightForRowAtIndexPath:(NSIndexPath *)indexPath{
return80;
}
- (CGFloat)tableView:(UITableView *)tableView heightForHeaderInSection:(NSInteger)section{
return0;
}
- (CGFloat)tableView:(UITableView *)tableView heightForFooterInSection:(NSInteger)section{
return0;
}
#pragma mark-datasource
- (NSInteger)tableView:(UITableView *)tableView numberOfRowsInSection:(NSInteger)section{
return10;
}
-(NSInteger)numberOfSectionsInTableView:(UITableView *)tableView{
return1;
}
- (UITableViewCell *)tableView:(UITableView *)tableView cellForRowAtIndexPath:(NSIndexPath *)indexPath{
UITableViewCell* cell=[[UITableViewCellalloc]init];
return cell;
}
uicollectiobview
UICollectionViewFlowLayout *layout = [[UICollectionViewFlowLayoutalloc]init];
layout.itemSize =CGSizeMake(myscreenwith/8.0,64);
layout.footerReferenceSize =CGSizeMake(0,0);
layout.sectionInset =UIEdgeInsetsMake(0,0,0,0);
layout.minimumInteritemSpacing =0.0;
layout.minimumLineSpacing =0.0;
_week=[[UICollectionViewalloc]initWithFrame:CGRectMake(0,0,320,568)collectionViewLayout:layout];
#pragma mark -- UICollectionViewDataSource
//定义展示的UICollectionViewCell的个数
-(NSInteger)collectionView:(UICollectionView *)collectionView numberOfItemsInSection:(NSInteger)section
{
return30;
}
//定义展示的Section的个数
-(NSInteger)numberOfSectionsInCollectionView:(UICollectionView *)collectionView
{
return1;
}
//每个UICollectionView展示的内容
-(UICollectionViewCell *)collectionView:(UICollectionView *)collectionView cellForItemAtIndexPath:(NSIndexPath *)indexPath
{
staticNSString * CellIdentifier =@"GradientCell";
UICollectionViewCell * cell = [collectionViewdequeueReusableCellWithReuseIdentifier:CellIdentifierforIndexPath:indexPath];
cell.backgroundColor = [UIColorcolorWithRed:((10 * indexPath.row) /255.0)green:((20 * indexPath.row)/255.0)blue:((30 * indexPath.row)/255.0)alpha:1.0f];
return cell;
}
#pragma mark --UICollectionViewDelegateFlowLayout
//定义每个UICollectionView的大小
- (CGSize)collectionView:(UICollectionView *)collectionView layout:(UICollectionViewLayout*)collectionViewLayout sizeForItemAtIndexPath:(NSIndexPath *)indexPath
{
returnCGSizeMake(96,100);
}
//定义每个UICollectionView的 margin
-(UIEdgeInsets)collectionView:(UICollectionView *)collectionView layout:(UICollectionViewLayout *)collectionViewLayout insetForSectionAtIndex:(NSInteger)section
{
returnUIEdgeInsetsMake(5,5,5,5);
}
#pragma mark --UICollectionViewDelegate
//UICollectionView被选中时调用的方法
-(void)collectionView:(UICollectionView *)collectionView didSelectItemAtIndexPath:(NSIndexPath *)indexPath
{
UICollectionViewCell * cell = (UICollectionViewCell *)[collectionViewcellForItemAtIndexPath:indexPath];
cell.backgroundColor = [UIColorwhiteColor];
}
//返回这个UICollectionView是否可以被选择
-(BOOL)collectionView:(UICollectionView *)collectionView shouldSelectItemAtIndexPath:(NSIndexPath *)indexPath
{
returnYES;
}
滑动事件:
//滑动开始事件
- (void)touchesBegan:(NSSet *)touches withEvent:(UIEvent *)event
{
UITouch *touch = [touchesanyObject];
CGPoint pointone = [touchlocationInView:self.view];//获得初始的接触点
startPoint = pointone;
}
//滑动移动事件
- (void)touchesMoved:(NSSet *)touches withEvent:(UIEvent *)event
{
UITouch *touch = [touchesanyObject];
//imgViewTop是滑动后最后接触的View
CGPoint pointtwo = [touchlocationInView:self.view]; //获得滑动后最后接触屏幕的点
if(fabs(pointtwo.x-startPoint.x)>100)
{ //判断两点间的距离
bMove =YES;
}
}
//滑动结束处理事件
-(void)touchesEnded:(NSSet *)touches withEvent:(UIEvent *)event
{
UITouch *touch = [touchesanyObject];
pointtwo = [touchlocationInView:self.view]; //获得滑动后最后接触屏幕的点
if((fabs(pointtwo.x-startPoint.x)>20)&&(bMove))
{
//判断点的位置关系左滑动
if(pointtwo.x-startPoint.x<0)
{ //左滑动业务处理
NSLog(@"左滑、、、、、");
}
//判断点的位置关系右滑动
else
{ //右滑动业务处理
NSLog(@"右滑、、、、、");
}
}
}
hitest:
//-(UIView *)hitTest:(CGPoint)point withEvent:(UIEvent *)event{
// CGPoint point1=[_container convertPoint:point fromView:self];
// // if ([_container pointInside:point1 withEvent:event]) {
// // return nil;
// // }
// return _edit;
//}
//统一修改导航栏字体
[[UINavigationBarappearance]setTitleTextAttributes:@{NSFontAttributeName:[UIFontsystemFontOfSize:17],
NSForegroundColorAttributeName:[UIColorcolorWithRed:51/255.0green:51/255.0 blue:51/255.0 alpha:1.0]}];
//修改系统返回键按钮样式
UIImage *backImage = [UIImageimageNamed:@"navback"]; [[UIBarButtonItemappearance]setBackButtonBackgroundImage:[backImageresizableImageWithCapInsets:UIEdgeInsetsMake(0, backImage.size.width,0,0)] forState:UIControlStateNormalbarMetrics:UIBarMetricsDefault]; [[UIBarButtonItemappearance]setBackButtonTitlePositionAdjustment:UIOffsetMake(-233,0)forBarMetrics:UIBarMetricsDefault];
[[UIBarButtonItemappearance]setTitleTextAttributes:@{NSFontAttributeName:[UIFontsystemFontOfSize:15]}forState:UIControlStateNormal];
修改导航栏与状态栏颜色self.navigationController.navigationBar.barTintColor =[UIColor colorWithRed:24/255.0green:179/255.0blue:139.0/255.0alpha:1.0];
How Do I Declare A Block in Objective-C?
As a local variable:
returnType (^blockName)(parameterTypes) = ^returnType(parameters) {...};
As a property:
@property (nonatomic, copy) returnType (^blockName)(parameterTypes);
As a method parameter:
- (void)someMethodThatTakesABlock:(returnType (^)(parameterTypes))blockName;
As an argument to a method call:
[someObject someMethodThatTakesABlock:^returnType (parameters) {...}];
As a typedef:
typedef returnType (^TypeName)(parameterTypes);
 TypeName blockName = ^returnType(parameters) {...};
If you find yourself needing syntax not listed here, it is likely that a typedef would make your code more readable.
iOS8开发中采用xcassets设置LaunchImage后如何获取自适应屏幕大小的启动图片
导航栏去掉下面的黑线
if ([self.navigationController.navigationBar respondsToSelector:@selector( setBackgroundImage:forBarMetrics:)]){
        NSArray *list=self.navigationController.navigationBar.subviews;
        for (id obj in list) {
            if ([obj isKindOfClass:[UIImageView class]]) {
                UIImageView *imageView=(UIImageView *)obj;
                NSArray *list2=imageView.subviews;
                for (id obj2 in list2) {
                    if ([obj2 isKindOfClass:[UIImageView class]]) {
                        UIImageView *imageView2=(UIImageView *)obj2;
                        imageView2.hidden=YES;
                    }
                }
            }
        }
    }
git commands
-
是否每次敲block都要在心里默念: 没有返回值~括号~尖号~参数...不用这么麻烦, 试着敲个
inline,还没等你敲完,人家xcode已经给你提示了,
喏:

然后你负责敲个回车:

哈哈哈,这需要记?
-
把block去typedef也是一样的.直接敲
typedef...选择typedefBlock那一项:

一个回车之后请做填空题:

- 写枚举的时候总是不小心写个#号或者@,又或者不小心忘了应该先写typedef还是enum, 不要担心, 从此你只需要敲
enumdef,如:

回车之后就是见证奇迹的时刻:

- 使用GCD定时器的时候,输入
dispatch_source后查找Xcode内置代码段

Xcode会帮你做好GCD定时器一系列的创建、设置属性、回调函数、启动等工作.意外收获的惊喜呀,所以赶紧补上来了.

拖动tableView时收起键盘
只有一行代码:
tableView.keyboardDismissMode = UIScrollViewKeyboardDismissModeOnDrag; 其中keyboardDismissMode是UIScrollView的属性,
它的值除了UIScrollViewKeyboardDismissModeNone,
还有一种是UIScrollViewKeyboardDismissModeInteractive,表示键盘可以随着手指下滑而移出屏幕,具体效果小伙伴们可以自己试着体验下.
既然是UIScrollView的属性,那么在文字常用的UITextView等控件中也可以使用.
我们可以通过Quartz 2D来绘制文本内容
绘制文本内容
//绘图只能在当前位方法中调用,否则无法得到图形上下文
- (void)drawRect:(CGRect)rect{

    //要显示的文字
    NSString *str = @"苹果在昨天成功获得一项关于音频方面的专利,可以让纤薄电子设备中的扬声器音量更高,音质更好。虽然该专利的文件内容冗长,不过却描述了一种方法:“由于便携式电子设备的体积限制,在使设备更薄更小的同时,提供高质量的音频输出/接收能力已变得愈发困难。因此,就需要新的方法,来提供高质量的音频输出/接收能力。” ";

    //绘制文字显示的指定区域
    CGRect rect = CGRectMake(20, 50, 374, 500);
    //字体大小
    UIFont *font = [UIFont systemFontOfSize:25];
    //字体颜色
    UIColor *color = [UIColor redColor];
    //初始化段落样式
    NSMutableParagraphStyle *paragraphStyle = [[NSMutableParagraphStyle alloc]init];
    //居中对齐
    NSTextAlignment textAlignment = NSTextAlignmentCenter;
    //设置段落样式
    paragraphStyle.alignment = textAlignment;

    [str drawInRect:rect withAttributes:@{NSFontAttributeName:font, NSForegroundColorAttributeName:color, NSParagraphStyleAttributeName:paragraphStyle}];

}
绘制图像
//绘图只能在当前位方法中调用,否则无法得到图形上下文
- (void)drawRect:(CGRect)rect{

    //加载图片
    UIImage *image = [UIImage imageNamed:@"mv1.jpg"];

    //拉伸的方式显示图片
    [image drawInRect:CGRectMake(20, 300, 374, 400)];
    //设置图片位置(平铺的方式显示图片)
    //[image drawAsPatternInRect:CGRectMake(20, 400, 374, 336)];

}
同样我们可以通过Quartz 2D进行图片剪切
//绘图只能在当前位方法中调用,否则无法得到图形上下文
- (void)drawRect:(CGRect)rect{

    //获取图形上下文
    CGContextRef context = UIGraphicsGetCurrentContext();
    //指定上下文显示的范围
    CGContextAddEllipseInRect(context, CGRectMake(80, 50, 100, 100));
    //裁剪
    CGContextClip(context);

    //获取图片
    UIImage *image = [UIImage imageNamed:@"mv2.jpg"];
    //
    [image drawAtPoint:CGPointMake(50, 50)];

}
coretext里面设置富文本:
NSString*string =@"Be Bold! And a little color wouldn’t hurt either.";NSDictionary*attrs = @{NSFontAttributeName: [UIFontsystemFontOfSize:36]};
NSMutableAttributedString*
as = [[NSMutableAttributedStringalloc]initWithString:stringattributes:attrs];
[as addAttribute:NSFontAttributeNamevalue:[UIFontboldSystemFontOfSize:36]
range:[stringrangeOfString:@"Bold!"]];
[as addAttribute:NSForegroundColorAttributeNamevalue:[UIColorblueColor]
range:[stringrangeOfString:@"little color"]];
[as addAttribute:NSFontAttributeNamevalue:[UIFontsystemFontOfSize:18]
range:[stringrangeOfString:@"little"]];self.label.attributedText= as;
NSMutableAttributedString*as = ...
[as enumerateAttribute:...inRange:...options:...
{
...
}];
CGContextMoveToPoint设置起点
CGContextClosePath 连接起点和当前点
CGPathCreateMutable 类似于 CGContextBeginPath
CGPathMoveToPoint 类似于 CGContextMoveToPoint
CGPathAddLineToPoint 类似于 CGContextAddLineToPoint
CGPathAddCurveToPoint 类似于 CGContextAddCurveToPoint
CGPathAddEllipseInRect 类似于 CGContextAddEllipseInRect
CGPathAddArc 类似于 CGContextAddArc
CGPathAddRect 类似于 CGContextAddRect
CGPathCloseSubpath 类似于 CGContextClosePath
CGContextAddPath函数把一个路径添加到graphics
dispatch_group_t group = dispatch_group_create();
dispatch_group_enter(group);
[RecipeInfo fetchRecipeWithCompletionBlock:^(id returnValue) {
info = [RecipeInfo yy_modelWithDictionary:returnValue];
dispatch_group_leave(group);
} WithFailureBlock:^(NSError *error) {
dispatch_group_leave(group);
}];
dispatch_group_enter(group);
[HomePageNavContent fetchNavContentWithCompletionBlock:^(id returnValue) {
navContent = [HomePageNavContent yy_modelWithDictionary:returnValue];
dispatch_group_leave(group);
} WithFailureBlock:^(NSError *error) {
dispatch_group_leave(group);
}];
dispatch_group_notify(group, dispatch_get_main_queue(), ^{
[self.tableView reloadData];
});
1. 网络图片显示大体步骤:
- 下载图片
- 图片处理(裁剪,边框等)
- 写入磁盘
- 从磁盘读取数据到内核缓冲区
- 从内核缓冲区复制到用户空间(内存级别拷贝)
- 解压缩为位图(耗cpu较高)
- 如果位图数据不是字节对齐的,
CoreAnimation会copy一份位图数据并进行字节对齐CoreAnimation渲染解压缩过的位图以上4,5,6,7,8步是在
UIImageView的setImage时进行的,所以默认在主线程进行(iOS UI操作必须在主线程执行)。2. 一些优化思路:
- 异步下载图片
- image解压缩放到子线程
- 使用缓存 (包括内存级别和磁盘级别)
- 存储解压缩后的图片,避免下次从磁盘加载的时候再次解压缩
- 减少内存级别的拷贝 (针对第5点和第7点)
- 良好的接口(比如
SDWebImage使用category)Core Datavs 文件存储- 图片预下载
有时候使用UITableView所实现的列表,会使用到section,但是又不希望它粘在最顶上而是跟随滚动而消失或者出现,下面的代码片段就是实现此功能:
|
1
2
3
4
5
6
7
8
9
10
11
12
13
|
-
(
void
)
scrollViewDidScroll
:
(
UIScrollView
*
)
scrollView
{
if
(
scrollView
==
_tableView
)
{
CGFloat
sectionHeaderHeight
=
36
;
if
(
scrollView
.
contentOffset
.
y
<=
sectionHeaderHeight
&&
scrollView
.
contentOffset
.
y
>=
0
)
{
scrollView
.
contentInset
=
UIEdgeInsetsMake
(
-
scrollView
.
contentOffset
.
y
,
0
,
0
,
0
)
;
}
else
if
(
scrollView
.
contentOffset
.
y
>=
sectionHeaderHeight
)
{
scrollView
.
contentInset
=
UIEdgeInsetsMake
(
-
sectionHeaderHeight
,
0
,
0
,
0
)
;
}
}
}
UITableView的分割线默认是开头空15像素点的(好像是15来着~~),产品经理有时候希望能够定格显示,那么你可能会这么做。 但是你很快就会发现这么做并没有效果,这是因为 CFAttributedStringRef :属性字符串,用于存储需要绘制的文字字符和字符属性 CTFramesetterRef:通过CFAttributedStringRef进行初始化,作为CTFrame对象的生产工厂,负责根据path创建对应的CTFrame CTFrame:用于绘制文字的类,可以通过CTFrameDraw函数,直接将文字绘制到context上 CTLine:在CTFrame内部是由多个CTLine来组成的,每个CTLine代表一行 CTRun:每个CTLine又是由多个CTRun组成的,每个CTRun代表一组显示风格一致的文本 实际上CoreText是不直接支持绘制图片的,但是我们可以先在需要显示图片的地方用一个特殊的空白占位符代替,同时设置该字体的CTRunDelegate信息为要显示的图片的宽度和高度,这样绘制文字的时候就会先把图片的位置留出来,再在drawRect方法里面用CGContextDrawImage绘制图片。 - (void)drawRect:(CGRect)rect {
[super drawRect:rect]; // 省略步骤1-4 ,步骤8
// 步骤9:图文混排部分
// CTRunDelegateCallbacks:一个用于保存指针的结构体,由CTRun delegate进行回调
CTRunDelegateCallbacks callbacks;
memset(&callbacks, 0, sizeof(CTRunDelegateCallbacks));
callbacks.version = kCTRunDelegateVersion1;
callbacks.getAscent = ascentCallback;
callbacks.getDescent = descentCallback;
callbacks.getWidth = widthCallback;
// 图片信息字典
NSDictionary *imgInfoDic = @{@"width":@100,@"height":@30};
// 设置CTRun的代理
CTRunDelegateRef delegate = CTRunDelegateCreate(&callbacks, (__bridge void *)imgInfoDic);
// 使用0xFFFC作为空白的占位符
unichar objectReplacementChar = 0xFFFC; NSString *content = [NSString stringWithCharacters:&objectReplacementChar length:1]; NSMutableAttributedString *space = [[NSMutableAttributedString alloc] initWithString:content]; CFAttributedStringSetAttribute((CFMutableAttributedStringRef)space, CFRangeMake(0, 1), kCTRunDelegateAttributeName, delegate); CFRelease(delegate);
// 将创建的空白AttributedString插入进当前的attrString中,位置可以随便指定,不能越界
[attrString insertAttributedString:space atIndex:50];
// 省略步骤5-6
// 步骤10:绘制图片
UIImage *image = [UIImage imageNamed:@"coretext-img-1.png"]; CGContextDrawImage(context, [self calculateImagePositionInCTFrame:frame], image.CGImage);
// 省略步骤7
}
#pragma mark - CTRun delegate 回调方法
static CGFloat ascentCallback(void *ref) {
return [(NSNumber *)[(__bridge NSDictionary *)ref objectForKey:@"height"] floatValue];
} static CGFloat descentCallback(void *ref) {
return 0;
}
static CGFloat widthCallback(void *ref) {
return [(NSNumber *)[(__bridge NSDictionary *)ref objectForKey:@"width"] floatValue];
}
/**
* 根据CTFrameRef获得绘制图片的区域
*
* @param ctFrame CTFrameRef对象
*
* @return绘制图片的区域
*/
- (CGRect)calculateImagePositionInCTFrame:(CTFrameRef)ctFrame {
// 获得CTLine数组
NSArray *lines = (NSArray *)CTFrameGetLines(ctFrame); NSInteger lineCount = [lines count]; CGPoint lineOrigins[lineCount];
CTFrameGetLineOrigins(ctFrame, CFRangeMake(0, 0), lineOrigins);
// 遍历每个CTLine
for (NSInteger i = 0 ; i < lineCount; i++) {
CTLineRef line = (__bridge CTLineRef)lines[i]; NSArray *runObjArray = (NSArray *)CTLineGetGlyphRuns(line);
// 遍历每个CTLine中的CTRun
for (id runObj in runObjArray) {
CTRunRef run = (__bridge CTRunRef)runObj; NSDictionary *runAttributes = (NSDictionary *)CTRunGetAttributes(run);
CTRunDelegateRef delegate = (__bridge CTRunDelegateRef)[runAttributes valueForKey:(id)kCTRunDelegateAttributeName]; if (delegate == nil) { continue;
}
NSDictionary *metaDic = CTRunDelegateGetRefCon(delegate); if (![metaDic isKindOfClass:[NSDictionary class]]) { continue;
}
CGRect runBounds; CGFloat ascent; CGFloat descent;
runBounds.size.width = CTRunGetTypographicBounds(run, CFRangeMake(0, 0), &ascent, &descent, NULL);
runBounds.size.height = ascent + descent;
CGFloat xOffset = CTLineGetOffsetForStringIndex(line, CTRunGetStringRange(run).location, NULL);
runBounds.origin.x = lineOrigins[i].x + xOffset;
runBounds.origin.y = lineOrigins[i].y;
runBounds.origin.y -= descent;
CGPathRef pathRef = CTFrameGetPath(ctFrame); CGRect colRect = CGPathGetBoundingBox(pathRef);
CGRect delegateBounds = CGRectOffset(runBounds, colRect.origin.x, colRect.origin.y); return delegateBounds;
}
} return CGRectZero;
}
在此例中:我们知道,NSString永远是immutable的,所以NSString * const 是有效的,而const NSString * 则是无效的。而使用错误的写法,则无法阻止修改该指针指向的地址,使得本应该是常量的值能被修改,造成了隐患。这是需要注意的一个常见错误。 HTTP缓存,明确的要知道GET请求可以被缓存,POST不能被缓存,所以要想在客户端做HTTP的缓存一定要注意使用GET请求! 
fiddler-get.png
再看左栏的Result也就是状态码:可以看到我这是304:这代码当前页面在本地的缓存没有过期和服务器一致,可以使用!那这是怎么做到的呢?有下面两种方式。 If-Modified-Since/Last-ModifiedIf-Modified-Since这个是在Request里面的Cache中的信息用来表示本地缓存最后一次被修改的时间,他被发送到服务器并且和Response的Entity中Last-Modified作比较,如果两者的日期一致,那就说明在此期间页面没有任何改动浏览器可以使用本地缓存。(所提到的头域都可以在上面图中找到,大家结合图来看比较清晰) If-None-Match/EtagIf-None-Match是在Request中请求头的第一行,他存储一个字符串(资源在服务器的唯一确定标志)。Etag是Response中Entity中的一个字符串。两个也是做比较,相同说明可以使用缓存。
那么问题来了为什么要使用两种缓缓存方式呢?而且从我的截图中可以看到仅有第二种Etag方式原因如下:
缓存过期时间Expires:到期时间。作用: 浏览器会在指定过期时间内使用本地缓存 怎么改变uitextfield placeholder的颜色和位置?继承uitextfield,重写这个方法 navigationBar的透明有时候,我们需要将navigationBar设置透明,但不是隐藏,因为还需要其item控件(返回键什么的),虽然navigationBar是继承于UIView的,但是直接设置其 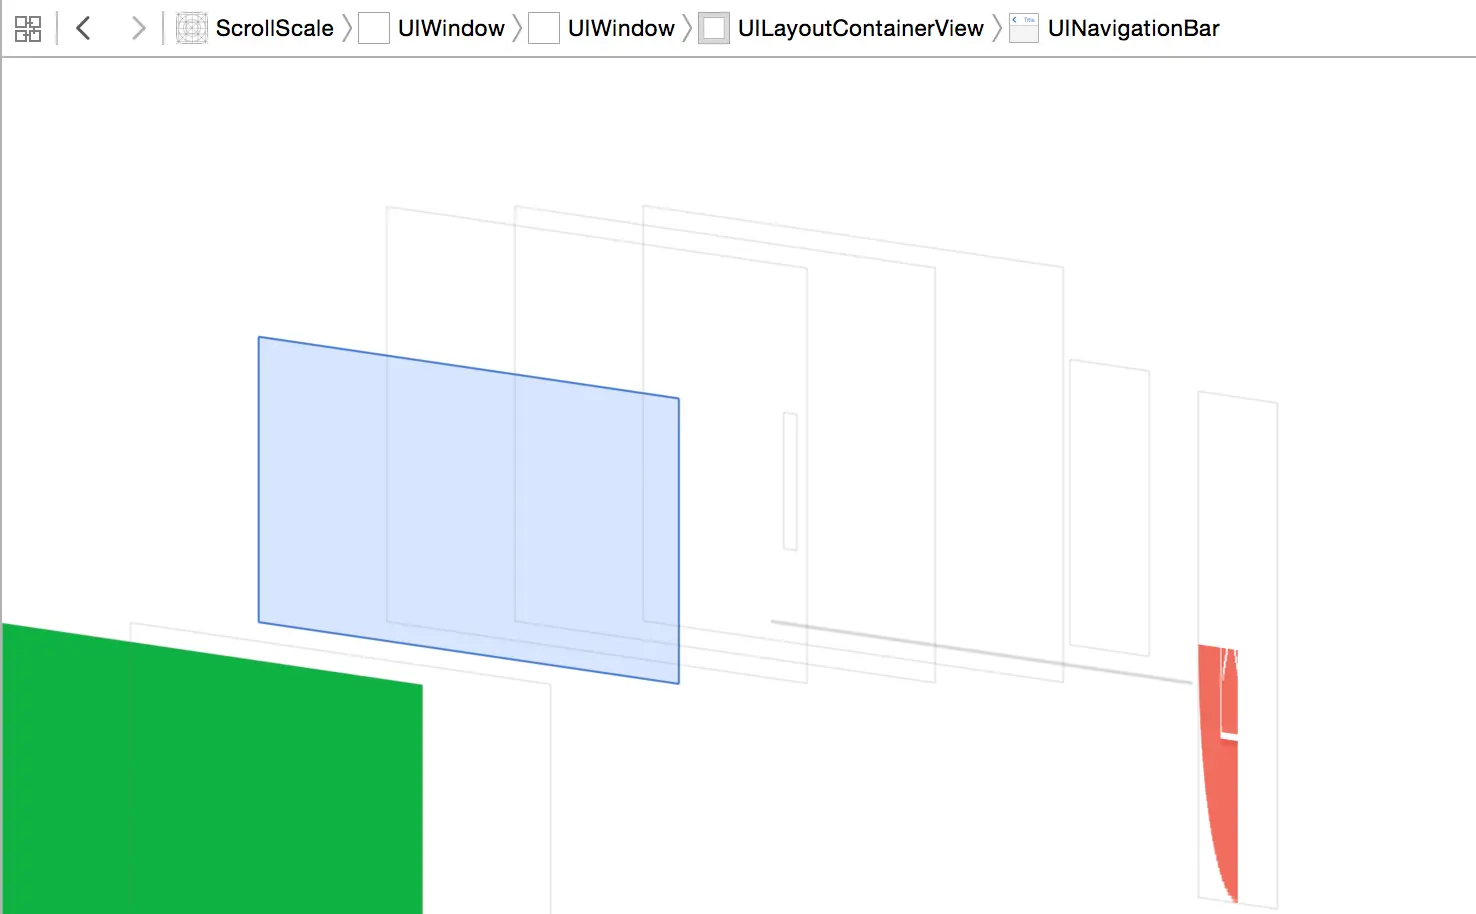
|
//平移按钮
CGAffineTransform transForm = self.buttonView.transform;
self.buttonView.transform = CGAffineTransformTranslate(transForm, 10, 0);

//旋转按钮
CGAffineTransform transForm = self.buttonView.transform;
self.buttonView.transform = CGAffineTransformRotate(transForm, M_PI_4);

//缩放按钮
self.buttonView.transform = CGAffineTransformScale(transForm, 1.2, 1.2);

//初始化复位
self.buttonView.transform = CGAffineTransformIdentity;更新:最后提供的所谓“终极”解决方案,之前都是自己的项目在用,分享出来之后,发现有一些地方还需要改进。但是总体思路不变,因此如非必要文章不会做大幅更改,最终代码请以文末github地址为准,另,欢迎提供Bug
前言
前一段时间换了工作,公司项目赶得比较紧,没有时间更新文章,现在闲下来了,赶紧写一篇来弥补自己的羞愧。
今天我们来重点讨论导航栏返回的问题,包括各种问题的解决方案。
系统默认导航栏的返回按钮和返回方式
在默认情况下,导航栏返回按钮长这个样子
导航栏左上角的返回按钮,其文本默认为上一个ViewController的标题,如果上一个ViewController没有标题,则为Back(中文环境下为“返回”)。
在默认情况下,导航栏返回的点击交互和滑动交互如下
这些东西不需要任何设置和操作,因此也没有其他需要说明的地方。
自定义左上角的返回按钮
绝大多数情况下,我们都需要根据产品需求自定义左上角的返回按钮,虽然这对大多数开发者来说不是什么难事,但依然有几个问题值得注意。
替换左上角返回按钮
替换返回按钮非常简单,只需要在ViewController中创建一个UIBarButtonItem和一张图片,并为按钮添加相应的点击事件即可,代码如下
- (void)viewDidLoad {
[super viewDidLoad];
// Do any additional setup after loading the view.
UIButton * leftBtn = [UIButton buttonWithType:UIButtonTypeSystem];
leftBtn.frame = CGRectMake(0, 0, 25,25);
[leftBtn setBackgroundImage:[UIImage imageNamed:@"nav_back"] forState:UIControlStateNormal];
[leftBtn addTarget:self action:@selector(leftBarBtnClicked:) forControlEvents:UIControlEventTouchUpInside];
self.navigationItem.leftBarButtonItem = [[UIBarButtonItem alloc]initWithCustomView:leftBtn];
}
- (void)leftBarBtnClicked:(UIButton *)btn
{
[self.navigationController popViewControllerAnimated:YES];
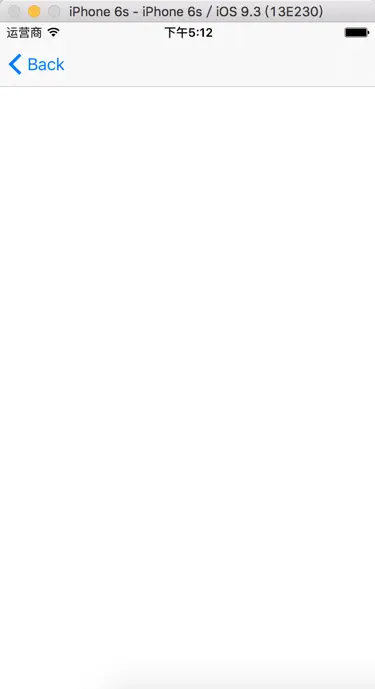
}我们来看一眼效果

调整按钮位置
我们可以看到,上面的按钮是有点偏右的,那如果我们想调整按钮的位置该怎么做呢?设置Frame显然是行不通的,因为导航栏的NavigationItem是个比较特殊的View,我们无法通过简单的调整Frame来的调整左右按钮的位置。但是在苹果提供的UIButtonBarItem中有个叫做UIBarButtonSystemItemFixedSpace的控件,利用它,我们就可以轻松调整返回按钮的位置。具体使用方法如下
//创建返回按钮
UIButton * leftBtn = [UIButton buttonWithType:UIButtonTypeSystem];
leftBtn.frame = CGRectMake(0, 0, 25,25);
[leftBtn setBackgroundImage:[UIImage imageNamed:@"icon_back"] forState:UIControlStateNormal];
[leftBtn addTarget:self action:@selector(leftBarBtnClicked:) forControlEvents:UIControlEventTouchUpInside];
UIBarButtonItem * leftBarBtn = [[UIBarButtonItem alloc]initWithCustomView:leftBtn];;
//创建UIBarButtonSystemItemFixedSpace
UIBarButtonItem * spaceItem = [[UIBarButtonItem alloc]initWithBarButtonSystemItem:UIBarButtonSystemItemFixedSpace target:nil action:nil];
//将宽度设为负值
spaceItem.width = -15;
//将两个BarButtonItem都返回给NavigationItem
self.navigationItem.leftBarButtonItems = @[spaceItem,leftBarBtn];
我们来看一眼效果

可以看到,我们的返回按钮已经紧靠着屏幕边缘。
这个方法同样适用于调整导航栏右侧的按钮
让滑动返回手势生效
如果使用自定义的按钮去替换系统默认返回按钮,会出现滑动返回手势失效的情况。解决方法也很简单,只需要重新添加导航栏的interactivePopGestureRecognizer的delegate即可。
首先为ViewContoller添加UIGestureRecognizerDelegate协议
然后设置代理
self.navigationController.interactivePopGestureRecognizer.delegate = self;至此,我们已经将返回按钮替换为我们的自定义按钮,并使滑动返回重新生效。接下来,我们继续来解决交互上的问题。
全屏滑动返回
这个一个很常见的需求,网上解决方案也很多,这里将本人常用的方法贴到这里。仅供参考
实现全屏滑动返回仅需在导航栏给导航栏添加UIGestureRecognizerDelegate协议,并在ViewDidLoad中写入如下代码
// 获取系统自带滑动手势的target对象
id target = self.interactivePopGestureRecognizer.delegate;
// 创建全屏滑动手势,调用系统自带滑动手势的target的action方法
UIPanGestureRecognizer *pan = [[UIPanGestureRecognizer alloc] initWithTarget:target action:@selector(handleNavigationTransition:)];
// 设置手势代理,拦截手势触发
pan.delegate = self;
// 给导航控制器的view添加全屏滑动手势
[self.view addGestureRecognizer:pan];
// 禁止使用系统自带的滑动手势
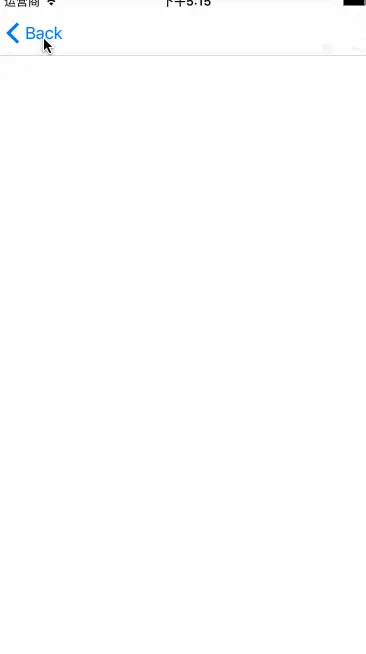
self.interactivePopGestureRecognizer.enabled = NO;我们来看一眼效果(注意鼠标位置)

成功
这种方法的原理其实很简单,其实就是自定义一个全屏滑动手势,并将滑动事件设置为系统滑动事件,然后禁用系统滑动手势即可。
handleNavigationTransition就是系统滑动的方法,虽然系统并未提供接口,但是我们我们可以通过runtime找到这个方法,因此直接调用即可。两位,不必担心什么私有API之类的问题,苹果如果按照方法名去判断是否使用私有API,那得误伤多少App。
NavigationBar切换动画的“终极解决方案”
本部分文字代码都较多,不想看这么多废话的同学请直接翻到末尾,文末附有下载地址,导入项目后,继承即可生效。
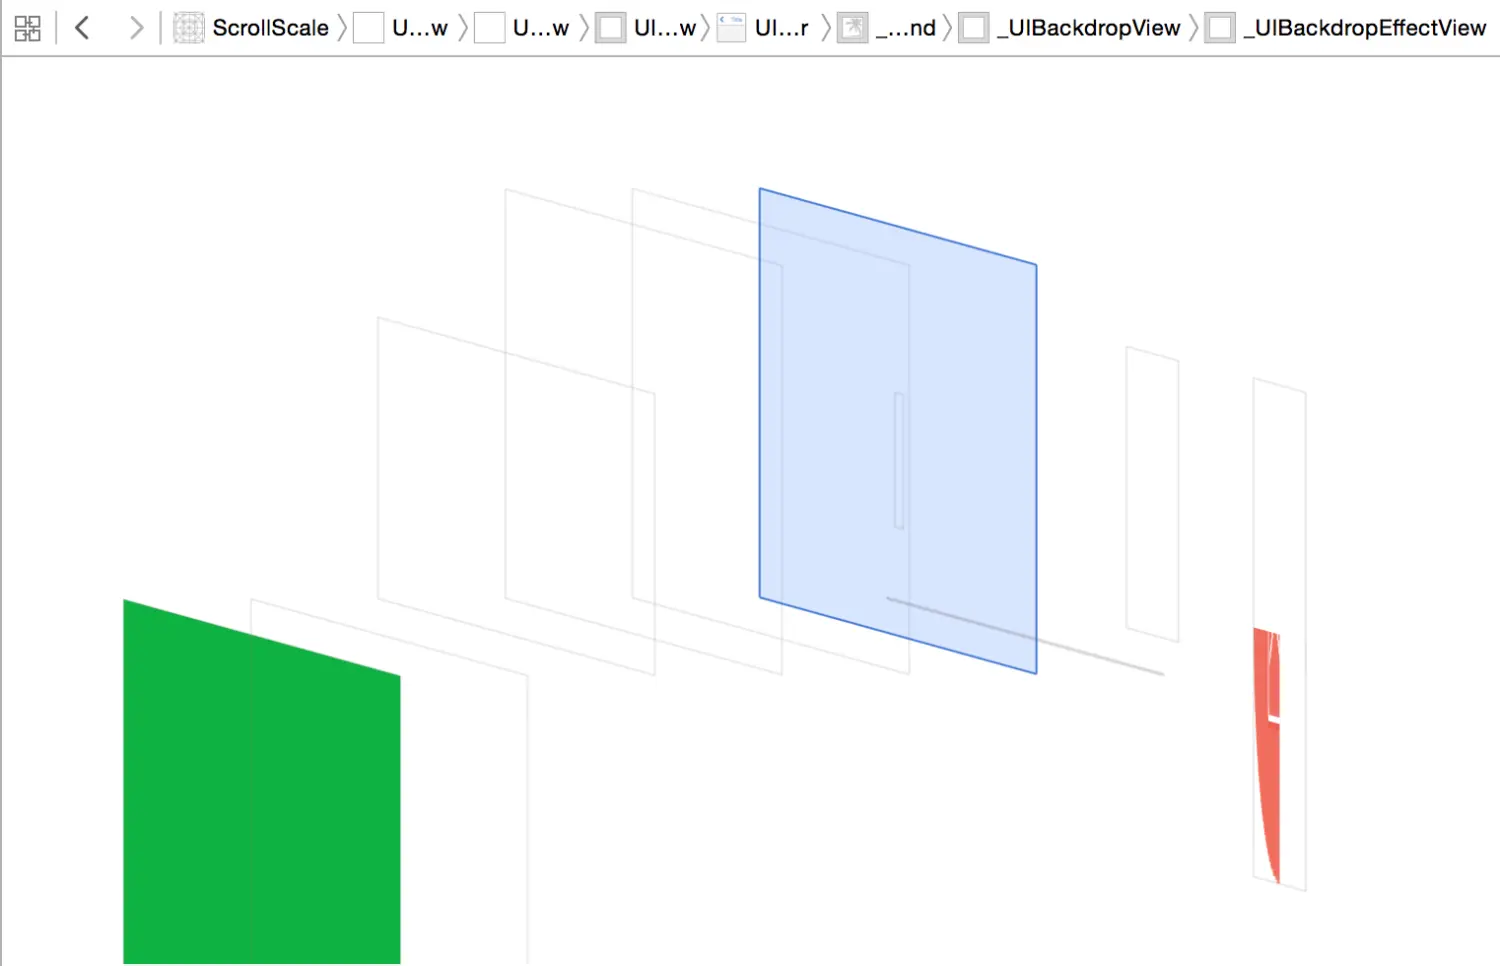
在改变了导航栏样式,实现了全屏滑动返回之后,我们有了一个看起来还不错的导航栏。但是我们滑动时的切换依然是系统自带的动画,如果遇到前一个界面的NavigationBar为透明或前后两个Bar颜色不一样,这种渐变式的动画看起来就会不太友好,尤其当前后两个界面其中一个界面的NavigationBar为透明或隐藏时,其效果更是惨不忍睹。
这个问题,其实很多App,比如天猫、美团等都通过一种“整体返回”的效果来解决这个问题。效果如下:

这种解决方案等于将两个NavigationBar独立开来,因此可以相对完美的解决导航栏滑动切换中的种种Bug。
接下来,我们来看看如何实现这种效果。
基本原理
以我个人的认知,实现这个效果有三种基本思路:
- 使用
UINavigationController自带的setNavigationBarHidden: animated:方法来实现,每次push或pop时,在当前控制器的viewWillDisappear:中设置隐藏,在要跳转的控制器的viewWillAppear:中设置导航栏显示。- 在每次Push前对当前页面进行截图并保存到数组,Pop时取数组最后一个元素显示,滑动结束后调用系统Pop方法并删除最后一张截图。
- 使用iOS 7之后开放的,UIViewControllerAnimatedTransitioning协议,来实现自定义导航栏转场动画及交互。
以上三种方法,方法一十分繁琐,而且会有很多莫名其妙的BUG,直接pass。
在iOS的交互中,push一般通过按钮的点击事件或View的tap事件触发,而pop则可能通过事件触发,也可能通过右滑手势触发。因此,我们将这个我们要实现的动画效果分为交互效果和无交互效果两种,下面我们将使用方法2和方法3提供的思路,分别实现这两种效果,这样就能较为完美的解决Push和Pop的动画问题。
实现交互动画效果
准备需要使用的数组及手势
#define ScreenWidth [UIScreen mainScreen].bounds.size.width
#define ScreenHeight [UIScreen mainScreen].bounds.size.height
@interface LTNavigationController ()<UIGestureRecognizerDelegate>
@property(strong,nonatomic)UIImageView * screenshotImgView;
@property(strong,nonatomic)UIView * coverView;
@property(strong,nonatomic)NSMutableArray * screenshotImgs;
@property(strong,nonatomic)UIPanGestureRecognizer *panGestureRec;
@end

@implementation LTNavigationController

- (void)viewDidLoad {
[super viewDidLoad];
// Do any additional setup after loading the view.

// 1,创建Pan手势识别器,并绑定监听方法
_panGestureRec = [[UIScreenEdgePanGestureRecognizer alloc]initWithTarget:self action:@selector(panGestureRec:)];
_panGestureRec.edges = UIRectEdgeLeft;
// 为导航控制器的view添加Pan手势识别器
[self.view addGestureRecognizer:_panGestureRec];

// 2.创建截图的ImageView
_screenshotImgView = [[UIImageView alloc] init];
// app的frame是包括了状态栏高度的frame
_screenshotImgView.frame = CGRectMake(0, 0, ScreenWidth, ScreenHeight);


// 3.创建截图上面的黑色半透明遮罩
_coverView = [[UIView alloc] init];
// 遮罩的frame就是截图的frame
_coverView.frame = _screenshotImgView.frame;
// 遮罩为黑色
_coverView.backgroundColor = [UIColor blackColor];

// 4.存放所有的截图数组初始化
_screenshotImgs = [NSMutableArray array];
}
实现手势的相应事件
// 响应手势的方法
- (void)panGestureRec:(UIPanGestureRecognizer *)panGestureRec
{

// 如果当前显示的控制器已经是根控制器了,不需要做任何切换动画,直接返回
if(self.visibleViewController == self.viewControllers[0]) return;
// 判断pan手势的各个阶段
switch (panGestureRec.state) {
    case UIGestureRecognizerStateBegan:
        // 开始拖拽阶段
        [self dragBegin];
        break;

    case UIGestureRecognizerStateEnded:
        // 结束拖拽阶段
        [self dragEnd];
        break;

    default:
        // 正在拖拽阶段
        [self dragging:panGestureRec];
        break;
}
}

#pragma mark 开始拖动,添加图片和遮罩
- (void)dragBegin
{
// 重点,每次开始Pan手势时,都要添加截图imageview 和 遮盖cover到window中
[self.view.window insertSubview:_screenshotImgView atIndex:0];
[self.view.window insertSubview:_coverView aboveSubview:_screenshotImgView];

// 并且,让imgView显示截图数组中的最后(最新)一张截图
_screenshotImgView.image = [_screenshotImgs lastObject];
//_screenshotImgView.transform = CGAffineTransformMakeTranslation(ScreenWidth, 0);
}

// 默认的将要变透明的遮罩的初始透明度(全黑)
#define kDefaultAlpha 0.6

// 当拖动的距离,占了屏幕的总宽高的3/4时, 就让imageview完全显示,遮盖完全消失
#define kTargetTranslateScale 0.75
#pragma mark 正在拖动,动画效果的精髓,进行位移和透明度变化
- (void)dragging:(UIPanGestureRecognizer *)pan
{

// 得到手指拖动的位移
CGFloat offsetX = [pan translationInView:self.view].x;

// 让整个view都平移     // 挪动整个导航view
if (offsetX > 0) {
    self.view.transform = CGAffineTransformMakeTranslation(offsetX, 0);
  }


// 计算目前手指拖动位移占屏幕总的宽高的比例,当这个比例达到3/4时, 就让imageview完全显示,遮盖完全消失
double currentTranslateScaleX = offsetX/self.view.frame.size.width;

if (offsetX < ScreenWidth) {

    _screenshotImgView.transform = CGAffineTransformMakeTranslation((offsetX - ScreenWidth) * 0.6, 0);
}

// 让遮盖透明度改变,直到减为0,让遮罩完全透明,默认的比例-(当前平衡比例/目标平衡比例)*默认的比例
double alpha = kDefaultAlpha - (currentTranslateScaleX/kTargetTranslateScale) * kDefaultAlpha;
_coverView.alpha = alpha;
}

#pragma mark 结束拖动,判断结束时拖动的距离作相应的处理,并将图片和遮罩从父控件上移除
- (void)dragEnd
{
// 取出挪动的距离
CGFloat translateX = self.view.transform.tx;
// 取出宽度
CGFloat width = self.view.frame.size.width;

if (translateX <= 40) {
    // 如果手指移动的距离还不到屏幕的一半,往左边挪 (弹回)
    [UIView animateWithDuration:0.3 animations:^{
        // 重要~~让被右移的view弹回归位,只要清空transform即可办到
        self.view.transform = CGAffineTransformIdentity;
        // 让imageView大小恢复默认的translation
        _screenshotImgView.transform = CGAffineTransformMakeTranslation(-ScreenWidth, 0);
        // 让遮盖的透明度恢复默认的alpha 1.0
        _coverView.alpha = kDefaultAlpha;
    } completion:^(BOOL finished) {
        // 重要,动画完成之后,每次都要记得 移除两个view,下次开始拖动时,再添加进来
        [_screenshotImgView removeFromSuperview];
        [_coverView removeFromSuperview];
    }];
} else {
    // 如果手指移动的距离还超过了屏幕的一半,往右边挪
    [UIView animateWithDuration:0.3 animations:^{
        // 让被右移的view完全挪到屏幕的最右边,结束之后,还要记得清空view的transform
        self.view.transform = CGAffineTransformMakeTranslation(width, 0);
        // 让imageView位移还原
        _screenshotImgView.transform = CGAffineTransformMakeTranslation(0, 0);
        // 让遮盖alpha变为0,变得完全透明
        _coverView.alpha = 0;
    } completion:^(BOOL finished) {
        // 重要~~让被右移的view完全挪到屏幕的最右边,结束之后,还要记得清空view的transform,不然下次再次开始drag时会出问题,因为view的transform没有归零
        self.view.transform = CGAffineTransformIdentity;
        // 移除两个view,下次开始拖动时,再加回来
        [_screenshotImgView removeFromSuperview];
        [_coverView removeFromSuperview];

        // 执行正常的Pop操作:移除栈顶控制器,让真正的前一个控制器成为导航控制器的栈顶控制器
        [self popViewControllerAnimated:NO];
    }];
}
}
实现截图保存功能,并在Push前截图
- (void)screenShot
{
// 将要被截图的view,即窗口的根控制器的view
UIViewController *beyondVC = self.view.window.rootViewController;
// 背景图片 总的大小
CGSize size = beyondVC.view.frame.size;
// 开启上下文,使用参数之后,截出来的是原图(YES  0.0 质量高)
UIGraphicsBeginImageContextWithOptions(size, YES, 0.0);
// 要裁剪的矩形范围
CGRect rect = CGRectMake(0, 0, ScreenWidth, ScreenHeight);
//注:iOS7以后renderInContext:由drawViewHierarchyInRect:afterScreenUpdates:替代
[beyondVC.view drawViewHierarchyInRect:rect  afterScreenUpdates:NO];
// 从上下文中,取出UIImage
UIImage *snapshot = UIGraphicsGetImageFromCurrentImageContext();
// 添加截取好的图片到图片数组
if (snapshot) {
    [_screenshotImgs addObject:snapshot];
}
// 千万记得,结束上下文(移除栈顶的基于当前位图的图形上下文)
UIGraphicsEndImageContext();
}
- (void)pushViewController:(UIViewController *)viewController animated:(BOOL)animated
{
  //有在导航控制器里面有子控制器的时候才需要截图
if (self.viewControllers.count >= 1) {
    // 调用自定义方法,使用上下文截图
    [self screenShot];
}
// 截图完毕之后,才调用父类的push方法
[super pushViewController:viewController animated:YES];
}
重写常用的pop方法
在一开始基本原理地方,我们说过pop时要删除最后一张截图,用来保证数组中的最后一张截图是上一个控制器,但是很多情况下我们可能调用的是导航栏的popToViewController: animated:方法或popToRootViewControllerAnimated:来返回,这种情况下,我们删除的可能就不是一张截图,因此我们需要分别重写这些Pop方法,去确定我们要删除多少张图片,代码如下
- (UIViewController *)popViewControllerAnimated:(BOOL)animated
{
   [_screenshotImgs removeLastObject];
   return [super popViewControllerAnimated:animated];
}
- (NSArray<UIViewController *> *)popToViewController:(UIViewController *)viewController animated:(BOOL)animated
{
for (NSInteger i = self.viewControllers.count - 1; i > 0; i--) {
    if (viewController == self.viewControllers[i]) {
        break;
    }
    [_screenshotImgs removeLastObject];
}

return [super popToViewController:viewController animated:animated];
}
- (NSArray<UIViewController *> *)popToRootViewControllerAnimated:(BOOL)animated
{
[_screenshotImgs removeAllObjects];
return [super popToRootViewControllerAnimated:animated];
}
※在指定的控制器屏蔽手势
在上面代码中,我们使用的是侧滑手势,并将相应区域设置为屏幕左侧。
之所以不用全屏滑动,是因为全屏滑动手势在有些时候会和其他手势冲突,如果冲突的是我们自定义的手势,自然好解决,但如果是系统手势,如TableView的左滑菜单操作,这个事情就很蛋疼的。
但是如果必须要做全屏滑动手势的话,我们可以对代码稍作修改,某些控制器中屏蔽手势。
首先给导航栏添加禁用名单数组并配置
...
@property(nonatomic,copy)NSArray * forbiddenArray;
...
- (void)viewDidLoad {
[super viewDidLoad];
//原来代码
...
  //将手势禁用,之后在Push时根据条件开启
 self.panGestureRec.enabled = enable
//将需要禁用手势的控制器的类名加到这个数组
self.forbiddenArray = @[@"SCViewController",@"ManageAddressViewController"];
}

- (void)pushViewController:(UIViewController *)viewController animated:(BOOL)animated
{

//在指定控制器中禁用手势  解决滑动返回手势和某些手势冲突问题
BOOL enable = YES;
for (NSString * string in self.forbiddenArray) {
    NSString * className = NSStringFromClass([viewController class]);
    if ([string isEqualToString:className]) {
        enable = NO;
    }
}
self.panGestureRec.enabled = enable;

//原有代码
...
}
- (UIViewController *)popViewControllerAnimated:(BOOL)animated
{
NSInteger count = self.viewControllers.count;
NSString * className = nil;
if (count >= 2) {
    className = NSStringFromClass([self.viewControllers[count -2] class]);
}

BOOL enable = YES;
for (NSString * string in self.forbiddenArray) {
    if ([string isEqualToString:className]) {
        enable = NO;
    }
}
self.panGestureRec.enabled = enable;
//原有代码
...

return [super popViewControllerAnimated:animated];
}
到了这里,我们已经完成了交互式的切换动画,效果跟开头一样,就不再截图。接下来我们来解决另一个大Boss-非交互式动画
实现非交互动画效果
理论基础
这里我们就要用到之前说的UIViewControllerAnimatedTransitioning来实现。限于篇幅,这里不再详细介绍这部分的基础知识,大家可以移步这两篇博客做一个初步的了解
向 UINavigationController 的传统动画说”再见” — 自定义过场动画(一)
iOS 7:自定义导航转场动画以及更多
实现原理
注:FromVC代表即将消失的视图控制器,ToVC表示将要展示的视图控制器
我们要实现的效果:
Push的时候,FromVC往左移动,ToVC从屏幕右侧出现跟随FromVC左移直至FromVC消失,此时ToVC刚好完整显示在屏幕上。
Pop的时候,FromVC向右移动,ToVC从屏幕边缘出现跟随FromVC向右移动直至FromVC消失,此时ToVC刚好完整显示在屏幕上
实现的时候,我们依然需要将Push和Pop分开讨论
先说Pop
1.和交互式动画一样,每次Push时对屏幕截屏并保存,Pop的再次截屏但不保存
2.把Pop时截取的图片作为FromVC展示,把Push到这个界面时截取的图片作为ToVC展示
3.并对两张图片做位移动画,动画结束后移除两张图片
然后是Push
1.Push时先对当前屏幕截屏。
2.将截取的图片保存方便Pop回来时使用,并把这张图片作为这次Push的FromVC保存。
3.获取当前导航栏控制器对象,调整其Transform属性中的位移参数作为ToVC展示
4.对截图和导航栏做位移,动画结束后直接移除截屏图片
为什么要对导航栏作位移?
首先,在Push结束之前,我们是无法知道ToVC具体是什么样子,系统的截屏方法对于未加载出来的View是无能为力的,而UIView的
snapshotViewAfterScreenUpdates:方法又无法带着导航栏一起映射到一个新的View上,因此视觉效果很差。
正好在Pop的时候,为了达到想要的动画效果,用来展示的两张图片都需要放到导航栏的View上,因此在Push的时候我们就直接将导航栏的View做一个放射变换,当然,这也就意味着,当我们Push的时候,截屏就不能再放到导航栏上,而是应该放到它的“更上一层“ --UITabbarController的View上
让我们撸一发代码
根据上述实现原理,我们可以知道,我们的主要工作重点在于打造一个合适的动画控制器。更准确的说,我们需要实现的细节都在UIViewControllerAnimatedTransitioning中,由于之前解释的很详细,这里我直接贴上相应代码供参考
-(void)animateTransition:(id<UIViewControllerContextTransitioning>)transitionContext
{


UIImageView * screentImgView = [[UIImageView alloc]initWithFrame:CGRectMake(0, 0, ScreenWidth, ScreenHeight)];
UIImage * screenImg = [self screenShot];
screentImgView.image =screenImg;

//取出fromViewController,fromView和toViewController,toView
UIViewController * fromViewController = [transitionContext viewControllerForKey:UITransitionContextFromViewControllerKey];
//    UIView * fromView = [transitionContext viewForKey:UITransitionContextFromViewKey];
UIViewController * toViewController = [transitionContext viewControllerForKey:UITransitionContextToViewControllerKey];
UIView * toView = [transitionContext viewForKey:UITransitionContextToViewKey];


CGRect fromViewEndFrame = [transitionContext finalFrameForViewController:fromViewController];
fromViewEndFrame.origin.x = ScreenWidth;
CGRect fromViewStartFrame = fromViewEndFrame;
CGRect toViewEndFrame = [transitionContext finalFrameForViewController:toViewController];
CGRect toViewStartFrame = toViewEndFrame;


UIView * containerView = [transitionContext containerView];

if (self.navigationOperation == UINavigationControllerOperationPush) {


    [self.screenShotArray addObject:screenImg];
    //toViewStartFrame.origin.x += ScreenWidth;
    [containerView addSubview:toView];

    toView.frame = toViewStartFrame;

    UIView * nextVC = [[UIView alloc]initWithFrame:CGRectMake(ScreenWidth, 0, ScreenWidth, ScreenHeight)];
     //[nextVC addSubview:[toView snapshotViewAfterScreenUpdates:YES]];

    [self.navigationController.tabBarController.view insertSubview:screentImgView atIndex:0];

    //[self.navigationController.tabBarController.view addSubview:nextVC];
    nextVC.layer.shadowColor = [UIColor blackColor].CGColor;
    nextVC.layer.shadowOffset = CGSizeMake(-0.8, 0);
    nextVC.layer.shadowOpacity = 0.6;

    self.navigationController.view.transform = CGAffineTransformMakeTranslation(ScreenWidth, 0);

    [UIView animateWithDuration:[self transitionDuration:transitionContext] animations:^{
        //toView.frame = toViewEndFrame;
    self.navigationController.view.transform = CGAffineTransformMakeTranslation(0, 0);
        screentImgView.center = CGPointMake(-ScreenWidth/2, ScreenHeight / 2);
        //nextVC.center = CGPointMake(ScreenWidth/2, ScreenHeight / 2);


    } completion:^(BOOL finished) {

        [nextVC removeFromSuperview];
        [screentImgView removeFromSuperview];
        [transitionContext completeTransition:YES];
    }];

}
if (self.navigationOperation == UINavigationControllerOperationPop) {


    fromViewStartFrame.origin.x = 0;
    [containerView addSubview:toView];
    //若removeCount大于0  则说明Pop了不止一个控制器
    if (_removeCount > 0) {
        for (NSInteger i = 0; i < _removeCount; i ++) {
            if (i == _removeCount - 1) {
                //当删除到要跳转页面的截图时,不再删除,并将该截图作为ToVC的截图展示
                lastVcImgView.image = [self.screenShotArray lastObject];
                _removeCount = 0;
                break;
            }
            else
            {
                [self.screenShotArray removeLastObject];
            }

        }
    }
    else
    {
        lastVcImgView.image = [self.screenShotArray lastObject];
    }
    lastVcImgView.image = [self.screenShotArray lastObject];
    screentImgView.layer.shadowColor = [UIColor blackColor].CGColor;
    screentImgView.layer.shadowOffset = CGSizeMake(-0.8, 0);
    screentImgView.layer.shadowOpacity = 0.6;
    [self.navigationController.tabBarController.view addSubview:lastVcImgView];
    [self.navigationController.tabBarController.view addSubview:screentImgView];

   // fromView.frame = fromViewStartFrame;
    [UIView animateWithDuration:[self transitionDuration:transitionContext] animations:^{

        screentImgView.center = CGPointMake(ScreenWidth * 3 / 2 , ScreenHeight / 2);
        lastVcImgView.center = CGPointMake(ScreenWidth/2, ScreenHeight/2);
        //fromView.frame = fromViewEndFrame;

    } completion:^(BOOL finished) {
        //[self.navigationController setNavigationBarHidden:NO];
        [lastVcImgView removeFromSuperview];
        [screentImgView removeFromSuperview];
        [self.screenShotArray removeLastObject];
        [transitionContext completeTransition:YES];

    }];

  }

}
- (void)removeLastScreenShot
{
[self.screenShotArray removeLastObject];
}
- (UIImage *)screenShot
{
// 将要被截图的view,即窗口的根控制器的view(必须不含状态栏,默认ios7中控制器是包含了状态栏的)
UIViewController *beyondVC = self.navigationController.view.window.rootViewController;
// 背景图片 总的大小
CGSize size = beyondVC.view.frame.size;
// 开启上下文,使用参数之后,截出来的是原图(YES  0.0 质量高)
UIGraphicsBeginImageContextWithOptions(size, YES, 0.0);
// 要裁剪的矩形范围
CGRect rect = CGRectMake(0, 0, ScreenWidth, ScreenHeight);
//注:iOS7以后renderInContext:由drawViewHierarchyInRect:afterScreenUpdates:替代
[beyondVC.view drawViewHierarchyInRect:rect  afterScreenUpdates:NO];
// 从上下文中,取出UIImage
UIImage *snapshot = UIGraphicsGetImageFromCurrentImageContext();

// 千万记得,结束上下文(移除栈顶的基于当前位图的图形上下文)
UIGraphicsEndImageContext();


// 返回截取好的图片
return snapshot;

}
注:
removeLastScreenShot需要在使用滑动手势Pop后调用,用来清除动画控制器中保存的截图,否则当交互式和非交互式动画交替使用时,会出现截图混乱的问题。更新:
在调用
popToViewController:(UIViewController *)viewController animated:(BOOL)animated一次Pop多个页面,或调用popToRootViewControllerAnimated直接回到跟控制器时,一样需要清除对应数量的截图,并且需要和导航栏配合操作。新的代码已提交github,文章里也已经更新动画控制器对应的部分,具体代码还是以GitHub为准。
看看效果
我们将动画持续时间调制两秒,观察一下效果

后记
这篇文章开始于四个月之前,中间由于个人以及工作原因拖了又拖,终于在最近补完,逻辑混乱之处请见谅。
制作完成的导航栏和动画控制器的下载地址
导航栏和动画控制器下载地址
使用方法:
1.将这四个文件导入工程
2.将需要动画的导航栏继承KLTNavigationController即可


 1万+
1万+

 被折叠的 条评论
为什么被折叠?
被折叠的 条评论
为什么被折叠?
 到【灌水乐园】发言


