


目录
六、工厂 Bean(Factory)
Spring 有两种类型 bean,一种普通 bean,另外一种工厂 bean(FactoryBean)。
1、普通 bean
普通 bean:在配置文件中的 id 定位 bean实例,定义的 class 类型就是返回类型。
2、工厂 bean
工厂 bean:在配置文件定义 bean 类型可以和返回类型不一样。
通过两个步骤即可实现工厂 bean:
- 第一步:创建类,让这个类作为工厂 bean,实现接口 FactoryBean<T>
- 第二步:实现接口里面的方法,在实现的方法中定义返回的 bean 类型
3、示例
建立一个 Factory 类,获取 Course 实例对象。在 xml 中 bean 类型写的是 Factory 类,但是可以返回 Course(通过继承接口 FactoryBean<T>)。
(1)代码
(1-1)Factory 类:
package com.demo.factory;

import com.demo.pojo.Course;
import org.springframework.beans.factory.FactoryBean;

public class Factory implements FactoryBean<Course> {
    @Override
    public Course getObject() throws Exception {
        Course course = new Course();
        course.setName("course01");
        return course;
    }

    @Override
    public Class<?> getObjectType() {
        return null;
    }

    @Override
    public boolean isSingleton() {
        return FactoryBean.super.isSingleton();
    }
}
(1-2)Course 类:
package com.demo.pojo;

public class Course {
    private String name;

    public String getName() {
        return name;
    }

    public void setName(String name) {
        this.name = name;
    }

    @Override
    public String toString() {
        return "Course{" +
                "name='" + name + '\'' +
                '}';
    }
}
(1-3)FactoryBean.xml:
<?xml version="1.0" encoding="UTF-8"?>
<beans xmlns="http://www.springframework.org/schema/beans"
       xmlns:xsi="http://www.w3.org/2001/XMLSchema-instance"
       xsi:schemaLocation="http://www.springframework.org/schema/beans http://www.springframework.org/schema/beans/spring-beans.xsd">

    <bean id="CourseFactory" class="com.demo.factory.Factory">

    </bean>

</beans>
(1-4)测试代码
import com.demo.pojo.Course;
import org.junit.Test;
import org.springframework.context.ApplicationContext;
import org.springframework.context.support.ClassPathXmlApplicationContext;

public class FactoryTest {
    @Test
    public void test() {
        ApplicationContext context = new ClassPathXmlApplicationContext("FactoryBean.xml");
        Course course = context.getBean("CourseFactory", Course.class);
        System.out.println(course);
    }
}
(2)输出结果

七、Bean 的作用域
bean 的作用域,可以设置我们创建的 bean 实例,是单实例还是多实例。默认情况下,Spring 会将 bean 设置为单实例对象。
1、单例和多例
- 单例就是所有的请求都用一个对象来处理,比如我们常用的service和dao层的对象通常都是单例的;
- 多例则指每个请求用一个新的对象来处理,比如action;
单例其实就在内存中该对象只有一个内存对应地址。无论你多少个线程访问那个对象,都是同一个地址。这样节省内存。
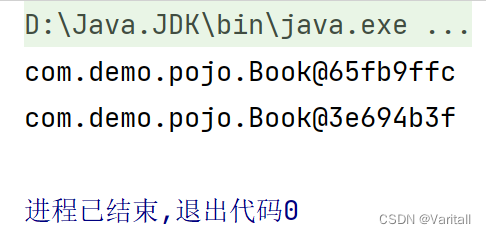
(1)单实例的输出结果


可以看到,两个实例的地址是一样的。说明该 bean 对象是一个单实例对象。
2、如何设置为单实例或多实例
在 spring 配置文件中的 bean 标签里面有属性(scope)用于设置单实例还是多实例。
(1)scope 的属性值
- scope = "singleton",表示单实例对象(默认值);
- scope = "prototype",表示多实例对象;
(2)修改 scope = "prototype" 后
(3)singleton 和 prototype 区别
- singleton 单实例,prototype 多实例;
- scope = singleton 时,加载 spring 配置文件时候就会创建单实例对象;
- scope = prototype 时,不是在加载 spring 配置文件时候创建对象,而是在调用 getBean() 方法时才创建多实例对象;
(4)属性值为 request 和 session
- scope = "request" 时,创建的对象会放到 request 域中;
- scope = "session" 时,创建的对象会放到 session 域中;
八、Bean 的生命周期
1、生命周期
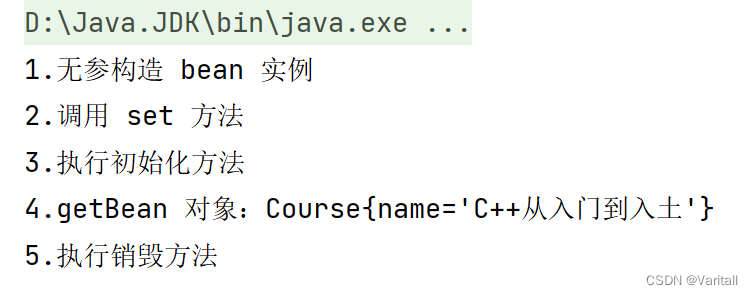
Bean 对象从创建到销毁的过程。有如下 5 个步骤:
- 通过无参构造函数创建 bean 实例;
- 为 bean 实例的属性设置值或对其他 bean 的引用(如:外部 bean、内部 bean);(调用 set 方法)
- 调用 bean 的初始化的方法(需要手动写出初始化的方法);
- bean 可以使用了(对象获取到了);
- 当容器关闭时候,调用 bean 的销毁的方法(需要手动写出销毁的方法)
2、生命周期示例
(1)代码
(1-1)Course 类
package com.demo.pojo;

public class Course {
    private String name;

    public Course() {
        System.out.println("1.无参构造 bean 实例");
    }

    // 创建执行的初始化方法
    public void initFunc() {
        System.out.println("3.执行初始化方法");
    }

    // 创建销毁的方法
    public void destroyFunc() {
        System.out.println("5.执行销毁方法");
    }

    public String getName() {
        return name;
    }

    public void setName(String name) {
        System.out.println("2.调用 set 方法");
        this.name = name;
    }

    @Override
    public String toString() {
        return "Course{" +
                "name='" + name + '\'' +
                '}';
    }
}
(1-2)LifeBean.xml
<?xml version="1.0" encoding="UTF-8"?>
<beans xmlns="http://www.springframework.org/schema/beans"
       xmlns:xsi="http://www.w3.org/2001/XMLSchema-instance"
       xsi:schemaLocation="http://www.springframework.org/schema/beans http://www.springframework.org/schema/beans/spring-beans.xsd">

    <bean id="course" class="com.demo.pojo.Course" init-method="initFunc" destroy-method="destroyFunc">
        <property name="name" value="C++从入门到入土"></property>
    </bean>

</beans>
(1-3)测试代码
import com.demo.pojo.Course;
import org.junit.Test;
import org.springframework.context.ApplicationContext;
import org.springframework.context.support.ClassPathXmlApplicationContext;

public class LifeBeanTest {
    @Test
    public void test() {
        ApplicationContext context = new ClassPathXmlApplicationContext("LifeBean.xml");
        Course course = context.getBean("course", Course.class);
        System.out.println("4.getBean 对象:" + course);
        // 最后要手动销毁 bean 实例,Application 的子类才有 close 方法
        ((ClassPathXmlApplicationContext)context).close();
    }
}
(2)输出结果
3、Bean 的后置处理器
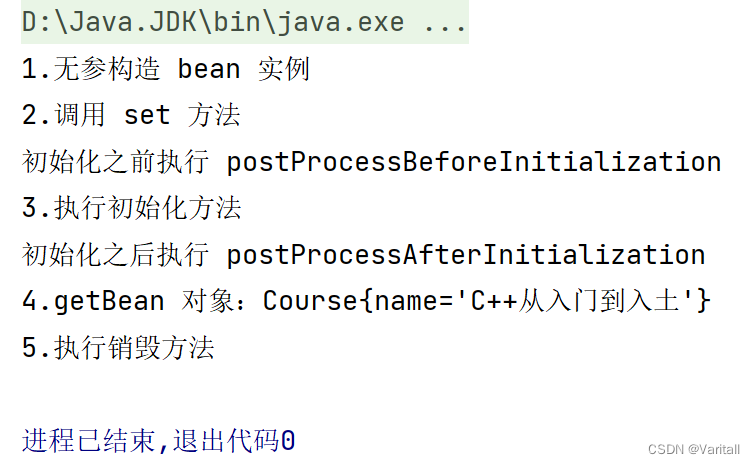
Bean 的生命周期除了前面的 5 个步骤外,还有两个步骤,分别位于初始化方法前和初始化方法后。
- 通过无参构造函数创建 bean 实例;
- 为 bean 实例的属性设置值或对其他 bean 的引用(如:外部 bean、内部 bean);(调用 set 方法)
- 把 bean 实例传递给 bean 的后置处理器的方法 postProcessBeforeInitialization
- 调用 bean 的初始化的方法(需要手动写出初始化的方法);
- 把 bean 实例传递给 bean 的后置处理器的方法 postProcessAfterInitialization
- bean 可以使用了(对象获取到了);
- 当容器关闭时候,调用 bean 的销毁的方法(需要手动写出销毁的方法)
4、后置处理器示例
(1)创建类,实现接口 BeanPostProcessor
package com.demo.impl;

import org.springframework.beans.BeansException;
import org.springframework.beans.factory.config.BeanPostProcessor;

public class PostProcess implements BeanPostProcessor {
    @Override
    public Object postProcessBeforeInitialization(Object bean, String beanName) throws BeansException {
        System.out.println("初始化之前执行 postProcessBeforeInitialization");
        return bean;
    }

    @Override
    public Object postProcessAfterInitialization(Object bean, String beanName) throws BeansException {
        System.out.println("初始化之后执行 postProcessAfterInitialization");
        return bean;
    }
}
(2)xml 配置文件,配置后置处理器
<?xml version="1.0" encoding="UTF-8"?>
<beans xmlns="http://www.springframework.org/schema/beans"
       xmlns:xsi="http://www.w3.org/2001/XMLSchema-instance"
       xsi:schemaLocation="http://www.springframework.org/schema/beans http://www.springframework.org/schema/beans/spring-beans.xsd">

    <bean id="course" class="com.demo.pojo.Course" init-method="initFunc" destroy-method="destroyFunc">
        <property name="name" value="C++从入门到入土"></property>
    </bean>

    <!-- 配置后置处理器 -->
    <bean id="postProcess" class="com.demo.impl.PostProcess"></bean>
</beans>
(3)输出结果
九、XML 的自动装配
1、什么是自动装配
- 手动装配:通过 <property name="" value="">、外部/内部 Bean、等等,来给属性值赋值,就是手动装配。
- 自动装配:根据指定的装配规则(属性名称或者属性类型),Spring 自动将匹配的属性值进行注入。
(1)bean 标签属性 autowire,配置自动装配:
- autowire = "byName",表示根据属性名称注入,要求 bean 的 id 值和目标属性的属性名一致;
- autowire = "byType",表示根据属性类型注入,也因此在 xml 中同一类型只能配置 1 个 bean;
(2)易错点
注意目标类路径所指向的类是否与配置的类一致,比如有很多 Util 类,不论在 java 文件中导入错误的类路径,还是在 xml 中写错了类路径,都无法匹配 set() 方法。
2、byName 示例
(1)代码
(1-1)Employee 类
package com.demo.autowire;

import com.demo.autowire.Department;

public class Employee {
    private Department department;

    @Override
    public String toString() {
        return "Employee{" +
                "department=" + department +
                '}';
    }

    public Department getDepartment() {
        return department;
    }

    public void setDepartment(Department department) {
        this.department = department;
    }
}
(1-2)Department 类
package com.demo.autowire;

public class Department {
    private String name;

    public String getName() {
        return name;
    }

    public void setName(String name) {
        this.name = name;
    }

}
(1-3)AutoWireBean.xml:
<?xml version="1.0" encoding="UTF-8"?>
<beans xmlns="http://www.springframework.org/schema/beans"
       xmlns:xsi="http://www.w3.org/2001/XMLSchema-instance"
       xsi:schemaLocation="http://www.springframework.org/schema/beans http://www.springframework.org/schema/beans/spring-beans.xsd">

    <bean id="employee" class="com.demo.autowire.Employee" autowire="byName">

    </bean>
    <bean id="department" class="com.demo.autowire.Department">
        <property name="name" value="技术部门"></property>
    </bean>

</beans>
(1-4)测试代码
import com.demo.autowire.Employee;
import org.junit.Test;
import org.springframework.context.ApplicationContext;
import org.springframework.context.support.ClassPathXmlApplicationContext;

public class AutoWireBeanTest {
    @Test
    public void test() {
        ApplicationContext context = new ClassPathXmlApplicationContext("AutoWireBean.xml");
        Employee employee = context.getBean("employee", Employee.class);
        System.out.println(employee);
        System.out.println(employee.getDepartment().getName());
    }
}
(2)输出结果

3、byType 示例
将 autowire = "byName" 改成 byType 即可。但是如果使用 byType,同一个类型就只能有 1 个 bean。
在实际开发中,更多情况下使用的是注解的方法来做到自动注入。
十、外部属性文件
当一个类中的属性非常的多的时候,使用 <property> 的方式进行注入,既麻烦又不好维护。对于一些固定的属性值,我们可以统一放到某个配置文件中,再用 xml 配置文件去读取相关信息。(比如数据库连接池使用的就是 properties 文件)
下面以数据库的直接配置和引用外部文件作比较为例。
1、直接配置数据库信息
下面用一个自定义的 Druid 类,包含一个数据库连接池属性,然后通过写死配置信息的方式注入 Druid 的数据库连接池。
需要用到 druid 和 jdbc,jdbc 根据自己使用的数据库引入依赖,导 jar 包或者 maven 都可以。
(1)配置 druid 连接池
<?xml version="1.0" encoding="UTF-8"?>
<beans xmlns="http://www.springframework.org/schema/beans"
       xmlns:xsi="http://www.w3.org/2001/XMLSchema-instance"
       xsi:schemaLocation="http://www.springframework.org/schema/beans http://www.springframework.org/schema/beans/spring-beans.xsd">

    <bean id="druid" class="com.demo.pojo.Druid">
        <property name="dataSource" ref="dataSource"></property>
    </bean>

    <bean id="dataSource" class="com.alibaba.druid.pool.DruidDataSource">
        <property name="driverClassName" value="org.postgresql.Driver"></property>
        <property name="url" value="jdbc:postgresql://localhost:5432/MyDatabase"></property>
        <property name="username" value="postgres"></property>
        <property name="password" value="123456"></property>
    </bean>


</beans>
(2)Druid 类(包含 DruidDataSource 属性)
package com.demo.pojo;

import com.alibaba.druid.pool.DruidDataSource;

public class Druid {
    private DruidDataSource dataSource;

    public void setDataSource(DruidDataSource dataSource) {
        this.dataSource = dataSource;
    }

    public DruidDataSource getDataSource() {
        return dataSource;
    }

}
(3)测试代码
import com.alibaba.druid.pool.DruidDataSource;
import com.demo.pojo.Druid;
import org.junit.Test;
import org.springframework.context.ApplicationContext;
import org.springframework.context.support.ClassPathXmlApplicationContext;

public class DruidTest {
    @Test
    public void test1() {
        ApplicationContext context = new ClassPathXmlApplicationContext("Druid.xml");
        Druid druid = context.getBean("druid", Druid.class);
        try {
            DruidDataSource druidDataSource = druid.getDataSource();
            System.out.println(druidDataSource.getConnection());
        } catch (Exception e) {
            e.printStackTrace();
        }

    }
}
(4)输出结果

2、引入外部属性文件配置
引入外部配置文件,只需要在上面的基础上修改 xml 配置文件即可:
- xml 文件要添加两个命名空间:util 和 context;
- property 的 value 属性值改用 EL 表达式的形式;
(1)修改 xml 文件
<?xml version="1.0" encoding="UTF-8"?>
<beans xmlns="http://www.springframework.org/schema/beans"
       xmlns:xsi="http://www.w3.org/2001/XMLSchema-instance"
       xmlns:util="http://www.springframework.org/schema/util"
       xmlns:context="http://www.springframework.org/schema/context"
       xsi:schemaLocation="http://www.springframework.org/schema/beans http://www.springframework.org/schema/beans/spring-beans.xsd
            http://www.springframework.org/schema/util http://www.springframework.org/schema/util/spring-util.xsd
            http://www.springframework.org/schema/context http://www.springframework.org/schema/context/spring-context.xsd">


    <context:property-placeholder location="druid.properties"/>

    <bean id="dataSource" class="com.alibaba.druid.pool.DruidDataSource">
        <property name="driverClassName" value="${prop.driverClassName}"></property>
        <property name="url" value="${prop.url}"></property>
        <property name="username" value="${prop.username}"></property>
        <property name="password" value="${prop.password}"></property>
    </bean>

    <bean id="druid" class="com.demo.pojo.Druid">
        <property name="dataSource" ref="dataSource"></property>
    </bean>


</beans>
(2)duird.properties
prop.url = jdbc:postgresql://localhost:5432/bookmarket
prop.username = postgres
prop.password = 123456
prop.driverClassName = org.postgresql.Driver
十一、基于注解方式的创建对象
1、什么是注解
注解是代码特殊标记,格式:@注解名称(属性名称=属性值, 属性名称=属性值..)
- 注解可以作用在类上面,方法上面,属性上面
- 使用注解目的:简化 xml 配置,减少 xml 代码的书写
2、为创建对象提供的注解;
- @Component
- @Service,一般用于 Service 层
- @Controller,一般用于 Web 层
- @Repository,一般用于 Dao 层(持久层)
上面四个注解功能是一样的,都可以用来创建 bean 实例,只是为了区分不同的层次而用不同的名称。
3、基于注解方式实现对象创建
(1)引入依赖 spring-aop-5.2.6.RELEASE

需要注意的是,此时 JDK 版本如果不兼容,就会报错:
- 17-21,建议使用 6.0 以上的版本;
- 8-16,建议使用 5.3 的版本,其中 16 最特殊,只能用 5.3 的版本;
(2)开启组件扫描,使得 spring 可以找到我们写的类
在 xml 配置文件中,添加 context 命名空间,然后写上:

(3)创建类,在类上面添加创建对象注解
@Component,包括另外几个注解,其中的 value 属性值,代表了 <bean> 中的 id 属性值。而如果没有显式地写出 value,那么默认值就是类名且首字母小写。
package com.demo.service.impl;

import com.demo.dao.UserDao;
import com.demo.service.UserService;
import org.springframework.stereotype.Component;

@Component(value = "userService")
public class UserServiceImpl implements UserService {
    private UserDao userDao;

    public UserDao getUserDao() {
        return userDao;
    }

    public void setUserDao(UserDao userDao) {
        this.userDao = userDao;
    }

    @Override
    public void func() {
        System.out.println("调用 UserService 的 func");
        userDao.func();
    }
}
(4)测试代码
import com.demo.service.UserService;
import com.demo.service.impl.UserServiceImpl;
import org.junit.Test;
import org.springframework.context.ApplicationContext;
import org.springframework.context.support.ClassPathXmlApplicationContext;

public class AopBeanTest {
    @Test
    public void test() {
        ApplicationContext context = new ClassPathXmlApplicationContext("AopBean.xml");
        UserService userService = context.getBean("userService", UserServiceImpl.class);
        userService.func();
    }

}

4、组件扫描的配置
前面我们知道,对于一个 base-package,Spring 会扫描这个目录下的所有 class。而通过添加其他配置,可以规定哪些需要扫描、哪些不需要扫描。
(1)use-default-filters
当它的值为 false 时,表示不使用默认的 filter,而使用自己配置的 filter。
(2)如何自己配置 filter
(2-1)设置需要扫描哪些内容
- 在组件扫描中,设置 use-default-filters="false",然后嵌套 context:include-filter。
(2-2)设置不需要扫描哪些内容,而是扫描其他的所有内容
- 在组件扫描中,不需要设置 use-default-filters="false",直接嵌套 context:exclude-filter。
- (因为还要扫描其他所有内容,所以不用设置 use-default-filters="false")
(3)内容如何规定
在 context:include-filter 和 context:exclude-filter 中,有两个属性配合使用:
<context:include-filter type="annotation" expression="org.springframework.stereotype.Controller"/><context:exclude-filter type="annotation" expression="org.springframework.stereotype.Controller"/>表示目标内容就是带有注解 @Controller 的类。
十二、基于注解方式的属性注入
1、@Autowired(针对 Object 类型)
@Autowired:根据属性类型进行自动装配。
其缺点在于,如果一个接口有多个实现类(比如有 DaoImpl1、DaoImpl2),那么就无法得知在 UserServiceImpl 中的属性 UserDao,具体应该被注入哪一个实现类,因此 @Autowired 只适合仅有一种实现类的情况。
(1)创建 service 和 dao 对象,在 service 和 dao 的 Impl 类中添加创建对象注解
Service 添加 @Service,Dao添加 @Repository。
(2)在 service 类添加 dao 类型属性,在属性上面使用注解
注意:不需要添加 set 方法,Spring 已经封装好 set 方法。
(3)代码
(3-1)UserDaoImpl 类
package com.demo.dao.impl;

import com.demo.dao.UserDao;
import org.springframework.stereotype.Repository;

@Repository
public class UserDaoImpl implements UserDao {
    @Override
    public void func() {
        System.out.println("调用 UserDao 的 func");
    }
}
(3-2)UserServiceImpl 类
package com.demo.service.impl;

import com.demo.dao.UserDao;
import com.demo.service.UserService;
import org.springframework.beans.factory.annotation.Autowired;
import org.springframework.stereotype.Service;

@Service
public class UserServiceImpl implements UserService {
    @Autowired
    private UserDao userDao;

    @Override
    public void func() {
        System.out.println("调用 UserService 的 func");
        userDao.func();
    }
}
(3-3)AnnotationBean.xml
<?xml version="1.0" encoding="UTF-8"?>
<beans xmlns="http://www.springframework.org/schema/beans"
       xmlns:xsi="http://www.w3.org/2001/XMLSchema-instance"
       xmlns:context="http://www.springframework.org/schema/context"
       xsi:schemaLocation="http://www.springframework.org/schema/beans http://www.springframework.org/schema/beans/spring-beans.xsd
                           http://www.springframework.org/schema/context http://www.springframework.org/schema/context/spring-context.xsd">

    <context:component-scan base-package="com.demo" use-default-filters="false">
        <context:include-filter type="annotation" expression="org.springframework.stereotype.Repository"/>
        <context:include-filter type="annotation" expression="org.springframework.stereotype.Service"/>
    </context:component-scan>

</beans>
(3-4)测试代码
import com.demo.service.UserService;
import org.junit.Test;
import org.springframework.context.ApplicationContext;
import org.springframework.context.support.ClassPathXmlApplicationContext;

public class AnnotationBeanTest {
    @Test
    public void test() {
        ApplicationContext context = new ClassPathXmlApplicationContext("AnnotationBean.xml");
        UserService userService = context.getBean("userServiceImpl", UserService.class);
        userService.func();
    }

}
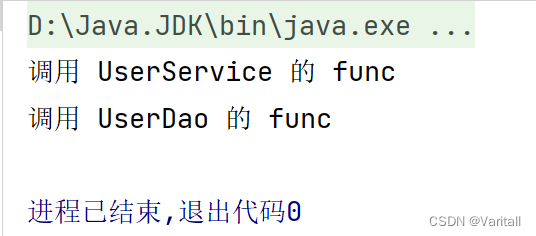
(4)输出结果
2、@Qualifier(针对 Object 类型)
@Qualifier:根据属性名称进行自动装配,并且需要跟 @Autowired 一起使用。
当有多个实现类,比如:Impl1、Impl2,这时候 @Autowired 配合上 @Qualifier(value = "Impl1"),就可以明确注入 Impl1 这个实现类。
简单来说,就是 @Autowired 确定了接口,Qualifier 确定了具体的实现类。
(1)在 AnnotationBean.xml 和 测试代码 不变的情况下,修改以下内容
(1-1)UserDaoImpl1 类
package com.demo.dao.impl;

import com.demo.dao.UserDao;
import org.springframework.stereotype.Repository;

@Repository(value = "userDaoImpl1")
public class UserDaoImpl1 implements UserDao {
    @Override
    public void func() {
        System.out.println("调用 UserDaoImpl1 的 func");
    }
}
(1-2)UserDaoImpl2 类
package com.demo.dao.impl;

import com.demo.dao.UserDao;
import org.springframework.stereotype.Repository;

@Repository(value = "userDaoImpl2")
public class UserDaoImpl2 implements UserDao {
    @Override
    public void func() {
        System.out.println("调用 UserDaoImpl2 的 func");
    }
}
(1-3)UserServiceImpl 类
package com.demo.service.impl;

import com.demo.dao.UserDao;
import com.demo.service.UserService;
import org.springframework.beans.factory.annotation.Autowired;
import org.springframework.beans.factory.annotation.Qualifier;
import org.springframework.stereotype.Service;

@Service
public class UserServiceImpl implements UserService {
    @Autowired
    @Qualifier(value = "userDaoImpl2")
    private UserDao userDao;

    @Override
    public void func() {
        System.out.println("调用 UserService 的 func");
        userDao.func();
    }
}
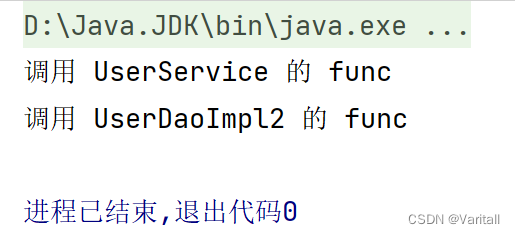
(2)输出结果
3、@Resource(针对 Object 类型)
@Resource:可以根据类型注入,也可以根据名称注入。
- @Resource:根据类型注入;
- @Resource(name = "userDaoImpl1"):根据名称注入
需要注意的是,@Resource 是 javax 提供的注解,不是 Spring 官方提供的,因此建议还是使用 @Autowired 和 @Qualifier。
(1)修改 UserServiceImpl 类
package com.demo.service.impl;

import com.demo.dao.UserDao;
import com.demo.service.UserService;
import org.springframework.stereotype.Service;

import javax.annotation.Resource;

@Service
public class UserServiceImpl implements UserService {
    @Resource(name = "userDaoImpl2")
    private UserDao userDao;

    @Override
    public void func() {
        System.out.println("调用 UserService 的 func");
        userDao.func();
    }
}
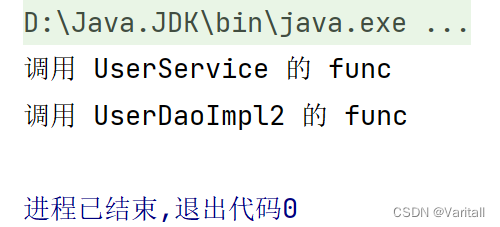
(2)输出结果
4、@Value(针对普通类型)
@Value:注入普通类型属性。
- @Value(value = "MyValue"),表示给属性注入值为 MyValue。
十三、完全注解开发
不需要使用 xml 文件去配置,仅使用注解,就可以实现创建对象和属性注入。
(1)创建配置类,替代 xml 配置文件:
package com.demo.config;

import org.springframework.context.annotation.ComponentScan;
import org.springframework.context.annotation.Configuration;

@Configuration // 作为配置类,代替 xml 配置文件
@ComponentScan(basePackages = {"com.demo"})
public class SpringConfig {

}
(2)测试代码
import com.demo.config.SpringConfig;
import com.demo.service.UserService;
import org.junit.Test;
import org.springframework.context.ApplicationContext;
import org.springframework.context.annotation.AnnotationConfigApplicationContext;

public class AnnotationConfigTest {
    @Test
    public void test() {
        ApplicationContext context = new AnnotationConfigApplicationContext(SpringConfig.class);
        UserService userService = context.getBean("userServiceImpl", UserService.class);
        userService.func();
    }

}
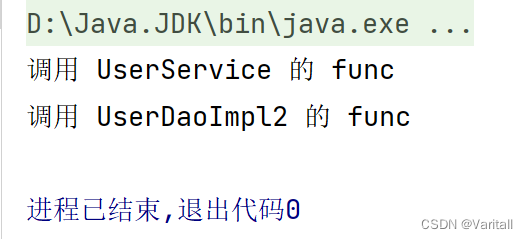
(3)输出结果


 217
217


 被折叠的 条评论
为什么被折叠?
被折叠的 条评论
为什么被折叠?
 到【灌水乐园】发言


