


前言
之前在服务器搭建的项目都是用http的,但是一般来说都要换成https;因为https比http更加安全,数据不再是明文传输,更不容易被攻击/被第三方广告光顾;所以就有了将http换成https的想法。
第一个需要升级的项目是我使用nuxt3重构的博客项目,期间遇到了诸多问题,所以想记录下踩坑过程
1. 使用PM2搭建
安装PM2

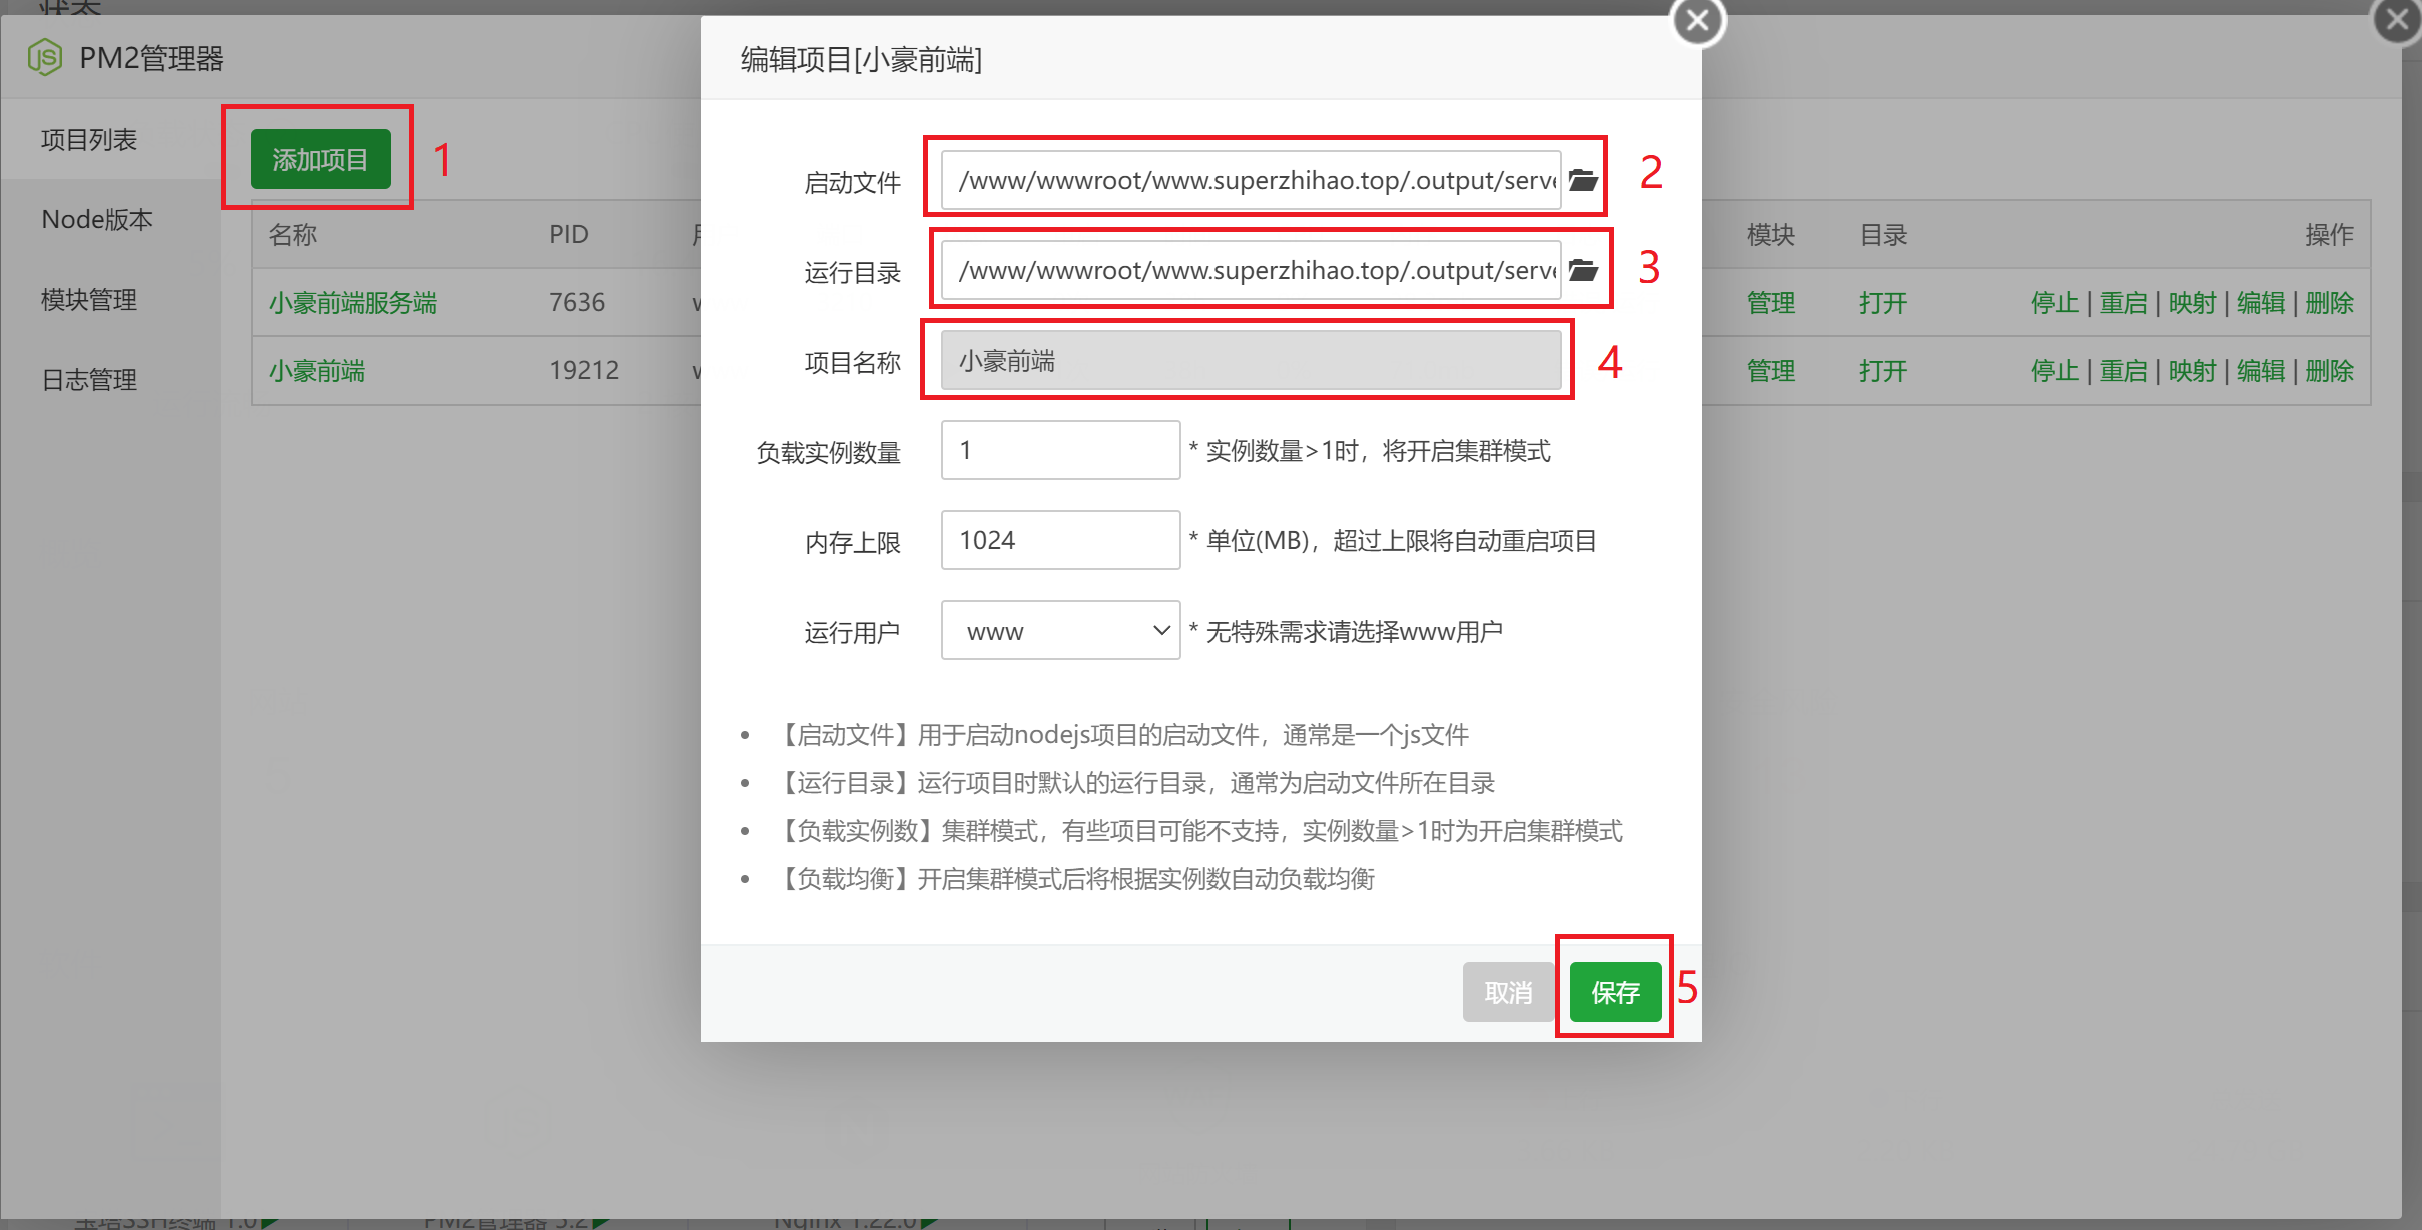
通过PM2添加node项目
启动文件选择.output/server/index.mjs
配置端口
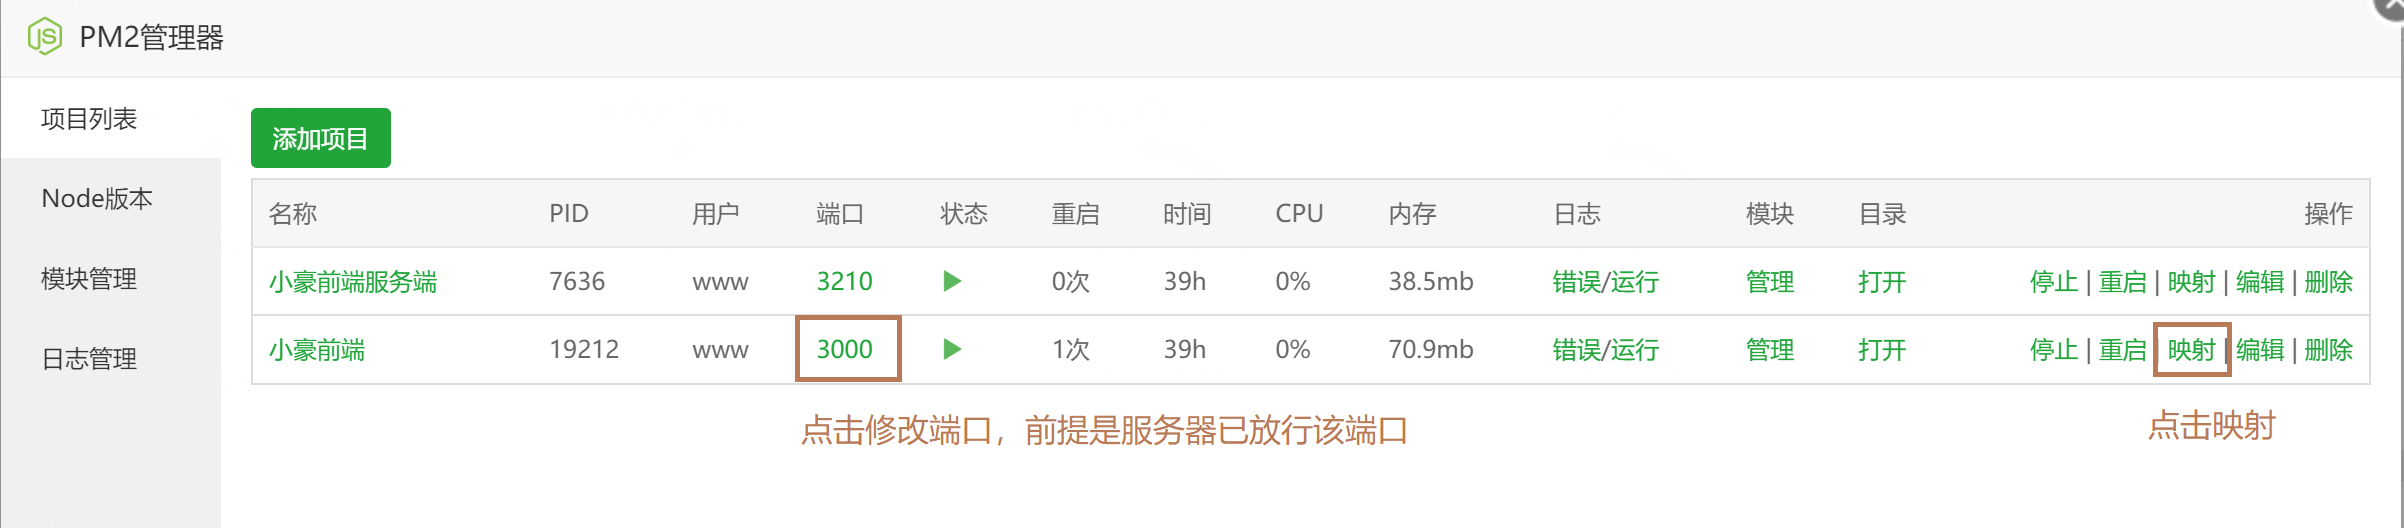
创建项目映射
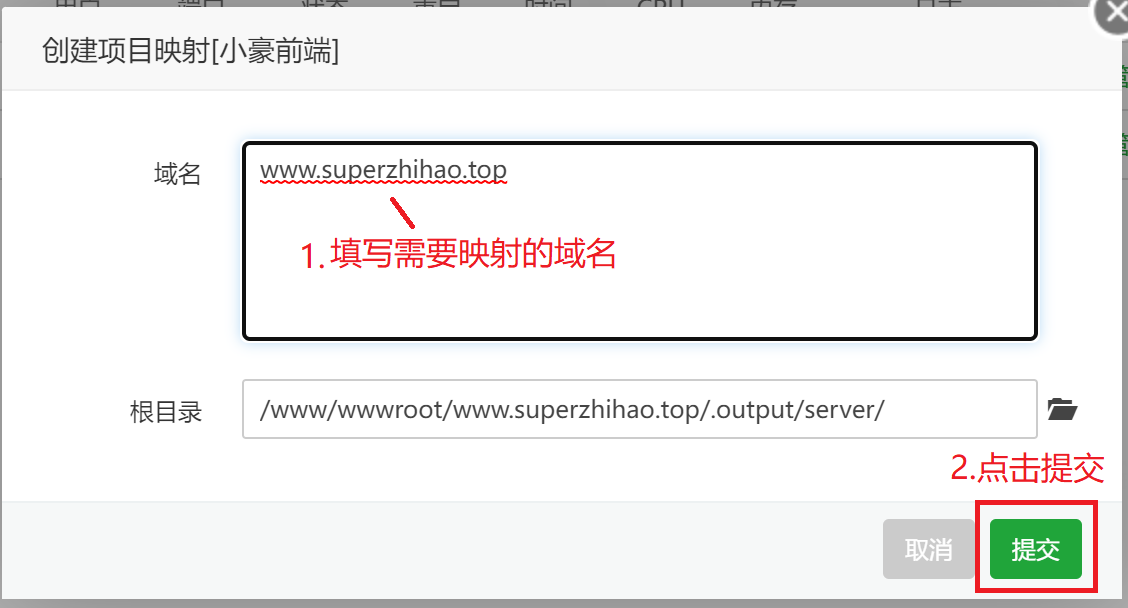
映射创建成功后,在宝塔的网站面板(php项目)会出现这个项目
2. 配置SSL(https)
进入php项目面板
点击宝塔菜单-网站-php项目

点击设置

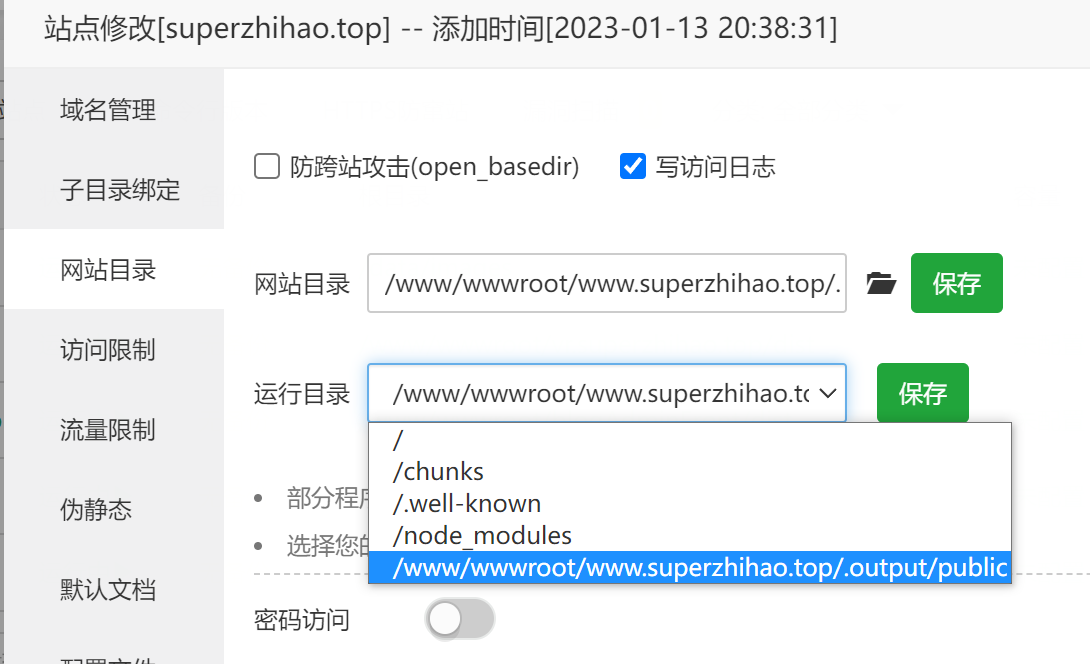
选择Nuxt3运行目录
选择运行目录.output/server/public
使用Nuxt3搭建的项目上线后,首页加载的内容会从public文件取,所以一定要记得改运行目录!
点击配置文件-配置反向代理
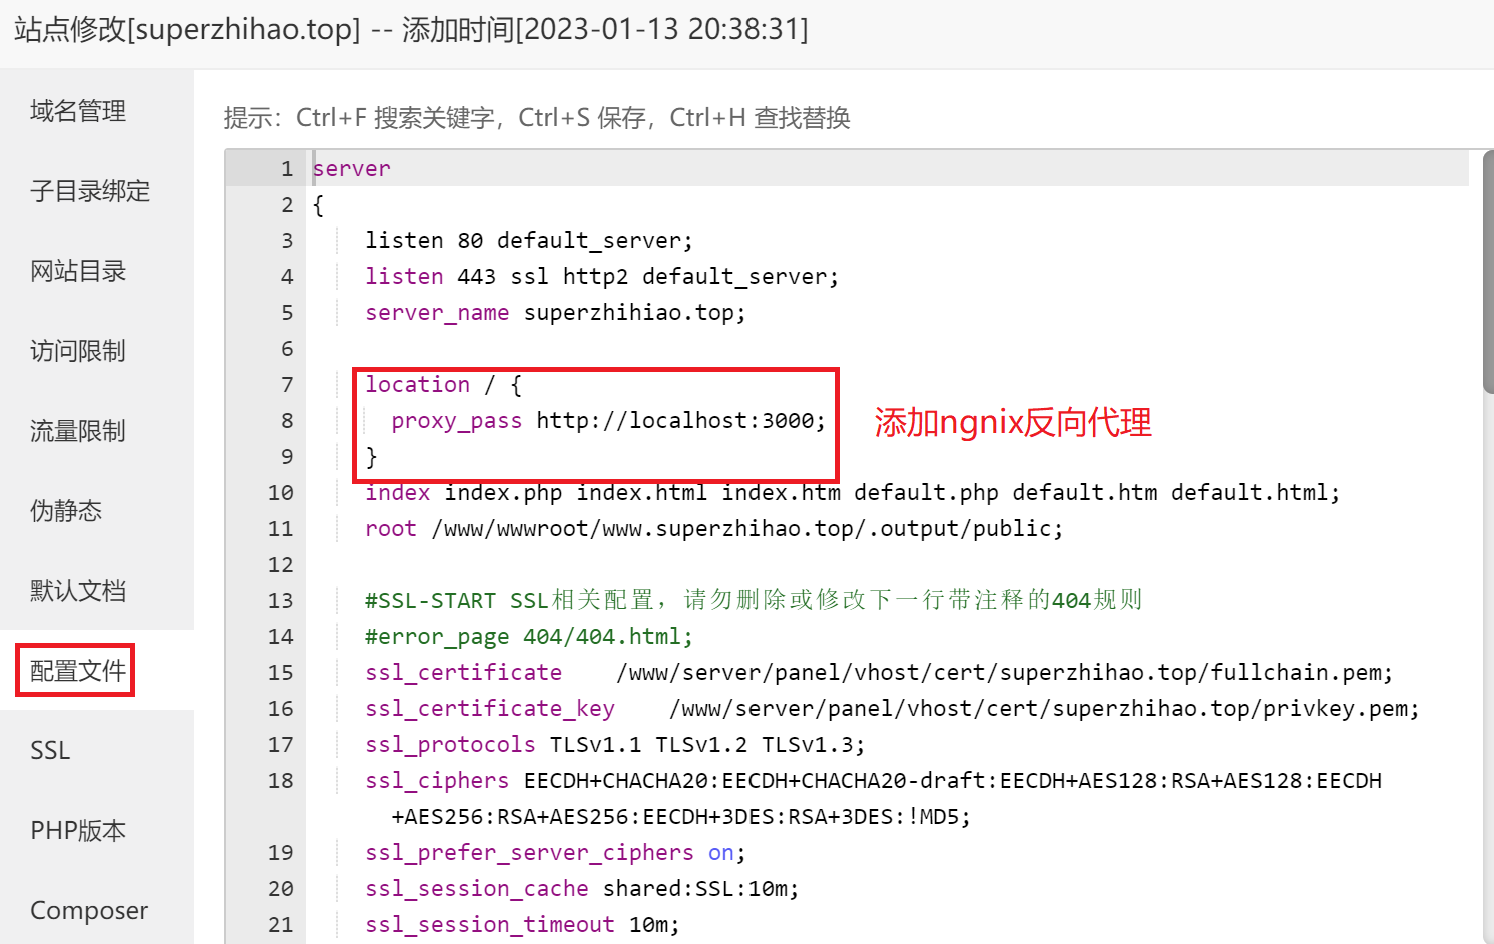
配置ngnix反向代理
    location / {
      proxy_pass http://localhost:3000;
    }
此处的3000端口与PM2项目端口要相同
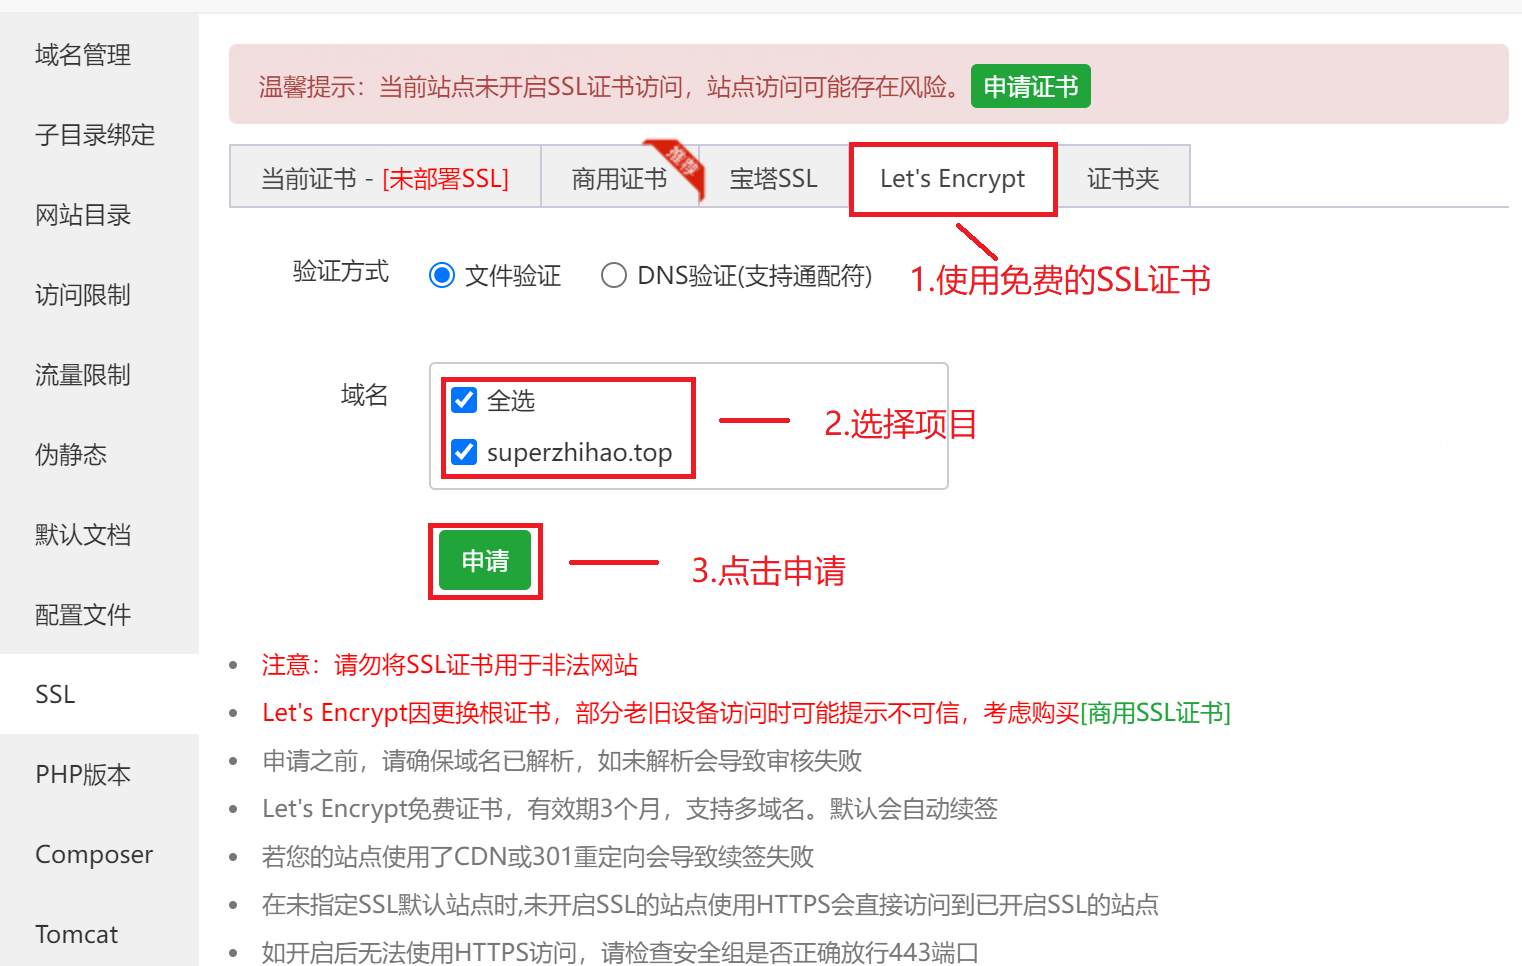
选择SSL进行配置

申请SSL证书
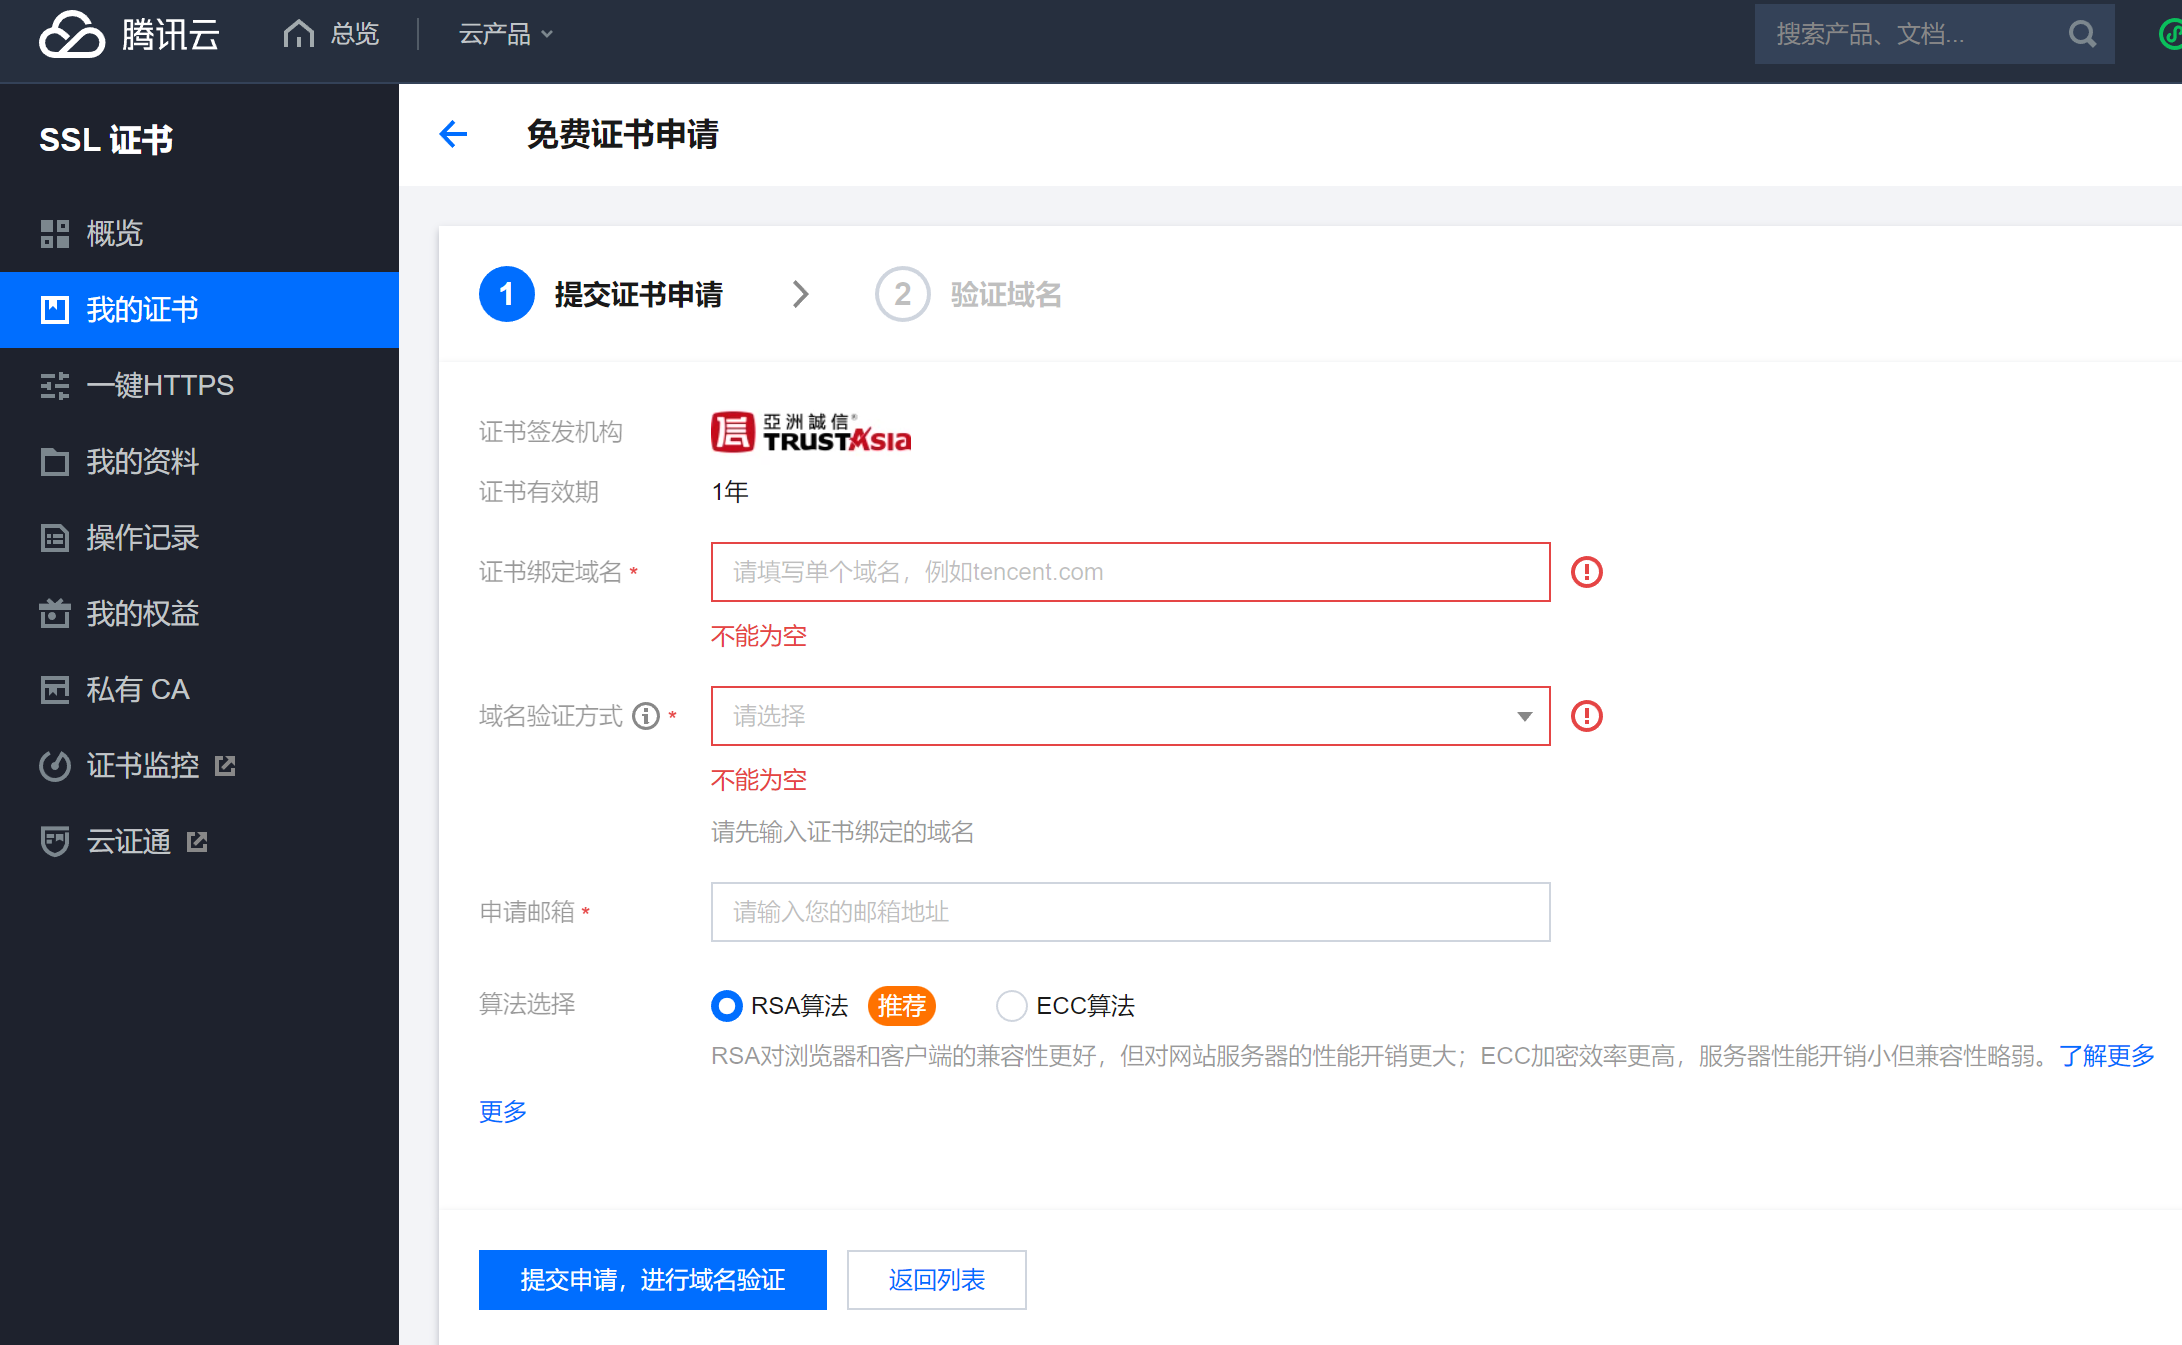
一级域名推荐使用云服务器提供SSL证书
如果一级域名使用上述的Let's Encrypt里的证书,同时二级域名也使用同类证书,会导致一级域名证书失效。(别问我怎么知道的,因为这个捣鼓了很久)
腾讯云的可以在这个地址申请[ https://console.cloud.tencent.com/ssl/dsc/apply](https://console.cloud.tencent.com/ssl/dsc/apply)
3.https网址测试
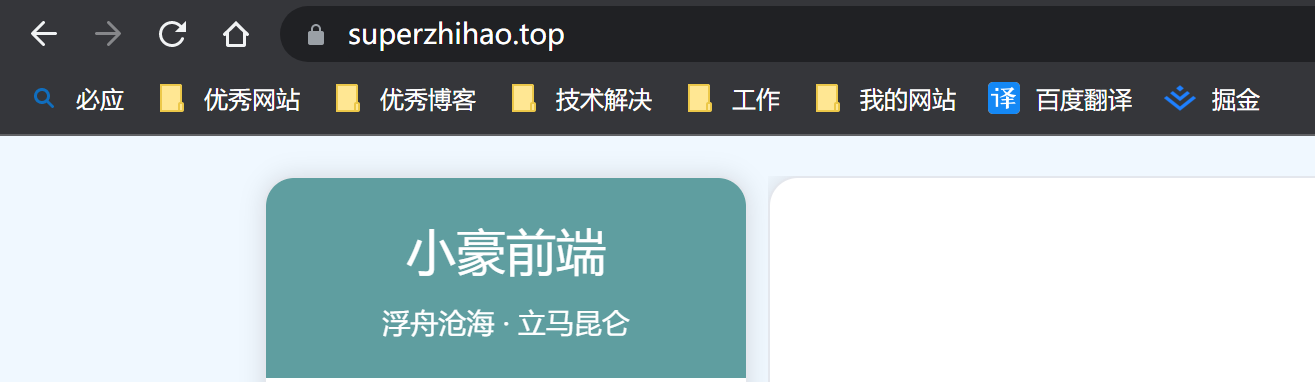
成功实现https项目上线,完结撒花


 1844
1844


 被折叠的 条评论
为什么被折叠?
被折叠的 条评论
为什么被折叠?
 到【灌水乐园】发言


