


UITabBarController(标签视图控制器)
三层结构
tabBarContentView
customContent
tabBar
重要属性
| 属性 | 含义 |
|---|---|
| viewController | 现实的视图控制器 |
| tabBar | 标签栏 |
| delegate | 代理 |
| selectedIndex | 选中某个tabBarItem |
配置UITabBar
tabBar
tabBar是UITabBar对象,包含多个UITabBarItem,每一个tabBarItem对应一个viewController。tabBar高度49.
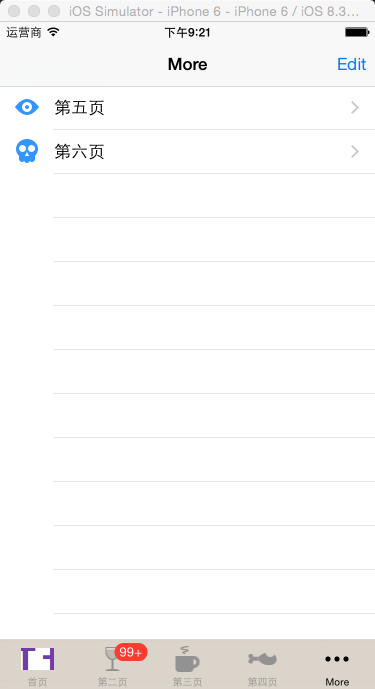
当tabBarItem超过5个时,系统会自动增加一个更多按钮,点击更多按钮,没有在底部出现的那些按钮会以列表形式显示出来
tabBar属性:tintColor、barTintColor、图像设置
UITabBarItem
可以设置title、image、badgeValue
可以使用系统样式创建tabBarItem
改变tabbar的风格和自定义UITabBarItem并设置图片
与UINavigationController的区别
UITabBarController的viewControllers都是并列的,而UINavigationController的则是层次性的
三大视图控制器的综合使用
UITabBarController、UINavigationController、UITableViewController通常都是组合出现,这种布局方式特别常见,一定要熟练应用
UITabBarController可以嵌套UINavigationController
UINavigationController也可以嵌套UITabBarController
例题
创建新工程,新建一个tabBarController作为window的根标签控制器
    // 创建一个UITabBarController的子类
    // 把UITabBarController 作为window的根视图控制器 显示出来
    RootTabBarController *rootTabBarC = [[RootTabBarController alloc] init];
    self.window.rootViewController = rootTabBarC;
    [rootTabBarC release];
创建6个视图控制器,在tabBarController中编辑
   // 创建控制器
    OneViewController *oneVC = [[OneViewController alloc] init];
    // 显示按钮标题(tabBarItem)
    oneVC.tabBarItem.title = @"首页";
    // 设置图片
    // 显示图片原有的颜色
    // UIImageRenderingModeAlwaysOriginal
    // 按原始的图片进行绘制(绘制出来是原来的颜色)
    oneVC.tabBarItem.image = [[UIImage imageNamed:@"11"] imageWithRenderingMode:(UIImageRenderingModeAlwaysOriginal)];
    // 设置选中图片
    oneVC.tabBarItem.selectedImage = [UIImage imageNamed:@"103-map"];
    // 创建导航控制器
    UINavigationController *oneNav = [[UINavigationController alloc] initWithRootViewController:oneVC];

    TwoViewController *twoVC = [[TwoViewController alloc] init];
    twoVC.tabBarItem.title = @"第二页";
    twoVC.tabBarItem.image = [UIImage imageNamed:@"87-wineglass"];
    UINavigationController *twoNav = [[UINavigationController alloc] initWithRootViewController:twoVC];
    // 设置tabBarItem上的 红色提示按钮
    twoVC.tabBarItem.badgeValue = @"99+";

    ThreeViewController *threeVC = [[ThreeViewController alloc] init];
    threeVC.tabBarItem.title = @"第三页";
    threeVC.tabBarItem.image = [UIImage imageNamed:@"34-coffee"];
    UINavigationController *threeNav = [[UINavigationController alloc] initWithRootViewController:threeVC];

    FourViewController *fourVC = [[FourViewController alloc] init];
    fourVC.tabBarItem.title = @"第四页";
    fourVC.tabBarItem.image = [UIImage imageNamed:@"109-chicken"];
    UINavigationController *fourNav = [[UINavigationController alloc] initWithRootViewController:fourVC];

    FiveViewController *fiveVC = [[FiveViewController alloc] init];
    fiveVC.tabBarItem.title = @"第五页";
    fiveVC.tabBarItem.image = [UIImage imageNamed:@"12-eye"];
    UINavigationController *fiveNav = [[UINavigationController alloc] initWithRootViewController:fiveVC];

    SixViewController *sixVC = [[SixViewController alloc] init];
    sixVC.tabBarItem.title = @"第六页";
    sixVC.tabBarItem.image = [UIImage imageNamed:@"21-skull"];
    UINavigationController *sixNav = [[UINavigationController alloc] initWithRootViewController:sixVC];

    // 显示到tabBarController
    // 需要添加到 viewControllers的数组中
    self.viewControllers = @[oneNav, twoNav, threeNav, fourNav, fiveNav, sixNav];
设置基本属性
   // 设置bar的颜色
    self.tabBar.barTintColor = [UIColor cyanColor];
   // 设置barTint的颜色
    self.tabBar.tintColor = [UIColor blackColor];
   // 设置bar的背景图片
   // tabBar的高度 49
    self.tabBar.backgroundImage = [UIImage imageNamed:@"tabBar"];
   // 设置默认选中的页面
    self.selectedIndex = 2;
   // 设置代理
    self.delegate = self;
得到如下界面:
实现代理方法
- (BOOL)tabBarController:(UITabBarController *)tabBarController shouldSelectViewController:(UIViewController *)viewController
{
    // 可以指定哪个控制器不让点击
    //先取出不让点的控制器
    UINavigationController *navC = self.viewControllers[3];
    // 如果你选中的控制器是你不想让用户点击的
    // 那么返回NO
    if (navC == viewController) {
        return NO;
    } else {
       return YES;
    }
}

// 选中页面时触发的方法
- (void)tabBarController:(UITabBarController *)tabBarController didSelectViewController:(UIViewController *)viewController
{
  // 打印选中的索引
    NSLog(@"%ld", self.selectedIndex);
    // 选中时把红点去掉
    viewController.tabBarItem.badgeValue = nil;
}
  // 控制more的代理方法
- (void)tabBarController:(UITabBarController *)tabBarController willBeginCustomizingViewControllers:(NSArray *)viewControllers
{
    NSLog(@"将要开始编辑more");
}

- (void)tabBarController:(UITabBarController *)tabBarController willEndCustomizingViewControllers:(NSArray *)viewControllers changed:(BOOL)changed
{
    NSLog(@"将要结束编辑more");
}

- (void)tabBarController:(UITabBarController *)tabBarController didEndCustomizingViewControllers:(NSArray *)viewControllers changed:(BOOL)changed
{
    NSLog(@"已经编辑more");
block
block是匿名函数,能够实现函数回调功能。
用于页面之间通信,同时可以进行传值。
内存问题
定义属性接收block,必须使用copy。retain无效,即retain和assign会造成野指针问题。
block在某个方法中定义时存储在栈区,在另一个类 中使用需要进行copy,存储在堆区。
当不使用block时需要销毁,Block_release()
  // block作为属性 copy设置 set方法内部实现
- (void)setBlock:(MTTBlock)block
{
    if (_block != block) {
        Block_release(_block);
        _block = Block_copy(block);
    }
}
循环引用
在block实现部分,不能直接使用实例变量、self调用属性,因为block会造成self引用计数加1,最终导致循环应用的问题。
使用__block解决循环引用问题。
例题
基本操作
RootViewController *rootVC = [[RootViewController alloc] init];
    UINavigationController *navC = [[UINavigationController alloc] initWithRootViewController:rootVC];
    self.window.rootViewController = navC;
    [navC release];
    [rootVC release];
在RootViewController中创建UIBarButtonItem跳转到另一个视图控制器
- (void)viewDidLoad {
[super viewDidLoad];
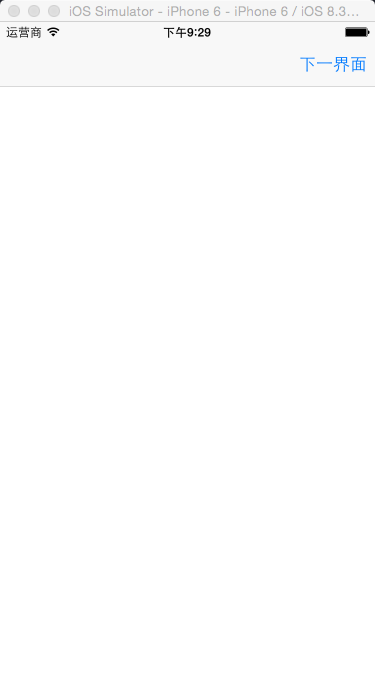
UIBarButtonItem *rightButton = [[UIBarButtonItem alloc] initWithTitle:@"下一界面" style:(UIBarButtonItemStylePlain) target:self action:@selector(rightButtonAction:)];
self.navigationItem.rightBarButtonItem = rightButton;
[rightButton release];
}
得到界面1:
再创建一个是图控制器,创建一个UIBarButtonItem
- (void)viewDidLoad {
[super viewDidLoad];
[self addSubView];
}
- (void)addSubView
{
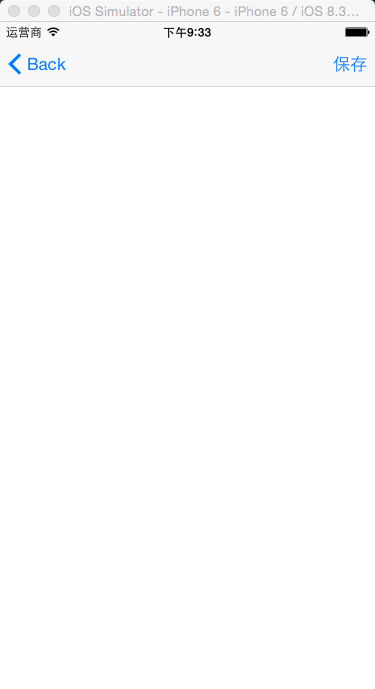
UIBarButtonItem *rightButton = [[UIBarButtonItem alloc] initWithTitle:@"保存" style:(UIBarButtonItemStylePlain) target:self action:@selector(rightButtonAction:)];
self.navigationItem.rightBarButtonItem = rightButton;
[rightButton release];
}得到界面2:
通过点击界面2的保存按钮传值到界面1
在界面2中声明一个block属性,并取别名
// 无返回值 有一个字符串参数
typedef void(^PassValue)(NSString *str);

@property (nonatomic, copy) PassValue myBlock;
在按钮的点击事件中调用
// 点击按钮传值
- (void)rightButtonAction:(UIButton *)rightButton
{
    // 调用block进行传值
    self.myBlock(@"nini");
    [self.navigationController popToRootViewControllerAnimated:YES];

}
在第一个界面的按钮点击事件中实现
- (void)rightButtonAction:(UIButton *)rightButton
{
    SecondViewController *secondVC = [[SecondViewController alloc] init];
    // 实现block接收传回来的值
    secondVC.myBlock = ^ void(NSString *str){
        self.navigationItem.title = str;
        NSLog(@"没传过来?");
    };
    [self.navigationController pushViewController:secondVC animated:YES];
    [secondVC release];
}
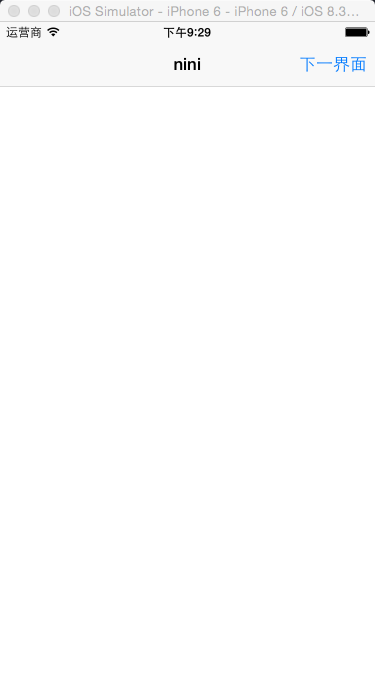
这样就可以把值从后往前传了


 447
447

 被折叠的 条评论
为什么被折叠?
被折叠的 条评论
为什么被折叠?
 到【灌水乐园】发言


