


如果在项目中要用到多种不同的tableViewCell,可以使用工厂模式。
主要思路是,Client 传递参数给工厂,工厂通过参数判断到底生产什么产品。主要利用面向对象的 多态的特性,父类指针指向子类对象。
废话不多说,一起看代码吧。
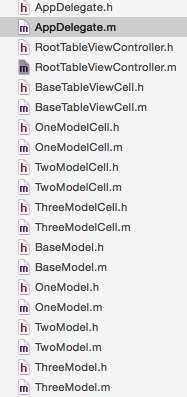
新建工程,新建一个RootTableViewController,一个BaseTableCell,一个BaseModel。新建三种cell,都继承于BaseTableCell。新建三种model,继承于BaseModel。创建完如下图:
将RootTableViewController作为window的根视图控制器
 RootTableViewController *rootVC = [[RootTableViewController alloc] initWithStyle:(UITableViewStylePlain)];
    UINavigationController *navC = [[UINavigationController alloc] initWithRootViewController:rootVC];
    self.window.rootViewController = navC;
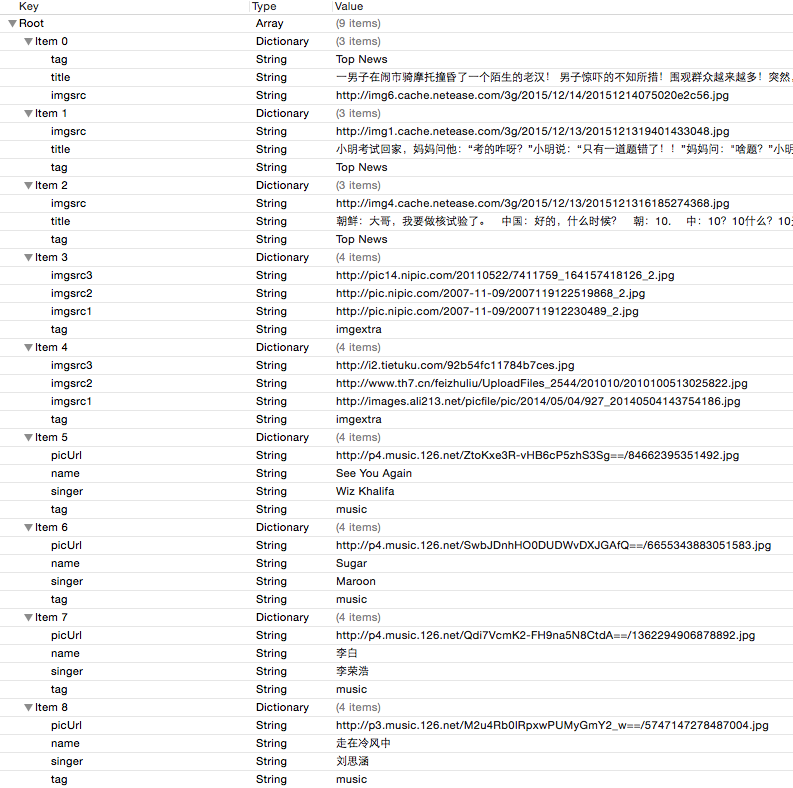
- 根据数据填写model
// OneModel.h
@property (nonatomic, copy) NSString *title;
@property (nonatomic, copy) NSString *imgsrc;

// TwoModel.h
@property (nonatomic, copy) NSString *imgsrc1;
@property (nonatomic, copy) NSString *imgsrc2;
@property (nonatomic, copy) NSString *imgsrc3;

// ThreeModel.h
@property (nonatomic, copy) NSString *name;
@property (nonatomic, copy) NSString *picUrl;
@property (nonatomic, copy) NSString *singer;- 根据model完成cell
// OneModelCell.h
@property (nonatomic, strong) UIImageView *imageV;
@property (nonatomic, strong) UILabel *titleLabel;

// TwoModelCell.h
@property (nonatomic, strong) UIImageView *imageV1;
@property (nonatomic, strong) UIImageView *imageV2;
@property (nonatomic, strong) UIImageView *imageV3;

// ThreeModelCell.h
@property (nonatomic, strong) UIImageView *imageV;
@property (nonatomic, strong) UILabel *songNameLabel;
@property (nonatomic, strong) UILabel *singerLabel;
- BaseTableViewCell.h中
// 在父类中申明出一个BaseModel对象,在其子类里重写set方法,在set方法内部去做赋值操作
@property (nonatomic, strong) BaseModel *baseModel;

// 根据不同类型的model创建出来不同的cell
+ (instancetype)initWithModel:(BaseModel *)model;- BaseTableViewCell.m中实现方法
+ (instancetype)initWithModel:(BaseModel *)model
{
    // 根据我们的OC函数获取我们的model类名并将其转化为OC字符串
    NSString *modelName = [NSString stringWithUTF8String:object_getClassName(model)];

    // 使用model的类名拼接一个“Cell”来获取到我们的Cell类名
    NSString *cellName = [modelName stringByAppendingString:@"Cell"];

    // 根据我们所提供的cellName来获取其对应的“cell子类”初始化一个cell对象返回给我们的父类对象
    // 唯一标识符可以使用我们所提供的model来给予不同cell所对应的标识来重用
    BaseTableViewCell *cell = [[NSClassFromString(cellName) alloc] initWithStyle:(UITableViewCellStyleDefault) reuseIdentifier:modelName];
    return cell;
}
- BaseModel.h中
+ (instancetype)initWithDictionary:(NSDictionary *)dictionary;- BaseModel.m中
// 根据字典内提供的数据分别创建出对应的model来获取数据
+ (instancetype)initWithDictionary:(NSDictionary *)dictionary
{
    // 先使用当前类(父类)创建出model对象
    BaseModel *model = nil;

    // 根据字典中key对应的数据初始化不同的子类对象并将其返回给我们的父类
    if ([dictionary[@"tag"] isEqualToString:@"Top News"]) {
        model = [[OneModel alloc] init];
    } else if ([dictionary[@"tag"] isEqualToString:@"imgextra"]){
        model = [[TwoModel alloc] init];
    } else if([dictionary[@"tag"] isEqualToString:@"music"]){
        model = [[ThreeModel alloc] init];
    }
    [model setValuesForKeysWithDictionary:dictionary];
    return model;
}
- 在三种cell中重写初始化方法,实现父类方法给model赋值
// OneModel
- (instancetype)initWithStyle:(UITableViewCellStyle)style reuseIdentifier:(NSString *)reuseIdentifier
{
    self = [super initWithStyle:style reuseIdentifier:reuseIdentifier];
    if (self) {

        self.imageV = [[UIImageView alloc]initWithFrame:CGRectMake(10, 10, [UIScreen mainScreen].bounds.size.width - 20, 120)];
        [self.contentView addSubview:self.imageV];

        self.titleLabel = [[UILabel alloc]initWithFrame:CGRectMake(10, 135, [UIScreen mainScreen].bounds.size.width - 20, 40)];
        [self.contentView addSubview:self.titleLabel];
    }
    return self;
}

- (void)setBaseModel:(BaseModel *)baseModel
{
    OneModel *model = (OneModel *)baseModel;
    self.titleLabel.text = model.title;
    [self.imageV sd_setImageWithURL:[NSURL URLWithString:model.imgsrc]];
}

// TwoModel
- (instancetype)initWithStyle:(UITableViewCellStyle)style reuseIdentifier:(NSString *)reuseIdentifier
{

    self = [super initWithStyle:style reuseIdentifier:reuseIdentifier];
    if (self) {
        self.imageV1 = [[UIImageView alloc]initWithFrame:CGRectMake(10, 0, (kWidth - 20) / 3, 80)];
        self.imageV2 = [[UIImageView alloc]initWithFrame:CGRectMake(10 +  (kWidth - 20) / 3, 0, (kWidth - 20) / 3, 80)];
        self.imageV3 = [[UIImageView alloc]initWithFrame:CGRectMake(10 + (kWidth - 20) / 3 * 2, 0, (kWidth - 20) / 3, 80)];
        [self.contentView addSubview:self.imageV1];
        [self.contentView addSubview:self.imageV2];
        [self.contentView addSubview:self.imageV3];

    }
    return self;
}

- (void)setBaseModel:(BaseModel *)baseModel
{
    TwoModel *model = (TwoModel *)baseModel;
    [self.imageV1 sd_setImageWithURL:[NSURL URLWithString:model.imgsrc1]];
    [self.imageV2 sd_setImageWithURL:[NSURL URLWithString:model.imgsrc2]];
    [self.imageV3 sd_setImageWithURL:[NSURL URLWithString:model.imgsrc3]];
}

// ThreeModel
- (instancetype)initWithStyle:(UITableViewCellStyle)style reuseIdentifier:(NSString *)reuseIdentifier
{
    self = [super initWithStyle:style reuseIdentifier:reuseIdentifier];
    if (self) {
        self.imageV = [[UIImageView alloc]initWithFrame:CGRectMake(10, 10, 55, 55)];
        [self.contentView addSubview:self.imageV];

        self.songNameLabel = [[UILabel alloc]initWithFrame:CGRectMake(120, 10, 70, 35)];
        [self.contentView addSubview:self.songNameLabel];

        self.singerLabel = [[UILabel alloc]initWithFrame:CGRectMake(120, 90, 70, 30)];
        [self.contentView addSubview:self.singerLabel];
    }
    return self;
}

- (void)setBaseModel:(BaseModel *)baseModel
{
    ThreeModel *model = (ThreeModel *)baseModel;
    [self.imageV sd_setImageWithURL:[NSURL URLWithString:model.picUrl]];
    self.songNameLabel.text = model.name;
    self.singerLabel.text = model.singer;
}
- RootTableViewController.h中,解析数据,实现tableView的代理方法
- (void)setUpData
{
    NSString *path = [[NSBundle mainBundle] pathForResource:@"data" ofType:@"plist"];
    NSArray *arr = [NSArray arrayWithContentsOfFile:path];
    for (NSDictionary *dic in arr) {
        BaseModel *model = [BaseModel initWithDictionary:dic];
        // 将不同子类创建出的model对象添加到我们的数组当中
        [_dataArr addObject:model];
    }
}


- (NSInteger)tableView:(UITableView *)tableView numberOfRowsInSection:(NSInteger)section
{
    return _dataArr.count;
}

- (UITableViewCell *)tableView:(UITableView *)tableView cellForRowAtIndexPath:(NSIndexPath *)indexPath
{
    // 根据我们的indexPath.row获取我们对应的model
    BaseModel *baseModel = [_dataArr objectAtIndex:indexPath.row];

    // 根据取出来的model获取其对应的类名
    NSString *modelName = [NSString stringWithUTF8String:object_getClassName(baseModel)];

    // 根据不同的唯一标识重用不同的cell
    BaseTableViewCell *cell = [tableView dequeueReusableCellWithIdentifier:modelName];

    // 如果cell不存在
    if (cell == nil) {
        // 根据我们每行提供的model创建出对应的cell
        // 根据不同需求生产不同的产品
        cell = [BaseTableViewCell initWithModel:baseModel];
    }
    [cell setBaseModel:baseModel];
    return cell;
}
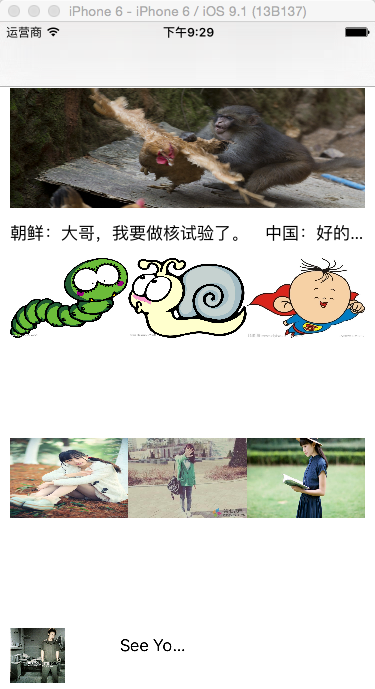
- 最终效果


 376
376

 被折叠的 条评论
为什么被折叠?
被折叠的 条评论
为什么被折叠?
 到【灌水乐园】发言


