


最近在学习SpringMVC框架,在此记录一下个人的心得笔记,希望能够为初学者提供一些帮助。
如何在eclipse中的web项目上使用SpringMVC
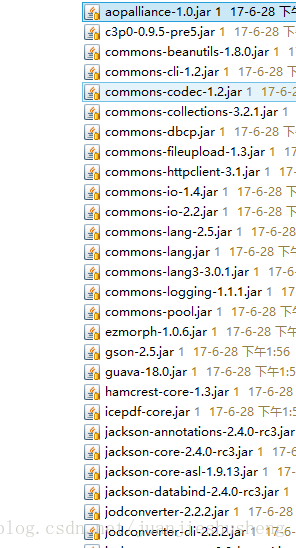
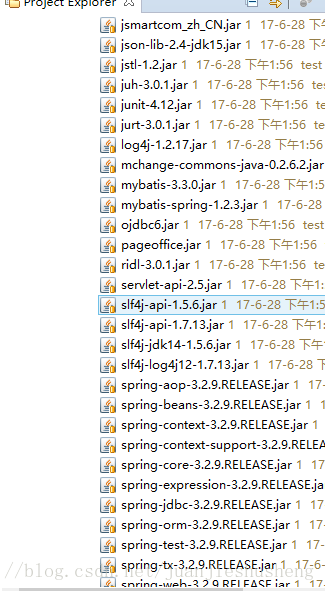
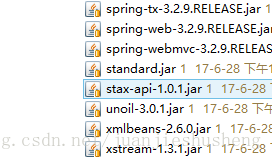
1.按照正常的情况创建java web项目,然后倒入SpringMVC的支持包。此处给出ssm框架中常用包的名称:
2.在为项目导入相关支持包后,就可以开始给项目配置SpringMVC支持了。首先我们需要写好SpringMVC的配置文件。以下给出web.xml中对SpringMVC的配置。
<servlet>
    <servlet-name>springMVC</servlet-name>
    <servlet-class>org.springframework.web.servlet.DispatcherServlet</servlet-class>
    <init-param>
      <param-name>contextConfigLocation</param-name>
      <param-value>classpath:springMVC.xml</param-value>
    </init-param>
    <load-on-startup>0</load-on-startup>
  </servlet>
  <servlet-mapping>
    <servlet-name>springMVC</servlet-name>
    <url-pattern>*.action</url-pattern>
  </servlet-mapping>
我们可以看到这里指定了SpringMVC配置文件的名称和路径,该路径表示在src目录下有名为SpringMVC.xml的文件记录了SpringMVC的配置,以下给出SpringMVC.xml文件内的相关配置
<beans xmlns="http://www.springframework.org/schema/beans"
    xmlns:xsi="http://www.w3.org/2001/XMLSchema-instance" xmlns:mvc="http://www.springframework.org/schema/mvc"
    xmlns:context="http://www.springframework.org/schema/context"
    xmlns:aop="http://www.springframework.org/schema/aop" xmlns:tx="http://www.springframework.org/schema/tx"
    xsi:schemaLocation="http://www.springframework.org/schema/beans
        http://www.springframework.org/schema/beans/spring-beans-3.2.xsd
        http://www.springframework.org/schema/mvc
        http://www.springframework.org/schema/mvc/spring-mvc-3.2.xsd
        http://www.springframework.org/schema/context
        http://www.springframework.org/schema/context/spring-context-3.2.xsd
        http://www.springframework.org/schema/aop
        http://www.springframework.org/schema/aop/spring-aop-3.2.xsd
        http://www.springframework.org/schema/tx
        http://www.springframework.org/schema/tx/spring-tx-3.2.xsd ">

    <!-- 注解驱动 -->
    <mvc:annotation-driven></mvc:annotation-driven>
    <!-- 可以扫描controller, 这里让扫描controller,指定controller的包 -->
    <context:component-scan base-package="servlet"></context:component-scan>
    <context:component-scan base-package="service"></context:component-scan>

    <!-- 视图解析器 解析jsp解析,默认使用jstl标签,classpath下的得有jstl的包 -->
    <bean class="org.springframework.web.servlet.view.InternalResourceViewResolver">
        <!-- 配置jsp路径的前缀 -->
        <!-- <property name="prefix" value="/WEB-INF/jsp/"/> -->
        <!-- 配置jsp路径的后缀 -->
        <!-- <property name="suffix" value=".jsp"/> -->
    </bean>

</beans>
注意在这个文件中我们配置了SpringMVC扫描包的路径,路径应为配置了@Controller和@Service的类所在的包的全名
3.在写好了所有的配置文件之后我们就可以开始使用Sprngmvc框架了,我们首先看在控制层如何使用SpringMVC框架
@Controller
@RequestMapping("/User")
public class UserController {

    //spring DI
    @Autowired
    UserService userService ;

    @RequestMapping("/reg")
    public String reg(User user, HttpServletRequest req){
        userService.reg(user);
        req.getSession().setAttribute("mess", "注册成功, 请登录。。。");
        //跳转到登录页面。
        return "redirect:/login.jsp";
    }

    @RequestMapping("/login")
    public String login(String name , String password, HttpServletRequest req){
        User user = userService.login(name, password);
        if(user!=null){
            req.getSession().setAttribute("onlineUser", user);
            return "redirect:/index.jsp";
        }else{
            req.setAttribute("errorMess", "用户名或密码错误, 请重试!!");
            return "/login.jsp";
        }
    }

    @RequestMapping("/exit")
    public String exit(HttpSession session){
        //销毁session
        session.invalidate();
        return "redirect:/index.jsp";
    }

}
以一个具体的方法举例,在这个控制器上配置了@Controller注解和@RequestMapping注解定义了这个控制器的映射路径。
在前端页面访问这个路径
<%@ page language="java"
    contentType="text/html; charset=UTF-8"
    pageEncoding="UTF-8"%>
<%@ taglib prefix="c"  uri="http://java.sun.com/jsp/jstl/core" %>

<!DOCTYPE html PUBLIC "-//W3C//DTD HTML 4.01 Transitional//EN" "http://www.w3.org/TR/html4/loose.dtd">
<html>
<head>
<meta http-equiv="Content-Type" content="text/html; charset=UTF-8">
<title>SpringMVC学习笔记(一)</title>
</head>
<body>
    <h1>欢迎登录</h1>

    <form action="User/login.action" method="post">
        账户:<input type="text" name="name"><br>
        密码:<input type="password" name="password"><br>
        <input type="submit" value="登录">
    </form>
    <font color="red">${requestScope.errorMess}</font>
</body>
</html>
通过这种方式我们就可以访问对应的后台了
除了控制器外业务处理的实现类还需要实现@Service注解
如下所示
@Service
public class UserServiceImpl implements UserService{

    private static final List<User> userList = new ArrayList();

    @Override
    public void reg(User user) {
        //模拟数据库,把user保存起来。
        synchronized ("addUser") {
            userList.add(user);
        }
    }

    @Override
    public User login(String name, String password) {
        for(User user :  userList){
            if(name.equals(user.getName())&&password.equals(user.getPassword())){
                return user;
            }
        }
        return null;
    }

}


 155
155


 被折叠的 条评论
为什么被折叠?
被折叠的 条评论
为什么被折叠?
 到【灌水乐园】发言


