


List组件的使用

import router from '@ohos.router'

@Entry
@Component
struct Index {
  private arr: number[] = [0, 1, 2, 3, 4, 5, 6, 7, 8, 9]

  build() {
    Row() {
      Column() {
        List({ space: 10 }) {
          ForEach(this.arr, (item: number) => {
            ListItem() {
              Text(`${item}`)
                .width('100%')
                .height(100)
                .fontSize(20)
                .fontColor(Color.White)
                .textAlign(TextAlign.Center)
                .borderRadius(10)
                .backgroundColor(0x007DFF)
                .onClick(() => {
                  if (item === 0) {
                    //跳转到GridPage页面
                    router.push({
                      url: 'pages/GridPage'
                    })
                  }
                })
            }
          }, item => item)
        }
        //strokeWidth: 分割线的线宽。
        //color: 分割线的颜色。
        //startMargin:分割线距离列表侧边起始端的距离。
        //endMargin: 分割线距离列表侧边结束端的距离。
        // .divider({
        //   strokeWidth: 1,
        //   color: Color.Gray,
        //   startMargin: 10,
        //   endMargin: 10
        // })
        //Vertical(默认值):子组件ListItem在List容器组件中呈纵向排列。
        //子组件ListItem在List容器组件中呈横向排列。
        .listDirection(Axis.Vertical)
      }
      .padding(12)
      .height('100%')
      .backgroundColor(0xF1F3F5)
    }
    .height('100%')
  }
}
List下用ForEach循环数据,列表子项用ListItem组件,组件中再设置布局。
divider属性设置列表分割线,listDirection属性设置列表是横向排列还是纵向排列(默认纵向)。
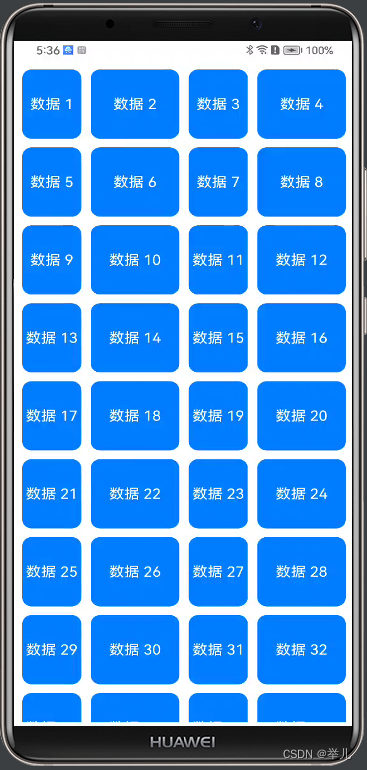
Grid组件的使用
@Entry
@Component
struct GridPage {
  // 定义一个数组
  private arr: string[] = new Array(50)
    .fill('')
    .map((_, index) => `数据 ${index + 1}`);

  build() {
    Column() {
      Grid() {
        ForEach(this.arr, (item: string) => {
          GridItem() {
            Text(item)
              .fontSize(16)
              .fontColor(Color.White)
              .backgroundColor(0x007DFF)
              .width('100%')
              .height(80)
              .textAlign(TextAlign.Center)
              .borderRadius(10)
          }
        }, item => item)
      }
      //指定当前网格布局中的列数(数字代表列的权重)
      .columnsTemplate('2fr 3fr 2fr 3fr')
      //设置当前网格布局中的行数(数字代表行的权重)
      // .rowsTemplate('1fr 1fr 2fr 1fr')
      //设置列之间的间距
      .columnsGap(10)
      //设置行之间的距离
      .rowsGap(10)
      .height('100%')
    }
    .width('100%')
    .padding(10)
  }
}
GridItem设置子项,Grid下使用columnsTemplate属性指定当前网格布局中的列数。
rowsTemplate属性设置行数,数字代表给每行或每列设置占比的权重。
columnsGap属性设置列之间的间距,rowsGap属性设置行之间的距离。
如果行和列数同时设置只会显示设置行列内的数据,其他数据不会显示,并且只能显示在一屏内,不支持滑动,所以一般行数和列数只设置一个。
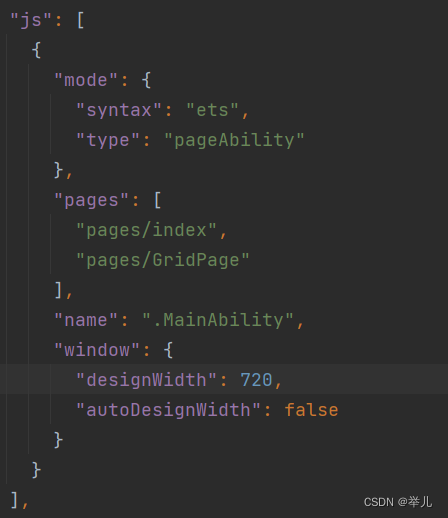
新建页面记得在config.json文件下的pages中添加,不然不会跳转。我这里创建项目用的API8,API9添加文件稍微有点差异。用最新API9的话运行到API8的远程设备会报错,所以这里创建项目选择了API和SDK都用了8.


 2778
2778


 被折叠的 条评论
为什么被折叠?
被折叠的 条评论
为什么被折叠?
 到【灌水乐园】发言


