


上个月因为事情繁多,也就没空整理文档了,现在拾起来
这一篇文档,我们主要介绍一下如何将数据提交到后台,也就是应用的访问网络提交数据,这在我们的日常中经常见到,如我们的QQ登录,输入用户名和密码,点击登录,如果正确,则允许你登录上去,如果不正确,则提示你用户名密码错误。
数据怎样才能被提交呢?
数据提交需要有一个东西接收他,就像你把一杯水转移到另一个水壶中,这里的水壶和水杯都是容器,也就是我们要接收数据的容器(水是我们的数据),至于我们将水倒入水壶中是在倒掉还是烧开喝,这我们就先不管了。
容器的搭建有很多,一般我使用的tomcat,在tomcat中搭建了一个项目,项目名叫Test,是最简单的Servlet—jsp项目,在项目中值负责接收用户名和密码,此处不做详细解释,代码会跟随这一次的Android学习打包上传。
要建立一个登陆的界面,则需要用户名和密码以及登录框这几个元素。因此,我们要建立这样一个界面
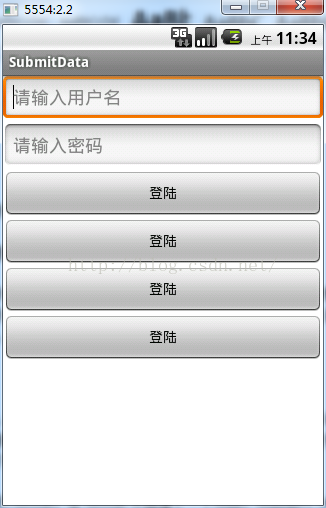
界面中含有四个登陆框,标识着我们将使用四种方式提交,分别对应的是URL的get和Post以及HttpClient的get和pots,其xml配置文件如:
<LinearLayout xmlns:android="http://schemas.android.com/apk/res/android"
    xmlns:tools="http://schemas.android.com/tools"
    android:layout_width="match_parent"
    android:layout_height="match_parent"
    android:orientation="vertical"
    tools:context=".MainActivity" >

    <EditText
        android:id="@+id/et_name"
        android:layout_width="fill_parent"
        android:layout_height="wrap_content"
        android:hint="@string/username" />

    <EditText
        android:id="@+id/et_pwd"
        android:layout_width="fill_parent"
        android:layout_height="wrap_content"
        android:hint="@string/password"
        android:inputType="textPassword"
        />

    <Button
        android:id="@+id/bt_get"
        android:layout_width="fill_parent"
        android:layout_height="wrap_content"
        android:text="@string/logIn"
        />
    <Button
        android:id="@+id/bt_post"
        android:layout_width="fill_parent"
        android:layout_height="wrap_content"
        android:text="@string/logIn"
        />

    <Button
        android:id="@+id/bt_get_client"
        android:layout_width="fill_parent"
        android:layout_height="wrap_content"
        android:text="@string/logIn"
        />
     <Button
        android:id="@+id/bt_post_client"
        android:layout_width="fill_parent"
        android:layout_height="wrap_content"
        android:text="@string/logIn"
        />

</LinearLayout>
由于这四个登陆可以单独封装成一个函数调用,我们写了一个LogInService.java,其代码如下:
package com.hackerant.submitdata.service;

import java.io.InputStream;
import java.io.OutputStream;
import java.net.HttpURLConnection;
import java.net.MalformedURLException;
import java.net.URL;
import java.util.ArrayList;
import java.util.List;

import org.apache.http.HttpEntity;
import org.apache.http.HttpResponse;
import org.apache.http.NameValuePair;
import org.apache.http.client.HttpClient;
import org.apache.http.client.entity.UrlEncodedFormEntity;
import org.apache.http.client.methods.HttpGet;
import org.apache.http.client.methods.HttpPost;
import org.apache.http.impl.client.DefaultHttpClient;
import org.apache.http.message.BasicNameValuePair;

import com.hackerant.submitdata.utils.InputStreamUtils;

import android.R.integer;

public class LogInService
{
	/**
	 * 用户登陆,type为1表示URL get方式,type为2表示URL post方式,
	 * type为3表示HttpClient get方式,type为4表示HttpClient post方式
	 * @param userName
	 * @param userPwd
	 * @param type
	 * @return
	 */
	public static String login(String userName,String userPwd,int type){
		String result = "login error";
		try
		{
			String urlPath = "http://10.0.0.18:8080/Test/LoginServlet";
			if (type == 1)
			{
				URL url = new URL(urlPath + "?username=" + userName + "&password=" + userPwd);
				HttpURLConnection conn = (HttpURLConnection) url.openConnection();

				conn.setRequestMethod("GET");
				conn.setConnectTimeout(5000);

				int code = conn.getResponseCode();
				if (code == 200)
				{
					InputStream is = conn.getInputStream();
					result = InputStreamUtils.getString(is);
				}else {
					result = "login error";
				}
			}else if(type == 2){
				String data = "username=" + userName + "&password=" + userPwd;
				URL url = new URL(urlPath);
				HttpURLConnection conn = (HttpURLConnection) url.openConnection();
				conn.setRequestMethod("POST");
				conn.setConnectTimeout(5000);
				conn.setRequestProperty("Content-Type", "application/x-www-form-urlencoded");
				conn.setRequestProperty("Content-Length", data.length() + "");
				conn.setDoOutput(true);
				OutputStream os = conn.getOutputStream();
				os.write(data.getBytes());

				int code = conn.getResponseCode();
				if (code == 200)
				{
					InputStream is = conn.getInputStream();
					result = InputStreamUtils.getString(is);
				}else {
					result = "login error";
				}

			}else if (type == 3) {
				HttpClient client = new DefaultHttpClient();
				HttpGet get = new HttpGet(urlPath + "?username=" + userName + "&password=" + userPwd);
				HttpResponse response = client.execute(get);
				int code = response.getStatusLine().getStatusCode();
				if (code == 200)
				{
					InputStream is = response.getEntity().getContent();
					result = InputStreamUtils.getString(is);
				}else {
					result = "login error";
				}

			}else if (type == 4) {
				HttpClient client = new DefaultHttpClient();
				HttpPost post = new HttpPost(urlPath);
				List<NameValuePair> parameters = new ArrayList<NameValuePair>();
				parameters.add(new BasicNameValuePair("username", userName));
				parameters.add(new BasicNameValuePair("password", userPwd));
				post.setEntity(new UrlEncodedFormEntity(parameters,"utf8"));
				HttpResponse response = client.execute(post);
				int code = response.getStatusLine().getStatusCode();
				if (code == 200)
				{
					InputStream is = response.getEntity().getContent();
					result = InputStreamUtils.getString(is);
				}else {
					result = "login error";
				}
			}
		} catch (Exception e)
		{
			e.printStackTrace();
		}


		return result;
	}

}
代码中含有注释,但需要说明的是get方式都是使用拼接字符串的形式将数据提交且一般不需要设置头信息,而post则不同,我们使用url方式的时候需要明确写出conn.setRequestProperty("Content-Type","application/x-www-form-urlencoded");
否则有可能导致报错,而HttpClient中虽然没有明写,但其实是被HttpClient封装了起来,而且HttpClient的post中需要使用post.setEntity(newUrlEncodedFormEntity(parameters,"utf8"));将数据提交,注意大小写
在MainActivity里需要另起一个子线程来完成数据的提交,因为Android的UI进程有这样一个规定就是不允许阻塞UI线程,否则将会报错,导致程序异常退出
MainActivity.java
package com.hackerant.submitdata;

import android.app.Activity;
import android.os.Bundle;
import android.view.Menu;
import android.view.View;
import android.view.View.OnClickListener;
import android.widget.Button;
import android.widget.EditText;
import android.widget.Toast;

import com.hackerant.submitdata.service.LogInService;

public class MainActivity extends Activity implements OnClickListener
{
	protected static final int ERROR = 0;
	private Button btGet;
	private Button btPost;
	private EditText etName;
	private EditText etPwd;
	private Button btClientGet;
	private Button btClientPost;

	@Override
	protected void onCreate(Bundle savedInstanceState)
	{
		super.onCreate(savedInstanceState);
		setContentView(R.layout.activity_main);
		etName = (EditText) findViewById(R.id.et_name);
		etPwd = (EditText) findViewById(R.id.et_pwd);
		btGet = (Button) findViewById(R.id.bt_get);
		btPost = (Button) findViewById(R.id.bt_post);
		btClientGet = (Button) findViewById(R.id.bt_get_client);
		btClientPost = (Button) findViewById(R.id.bt_post_client);
		btGet.setOnClickListener(this);
		btPost.setOnClickListener(this);
		btClientGet.setOnClickListener(this);
		btClientPost.setOnClickListener(this);

	}

	@Override
	public boolean onCreateOptionsMenu(Menu menu)
	{
		// Inflate the menu; this adds items to the action bar if it is present.
		getMenuInflater().inflate(R.menu.main, menu);
		return true;
	}

	@Override
	public void onClick(View v)
	{
		final String userName = etName.getText().toString().trim();
		final String userPwd = etPwd.getText().toString().trim();

		switch (v.getId())
		{
		case R.id.bt_get:
			new Thread(){
				public void run(){
					final String result = LogInService.login(userName, userPwd, 1);
					runOnUiThread(new Runnable()
					{
						public void run()
						{
							Toast.makeText(getApplicationContext(), result, 0).show();
						}
					});
				}
			}.start();
			break;

		case R.id.bt_post:
			new Thread(){
				public void run(){
					final String result = LogInService.login(userName, userPwd, 2);
					runOnUiThread(new Runnable()
					{
						public void run()
						{
							Toast.makeText(getApplicationContext(), result, 0).show();
						}
					});
				}
			}.start();
			break;
		case R.id.bt_get_client:
			new Thread(){
				public void run(){
					final String result = LogInService.login(userName, userPwd, 3);
					runOnUiThread(new Runnable()
					{
						public void run()
						{
							Toast.makeText(getApplicationContext(), result, 0).show();
						}
					});
				}
			}.start();
			break;
		case R.id.bt_post_client:
			new Thread(){
				public void run(){
					final String result = LogInService.login(userName, userPwd, 4);
					runOnUiThread(new Runnable()
					{
						public void run()
						{
							Toast.makeText(getApplicationContext(), result, 0).show();
						}
					});
				}
			}.start();
			break;
		default:
			break;
		}

	}

}
另外,由于我们使用到了网络,因此还要设置可以访问网络的权限,此处就不再赘述。
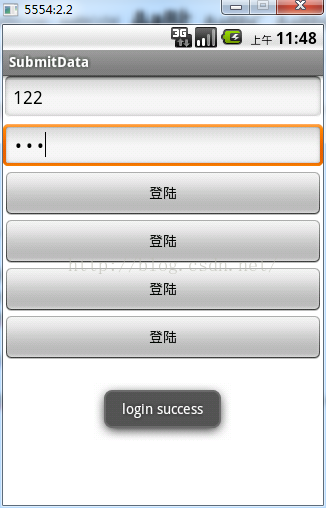
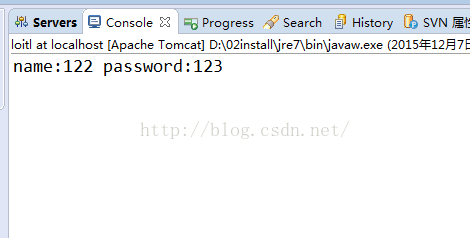
其运行结果图如下:
具体代码可以至百度云下载


 1749
1749

 被折叠的 条评论
为什么被折叠?
被折叠的 条评论
为什么被折叠?
 到【灌水乐园】发言


