


1、基于svg的方式:
我们先建一个demo测试环境,然后安装@antv/x6:
https://x6.antv.antgroup.com/tutorial/getting-started

2、代码如下:
<script setup lang="ts">
import { onMounted, ref } from "vue";
defineProps<{ msg: string }>();
import { Graph } from "@antv/x6";
const data = {
// 节点
nodes: [
{
id: "node1", // String,可选,节点的唯一标识
x: 40, // Number,必选,节点位置的 x 值
y: 40, // Number,必选,节点位置的 y 值
width: 80, // Number,可选,节点大小的 width 值
height: 40, // Number,可选,节点大小的 height 值
label: "hello", // String,节点标签
},
{
id: "node2", // String,节点的唯一标识
x: 160, // Number,必选,节点位置的 x 值
y: 180, // Number,必选,节点位置的 y 值
width: 80, // Number,可选,节点大小的 width 值
height: 40, // Number,可选,节点大小的 height 值
label: "world", // String,节点标签
},
],
// 边
edges: [
{
source: "node1", // String,必须,起始节点 id
target: "node2", // String,必须,目标节点 id
},
],
};
onMounted(() => {
console.log(document.getElementById("container"));
initX6();
});
function initX6() {
const graph = new Graph({
container: document.getElementById("container") as HTMLElement,
width: 800,
height: 600,
background: {
color: "#F2F7FA",
},
});
graph.fromJSON(data);
}
</script>
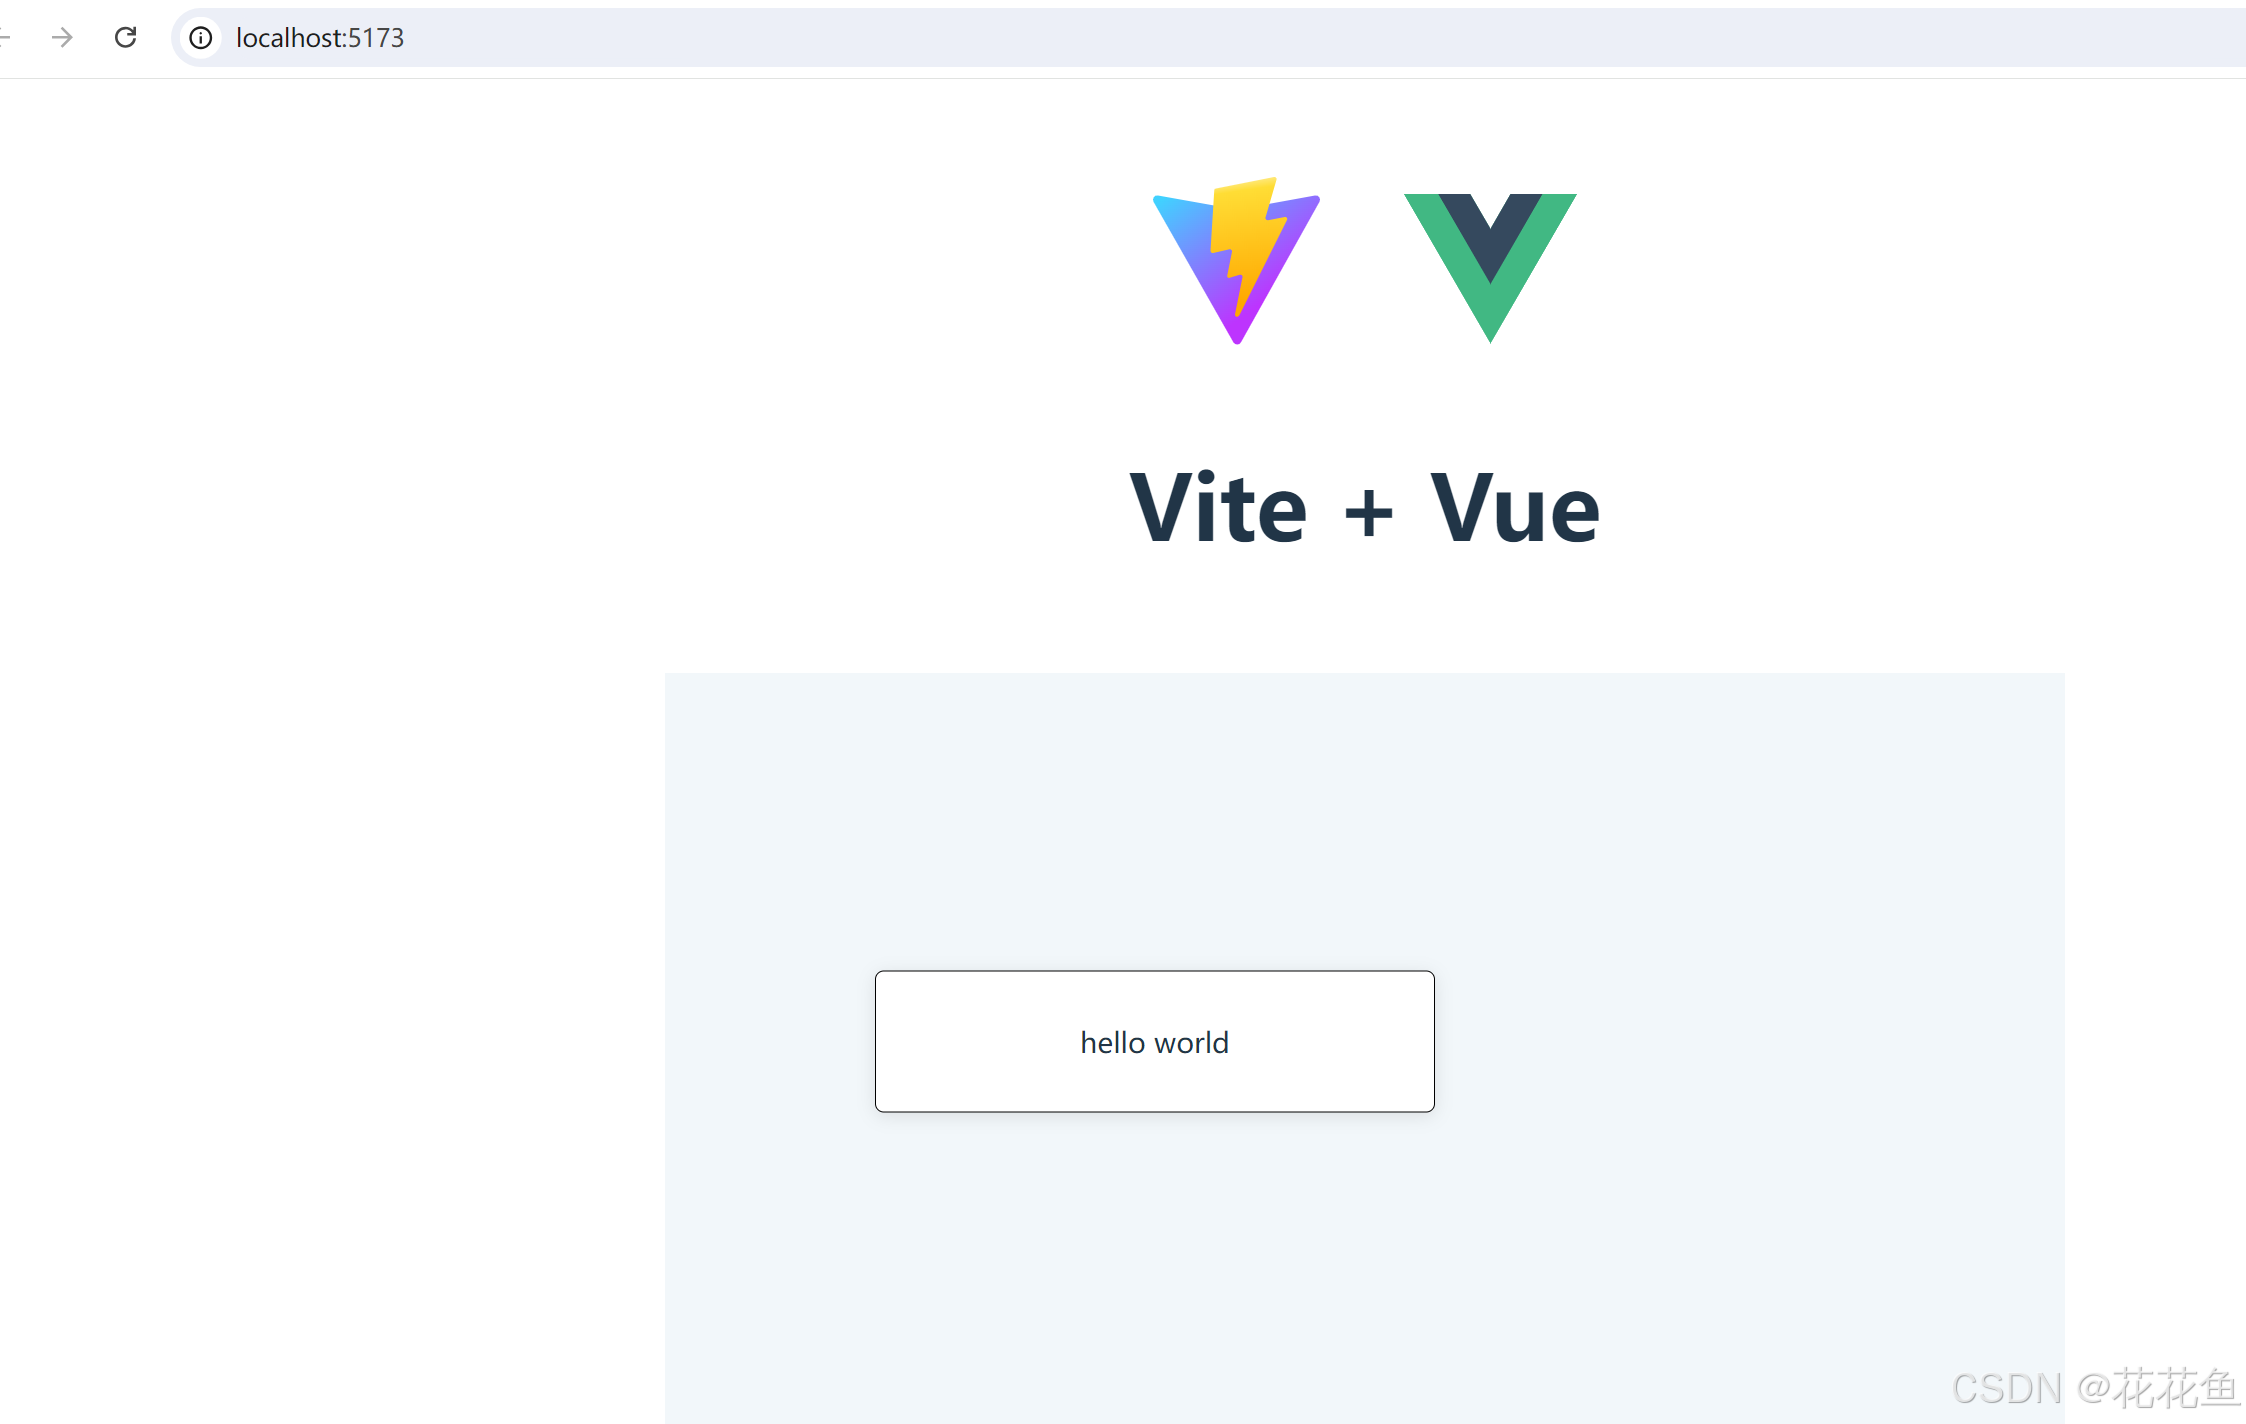
<template>
<h1>{{ msg }}</h1>
<div class="card">
<div id="container"></div>
</div>
</template>
<style scoped>
.read-the-docs {
color: #888;
}
</style>
3、在onMounted中调用,如果直接帖代码到script中的话,会报错,因为此时container为null。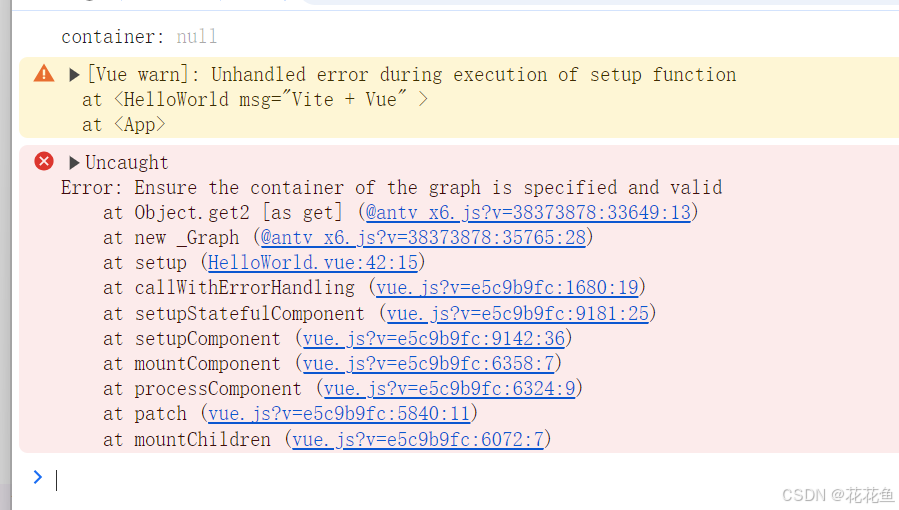
4、基于Html的方法实现:
5、html方式代码如下:
function initX6Html() {
  const graph = new Graph({
    container: document.getElementById("container") as HTMLElement,
    width: 800,
    height: 600,
    background: {
      color: "#F2F7FA",
    },
  });

  Shape.HTML.register({
    shape: "custom-html",
    width: 160,
    height: 80,
    html() {
      const div = document.createElement("div");
      div.className = "custom-html";//这里设置了不生效,要在style中设置
      div.innerText = "hello world";
      div.style.border = "1px solid #000";
      div.style.padding = "10px";
      div.style.background = "#fff";
      div.style.borderRadius = "5px";
      div.style.boxShadow = "0 2px 10px rgba(0, 0, 0, 0.1)";
      div.style.textAlign = "center";
      div.style.lineHeight = "60px";
      div.style.cursor = "pointer";
      return div;
    },
  });

  graph.addNode({
    shape: "custom-html",
    x: 60,
    y: 100,
  });
以上是2.x的版本,与1.x的版本不一致了,要注意版本。
以上是二种方式的分别实现,个人还是建议用svg的方式,我们实战下来还不错的。


 4747
4747

 被折叠的 条评论
为什么被折叠?
被折叠的 条评论
为什么被折叠?
 到【灌水乐园】发言


